
Sunday, May 31, 2009
Quick Update
Hello blog world. It's been a long time since I have posted. Sure there have been posts, but they have all been pre-scheduled posts. So much has happened within the last two weeks and I have so many stories to tell. I'm trying to readjust to being back in Miami and catching up on everything that was put on hold during the Big Move. I should get back to regular posting but I'm not too sure when I'll be back in the kitchen. I'm being optimistic and am hoping that I will be back in cooking/baking shape in two weeks. For now though, I wanted to leave you with a preview of one of our many adventures:
Wednesday, May 27, 2009
Daring Bakers: Apple Strudel

The May Daring Bakers’ challenge was hosted by Linda of make life sweeter! and Courtney of Coco Cooks. They chose Apple Strudel from the recipe book Kaffeehaus: Exquisite Desserts from the Classic Cafés of Vienna, Budapest and Prague by Rick Rodgers.
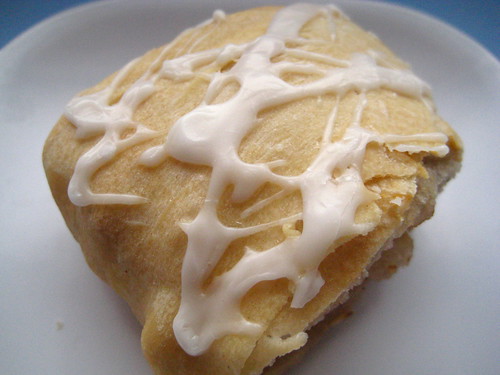
I know what a real strudel is now. I feel so proud of myself. This whole time I thought a strudel was a Pillsbury toaster strudel. Daring Bakers has once again enlightened me. I was so impressed and in awe of the dough because of how much it stretched (and I made it stretch) without breaking. I was a bit of a ditz in the kitchen and I almost forgot to butter the dough and I completely forgot to add the bread crumbs. I made the bread crumbs, but I forgot about them. They did, however, taste great of the chicken parmesan I made along with the ricotta gnocchi. I used Granny Smith apples and, while they held up nicely, they were too tart for me. I think the bread crumbs might have taken some of the tartness away. To sweeten it up I drizzled the strudel with a glaze. That helped, but the apples were still too tart for me. I will definitely be making this dessert again and it's going to be fun to play around with the fillings.
Don't forget to check out how the other bakers did in The Kitchen.
 Apple strudel
Source: “Kaffeehaus – Exquisite Desserts from the Classic Cafés of Vienna, Budapest and Prague” by Rick Rodgers
2 tablespoons (30 ml) golden rum
3 tablespoons (45 ml) raisins
1/4 teaspoon ground cinnamon
1/3 cup plus 1 tablespoon (80 g) sugar
1/2 cup (1 stick / 115 g) unsalted butter, melted, divided
1 1/2 cups (350 ml) fresh bread crumbs
strudel dough (recipe below)
1/2 cup (120 ml, about 60 g) coarsely chopped walnuts
2 pounds (900 g) tart cooking apples, peeled, cored and cut into ¼ inch-thick slices (use apples that hold their shape during baking)
1. Mix the rum and raisins in a bowl. Mix the cinnamon and sugar in another bowl.
2. Heat 3 tablespoons of the butter in a large skillet over medium-high. Add the breadcrumbs and cook whilst stirring until golden and toasted. This will take about 3 minutes. Let it cool completely.
3. Put the rack in the upper third of the oven and preheat the oven to 400°F (200°C). Line a large baking sheet with baking paper (parchment paper). Make the strudel dough as described below. Spread about 3 tablespoons of the remaining melted butter over the dough using your hands (a bristle brush could tear the dough, you could use a special feather pastry brush instead of your hands). Sprinkle the buttered dough with the bread crumbs. Spread the walnuts about 3 inches (8 cm) from the short edge of the dough in a 6-inch-(15cm)-wide strip. Mix the apples with the raisins (including the rum), and the cinnamon sugar. Spread the mixture over the walnuts.
4. Fold the short end of the dough onto the filling. Lift the tablecloth at the short end of the dough so that the strudel rolls onto itself. Transfer the strudel to the prepared baking sheet by lifting it. Curve it into a horseshoe to fit. Tuck the ends under the strudel. Brush the top with the remaining melted butter.
5. Bake the strudel for about 30 minutes or until it is deep golden brown. Cool for at least 30 minutes before slicing. Use a serrated knife and serve either warm or at room temperature. It is best on the day it is baked.
Strudel dough
1 1/3 cups (200 g) unbleached flour
1/8 teaspoon salt
7 tablespoons (105 ml) water, plus more if needed
2 tablespoons (30 ml) vegetable oil, plus additional for coating the dough
1/2 teaspoon cider vinegar
1. Combine the flour and salt in a stand-mixer fitted with the paddle attachment. Mix the water, oil and vinegar in a measuring cup. Add the water/oil mixture to the flour with the mixer on low speed. You will get a soft dough. Make sure it is not too dry, add a little more water if necessary.
Take the dough out of the mixer. Change to the dough hook. Put the dough ball back in the mixer. Let the dough knead on medium until you get a soft dough ball with a somewhat rough surface.
2. Take the dough out of the mixer and continue kneading by hand on an unfloured work surface. Knead for about 2 minutes. Pick up the dough and throw it down hard onto your working surface occasionally.
Shape the dough into a ball and transfer it to a plate. Oil the top of the dough ball lightly. Cover the ball tightly with plastic wrap. Allow to stand for 30-90 minutes (longer is better).
3. It would be best if you have a work area that you can walk around on all sides like a 36 inch (90 cm) round table or a work surface of 23 x 38 inches (60 x 100 cm). Cover your working area with table cloth, dust it with flour and rub it into the fabric. Put your dough ball in the middle and roll it out as much as you can.
Pick the dough up by holding it by an edge. This way the weight of the dough and gravity can help stretching it as it hangs. Using the back of your hands to gently stretch and pull the dough. You can use your forearms to support it.
4. The dough will become too large to hold. Put it on your work surface. Leave the thicker edge of the dough to hang over the edge of the table. Place your hands underneath the dough and stretch and pull the dough thinner using the backs of your hands. Stretch and pull the dough until it's about 2 feet (60 cm) wide and 3 feet (90 cm) long, it will be tissue-thin by this time. Cut away the thick dough around the edges with scissors. The dough is now ready to be filled.
Glazed.
 Cut.
Cut. Apple'd.
Tuesday, May 26, 2009
TWD: Chipster-Topped Brownies
 This week's selection comes from Beth of Supplicious and she picked Dorie's Chipster-Topped Brownies. I had always been curious about this recipe and curious about the taste of chocolate chip cookies and brownies combined. The brownies were exactly what you would expect them to be. Frudgy brownie on the bottom and crispy cookie on the top. The only problem I had with the recipe is that my chocolate chip cookies sank but it wasn't even that big of a problem because it just made the brownies even more chocolaty. This dessert is made to be paired with a big glass of milk and it is dessert genius because of the coolness of the pairing.
Make sure to head on over to Beth's blog for the recipe and to the TWD site to see what the other bakers thought of this week's selection.
 Dessert genius aka a kid's fantasy
Monday, May 25, 2009
Moving Day!
The day is finally here! This day felt so far away on March 19th and yet here it is. I can't believe it is moving day and that our Boston adventure is almost officially over. I moved up here on September 3rd, 2005 and I find it hard to believe that so much time has passed since that day. Since September 3rd, 2005 I have worked for a residential property management company, gotten engaged, gotten a master's, gotten married, and started law school. Since September 3rd, 2005 Alex has started and finished medical school. We left as kids and are going back as semi-adults. I will still be in school but Alex will be a real, employed doctor. Life in Miami is going to continue progressing toward adulthood all because of the seeds of adulthood we planted in Boston. Here's to the beginning of a new adventure...

Wednesday, May 20, 2009
Cake Slice: Mile-High Devil’s Food Cake
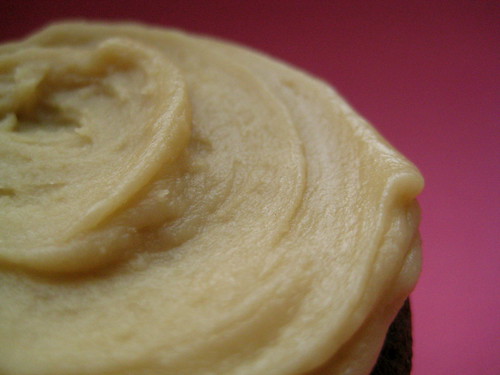
 One word sums up this month's Cake Slice selection....incredible. I LOVED this cake. This has been, by far, the best chocolate cake I have ever made. The cake was fudgy, chocolaty, light, and oh so good. I actually preferred eating the cake without the frosting; the cake was that good. The frosting was great too. I ended up making a different recipe for the frosting because I didn't want to use eggs. I think the one I made was a great substitution and went with the cake perfectly. The ultra-sweet frosting paired well with the flavors of the chocolate.
 Mile-High Devil’s Food Cake
From: Sky High: Irresistible Triple-Layer Cakes
By Alisa Huntsman and Peter Wynne
Makes an 8-inch triple layer cake:
1 cup of unsweetened cocoa NOT DUTCHED PROCESSED
1 and ¼ cups of hot water
3 cups of light brown sugar; packed
2 and 2/3 cups cake flour*
1 and ½ teaspoons baking soda
¾ teaspoon of salt
9 ounces of unsalted butter at room temperature [2 sticks plus 2 tablespoons]
3 large eggs
1 and ½ teaspoons of vanilla extract
¾ cup of cold water
Preheat the oven to 325 degrees F. Butter the bottoms and sides of three 8-inch round cake pans. Line the bottoms of the pans with parchment paper and grease the paper as well.
Place the cocoa in a medium bowl and add the hot water. Whisk until smooth and let it cool to room temperature.
In the bowl of an electric mixer, combine the sugar, flour, baking soda, and salt. With the mixer on low blend to combine. Add the butter and the dissolved cocoa. Then raise the mixer to medium speed and beat for 2 minutes until light and fluffy.
In a medium bowl whisk together the eggs, vanilla, and cold water until combined. Add this liquid to the batter in three additions scraping down the sides of the bowl between additions. Divide the batter among the three pans.
Bake for 35-45 minutes or until a cakes tester inserted into the almost comes out clean. There should be a few crumbs attached still. Cool the cakes in the pans for 15 minutes. Then invert and remove parchment paper and cool completely on a wire rack.
 Brown Sugar Frosting
Recipe here
6 tablespoons butter
3/4 cup light brown sugar, packed
3 tablespoons half-and-half or evaporated milk
2 cups confectioners' sugar, sifted
1/2 teaspoon vanilla
hot water, as needed
In a saucepan over medium heat, melt 6 tablespoons of butter with 3/4 cup of brown sugar, stirring constantly. Bring to a boil; continue cooking for 2 minutes, stirring constantly. Add the 3 tablespoons of cream or milk and bring back to the boil. Remove from heat and stir in 1/2 teaspoon of vanilla. Let cool to lukewarm. Beat confectioners' sugar into the lukewarm brown sugar mixture, adding small amounts of very hot water if frosting is too stiff.
 I can't stop myself from making cupcakes.
Tuesday, May 19, 2009
Three Years Ago Today...
I got engaged. It was the last day of Alex's first year of med school and we had plans to go out and celebrate. We got all dressed up and had dinner at Top of the Hub. After dinner, Alex suggested we go to the Public Garden. I was hesitant because my feet were killing me but he was pretty insistent on it. So we went to the garden, strolled hand-in-hand, and talked about how quickly time had gone by and how amazing it was to have one year of med school done with. We stopped at a bench across from the swans and Alex asked me if I wanted to dance. The man NEVER dances so I knew something was up. I told him there was no music and he played John Legend's "Live It Up" from his pocket PC. Sneaky little devil had his pocket PC on him the whole time. We danced in the park and ignored the other lovebirds strolling by us. Alex said the most beautiful things he could have said and then asked me to marry him. Of course, I said yes and then we called both families. Sneaky little devil, part 2, had the engagement ring on him the whole time. I don't know how anyone can be so sneaky about something so huge.
I can't believe it's been 3 years since that night. I can't believe how vivid that night is in my mind. I can feel that night as if I am reliving it. That night I felt calm, at peace, and incredibly in love. Three years later I feel even more in love as I have seen Alex grow into more of a man and into a husband. I am thankful he asked me to marry him 3 years ago and saying yes was the best thing I have ever done. While I was studying for finals, Alex really stepped it up and cooked for us every single night. I didn't think he had it in him but he did. And he did an amazing job and picked meals I never would have picked because I thought he wouldn't like them. As I ate each dinner I thought about how lucky I was to have someone who was willing to go outside of their comfort zone for me. I was continually reminded of how smart I was to say yes 3 years ago because if not, I would have let a good one get away.
Here are some of the meals Alex cooked for us:
 Picadillo
 Burgers with a fried egg
 Arroz con salchicha
 Cajun meatloaf with rice pilaf
 Caribbean Chicken
 White chili
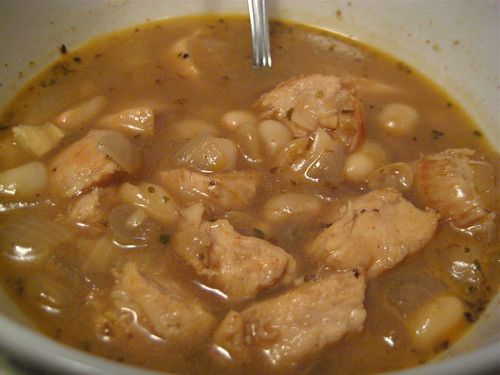 Steak with a balsamic reduction
I can't believe it's been 3 years since that night. I can't believe how vivid that night is in my mind. I can feel that night as if I am reliving it. That night I felt calm, at peace, and incredibly in love. Three years later I feel even more in love as I have seen Alex grow into more of a man and into a husband. I am thankful he asked me to marry him 3 years ago and saying yes was the best thing I have ever done. While I was studying for finals, Alex really stepped it up and cooked for us every single night. I didn't think he had it in him but he did. And he did an amazing job and picked meals I never would have picked because I thought he wouldn't like them. As I ate each dinner I thought about how lucky I was to have someone who was willing to go outside of their comfort zone for me. I was continually reminded of how smart I was to say yes 3 years ago because if not, I would have let a good one get away.
Here are some of the meals Alex cooked for us:
Steak with chimichurri
PicadilloBurgers with a fried eggArroz con salchichaCajun meatloaf with rice pilafCaribbean ChickenWhite chiliSteak with a balsamic reduction
TWD: Mango Bread
 I owe Kelly of Baking With the Boys a huge apology and a huge thank you. When I first saw that she chose mango bread I kind of brushed it off. I love mangoes but Alex doesn't. I thought this recipe would bomb in our house and I even considered not making it. But because Alex's family is in town and I know they like mangoes I decided to make the bread and give it to them. I halved the recipe and had enough batter for 3 mini loaves. I gave two of the loaves to his family and kept one for myself. I sliced up my loaf I and served it for breakfast and Alex actually liked it. I think he was just as surprised as I was. The bread didn't taste like mango, but it didn't taste like a regular sweet bread either. The bread tasted of the spices with a dash of tropical sweetness. So, Kelly I'm sorry that I thought this recipe would bomb and thank you for giving me something mango-ish that Alex actually liked.
Don't forget to check Kelly's blog for the recipe and the TWD site to see how the other bakers fared this week.
 The bread had such a beautiful golden color
 Delicious.
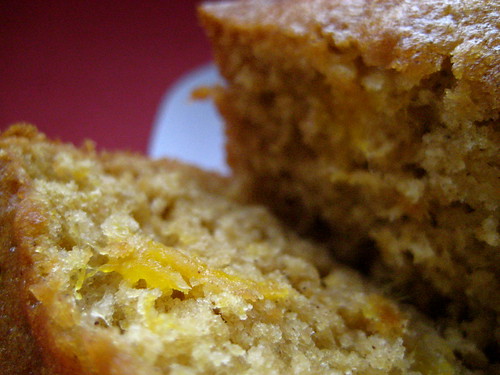
Monday, May 18, 2009
Bostone Pizza
Alex and I headed over to Bostone recently. Bostone is a pizza joint located on Newbury Street that specializes in deep dish Sicilian Pizza. We have passed by it a million times, but have never gone in for one reason or another. I had a close encounter with their pizza at a school function and I say close encounter because I was very close to trying their pizza until I noticed it was all-veggies. I am a cheese pizza type of person and I knew I would be eating nothing but crust after I took off all the vegetables.
This time, however, I could eat the type of pizza I actually wanted. And guess what I did. Go ahead, guess. I ordered buffalo wings. I still haven't tried their pizza and probably won't. Alex tried their sausage pizza and gave it a thumbs up because the slices were huge, hefty, and full of sausage.
 The wings were good but I've had better. These wings were baked and then topped with a buffalo sauce. I prefer my wings fried with a coating that sucks up the sauce. And I like my wings spicy. Bostone's wings were good but not my ideal for buffalo wings.
 Bostone is a small restaurant with great location on Newbury Street and it is worth checking out for their pizza selection.
This time, however, I could eat the type of pizza I actually wanted. And guess what I did. Go ahead, guess. I ordered buffalo wings. I still haven't tried their pizza and probably won't. Alex tried their sausage pizza and gave it a thumbs up because the slices were huge, hefty, and full of sausage.
The wings were good but I've had better. These wings were baked and then topped with a buffalo sauce. I prefer my wings fried with a coating that sucks up the sauce. And I like my wings spicy. Bostone's wings were good but not my ideal for buffalo wings.Bostone is a small restaurant with great location on Newbury Street and it is worth checking out for their pizza selection.
Sunday, May 17, 2009
Daring Cooks: Ricotta Gnocchi
 The past few days have been crazy and I completely forgot to post the first ever Daring Cook's challenge. My brain is still adjusting to not having to worry about school so I'm finding it hard to meet deadlines lately. I made the gnocchi and it came out delicious. It was the first time I have ever made gnocchi and I was afraid that it would be a huge waste of time because Alex has always thought gnocchi tasted like feet. Luckily enough, this did not taste like feet. It actually tasted like ricotta. The taste was soft and subtle and the sauce did not mask the or overwhelm the pasta. I served the gnocchi with a parmesan crusted chicken and the whole meal was delicious. Alex was super impressed and we were both extremely satisfied. Based on this first challenge I think my relationship with the Daring Cooks is going to be a good one. So good, I think you should head over to the Kitchen and join :)
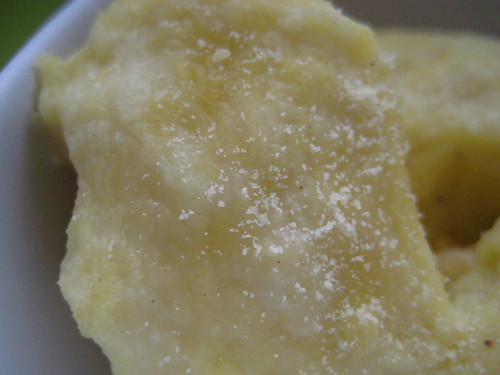 Zuni Ricotta Gnocchi
Source: From The Zuni Café Cookbook.
Yield: Makes 40 to 48 gnocchi (serves 4 to 6)
Prep time: Step 1 will take 24 hours. Steps 2 through 4 will take approximately 1 hour.
For the gnocchi:
1 pound (454 grams/16 ounces) fresh ricotta (2 cups)
2 large cold eggs, lightly beaten
1 tablespoon (1/2 ounce) unsalted butter
2 or 3 fresh sage leaves, or a few pinches of freshly grated nutmeg, or a few pinches of chopped lemon zest (all optional)
½ ounce Parmigiano-Reggiano, grated (about ¼ cup very lightly packed)
about ¼ teaspoon salt (a little more if using kosher salt)
all-purpose flour for forming the gnocchi
For the gnocchi sauce:
8 tablespoons (227 grams/1/4 pound/4 ounces) butter, sliced
2 teaspoons water
Step 1 (the day before you make the gnocchi): Preparing the ricotta.
If the ricotta is too wet, your gnocchi will not form properly. In her cookbook, Judy Rodgers recommends checking the ricotta’s wetness. To test the ricotta, take a teaspoon or so and place it on a paper towel. If you notice a very large ring of dampness forming around the ricotta after a minute or so, then the ricotta is too wet. To remove some of the moisture, line a sieve with cheesecloth or paper towels and place the ricotta in the sieve. Cover it and let it drain for at least 8 hours and up to 24 hours in the refrigerator. Alternatively, you can wrap the ricotta carefully in cheesecloth (2 layers) and suspend it in your refrigerator for 8 to 24 hours with a bowl underneath to catch the water that’s released. Either way, it’s recommended that you do this step the day before you plan on making the gnocchi.
Step 2 (the day you plan on eating the gnocchi): Making the gnocchi dough.
To make great gnocchi, the ricotta has to be fairly smooth. Place the drained ricotta in a large bowl and mash it as best as you can with a rubber spatula or a large spoon (it’s best to use a utensil with some flexibility here). As you mash the ricotta, if you noticed that you can still see curds, then press the ricotta through a strainer to smooth it out as much as possible.
Add the lightly beaten eggs to the mashed ricotta.
Melt the tablespoon of butter. As it melts, add in the sage if you’re using it. If not, just melt the butter and add it to the ricotta mixture.
Add in any flavouring that you’re using (i.e., nutmeg, lemon zest, etc.). If you’re not using any particular flavouring, that’s fine.
Add the Parmigiano-Reggiano and the salt.
Beat all the ingredients together very well. You should end up with a soft and fluffy batter with no streaks (everything should be mixed in very well).
Step 3: Forming the gnocchi.
Fill a small pot with water and bring to a boil. When it boils, salt the water generously and keep it at a simmer. You will use this water to test the first gnocchi that you make to ensure that it holds together and that your gnocchi batter isn’t too damp.
In a large, shallow baking dish or on a sheet pan, make a bed of all-purpose flour that’s ½ an inch deep.
With a spatula, scrape the ricotta mixture away from the sides of the bowl and form a large mass in the centre of your bowl.
Using a tablespoon, scoop up about 2 to 3 teaspoons of batter and then holding the spoon at an angle, use your finger tip to gently push the ball of dough from the spoon into the bed of flour.
At this point you can either shake the dish or pan gently to ensure that the flour covers the gnocchi or use your fingers to very gently dust the gnocchi with flour. Gently pick up the gnocchi and cradle it in your hand rolling it to form it in an oval as best as you can, at no point should you squeeze it. What you’re looking for is an oval lump of sorts that’s dusted in flour and plump.
Gently place your gnocchi in the simmering water. It will sink and then bob to the top. From the time that it bobs to the surface, you want to cook the gnocchi until it’s just firm. This could take 3 to 5 minutes.
If your gnocchi begins to fall apart, this means that the ricotta cheese was probably still too wet. You can remedy this by beating a teaspoon of egg white into your gnocchi batter. If your gnocchi batter was fluffy but the sample comes out heavy, add a teaspoon of beaten egg to the batter and beat that in. Test a second gnocchi to ensure success.
Form the rest of your gnocchi. You can put 4 to 6 gnocchi in the bed of flour at a time. But don’t overcrowd your bed of flour or you may damage your gnocchi as you coat them.
Have a sheet pan ready to rest the formed gnocchi on. Line the sheet pan with wax or parchment paper and dust it with flour.
You can cook the gnocchi right away, however, Judy Rodgers recommends storing them in the refrigerator for an hour prior to cooking to allow them to firm up.
Step 4: Cooking the gnocchi.
Have a large skillet ready to go. Place the butter and water for the sauce in the skillet and set aside.
In the largest pan or pot that you have (make sure it’s wide), bring at least 2 quarts of water to a boil (you can use as much as 3 quarts of water if your pot permits). You need a wide pot or pan so that your gnocchi won’t bump into each other and damage each other.
Once the water is boiling, salt it generously.
Drop the gnocchi into the water one by one. Once they float to the top, cook them for 3 to 5 minutes (as in the case with the test gnocchi).
When the gnocchi float to the top, you can start your sauce while you wait for them to finish cooking.
Place the skillet over medium heat and melt the butter. Swirl it gently a few times as it melts. As soon as it melts and is incorporated with the water, turn off the heat. Your gnocchi should be cooked by now.
With a slotted spoon, remove the gnocchi from the boiling water and gently drop into the butter sauce. Carefully roll in the sauce until coated. Serve immediately.
 With the chicken.
 A little bite.
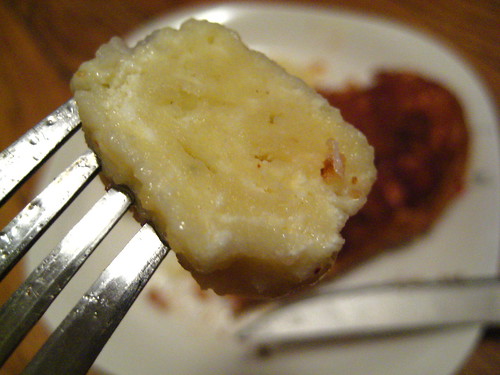
Wednesday, May 13, 2009
FINALLY DONE!
 Oh.My.God. The past two and a half weeks have been exhausting. I am drained and never want to look at another law book in my life. I know that won't happen because I still have 2 more years left, but a girl can dream. I am finally done and I can officially wave goodbye to first year. There were times where I didn't think I could make it, but I did and I never want to do it again. I am looking forward to a few months of not thinking about school, but more than anything, I am looking forward to the Big Move. Tomorrow is a big packing day and now my focus is switching to getting ready for the movers. I can't believe I am done with first year. I can't believe we are leaving Boston. And I can't believe we are moving back to Miami. Life is changing quickly and to celebrate all the good things I made muffins. I had starred this recipe in my reader a while ago and this recipe seemed perfect for celebrating. The muffins did not disappoint. Not only were they gorgeous to look at, but they were absolutely delicious. The muffins were fluffy and sweet and while the name includes doughnut, these babies are more like snickerdoodle muffins. I promise you will like these :)
 Doughnut Muffins
Source: Genesis of a Cook (here)
Muffin
3 cups flour
3/4 cups sugar, plus 1/8 cup of sugar
1/2 tbs. plus 1 tsp. baking powder
1/4 tsp. baking soda
1/2 tsp. salt
1/2 tsp. nutmeg
1/4 tsp. ground cinnamon
1/2 cup butter, softened
1 tsp. vanilla
2 large eggs
3/4 cup milk
1/4 cup heavy cream
Topping
1/4 cup butter, more if needed
1 cups sugar
1 tbs. ground cinnamon
Preheat oven to 350 degrees. Line a standard muffin pan with muffin cups.
In a large bowl, cream the butter and the sugar. Beat in the eggs, one at a time, until just mixed in. In another bowl, sift together the flour, baking powder, baking soda, salt, and cinnamon. Combine the vanilla, milk and heavy cream.
With a spoon, mix a quarter of the dry ingredients into the butter mixture. Then mix in a third of the milk mixture. Continue mixing in the remaining dry and wet ingredients alternately, ending with the dry. Mix until well combined and smooth, but don't overmix.
Scoop enough batter into each tin so that the top of the batter is even with the rim of the cup, about 1/2 cup. Bake the muffins until firm to the touch, about 25-30 minutes.
To finish, melt the butter for the dipping mixture in a small bowl. Combine the sugar and cinnamon in another bowl. When the muffins are just cool enough to handle, remove them from the tin, dip them into or brush them all over with the melted butter, and then roll them in the cinnamon sugar.
 Beautiful sugar crystals.
  A bite...
Tuesday, May 12, 2009
Tres Leches Cake
 My apologies this week to TWD and Babette of Babette's Feast. I really wanted to make the Tartest Lemon Tart but it wasn't in the cards for me. I just couldn't find the time to make this. As a result, you are not getting a post about a tart today. Instead you are getting a post about a cake. Not just any cake either, a Tres Leches cake. Tres Leche is a basic vanilla cake soaked in three milks and topped with a sweet whipped cream. The cake was another baking request. I made this cake last year and it came out awesome. I don't know what I did this year, but it came out differently. I think I might have used a different recipe this time. It was still good but the cake was too dense; it didn't soak up as much of the liquid as it should have. You could tell it was a Tres Leches cake because the taste was there, but the texture wasn't right. It wasn't like what I made last year or what I've had before in Miami. I asked Alex to describe what the soaking level of the cake should be and he said, "The cake should be moist, but wet enough that it's saturated, but not so wet that it's soupy." The cake should dissolve in your mouth and it should taste light despite all the liquid. Hopefully I'll get it right next time and there will be a next time because Alex loves this dessert.
 Tres Leches
Source: Allrecipes.com (here)
Cake
1 1/2 cups all-purpose flour
1 tsp baking powder
1/2 cup unsalted butter
1 cup white sugar
5 eggs
1/2 tsp vanilla extract
Milk mixture
2 cups whole milk
1 (14 ounce) can sweetened condensed milk
1 (12 fluid ounce) can evaporated milk
Preheat oven to 350 degrees F. Grease and flour one 9x13 inch baking pan.
Sift flour and baking powder together and set aside.
Cream butter or margarine and the sugar together until fluffy. Add eggs and the 1/2 teaspoon vanilla extract; beat well.
Add the flour mixture to the butter mixture 2 tablespoons at a time; mix until well blended. Pour batter into prepared pan.
Bake for 30 minutes. Remove from oven and pierce cake several times with a fork. Cool the cake to room temperature.
Combine the whole milk, condensed milk, and evaporated milk together. Pour over the top of the cooled cake.
Whipped topping
1 1/2 cups heavy whipping cream
1 cup white sugar
1 tsp vanilla extract
Whip whipping cream, the sugar, and the vanilla together until thick. Spread over the top of cake. Be sure and keep cake refrigerated.
Enjoy!
 pretty.
Monday, May 11, 2009
Things I'll Miss: Public Garden
 One of my favorite spots in the city is the Public Garden. It's probably the only place in the city, other than my apartment, that I love year-round. Tulips in the spring, roses in the summer, greens and reds in the fall, and snow in the winter. It's a beautiful natural oasis in a city full of people, cars, buildings, and noise. With the big move in 15 days I have come to appreciate the garden even more. There aren't any free gardens like this one in Miami. The Public Garden is full of so many happy memories for me and so many firsts. We've walked through the garden countless times and have strolled across the mini suspension bridge more times than I can remember. We've walked on the frozen lake in the winter and sat under the trees in the summer. I've photographed the flowers and swans each year and the beauty contained in the garden has never stopped amazing me. Alex proposed to me in the garden and we took our engagement pictures there. It really is a beautiful location and one of the things I will miss the most about Boston.
The bridge.
 I love this picture. The garden is literally surrounded by tall buildings.
  One of our engagement pictures.
  This is growing in the garden now.
Slowly Resurfacing
 Geeze. I haven't posted anything in 6 days. Finals are kicking my butt, sucking the life out of me, and isolating me from the world. I have calls I need to return, emails I need to reply to, and a world to re-enter. I still have one more test left but I am feeling eerily calm about it. I don't feel as stressed out as I felt a week ago and, although I still have a lot of studying to do, I am not feeling as anxious. My motto the past two weeks has been "I just need to do well enough to pass." Hopefully I will pass all my classes. I don't think I can take another year of first year law classes! Even though the blog has been quiet the past couple of weeks the kitchen has been pretty active. Alex even told me yesterday he was surprised with how much baking I have been doing. I actually thought I had been taking it easy on the mixer but after looking through all the pictures I've taken of stuff I've made, I realize that I have been in the kitchen quite a bit. The first time I walked into the kitchen during my finals time was because Alex requested rice krispies treats. Sure, it's not real baking but it was the first time in over a week that I made something sweet. I love these suckers.
I have quite of few other sweets plus some restaurant reviews to post so the blog should have a surge of activity over the next few days. Then it will probably die down again because Alex's family is coming up this weekend for Alex's graduation and then we are going to spend some time exploring Massachusetts. After that, the moving company is coming and we are driving down to Florida. Busy times for this city eater :)

Subscribe to:
Posts (Atom)