Showing posts with label Cake. Show all posts

Wednesday, September 17, 2014

Vote for my post on Mom Blog Network

Bailey's Irish Cream Cake

I'm all about balance so to balance out my fitness post from Monday about my record-setting half marathon time at the Chicago Half Marathon, today I give you a post about cake. Not just any cake, but a Bailey's cake that Alex gave me the recipe for and requested I make. This recipe came highly recommended and I was happy to fulfill the request, especially since I have been baking more (mostly tried-and-true recipes).

Other than being a Bailey's cake, I really liked and appreciated how quickly and easily the cake came together. I was able to make a home-cooked meal and dessert in the same night and that makes me feel like such a champ!

I will warn you, there's no denying this cake has alcohol in it. I even halved the syrup recipe (full recipe is posted below) and it still felt like more than enough syrup for the cake. I actually tasted the cake before putting the syrup on it and I think I liked it better that way. Alex, on the other hand, loved the cake and ate two not-so-small slices.
Better lighting the next day so you can see the layer of nuts.

Bailey's Irish Cream Cake
Yields: 1 bundt cake
Source: Cooks.com

Cake:
1 cup nuts (I used pecans)
1 package yellow cake mix
1 (3 oz.) pkg. Jello instant vanilla pudding
4 eggs
1/2 cup cold water
1/2 cup oil
1/2 cup Bailey's Irish Cream


Preheat oven to 325 degrees. Grease and flour a tube or bundt pan. 

Sprinkle nuts on the bottom of pan. Combine the rest of the ingredients. Pour over nuts. 

Bake 1 hour. Cool cake completely. Prick cake and pour glaze over top and sides.

Glaze:
1 stick butter
1/4 cup water
1 cup sugar
1/2 cup Bailey's Irish Cream

Melt butter. Stir in water and sugar. Boil for 5 minutes, stirring constantly. 

REMOVE from heat. Stir in Bailey's Irish Cream.

Note: If using cake mix which includes pudding, omit pudding from recipe, decrease eggs to 3, and decrease oil to 1/3 cup.

By the way, I rediscovered Pinterest and I'm in trouble! Follow me @steppystar on there to see what's on my baking To-Do list. Also, give a follow on Facebook and Instagram @thecookierunner!
Stephanie

Wednesday, August 13, 2014

Vote for my post on Mom Blog Network

Book Review: Jen Besel's Custom Confections

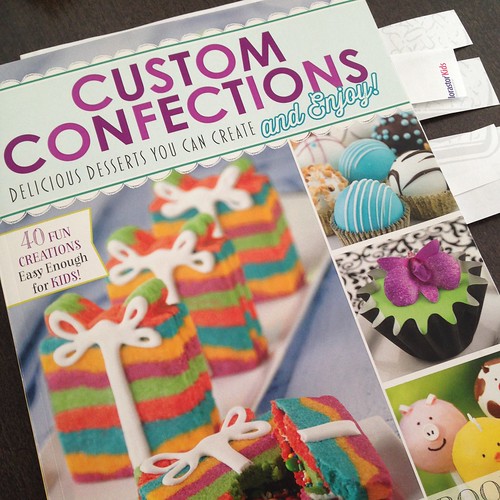
I was sent a copy of Jen Besel's book, Custom Confections: Delicious Desserts You Can Create and Enjoy, to review and, as usual, I am thankful for any reason to bake. Part of what really had me excited about the book was that it claimed to have recipes that were easy enough for kids. Now that my girls are older, especially Cati at almost 4.5 years old, they are very interested in everything that I do in the kitchen and are constantly asking to help add and mix ingredients. As soon as Cati saw the book she grabbed it, sat down, and started leafing through the pages. Right off the bat, the book's cover is eye-catching and I can't blame Cati for being immediately drawn to it.
The meaning behind the name, Custom Confections comes from Besel's view that everyone can make custom desserts. With this view, Besel has developed recipes with easy-to-find ingredients, short prep time, and shortcuts to creating showstopping desserts. The book is divided into five sections and includes recipes for everything from cakes to cookies to bars to popsicles to frosting. Like a good cookbook (or at least my favorite ones), there s a conversion chart and a list of tools that not only are useful for a fully stocked kitchen, but also for making the recipes in Custom Confections.

Aesthetically, the book is gorgeous to look at with pictures for every single recipe and fun colors and fonts. For the majority of the recipes you can lay the book flat on the counter and have the picture on one side and the recipe on the other. For someone who has baked as much as I have, it's always been a bit of a pet peeve when recipes are pages long and I have to flip back and forth to check the ingredient list and see where it matches up with the directions. Besel gives a one-sentence intro/commentary to every dessert, making you want to try every single dessert.

The only issue I had with the book was that the serving amount wasn't identified or clear. This is an issue for me because I usually cut recipes down so we don't have too many sweets in the house at a given time.

As part of my review I picked five recipes from the book. Recipes were chosen based on what I thought the family would like, tools I had, ease of making, and involvement of kids. The five recipes were Molten Caramel Cake, PB & J Cheesecake Brownies, Stained Glass Cookies, Stuffed Strawberries, and Ooey, Gooey Turtle Cake.

Molten Caramel Cake

Eight ingredients, 10 steps, and about 20-25 minutes from prep to table. Cati was able to help with unwrapping the caramel candies, adding them to the batter, and sprinkling with sea salt. This recipe was, by far, the favorite for everyone in the family. I baked for 12 minutes, but my cakes (4) could have used an extra minute or two in the oven. The leftover cake was put in the fridge and reheated the next day and tasted just as good as it did fresh out of the oven. This dessert is perfect for the chocolate lover and I loved that sea salt was added as caramel-sea salt is one of my favorite combinations. I've made molten cakes before and, while they are one of my favorite desserts, I rarely make them because the recipes I have tried before have been too involved. This recipe solves that problem for me and now molten cakes will be a dessert that I make more frequently.

PB & J Cheesecake Brownies

Nine ingredients, eight steps, and at least 40 minutes from prep to table. Instead of making an 8x8 pan of brownies, I made 12 brownie cups, quartered the cream cheese recipe, and added PB & J to half of the cups so that I could get a good taste of the finished cheesecake (plus, I'm not a fan of peanut butter in desserts). I also added a chocolate drizzle to the cups to make them look even prettier. The cups baked for 25 minutes and neither of the girls helped with the prep work for this dessert. The finished dessert was a hit and it was hard to get the girls to only have one for dessert. The brownie portion is made from a mix, but the cheesecake is made from scratch and, when baked, the cheesecake was smooth and didn't crack when cooled! The only thing I would change about this recipe is heating up the jam before putting it in the cheesecake mixture so that it mixes easier.
 

Stained Glass Cookies

Four ingredients, eight steps, and about 25 minutes from prep to table. This recipe was probably the funnest one for the girls as they got to unwrap the candies, help break them up into small pieces, place them in the hole of the cookie, and decorate their own cookies. They even sat in front of the oven, looking in to watch the candy melt. Once the cookies were out of the oven I was surprised by how hard the candies were! For some reason, I thought the candies would melt and become more pliable, but once cooled, the melted candy became hard again. My mistake with this recipe was thinking I had cookie cutters when I went to buy the ingredients and not actually checking to see if I did so my cookies did not end up with the wide opening I would have wanted. 

Stuffed Strawberries

Five ingredients, eight steps, and about 20 minutes from prep to table. I made half the filling recipe and had enough filling to "stuff" a dozen small- and medium-sized strawberries. The girls helped with this recipe by eating the cut-off tips. The finished product was so beautiful that it was almost a shame to eat. But eat them we did, and I am so happy we did because the strawberries were delicious and I fell in love with the tart-tangy-sweet combination. We ate all the stuffed strawberries in one sitting so I would call this recipe a complete success.
 
Ooey, Gooey Turtle Cake 

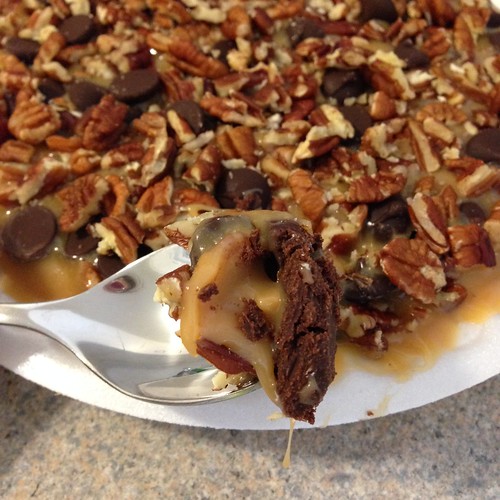
Five ingredients, nine steps, 10 minutes prep, and a torturous four hours to table. I made half the recipe and refrigerated the cake to expedite the process. The girls helped with unwrapping the caramel candies and sprinkling the cake with the pecans. I will warn you now, this dessert is completely addictive and incredibly dangerous. This was the simplest of the recipes I tried and, along with the Stuffed Strawberries, one of the recipes that I think best exemplifies Besel's efforts at creating easy-to-make custom desserts.

Custom Confections: Delicious Desserts You Can Create and Enjoy by Jen Besel will be available for purchase September 1st, 2014 for $12.95 USD ($14.95 CAD).

A copy of this book was provided to me by IWPR and the publisher, Capstone Young Readers, free of charge. The views and opinions in this review, however, are my own.

For more on my baking adventures follow me on Facebook and Instagram @thecookierunner
Stephanie

Tuesday, April 1, 2014

Vote for my post on Mom Blog Network

Celebrate April with Chocolate Mayonnaise Cake

It's April! I'm happy it's April because it's my birthday month. I'm so excited about turning 30 that I am going to be celebrating each day this month with one of my favorite foods or drinks (follow along on my Facebook page). I made a list of my favorites and almost half of the list has chocolate as an ingredient. I never realized how much of a chocolate lover I was until I made this list. To celebrate, I'm sharing one of my favorite chocolate cake recipes. I first made this recipe back in January of 2012, but a good recipe is always worth sharing multiple times. This time around, I made a cake and topped it with fudge frosting and sprinkles.


Chocolate Mayonnaise Cupcakes
Source: Jill O'Connor's Sticky, Chewy, Messy, Gooey
Half of this recipe yields 1-8x8 cake

2 cups bleached all-purpose flour
3/4 cups cocoa powder
1 tsp baking soda
1/4 tsp salt
2 cups sugar
2 large eggs
1 cup mayonnaise (not low-fat)
2 tsp pure vanilla extract
1 1/3 cups boiling water

Position a rack in the middle of the oven and preheat to 350 degrees F. Butter and flour baking pan and set aside. 

In a large bowl, sift together the flour, cocoa powder, baking soda, and salt. Set aside.

In another bowl, combine the sugar and eggs and beat with an electric mixer set at medium-high speed until light and fluffy, about 2 minutes. Beat in mayonnaise and vanilla just until combined. Reduce the speed to medium and beat in half of the flour mixture just until combined. Stop the mixer and scrape down the sides of the bowl. Add half of the boiling water and beat at a very low speed just until the batter is smooth, 5 to 10 seconds. Add the remaining flour mixture and beat just until combined, 5 to 10 seconds longer. Beat in the remaining water. The batter will be somewhat thin.

Pour the batter into the cake pan. Bake until a wooden skewer inserted into the center of the cake comes out clean, 30-40 minutes. Remove from oven and let cool completely. Frost once the cake has cooled. 

Fudge Icing
Source: Jill O'Connor's Sticky, Chewy, Messy, Gooey

1/4 cup semi-sweet chocolate chips
1/4 cup unsalted butter
2 Tbsp buttermilk
1/2 tsp vanilla extract
Pinch of salt
1 1/2 to 2 cups powdered sugar

Combine the chocolate, butter, and buttermilk in a saucepan and cook, stirring over medium heat, until the chocolate is melted. 

Remove from heat and whisk in vanilla, salt, and 1 1/2 cups powdered sugar. 

Add remaining sugar if you like a sweeter and thicker icing. 

Frost cake, serve, and enjoy.

Follow me on Facebook and Instagram @thecookierunner
Stephanie

Thursday, March 27, 2014

Vote for my post on Mom Blog Network

Chocolate Sour Cream Cake

I have had the worst craving for chocolate. I'm thinking it might have something to do with me eating healthier and trying to reduce my sugar intake. Whatever it is, it has left me with this insatiable desire to eat something very chocolaty. I had this particular recipe saved for a very long time because I love what sour cream does in cakes. This cake was good and everyone else in the family liked it, but it wasn't chocolaty enough for me. I will take the blame for that because I didn't add the frosting that Two Peas and Their Pod did in the original recipe. I thought I could get away with some chocolate sauce and was very wrong. Don't make the same mistake!


Chocolate Sour Cream Cake
Source: Two Peas and Their Pod
Half the recipe yields an 8x8 cake.

1 cup unsalted butter, plus more for the pan
1/3 cup cocoa powder (we use Dutch processed)
1 teaspoon kosher salt
1 cup water
2 cups all-purpose Gold Medal flour, plus more for the pan
1 3/4 cups granulated sugar
1 1/2 teaspoons baking soda
2 large eggs
1/2 cup sour cream
1 teaspoon pure vanilla extract


 Position a rack in the center of the oven and heat to 350 degrees F. Butter and flour a cake pan and set aside. 
In a small saucepan, combine the butter, cocoa powder, salt, and water and place over medium heat. Cook, stirring, just until melted and combined. Remove from the heat and set aside.
In a large bowl, whisk together the flour, sugar, and baking soda. Add half of the melted butter mixture and whisk until completely blended. The mixture will be thick. Add the remaining butter mixture and whisk until combined. Add the eggs, one at a time, whisking until completely blended. Whisk in the sour cream and the vanilla extract. Whisk until smooth.
Scrape the batter into the prepared pan and bake until a toothpick inserted into the center of the cake comes out clean, 30 to 40 minutes depending on your pan size. Let the cake cool in the pan for 15 minutes and then invert onto a rack.


Follow me on Facebook and Instagram @thecookierunner
Stephanie

Wednesday, October 3, 2012

Vote for my post on Mom Blog Network

Oatmeal Chocolate Chip Cake

Chocolate Oatmeal Cake
So much oatmeal so little blog space. I made this cake and it was a hit in my house. I thought it needed something more (cinnamon or nutmeg or something), but Alex thought it was perfect. As I do with anything oatmeal this day, I added flax seed. You couldn't even taste the addition so no harm done. 

Oatmeal Chocolate Chip Cake
Source: Luanne Thomson on Allrecipes.com

3/4 cup and 2 tablespoons boiling water
1/2 cup uncooked oatmeal
1/2 cup packed brown sugar
1/2 cup sugar
1/4 cup butter or margarine, softened
2 eggs
1 tsp vanilla extract
3/4 cup and 2 tablespoons all-purpose flour
1/2 tsp baking soda
1/2 tsp baking cocoa
1/8 tsp salt
1 Tbsp flaxseed
1/2 (12 ounce) package chocolate chips, divided


Preheat oven to 350 degrees F. Prepare an 8x8 pan by coating with cooking spray.

In a mixing bowl, pour water over oatmeal. Allow to stand 10 minutes.

Add sugars and butter, stirring until the butter melts. Add eggs, one at a time, mixing well after each addition. Add vanilla.

Sift flour, soda, cocoa, salt, and flaxseed together. Add to batter. Mix well. Stir in half the chocolate chips.

Pour into a greased 13-in. x 9-in. x 2-in. baking pan. Bake at for about 40 minutes or until a toothpick inserted in the middle comes out clean.
Stephanie

Wednesday, September 19, 2012

Vote for my post on Mom Blog Network

Vanilla Cake

IMG_0013
I've been on a cake kick lately and after making a delicious chocolate cake, I decided to make a vanilla cake. The cake is actually supposed to have almond extract in it but because Alex doesn't like almond extract, I used vanilla extract. The cake was light and buttery and because I had reached my fill of frosting, I left this cake unfrosted. No frosting made it even more perfect for eating with a glass of milk.

Vanilla Cake
Source: very slightly adapted from The Girl Who Ate Everything

1 cup butter
1 cup water
2 cups all-purpose four
2 cups white sugar
2 eggs, beaten
1/2 cup sour cream
1 teaspoon vanilla extract
1 teaspoon baking soda
1 teaspoon salt

Preheat oven to 375 degrees.

In a medium saucepan bring butter and water to a boil. Meanwhile, in a large bowl add flour and sugar and mix. Then add in eggs, sour cream, extract, baking soda and salt. Slowly pour in the boiling butter/water mixture. Stir with a spatula until well combined and smooth.  No need to use an electric mixer. Batter will be very thin.

Pour into a greased 15-in. x 10-in. x 1-in. baking sheet. Bake at 375 for 18-22 minutes or until golden brown. Your cake will be flat and not very tall (it's a sheet cake). Cool for about 10 minutes.
Stephanie

Tuesday, September 18, 2012

Vote for my post on Mom Blog Network

Chocolate Cake

IMG_9923
In my opinion, there is nothing better than chocolate cake. The only thing that makes it better is when it's really easy to make, just like this cake. I ended up halving the recipe but I wish I hadn't because the cake was soo good. You can frost it however you like and I guarantee you won't go wrong. Because I wanted something really chocolaty I went with a chocolate frosting.

Chocolate Cake
Source: Erin's Food Files

2 cups sugar
1 3/4 cups all-purpose flour
3/4 cup dutch processed cocoa powder
1 1/2 teaspoons baking powder
1 1/2 teaspoons baking soda
1 teaspoon salt
2 eggs
1 cup milk
1/2 cup vegetable oil
2 teaspoons vanilla extract
1 cup boiling water

Heat oven to 350°F. Grease and flour two 9-inch round pans.

Stir together sugar, flour, cocoa, baking powder, baking soda and salt in large bowl. Add eggs, milk, oil and vanilla; beat on medium speed of electric mixer 2 minutes. Stir in boiling water (batter will be thin). Pour batter into prepared pans.

Bake 30 to 35 minutes or until wooden pick inserted in center comes out clean. Cool 10 minutes; remove from pans to wire racks. Cool completely.
Stephanie

Monday, August 6, 2012

Vote for my post on Mom Blog Network

This Week in Mommyhood

The past two weeks have been a pretty busy. Nothing has really happened but both girls have been a handful because of developmental spurts; Elina is cranky with teething and Cati isn't sleeping well. I'm hoping they both start feeling better because I feel like I've participated in a triathlon at the end of each day. In the middle of all the craziness there will be a moment of peace and I get to enjoy the beauty of each child and the wonder of sisterhood. I really do love these silly girls.
IMG_9417

Here are Elina's big development from the past two weeks:

Tooth! Elina's first tooth broke through on Saturday, July 28th and the second one is just below the gum. I still can't believe that my five-month old has a tooth when it took her older sister ten months for the first tooth to show up. I haven't gotten nearly enough pictures of Elina's gummy smile and I'm sad to see those gummy smiling days come to an end.
IMG01871-20120731-1635

Bottle Holder. Elina has been real interested in holding her bottle and over the last couple of weeks she's actually been able to hold it all on her own. This is huge because it makes being out with two so much easier. 
IMG01868-20120731-1357

Here are Cati's big development from the past two weeks:

Manipulator. Cati has turned into a little manipulator and I love it. It just shows how comfortable she is with us that she knows what to do to get her way. When either of us are upset with her or tell her she can't do something her immediate response is to ask for the other parent. She's already learning that if you can't get your way with one parent then you need to try the other parent.

Left Right. Alex taught Cati how to look left and right before crossing the street and, as a result, Cati now knows her left from her right. This is great because if she had to rely on me for this she wouldn't get it because I am always confused about what's left and what's right.

Playhouse Fun. For the past few months we have been talking about getting Cati a playhouse so that she could play in our backyard instead of always having to walk/drive to the park. We finally got it this past weekend and she has been in heaven. Yesterday morning we all sat outside and enjoyed the weather while Cati played in her house and I hope we have more days like yesterday.
photo(2)

Other than that, my supply has rebounded a bit but it's still not what it was pre-mastitis. I'm still trying to figure out what to do in terms of pumping and right now I'm trying to take it day by day. Either way, I'm trying to focus on how great it's been to even make it this far with two kids. I think my goal is to make it to six months pumping how I am now and then I'll reassess and see how it's all going to work out with me going back to school. Speaking of which, I'm so nervous about starting school and leaving Elina with a sitter. If I thought it was hard leaving a year ago when it was only Cati, this year I will be a sobbing mess leaving both girls.  And with that in mind, I'm trying to enjoy both girls as much as possible.
IMG01874-20120731-1739
Stephanie

Friday, July 27, 2012

Vote for my post on Mom Blog Network

Best Pumpkin Cake Ever

IMG_9060
My position on pumpkin has changed over the years. I used to think I didn't like it but it just turns out I don't like pumpkin pie. Everything else with pumpkin in it? Love it. Take this cake for example, love is too weak of a word to describe how I felt about it. It was soft and moist and slightly pumpkin-y in flavor and was gone within a day of it being made. If you have pumpkin puree at home I highly recommend you give this cake a try.

Pumpkin Cake

Source: Sue Case on Allrecipes.com

2 cups white sugar
1 1/4 cups vegetable oil
1 teaspoon vanilla extract
2 cups canned pumpkin
4 eggs
2 cups all-purpose flour
3 teaspoons baking powder
2 teaspoons baking soda
1/4 teaspoon salt
2 teaspoons ground cinnamon
1 cup chopped walnuts (optional)

Preheat oven to 350 degrees F (175 degrees C). Grease and flour a 12x18 inch pan. Sift together the flour, baking powder, baking soda, salt and cinnamon. Set aside.

In a large bowl combine sugar and oil. Blend in vanilla and pumpkin, then beat in eggs one at a time. Gradually beat in flour mixture. Stir in nuts. Spread batter into prepared 12x18 inch pan.

Bake in the preheated oven for 30 minutes, or until a toothpick inserted into the center of the cake comes out clean. Allow to cool.
Stephanie

Thursday, June 14, 2012

Vote for my post on Mom Blog Network

Boozy Strawberry Shortcake for Two

IMG_8694
Did you know today is National Strawberry Shortcake Day? Well, it is and I'm celebrating with this messy concoction. I had a lot of fun creating this recipe and even more fun putting it all together. I'm not a strawberry fan but I loved the biscuit cookie because it was sweet and buttery and I loved the whipped cream because of its strawberry-orange liqueur flavor.

Boozy Strawberry Shortcake for Two
Serves 2

For the strawberries
5-6 strawberries, hulled and sliced
1 Tbsp sugar
2 Tbsp cointreau

In a small bowl combine all ingredients. Let sit for at least 30 minutes.

For the whipped cream
1/2 cup heavy cream
2 Tbsp liquid from strawberries
Combine ingredients in a small bowl. With a hand mixer on medium speed, mix until cream holds stiff peaks, 2-3 min.

For the biscuit cookies
1/2 cup flour
3/4 tsp baking powder
1/4 tsp salt
2 Tbsp sugar
3 Tbsp butter, chilled and cut into 6 pieces
1/4 cup heavy cream

Preheat oven to 350 degrees F.

Combine flour, baking powder, salt, and sugar in a bowl. Add butter and, using your fingers, mix until just incorporated and mixture looks like wet sand. With a fork stir in heavy cream until combined.
Let the dough sit for five minutes and then, on a floured surface, knead the dough until it hold together.
Divide the dough evenly in two, shape into circles, and pat them down until they are about 1/2-inch thick.

Bake for 15 to 20 minutes or until risen and golden in color. Remove from oven and allow to cool to room temperature.

Assembly
Lay one cookie on a plate. Layer with 2-3 Tbsp whipped cream, half of the berries, and 2-3 Tbsp whipped cream. Place the second cookie on top and garnish top with more whipped cream and the rest of the strawberries.
Stephanie

Tuesday, April 3, 2012

Vote for my post on Mom Blog Network

Chocolate Sour Cream Bundt Cake

Chocolate Sour Cream Bundt Cake
I have been on such a chocolate fix lately. I don't know what it is but all I want to eat is chocolate. Chocolate cookies, chocolate cake, chocolate ice cream, chocolate anything really. I made this cake recently and it was perfect for satisfying my chocolate sweet tooth. The cake was chocolaty and fudgy. The best part is that it was extremely easy to put together.

Chocolate Sour Cream Bundt Cake
Source: Shutterbean
Serves 10

1 cup (2 sticks) unsalted butter, plus more for the pan
1/3 cup cocoa powder
1 teaspoon kosher salt
1 cup water
2 cups all-purpose flour, plus more for the pan
1 3/4 cups sugar
1 1/2 teaspoons baking soda
2 large eggs
1/2 cup sour cream
1 teaspoon pure vanilla extract

Position a rack in the center of the oven and heat to 350 degrees. Butter and flour a 10- or 12-cup Bundt pan and set aside.

In a small saucepan, combine the butter, cocoa powder, salt, and water and put over medium heat. Cook, stirring, just until melted and combined. Remove from the heat and set aside.

Put the flour, sugar, and baking soda in a large bowl and whisk to blend. Add half of the melted-butter mixture and whisk until completely blended (it will be very thick). Add the remaining butter mixture and whisk. Add the eggs one at a time, whisking each to blend completely before adding the next. Whisk in the sour cream and vanilla until smooth.

Pour the mixture into the prepared pan and bake until a toothpick inserted into the center of the cake comes out clean, 40 to 45 minutes.

Let the cake cool in the pan for 15 minutes and then invert onto a rack. Let cool completely before making the glaze.
Stephanie

Monday, March 5, 2012

Vote for my post on Mom Blog Network

Pumpkin Streusel Coffee Cake

IMG_6675
This is the first thing I have baked from scratch since Elina was born. I haven't cooked anything yet but that's ok, baking something sweet is more fun and delicious. I couldn't have made a better selection because this cake was so divinely delicious. It seriously didn't last more than two days in our house and that's that I made the entire recipe instead of half like I normally do. This is another recipe that once again proves pumpkin in desserts is one of the best things ever.

Pumpkin Streusel Coffee Cake
Source: Tracey's Culinary Adventures

Streusel
1/3 cup all-purpose flour
1/2 cup old-fashioned oats
1/2 cup packed light brown sugar
1 teaspoon ground cinnamon
pinch kosher salt
6 tablespoons cold unsalted butter, cut into small cubes

Cake
1 1/2 cups all-purpose flour
2 teaspoons baking powder
1/2 teaspoon baking soda
2 teaspoons ground cinnamon
1 teaspoon ground ginger
1/4 teaspoon freshly grated nutmeg
1/2 teaspoon kosher salt
1/2 cup (1 stick) unsalted butter, at room temperature
1 cup packed light brown sugar
2 large eggs, at room temperature
1/2 cup pumpkin puree
1/2 cup sour cream, at room temperature

Preheat oven to 350 F. Spray a 9-inch springform pan with nonstick cooking spray with flour. (A 9-inch cake pan works too as long as it has about 3-inch sides.)

To make the streusel: Stir the flour, oats, brown sugar, cinnamon and salt together in a medium bowl. Add the butter, and use a pastry cutter to work it into dry ingredients until the mixture resembles coarse crumbs. Set aside while you make the batter.

To make the batter: Whisk the flour, baking powder, baking soda, cinnamon, ginger, nutmeg and salt together in a medium bowl. In the bowl of a stand mixer fitted with the paddle attachment, cream the butter and brown sugar on medium speed until light and fluffy, about 3 minutes. Add the eggs, one at a time, beating well after each addition, and scraping down the sides of the bowl as necessary. Add the pumpkin puree and sour cream and beat until incorporated. With the mixer on low speed, add the dry ingredients, beating just until combined - the batter will be very thick.

Spread half of the batter in an even layer in the bottom of the prepared pan. Sprinkle half of the streusel mixture over the batter. Dollop the remaining batter over the streusel and use an offset spatula to spread it as best you can (it doesn't have to be perfect). Top with the remaining streusel.

Bake the cake for about 45-50 minutes, or until a toothpick inserted in the center comes out clean. Transfer the pan to a wire rack and let cool for 15 minutes then remove the sides of the pan and let the cake cool completely.
Stephanie

Monday, February 20, 2012

Vote for my post on Mom Blog Network

Sour Cream Bundt Cake

Sour Cream Pound Cake
I was in the mood for a cake; a simple yet delicious cake. I had saved this recipe a while ago and seeing as I had all the ingredients I decided to make it. I normally, cut cake recipes in half but I didn't do that with this Sour Cream Bundt Cake recipe. Thank God I didn't because the cake was sooo good. It was literally all eaten up within two days. Alex even proclaimed this the best bundt cake I have ever made. With words like that, I highly recommend you make it now. 

Sour Cream Bundt Cake
Source: The Cutting Edge of Ordinary

2 stick butter, at room temp (do not substitute)
6 eggs, room temp
8oz sour cream, room temp
3 cups sugar
3 cups flour
¼ teaspoon baking soda
1 ½ teaspoons vanilla
½ teaspoon almond extract (optional)

Oven to 350. Grease and flour a tube pan or a bundt pan. Use the second rack from the bottom in your oven.

In a mixer, cream the butter and sugar together. Add the eggs in one at a time, beating well after each addition. Fold the baking soda into the sour cream. Add half of the four and half of the sour cream into the mixer. Beat well. Add in the remaining flour and sour cream and the vanilla and almond extract. Mix well. Pour into pan and bake for 1 hour and 15 minutes, or until toothpick inserted in center tests done. Cool in pan 10 minutes, invert onto rack to cool completely.
Stephanie

Monday, February 6, 2012

Vote for my post on Mom Blog Network

Cheesecake Bites

IMG_6183
Here's a dessert I have been dying to make again ever since I made them with the Daring Bakers back in April 2008. This time around, however, I wanted to take it easier on myself and instead of dipping them in chocolate I rolled them in graham cracker crumbs and drizzled them with chocolate sauce. The resulting dessert was literally a cheesecake on a stick. I don't remember much from the last time I made these, but this time I felt horrible ruining the cheesecake by scooping out balls because the cheesecake was, by far, the most beautiful cheesecake I have ever seen or made in my life. It was stunning. The best part about this dessert is that I stuck the bites in the freezer and they are a perfect snack for whenever the sweet tooth pops up. 

Cheesecake Pops
Source: Jill O'Connor's Sticky, Chewy, Messy, Gooey
Makes 20 – 25 Pops

2 8-oz. plus 4 oz packages cream cheese at room temperature
1 cups sugar
1⁄8 cup all-purpose flour
1⁄8 teaspoon salt
2.5 large eggs (I scrambled the third egg and just used half of it)
1 egg yolk
1/2 tsp pure vanilla extract
1⁄8 cup heavy cream
Boiling water as needed
Twenty to twenty-five 8-inch lollipop sticks
~1/2 cup graham cracker crumbs
1/4 chocolate sauce

Position oven rack in the middle of the oven and preheat to 325 degrees F. Set some water to boil.

In a large bowl, beat together the cream cheese, sugar, flour, and salt until smooth. If using a mixer, mix on low speed. Add the whole eggs and the egg yolks, one at a time, beating well (but still at low speed) after each addition. Beat in the vanilla and cream.

Grease a 9-inch cake pan (not a springform pan), and pour the batter into the cake pan. Place the pan in a larger roasting pan. Fill the roasting pan with the boiling water until it reaches halfway up the sides of the cake pan. Bake until the cheesecake is firm and slightly golden on top, 35 to 45 minutes.

Remove the cheesecake from the water bath and cool to room temperature. Cover the cheesecake with plastic wrap and refrigerate until very cold, at least 3 hours or up to overnight.

When the cheesecake is cold and very firm, scoop the cheesecake into 2-ounce balls and roll in graham cracker crumbs. When all balls are rolled, drizzle with chocolate sauce. Refrigerate for another hour or so and then serve and enjoy.
Stephanie

Friday, December 2, 2011

Vote for my post on Mom Blog Network

Apple Cake

Apple Cake
Like I've said before, I am really loving this fall season and find myself craving fall flavors. I dream of all things pumpkin and apple flavored and I would love it if my home smelled like cinnamon sugar baking. I came across this Apple Coffee Cake recipe recently and jumped on the chance to make it. I, however, left out the caramel sauce because I wanted something less sweet and truer to that apple flavor I was wanting. The cake itself was light but packed a flavorful punch thanks in part to the ginger and tart apples. Upon eating it, Alex first asked if I put ginger in the cake so a little goes a long way with this cake.
 Apple Cake
In general, this is a pretty cake to look at and a delicious one to snack on. I don't think the cake even lasted a day in our house.

Apple Coffee Cake
Source: The Baker Chick

1/4 cup melted butter

1/2 cup sugar
1/3 cup packed brown sugar
2 large eggs

1 tsp. vanilla
1 3/4 cup all-purpose flour, or some all-purpose, some whole wheat

2 tsp. cinnamon

1 tsp. ground ginger

1 1/2 tsp. baking powder
1/2 tsp. baking soda
1/4 tsp. salt
1 cup sour cream or plain yogurt
2-3 apples, unpeeled and sliced


Preheat oven to 350F. Spray a 10″ tube pan with nonstick spray.

In a large bowl, whisk together the butter and sugars until sandy. Mix in the eggs and vanilla until combined.

In a smaller bowl, whisk together the flour, cinnamon, ginger, baking powder, baking soda and salt. Add about a third to the butter mixture and whisk together just until blended. (as the batter gets thicker you may need to change to a wooden spoon.) Add half the sour cream, another third of the dry ingredients, the rest of the sour cream, and the rest of the dry ingredients, stirring by hand just until combined.

Arrange a layer of sliced apples onto the bottom of the pan. Scrape the batter into the pan on top of the apples. Add the rest of the apples onto the surface of the batter, arranging them however you like – they will shrink as they cook, so feel free to place them tightly together.
Stephanie

Wednesday, November 2, 2011

Vote for my post on Mom Blog Network

Pumpkin Bars

IMG_4832
I have been in a huge fall kick this year. Maybe it was our trip to Boston and seeing the changing of the leaves. Maybe it's the fact that fall means Thanksgiving. Maybe pregnancy just has me more in tuned with nature. Either way, I am loving all things fall this year and I am especially loving all things pumpkin. I was never a fan of pumpkins before, but I find myself longing for pie pumpkins so I can make some homemade pumpkin puree. I made these Pumpkin "Bars" (mine came out more like a pumpkin cake) with the first batch of pumpkin puree I made and they were a huge hit. As soon as I bit into a slice of this, I felt like fall was taking over my body and I felt happy, warm, cozy, and cinnamony. I highly recommend you try these, even if you only have enough for a quarter of this recipe.

Pumpkin Bars
Source: Paula Deen

Bars:
4 eggs
1 2/3 cups granulated sugar
1 cup vegetable oil
15-ounce can pumpkin
2 cups sifted all-purpose flour
2 teaspoons baking powder
2 teaspoons ground cinnamon
1 teaspoon salt
1 teaspoon baking soda

Icing:
8-ounce package cream cheese, softened
1/2 cup butter or margarine, softened
2 cups sifted confectioners' sugar
1 teaspoon vanilla extract

To make the bars: Preheat the oven to 350 degrees F.

Using an electric mixer at medium speed, combine the eggs, sugar, oil and pumpkin until light and fluffy. Stir together the flour, baking powder, cinnamon, salt and baking soda. Add the dry ingredients to the pumpkin mixture and mix at low speed until thoroughly combined and the batter is smooth. Spread the batter into a greased 13 by 10-inch baking pan. Bake for 30 minutes. Let cool completely before frosting. Cut into bars.

To make the icing: Combine the cream cheese and butter in a medium bowl with an electric mixer until smooth. Add the sugar and mix at low speed until combined. Stir in the vanilla and mix again. Spread on cooled pumpkin bars.
Stephanie