Showing posts with label Blog Events. Show all posts

Tuesday, August 17, 2010

Vote for my post on Mom Blog Network

Giving You Some Face

Guess what?? Go ahead and guess. What? You don't like guessing? It's ok I don't like it either. I just thought I'd give it a shot. I tried to create a fan page on Facebook for the blog. I'm having technical difficulties at the moment (it's actually more like I-don't-understand-Facebook-or-technology difficulties) so until I get it all figured out make sure to: And knowing how I am that probably won't work so you'll have to click HERE. Anyone have any tips or words of encouragement for the technologically impaired?

Make sure to spread the word because I'm doing a giveaway once I reach 100 fans. Here's what you can get:
PS Further proof of my problems with technology: It's taken me an hour to get this post together because of the new format on Blogger. I HATE it! Am I the only one?

Monday, April 5, 2010

Vote for my post on Mom Blog Network

And the winner is...

Katrina of Baking and Boys!

A huge thank you to everyone that entered the giveaway for Sara Perry's Deep Dark Chocolate.

Katrina, please email me (steppystar@aol.com) your contact info so that I can get the book out to you :)

Thursday, April 1, 2010

Vote for my post on Mom Blog Network

A Blog Celebration!

I had been wanting to do something special in honor of the blog turning two back in January but the pregnancy and the resulting baby put that plan on hold. So now, almost three months later, I am having a giveaway in honor of the blog's second birthday. I picked up Sara Perry's book Deep Dark Chocolate and fell in love with both the pictures and the recipes. The book has a recipe for almost everything you can think of putting chocolate in. Now you can own a copy of this book!
From Amazon.com:

From Publishers Weekly

Veteran cookbook author Perry (Holiday Baking, Everything Tastes Better with Bacon, The New Tea Book) returns with a winning take on everyone's favorite sweet. Chocolate lovers can start their day off with the indulgent, gooey Chocolate Sticky Buns or Chocolate Dream Scones with Mascarpone Spread before breaking out the Vin Santo and Brioche Chocolate Bread Pudding at brunch and snacking throughout the day on various cookies and bars. Desserts are where chocolate really shines, and Perry doesn't disappoint with dishes like a Chocolate Gingerbread with Cacao Nib Whipped Cream cake, "Baby Loves," a chocolate-filled macaroon, as well as Good Ol' Fudgy Brownies and the "It's My Party" Birthday Cake. Eschewing time and labor-intensive recipes, Perry offers an easy greatest-hits list, with 6 variations for hot chocolate, a fondue for every season and simple Mom's Frozen Fudge Pops for summertime. While there are already more than enough cookbooks devoted to the topic, the approachability and breadth of Perry's sweet, inventive collection make it worth the indulgence.

Product Description

Dark chocolate lovers will fall head over heels for each of the more than 60 indulgent recipes in Deep Dark Chocolate. Everyday treats include Black Magic Chocolate Espresso Cookies and Crunchy Nut Bittersweet Caramel Bars while fancy delights like Papa Haydn's Chocolate Gateau and Little Chocolate Cheesecake with Mocha Affogato offer up irresistible decadence. Whether the recipe calls for bittersweet or semisweet chocolate cocoa nibs cocoa beans or all of them together everyone at the dinner table will be saving room for dessert! With gorgeous chocolate-drenched photographs and a quick primer that reveals the essentials about this highly sought after treat (it's high in healthy antioxidants!) Deep Dark Chocolate keeps the bittersweet-tooth forever satisfied.

Here's how to enter (it's simple, I promise!)
:

1. You must comment on this post by answering the following question: What is your favorite type of chocolate?
2. Only one entry per person.
3. You have until 11pm on Sunday, April 4th to enter.

I'll choose the winner on Monday, April 5th using random.org and post about it then.

Good luck!

Monday, October 27, 2008

Vote for my post on Mom Blog Network

Spice Love


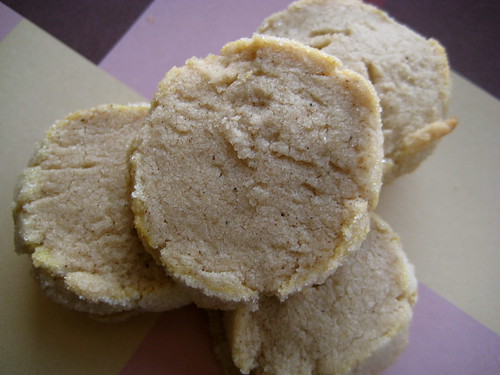
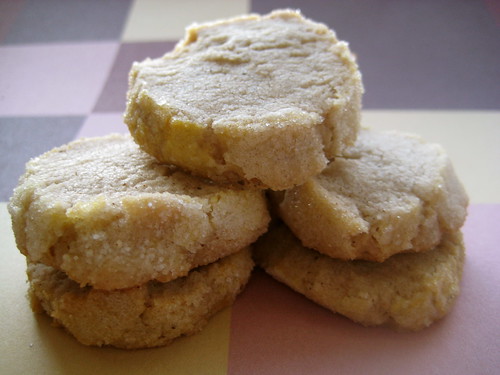
I am so excited to be participating in this month's Sugar High Fridays. For whatever I have never participated, but when I saw this month's theme I couldn't resist. What is this month's theme, you ask? Spices! This is such a great theme because it's a perfect way to wrap up fall (the season) into a dessert. I love the smell of spices and I love how warm and cozy their scent makes my house feel. So after thinking long and hard and narrowing down my choices, I decided to make Spiced Sugar Coins. These crunchy cookies were delicious and a wonderful way to highlight how spices complement one another. The smell was incredible and, I kid you not, it smelled like a candle from Yankee Candle.

Thanks to Dessert First for choosing spices as this month's theme.

Spiced Sugar Coins
Source: Carole Bloom's The Essential Baker

6 oz (12 Tbsp) unsalted butter, softened
½ cup granulated sugar
1 tsp. vanilla extract
1 ¾ cups all-purpose flour
1 tsp. cinnamon
½ tsp. ground ginger
¼ tsp. ground cloves
¼ tsp. ground nutmeg
1/8 tsp. salt
1 extra-large egg yolk
1/3 cup granulated sugar

Place the butter in a large bowl and beet until fluffy, about 2 minutes. Add the sugar and cream together well. Stop occasionally to scrape down the sides and bottom of the bowl with a spatula. Add the vanilla to the mixture and blend thoroughly.

In a medium bowl, sift together the flour, cinnamon, ginger, and cloves. Add the nutmeg and salt and toss to blend. Add this mixture to the butter mixture in 3 stages. Stop after each addition to scrape down the sides and bottom of the bowl.

Place two large sheets of wax paper on a flat surface and divide the dough evenly onto them. Use the wax paper to shape and roll the dough into cylinders about 10 inches long and 1 inch wide. Cover the cylinders tightly with plastic wrap and chill in the freezer for 45 minutes or in the fridge for at least 2 hours until firm enough to slice.

Preheat the oven to 400 degrees. Line two baking sheet with parchment paper.

Using a fork, lightly beat the egg yolk in a small bowl. Divide the sugar evenly between sheets of wax paper. Unwrap each dough cylinder and using a pasty brush or spook, coat the outside of each cylinder with egg yolk, then roll in the sugar, coating each completely.

Place a cylinder on a cutting board and, using a sharp knife, cut each cylinder into ¼-inch thick slices.

Place the slices on the baking sheets, leaving at least 1-inch of space between them Bake for 5 minutes, then switch the sheets, and bake for another 5-6 minutes, until set. Remove from oven and cool completely on baking racks.


Tuesday, October 14, 2008

Vote for my post on Mom Blog Network

Kiss Cookies for Breast Cancer

I didn't participate in TWD this week because neither of us likes biscotti. Biscotti is probably the only cookie on this planet that Alex and I don't like. But don't let that dissuade you from going to TWD and seeing how everyone fared with this week's selection.

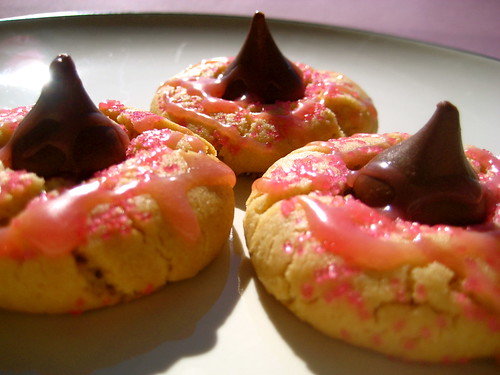
I still wanted to bake cookies so I decided to bake Kiss Cookies (I like this name better than the Betty Crocker one) for The Power of Pink Challenge hosted by Jen of Beantown Baker. This is a great event and, although I have not been personally affected by breast cancer, I still support organizations that focus on raising awareness and funding breast cancer research. Maybe it all stems from the lump scare I had with my mom a few years ago or maybe it has something to do with my sorority, Zeta Tau Alpha, or maybe I'm drawn to the pink since pink is my favorite color. Whatever it is, breast cancer has always been something I feel passionate about.


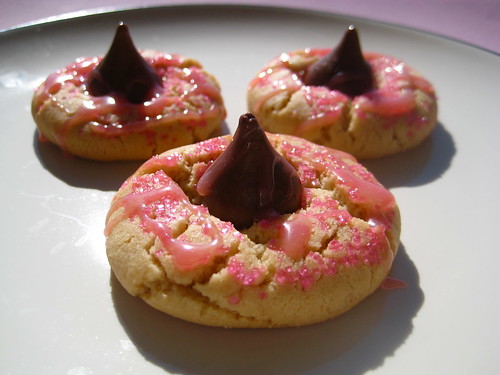
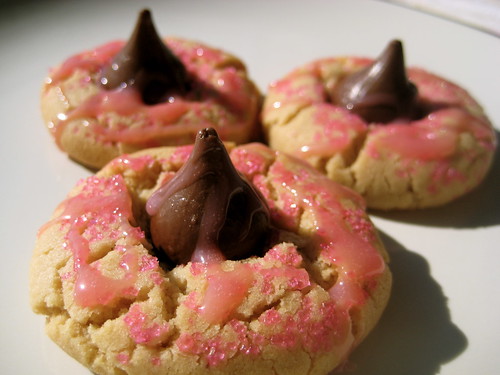
So for this event I thought long and hard about what to bake. At first I thought of M&M cookies but then I saw that Jen had already made some that look amazing so it was back to the drawing board for me. I decided on Kiss Cookies because these cookies are always a huge hit in my house and I could use the pink-foiled Hershey's Kisses. The cookies came out great and were so easy and fun to put together. My absolute favorite part of baking these cookies is sticking the Kiss in the middle. To make the cookies fit the pink theme I rolled them in pink sugar and drizzled them with pink-colored white chocolate.

Thanks Jen for hosting such a great event and I hope to see more pink goodies over the course of the month!

Peanut Butter-Chocolate Candy Cookies
Source: Betty Crocker

1/2 cup granulated sugar
1/2 cup packed brown sugar
1/2 cup creamy peanut butter
1/2 cup butter, softened
1 egg
1 1/2 cup all-purpose flour
3/4 tsp baking soda
1/2 tsp baking powder
Granulated sugar or colored sugar
About 36 Hershey's Kisses, unwrapped

Preheat the oven to 375 degrees and line a baking sheet with parchment paper.

In a large bowl, beat the granulated sugar, brown sugar, peanut butter, butter, and egg with an electric mixer on medium speed.

In a small bowl, combine the flour, baking soda, and baking powder. Stir the flour mixture into the butter mixture until a dough forms.

Shape dough into 1-inch balls and roll in granulated or colored sugar. Place the balls on the cookie sheet about 2 inches apart.

Bake for 8 to 10 minutes or until the edges are light golden brown. Remove from oven and immediately press 1 Hershey's Kiss in the center of each cookie. Remove from the cookie sheet and place on cooling rack.


Baking.


All done up...


Pretty and pink!


The lovely Hershey's Kisses.

Enjoy!

Tuesday, July 22, 2008

Vote for my post on Mom Blog Network

Got Milk? How About Arroz Con Leche?

I came across this cool event hosted by Linda over at Make Life Sweeter for World Breastfeeding Week. The event is called Got Milk? and you get to make any sweet dish you want as long as it has milk as an ingredient. Linda wanted to do this blog event to promote breastfeeding and I wanted to participate because I personally believe breastfeeding is important. If you are curious about the benefits of breastfeeding, I can send you the 15-page paper I wrote last Fall for my Infant & Toddler Development course :)

As soon as I saw the information for this event, I immediately knew what I was going to try to make. I say "try" because what I was going to do was try to replicate one of my mom's recipes. I called the woman up to ask for the recipe and, like any good recipe that has been in the family for decades, there are no measured amounts. I was told that to make the sweet dessert, Arroz con Leche (rice with milk), all I needed was rice, milk, butter, and condensed milk. Ok. Thanks mom! What was cool about this conversation was hearing my mom's history with this dish. When she was a little girl in Colombia she used to use Arroz con Leche as payment for getting out of household chores; she would give up her cup of Arroz con Leche to one of her siblings in exchange for a chance to sleep in during the week (she would wake up at 4:30am to get the homemade breakfast of arepas ready). She then told me about how thankful she is to live in the US because she can make Arroz con Leche whenever she wants and sleep in at the same time.

This dish came out great. Not exactly like my mom's but almost like it. I think the next time I am in Miami I am going to have her make it and I'm going to record it so that I can see every little thing that she does.

Arroz con Leche
Source: My Mom
Makes enough for 3-4 servings.

3 cups whole milk
1 Tbsp butter
1 cup of rice (I used long-grain)
1/2-3/4 cup sweet condensed milk

Combine the milk, butter and rice in a medium-sized saucepan. Bring the milk to a boil and then reduce the heat to a simmer. Stir constantly so that the rice does not stick to the bottom of the pan. Once the rice is tender and has soaked up most of the milk (
if the rice still isn't tender, add more milk 1/2 cup at a time), add the condensed milk 1/4 cup at a time until it reaches the desired sweetness. Serve immediately and enjoy!

Note: you can add raisins or queso blanco (like my mom does sometimes) and you can top it with cinnamon.

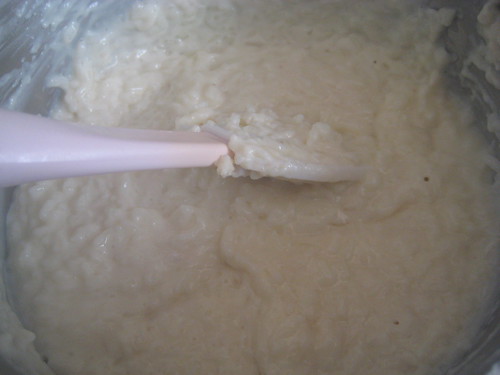
Rice being cooked.


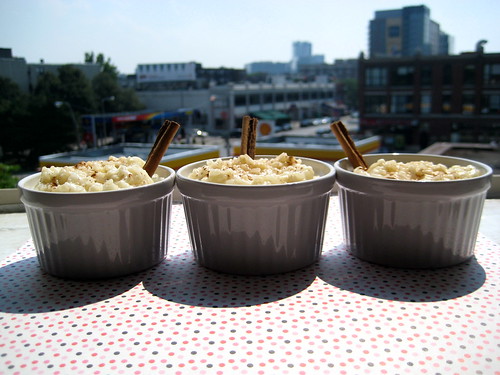
All served and ready to eat.


Closeup of goodness.


Sunday, July 20, 2008

Vote for my post on Mom Blog Network

I'm Scared of Knives

There I said it. I feel just a little bit freer after making that declaration. I seriously am terrified of them. I don't even like to look at them and I hate using them. But since Joelen of Joelen's Culinary Adventures has "Picture of Your Knives" as one of the July events to partake in, I'll tell you about the three experiences that have left me knife scarred for the rest of my life. The first incidence happened when I was a kid. I was trying to cut a mango and accidentally sliced my palm. Ouch. The second incidence happened when I was 16 and I was trying to sharpen a butcher's knife (I worked at Quiznos) and instead cut myself deeply by the thumb on my left hand. The last and most traumatizing incident happened a week after I graduated high school. I was trying to clean the meat slicer (again at Quiznos) and ended up slicing off the tip of my right index finger. I was rushed the emergency room, given a tetanus shot, and spent the summer laying in bed on pain meds. Thinking of that last experience still makes me cringe. Because of all of these experiences I refuse to have real knives in my house, much to Alex's dismay. Instead I rely heavily on my butter knives and some steak knives:


Saturday, July 12, 2008

Vote for my post on Mom Blog Network

I'm a winner!


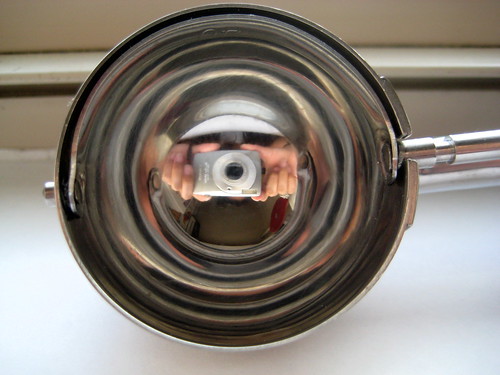
I'm a little late in posting this, but I just had to share with everyone because of how excited I was when I found out I was the winning blogger for the Little Chefs cookie giveaway. I won for the ultra-delicious raspberry butter cookies I made and Joelen of Joelen's Culinary Adventures sent me an awesome cookie scoop as a prize. This cookie scoop is so awesome that I have found myself asking, "where have you been all my life?!"

Thanks Joelen!


Tuesday, May 27, 2008

Vote for my post on Mom Blog Network

Raspberry Butter Cookies


One of my blog obsessions is Joelen's Culinary Adventures. The woman does some incredible things with foods and hosts the most delicious food events. So when I saw her post about joining her "Culinary Adventures in Cyberspace" I jumped on it. While she has a few adventures posted that I want to participate in, this was the one I wanted to do first:

Little Chefs: Cookies ~ This event is dedicated to all the young aspiring chefs out there. In this culinary adventure, we're teaming up with the Ronald McDonald House each month to provide some kid-friendly events to their children & families… as well as a chance for your children to participate too! This month, we're making cookies from scratch with the kids. If you have any cookie recipes easy enough for kids to make, please share it during this culinary blogging adventure!

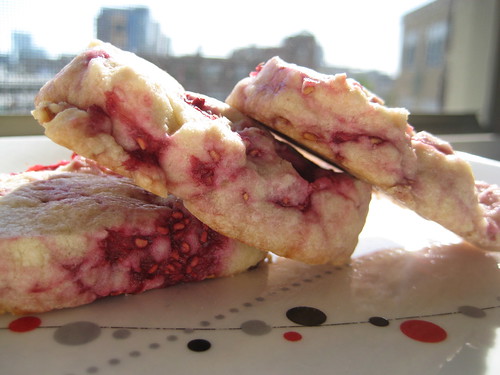
For this adventure, I thought it would be fun to do some easy cookies that had a red color to them in honor of Ronald McDonald's cool hair. I chose to make butter cookies with raspberries in them. The recipe is easy to follow and doesnt' have too many ingredients in them (you can even change the fruit to something else). The only part that isn't too kid friendly (depending on the age) is when you have to cut the roll into the slices, but you don't even have to do this part because of how well the dough holds together. After I baked the cookies, I thought about how great it would have been to create a flat sheet of dough, freeze that, and then use cookie cutters to make cool shapes out of the dough. Making the cookies this way would definitely be more kid friendly.

Raspberry Butter Cookies

Source: Carole Bloom's The Essential Baker


4 ounces (8 Tbsp/1 stick) unsalted butter, softened

1/3 cup firmly packed light brown sugar

1/8 tsp salt

1 cup all-purpose flour

1/2 cup sliced raspberries


Place the butter in a bowl and beat until fluffy, about 2 minutes.


Add the brown sugar and salt to the butter and cream together well. Stop occasionally and scrape down the sides and bottom of the bowl with a rubber spatula.


Add the flour in two stages to the butter mixture and blend thoroughly after each addition.


Add the raspberry to the dough mixture and stir in with the spatula.


Place a large sheet of wax paper on a flat surface and place the dough on the sheet. Use the wax paper to shape and roll the dough into a cylinder about 8 inches long and 2 inches wide. Cover the cylinder tightly with the waxed paper and then wrap in plastic wrap. Chill in the freezer for 45 minutes or in the fridge for at least 4 hours, until firm enough to slice.


Adjust the oven racks to the middle of the oven. Preheat the oven to 325 degrees F. Line a baking sheet with parchment paper or with a non-stick pan liner.


Place the cookie cylinders on a cutting board. Using a sharp knife, cut the cylinder into 1/2-inch-thick slices. Cut straight down and roll the cylinder a quarter after every 6 slices so it will keep its round shape. If the dough becomes soft while you are working with it, rewrap it, chill for another 10-15 minutes, then continue slicing.


Place the slices on the baking sheets, leaving at least 1 inch of space between them. Bake for 20-25 minutes, until set. Remove the baking sheets from the oven and leave the cookies on the sheets to cool on the racks.


Vote for my post on Mom Blog Network

Recipe Remix: PB&J French Toast


I came across this blog event on the What's Cooking? board of The Nest and thought it was such a fun thing to do. I was even more excited about the event because it was about breakfast foods and breakfast is my absolute favorite meal of the day. The whole premise of Recipe Remix is to take a recipe we all know and "remix" it in a fun, new, and different way.

After making myself a peanut butter and jelly sandwich yesterday for lunch I thought about how cool it would be to make this lunch staple a breakfast item. I went to bed dreaming about how a French Toast-pb&j sandwich combination would taste and I am happy to say that it tasted good! It tasted like your typical French Toast but with a gooey, yummy center. I dusted some powdered sugar on it and while it tasted good without syrup, I poured syrup on it just to see how well it would go with the pb&j filling. Remixing French Toast and combining it with all-time favorite sandwich (pb&j) was an awesome idea and I can't wait to make this again.

PB&J French Toast

Butter for skillet
1 egg
1/4 tsp vanilla extract

2 slices bread
Peanut Butter
Jelly (I used strawberry)


1. Over medium-low heat melt butter in a skillet.
2. Combine egg and vanilla extract and set aside.
3. Prepare pb&j sandwich as you normally would.
4. Dip the pb&j sandwich in the egg mixture and coat both sides.
5. Place on skillet and cook until golden; flip and repeat
6. Enjoy!


Thanks to Robin of Made With Love and Danielle of Make No Little Meals for hosting! If you want more details on Recipe Remix, click here.

Monday, May 5, 2008

Vote for my post on Mom Blog Network

Chocolate Strawberry Bliss Cupcakes


How cool do ice cream cupcakes sound!? I bet you are jumping out of your seats and exclaiming, "That is so freaking cool!" Oh you aren't that excited? Well, what's wrong with you? When is the last time you had an ice cream cupcake? If you haven't had one in the last six months, then you should be very excited about this post.

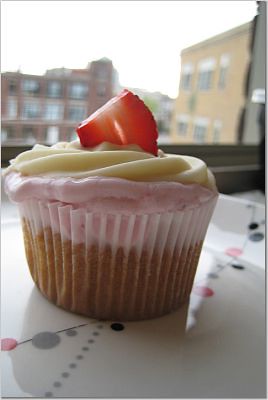
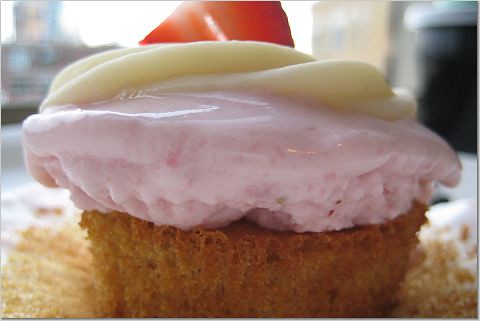
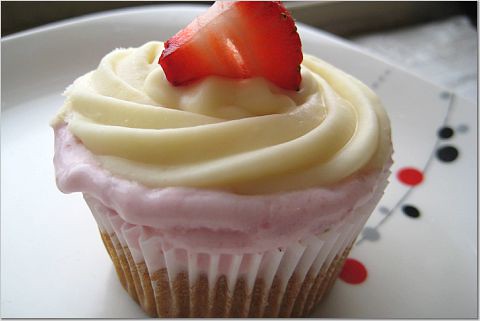
I came across this event hosted by Cupcake Project and Scoopalicious one day while browsing the good old internet. The event was all about putting your creative hat on and making an ice cream cupcake. I was immediately drawn to the idea of making ice cream and cupcakes and combining the two into something delicious. I knew I wanted to make something fun and colorful. I ran a whole slew of combinations in my mind and pictured what would look the best until I reached a combination I was satisfied with. I decided to be efficient and use the white chocolate cupcakes I had made earlier in the day and top it off with some homemade strawberry ice cream. It gets better though because I decided to top that with some delicious white chocolate frosting and a cute strawberry slice.

For more information about the event, make sure to check here. I had a lot of fun making these and I'm sure you would too, so give it a go!

Fresh Strawberry Ice Cream
Source: Whole Foods

2 cups sliced fresh strawberries
1 cup whole milk
1 cup heavy cream
3/4 cup sugar

Set aside 1/2 cup of sliced strawberries. In a blender or food processor, combine remaining ingredients and puree until smooth. Add reserved slices. Pour into ice cream maker and finish according to manufacturer's directions. (It's 20 minutes of a Cuisinart ice cream maker).


For this event it's best to halve the original cupcake recipe. This will yield 12 half-filled cupcakes liners.


These are other tips that Stef has posted on her blog:

How to Make Ice Cream Cupcakes

A simple ice cream cupcake is just cake on the bottom, ice cream on the top, and some frosting.

  1. Use any cake recipe you like. Just fill your cupcake liners half as full as you normally would. You don't want the cake to come to the top because you want to leave lots of room for ice cream. Bake as normal, although you may need to cut baking times a bit since there is less cake.
  2. When the cupcakes are done baking, let them come to room temperature and stick them in the freezer. I froze mine right in the cupcake tins to make it easy.
  3. Remove the cupcakes from the freezer and use a spatula to cover the cupcake with ice cream. I worked with ice cream that was out of the freezer for just a couple of minutes. It was still hard but not so hard that I couldn't spread it.
  4. Return the cupcakes to the freezer and wait for the ice cream to get hard again.
  5. After the ice cream is hard again, you can further smooth the tops by dipping your spatula in hot water and running it over the top of the cupcakes.
  6. Frost the cupcakes with your favorite frosting - I think a cream cheese frosting works best. You can also frost the cupcakes with ice cream. The words "Ice" and "Cream" in the photo above were frosted with ice cream. I found this to be REALLY hard. As I tried to pipe the ice cream, it would melt and as soon as it melted it wouldn't hold any shape. If anyone knows a good way to do this, please write about it!

Tuesday, April 22, 2008

Vote for my post on Mom Blog Network

Tasty Tools: Best Cookies Ever

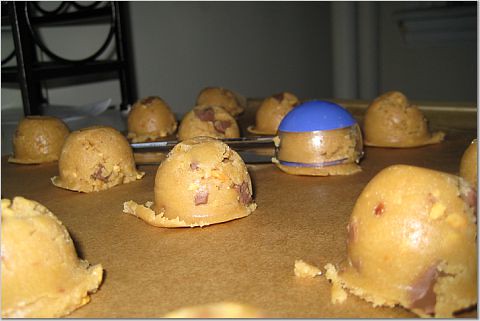
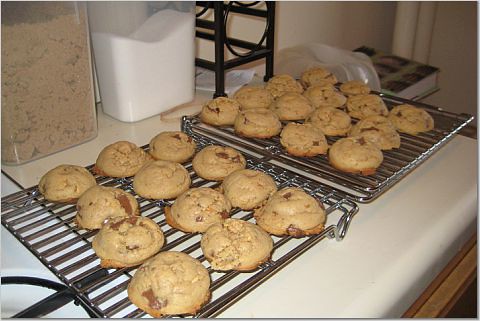
Joelen of Joelen's Culinary Adventures hosted another Tasty Tools event this month. The tool for this month was a scooper and once I found out this was the tool I immediately knew I wanted to make cookies. I LOVE cookies. They are my absolute favorite thing to bake. Cookies are like heaven to me, especially chocolate chip cookies. I have an unnatural obsession with chocolate chip cookies; I must make every recipe I encounter. (Note: if you have any good ones, send them my way!). I decided to try out another recipe from Carol Bloom's book "The Essential Baker." As soon as I spotted "Milk Chocolate Chunk-Peanut Butter Cookies" my taste buds went into overdrive. I was salivating just looking at the recipe. I thought the cookies came out great but I wasn't ready for Alex's reaction.

Like I said, I have made many cookies, but these cookies struck Alex in a way that I never thought a cookie could. After one bite, the words "best cookie ever" slipped out of his mouth. He was hooked. I've never seen the man go after cookies like he did with these cookies. I mean, I thought the cookies were good, but I didn't think they deserved the label "best cookie ever."

Joelen, thank you once again for hosting!

Milk Chocolate Chunk-Peanut Bitter Cookies
Source: Carol Bloom's The Essential Baker

3 oz (6 Tbsps) unsalted butter, at room temperature
1/2 cup unsalted natural-style chunky peanut butter, at room temperature
1/2 cup firmly packed light brown sugar
1/4 and 1/8 cup granulated sugar
1 extra large egg, at room temperature (1 extra large egg = 1 large egg)
1/2 tsp vanilla extract
1 cup all-purpose flour
1/4 tsp baking soda
1/4 tsp salt
3 oz milk chocolate, cut into small chunks (I love chocolate so I added 5 oz)


1. Preheat the oven to 350 degrees. Line baking sheets with parchment paper or non-stick liners
2. Beat the butter in a large bowl until fluffy, about 2 minutes
3. Add the peanut butter to the butter and mix together well. Scrape the sides and bottom of the the bowl with a rubber spatula
4. Add the brown sugar and granulated sugar to the butter mixture and cream together
5. Use a fork to lightly beat the egg and vanilla together in a small bowl. Add this to the butter mixture and blend thoroughly
6. Sift together the flour, baking soda, and salt. Add this to the butter mixture in 4 parts, blending well after each addition. Scrape the sides and the bottom of the bowl with a rubber spatula
7. Add the chocolate chunks and stir to distribute evenly
8. Using a scooper, scoop out mounds about 2 inches in diameter. Place the mounds on the baking sheets, leaving 2 inches of space between cookies
9. Bake the cookies for 5-7 minutes
10. Serve yourself a glass of milk and enjoy!

Scooping the cookie


All ready to be baked


Cooling and waiting to be eaten


Served best with milk :)

Tuesday, March 18, 2008

Vote for my post on Mom Blog Network

A Tropical Reminder

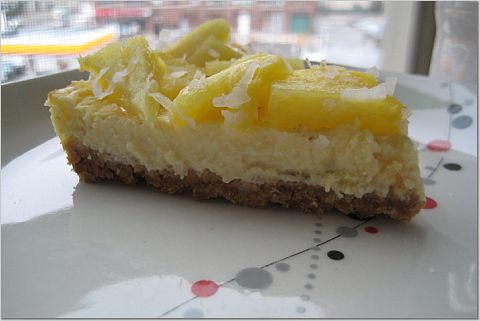
I finally got around to making one of the desserts that's in my Cooking Light Annual Recipes 2008 book that my friend Shanna gave me. After looking through the book for about an hour last night trying to find the perfect recipe, I decided to make a dessert that will transport me back to the warm weather and beaches... Piña Colada Cheesecake Bars!

Another attraction to this recipe was that I could use it to participate in Joelen of Joelen's Culinary Adventures monthly event Tasty Tools. The kitchen tools this month were a grater and microplane. I have two microplanes and love using them! They make baking and cooking so much fun.


Piña Colada Cheesecake Bars

Crust:
1 cup graham cracker crumbs
2 Tbs coconut flour or all-purpose flour
2 Tbs turbinado sugar
1/2 tsp ground ginger
2 Tbs butter, melted
1 Tbs canola oil
1 Tbs water
Cooking spray

Filling:
1 cup 2% low-fat cottage cheese
1/2 cup sugar
1/4 cup (2 oz) block-style fat-free cream cheese, softened
1 1/2 Tbs grated lemon rind
1 Tbs fresh lemon juice
1 Tbs pineapple juice
1/2 tsp vanilla extract
Dash of salt
3/4 cup egg substitute

Remaining Ingredients:
1 cup chopped free pineapple
1/4 cup unsweetened shredded coconut, toasted

1. Preheat over to 350 degrees
2. To prepare crust, combine first 4 ingredients in a bowl. Add butter, oil, and water; toss well. Press mixture onto the bottom of an 8-inch square baking pan (I used a cake pan since that's all I had) coated with cooking spray. Bake at 350 degrees for 10 minutes. Cool completely on a wire rack.
3. To prepare filling, place cottage cheese and next 7 ingredients in a food processor, and process until smooth. Add egg substitute, and process until blended. Spread cheese mixture over cooled crust. Bake at 350 degrees for 33 minutes or until set. Cool 10 minutes on a wire rack. Refrigerate 2 hours or until thoroughly chilled. Top with pineapple and coconut.
4. Cut into 16 bars (or slices) and enjoy!


Make sure to enjoy the first bite. There are tons of flavors in this recipe. The crust leaves you with a hint of ginger and the filling has a subtle lemon flavor. The pineapple ties in all the flavors and is a good balance to the lemon filling.


A Picture of the dessert and the microplane :)