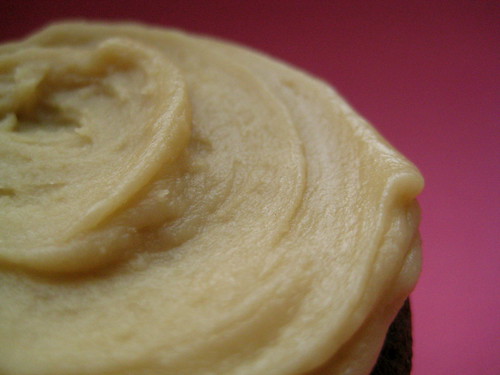
Showing posts with label The Cake Slice. Show all posts

Tuesday, September 27, 2011

Vote for my post on Mom Blog Network

The Cake Slice: Walnut Whiskey Pound Cake

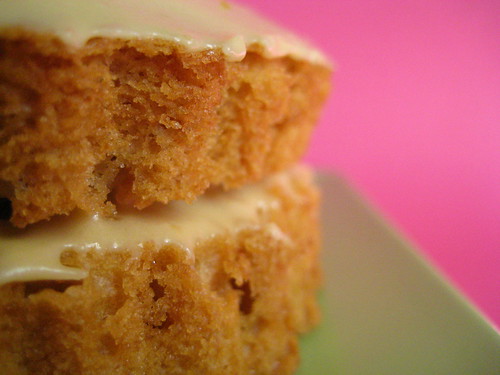
I am a solid week late on posting about this cake which is especially sad because I made this cake a month ago. This month we were allowed to bake whatever cake we wanted from Cake Keeper Cakes because it would be our last month baking from that book. I chose a cake that I knew would be loved and enjoyed in our house: Walnut Whiskey Pound Cake. Sure enough, the cake was a huge hit. This is the type of cake that makes you feel all warm and fuzzy inside and I promise it's not because of the whiskey. All you really get from the whiskey is a nutty flavor but I will admit that you can taste the whiskey the longer the cake sits. Either way, the cake is perfect for drinking with a tall glass of milk or a cup of coffee.
 Whiskey Walnut Pound Cake
For more on The Cake Slice group go here

Walnut Whiskey Pound Cake
Source: Lauren Chattman's Cake Keeper Cakes

1/4 cup sour cream
1/4 cup whiskey
3 large eggs
1 tsp pure vanilla extract
1 1/2 cups cake flour
3/4 tsp baking powder
1/4 tsp salt
1/2 cup (1 stick) unsalted butter, softened
1 1/4 cups packed light brown sugar
1/2 cup finely chopped walnuts

Preheat the oven to 325 degrees F. Grease a 9x5 loaf pan and dust with flour.

Combine the sour cream, whiskey, eggs, and vanilla in a large measuring cup and lightly beat. Combine the flour, baking powder, and salt in a medium mixing bowl.

Combine the butter and brown sugar in a large mixing bowl and cream with a mixer on medium-high until fluffy, about 3 minutes, scraping down the sides of the bowl once or twice as necessary.

With the mixer on medium-low, pour the egg mixture into the bowl in a slow stream, stopping the mixer once or twice to scrape down the sides.

Turn the mixer to low speed and add the flour mixture, 1/2 cup at a time, scraping down the sides of the bowl after each addition. After last addition, mix for 30 seconds on medium. Stir in nuts.

Scrape the batter into the prepared pan and smooth the top with a rubber spatula. Bake the cake until it is golden and a toothpick inserted int he center comes out clean, about 1 hour and 15 minutes. Let the cake cool completely.
Stephanie

Sunday, May 22, 2011

Vote for my post on Mom Blog Network

The Cake Slice: Orange Cake with Chocolate Cointreau Sauce

Orange Cake with Chocolate Cointreau Sauce
I cheated a bit with this month's cake, but it was a cheat out of necessity. The original cake was an Orange Almond Caramel Upside-Down Cake. We didn't have almonds and I didn't care to buy because Alex isn't a big fan of almonds in his desserts and if I wanted him to eat the majority of this cake, then I had to forgo the almonds. So instead of the cake having almonds and being an upside down cake, I made the cake into cupcakes with a chocolate Cointreau sauce. The sauce was perfect for dipping and the right consistency for balancing and adding a new flavor dimension to the cake; I think a glaze would have overpowered the delicate orange flavoring of the cake. What I got was a perfect orange cake that was not drowned out by the chocolate. Alex said the cupcake reminded him of those Chocolate Orange Balls. I thought the cupcake was light and refreshing.
Orange Cake with Chocolate Cointreau Sauce

Make sure to head over to The Cake Slice's blogroll to see what everyone else did with this month's cake. 

Orange Cake with Chocolate Cointreau Sauce
Source:  Cake Keeper Cakes by Lauren Chattman
Makes 6 cupcakes

For the cake
3/4 cup unbleached all purpose flour
1/2 tsp baking powder
1/4 tsp baking soda
1/8 tsp salt
1/4 cup sour cream
1 large eggs
2 Tbsp orange juice
1/2 tsp vanilla extract
4 Tbsp unsalted butter, softened
1/4 cup plus 2 Tbsp granulated sugar
1 1/2 tsp grated orange zest (I used zest from a mandarin)

Preheat oven to 350 degrees F. Line six of the cavities of a cupcake pan with cupcake liners.

Combine the flour, baking powder, baking soda and salt in a medium mixing bowl. Combine the sour cream, eggs, orange juice and vanilla in a glass measuring cup and beat lightly.

Combine the butter and granulated sugar in a large mixing bowl and cream with an electric mixer on medium high speed until fluffy, about 3 minutes, scraping down the sides of the bowl once or twice. Stir in the orange zest.

With the mixer on medium-low speed, pour the egg mixture into the bowl in a slow stream, stopping the mixer once or twice to scrape down the sides.

Turn the mixer to low speed and add the flour mixture and combine.

Pour the cake into the cupcake cavities and bake until the cake is golden and a toothpick inserted into the center comes out clean, 15 to 20 minutes. Transfer the pan to a wire rack and let stand for 5 minutes. Remove cupcakes from the pan and cool to room temperature before dipping in sauce.

Store uneaten cake in a cake keeper or wrap and store at room temperature for up to 2 days.

For the sauce
1/4 cup semi-sweet chocolate chips
2 Tbsp butter
1 Tbsp Cointreau

In a small bowl over medium-low heat, melt together the chocolate and butter. Remove from heat and stir in Cointreau.

Note: the longer the sauce sits, the thicker consistency it will have so you can either dip the cupcakes right away or wait until the sauce thickens and use a knife to spread the sauce on the cupcakes. 
Stephanie

Sunday, March 20, 2011

Vote for my post on Mom Blog Network

The Cake Slice: Chocolate Cream Pound Cake

Chocolate Pound Cake
This cake confused me. I hope I'm not the only one. I followed the recipe almost exactly (I used natural versus Dutch) and for some reason my cake baked differently. I almost thought I was baking a souffle of some sort because the outside was crunchy and cooked through but the inside was all chocolate gooey-ness. I ended up having to bake a little longer but it finally baked all the way through. I was however, left with a cake that was crunchy on the outside and perfectly pound cake-like on the inside. Aside from that, the cake was wonderful. It wasn't as richly chocolaty as I expected but that was just fine by me.

Chocolate Cream Pound Cake
Makes one 9x5 inch loaf cake
Source: Cake Keeper Cakes by Lauren Chattman

Ingredients
6 tbsp unsweetened Dutch process cocoa powder
¼ cup heavy cream
1 cup plus 2 tbsp all purpose flour
¼ tsp baking soda
¼ tsp salt
½ cup (1stick) unsalted butter, softened
1½ cups sugar
3 eggs
1 tsp vanilla extract

Method
Heat the oven to 325F. Grease a 9x5 inch loaf pan and dust with flour.

Sift the cocoa powder into a heatproof bowl. Place the cream in a microwavable bowl and heat for 30-60 seconds until just boiling. Pour the hot cream over the cocoa and stir and mash with a spoon to make a thick paste. Set aside to cool.

Combine the flour, baking soda and salt in a medium mixing bowl.

Combine the butter and sugar in a large bowl and cream with an electric mixer on medium-high speed until fluffy, about 3 minutes. Scrape down the sides of the bow once or twice as necessary. Beat in the cocoa powder paste until smooth.

With the mixer on medium-low speed add the eggs, one at a time, scraping down the bowl after each addition. Stir in the vanilla.

Turn the mixer to low speed and add the flour mixture, ½ cup at a time, scraping down the sides after each addition. Add the last addition, mix for 30 seconds on medium speed.

Scrape the batter into the prepared pan and smooth the top with a rubber spatula. Bake the cake until it is firm to the touch and a toothpick inserted in the centre comes out clean, about 1 hour and 10 minutes. Let the cake cool in the pan for 5 minutes. Invert it onto a wire rack and then turn it right side up on the rack to cool completely. Slice and serve.

Store uneaten cake in a cake keeper or wrap and store at room temperature for up to 3 days.
Stephanie

Sunday, February 20, 2011

Vote for my post on Mom Blog Network

The Cake Slice: Coffee Heath Bar Crunch Cake

IMG_0435
This month's cake for The Cake Slice was an interesting cake. I think this is the first real “coffee cake" I have ever made with actual coffee in the batter. I usually omit or make recipes that don't call for coffee but this cake intrigued me because I wanted to know what flavor the combination of coffee and toffee created. The cake tasted like drinking a mocha with a caramel swirl. The cake was moist with a strong, but not overwhelming, coffee flavor and the toffee melted (after it sunk!!) into a delightful caramel surprise in the midst of coffe-flavored cake.

Make sure to stop by the Blogroll to see all the other cakes baked up this month. 
IMG_0425

Coffee Heath Bar Crunch Cake
Source: Cake Keeper Cakes by Lauren Chattman

For the Cake
1½ cups all purpose flour
1 tbsp instant espresso powder
1½ tsp baking powder
½ tsp salt
½ cup (1 stick) unsalted butter, softened
1 cup packed light brown sugar
1 egg
1 egg yolk
1½ tsp vanilla extract
1 cup milk


For the Streusel
1 cup/4 Heath bars (1.4ounces each), chopped *(see below)
2 tbsp light brown sugar
2 tbsp all purpose flour
1 tbsp butter, softened

Method – Streusel
Preheat the oven to 350F. Grease a 9inch round springform pan.

Combine the Heath bars, brown sugar, flour and butter in a medium mixing bowl. Work the mixture with your fingers until it resembles large crumbs. Refrigerate until ready to use.

Method – Cake
Combine the flour, espresso powder, baking powder and salt in a medium mixing bowl.

Combine the butter and brown sugar in a large mixing bowl and cream with an electric mixer on medium-high speed until fluffy, about 3 minutes, scraping down the sides of the bowl as necessary.

With the mixer on low speed, add the egg, egg yolk and vanilla.

With the mixer on low speed, add a third of the flour mixture and then half the milk, scraping down the bowl after each addition. Repeat, alternating the flour and milk, ending with the flour.

Scrape the batter into the prepared pan and smooth into an even layer with a spatula. Scatter the streusel onto the batter, distributing it evenly over the cake.

Bake the cake until golden and a toothpick inserted in the centre comes out clean, 55 to 60 minutes. Let the cake cool in the pan on a wire rack for 5 minutes. Release the sides of the pan and use a large spatula to slide the cake from the pan bottom to onto a wire rack. Cool completely, cut into wedges and serve.

Store uneaten cake in a cake keeper or wrap in plastic and store at room temperature for up to 3 days.
Stephanie

Thursday, January 20, 2011

Vote for my post on Mom Blog Network

The Cake Slice: Graham Cracker Chocolate Chip Snacking Cake

Graham Cracker Snacking Cake
This was such a fun cake to make this month for The Cake Slice. The cake has a long name but it's basically a s'mores cake and a very good one at that. I followed the recipe to a T except for the frosting. I got lazy and just threw marshmallows on the cake toward the end of the cake's baking time. I got great feedback on the cake because it's not quite what you'd expect; it's a lot denser and you can actually taste the graham cracker.

Make sure to head over to The Cake Slice blogroll so you can read how the other bakers reacted to this cake.
Graham Cracker Snacking Cake

January’s Cake: Graham Cracker Chocolate Chip Snacking Cake
(Recipe from Cake Keeper Cakes by Lauren Chattman)

For the Cake
8 whole graham crackers, finely ground (about 1 cup) *
¼ cup unbleached all purpose flour
1 tsp baking powder
½ tsp salt
6 tbsp (¾ stick) butter, softened
¼ cup sugar
1 egg
1 egg yolk
1 tsp vanilla extract
¼ cup milk
½ cup semisweet chocolate chips

For the Frosting
½ cup (1 stick) unsalted butter, softened
½ cup confectioners sugar
½ tsp vanilla extract
½ cup marshmallow fluff *

Method – Cake
Preheat the oven to 350F. Grease an 8inch square baking pan and dust it with flour, knocking out any extra. Combine the graham cracker crumbs, flour, baking powder and salt in a medium mixing bowl.
Combine the butter and sugar in a large mixing bowl and cream with an electric mixer on medium-high speed until fluffy, about 3 minutes, scraping down the sides of the bowl as necessary. With the mixer on low speed, add the egg, egg yolk and vanilla. Scrape down the sides of the bowl and then beat until smooth.

With the mixer on low speed, add a third of the flour mixture, then half of the milk, stirring until combined. Repeat with the remaining flour and milk, ending with the flour. Stir in the chocolate chips.
Scrape the batter into the prepared pan and smooth the top with a rubber spatula. Bake until a toothpick inserted in the centre comes out clean, about 35 minutes. Let the cake cool in the pan for about 10 minutes. Invert it onto a wire rack, and then turn it right side up to cool completely.

Method – Frosting
Place the butter in a medium mixing bowl and beat until creamy. With the mixer on low speed, slowly add the sugar, scraping down the sides of the bowl as necessary. Stir in the vanilla and the marshmallow fluff and beat until smooth. Use immediately or cover the bowl with plastic wrap and keep in the fridge for up to 3 days.

Cut the cake into squares and serve each one with a dollop of frosting on top. (Bring the frosting back to room temperature first if it has been stored in the fridge). Store any uneaten cake in an airtight container for up to 3 days.
Stephanie

Wednesday, October 20, 2010

Vote for my post on Mom Blog Network

The Cake Slice: Pumpkin Chocolate Chip Pound Cake

Pumpkin Pound Cake
This has become an unofficial pumpkin week on the blog. I had pumpkin baby food on Monday, pumpkin pie yesterday, and today I have a pumpkin pound cake. I am fully embracing pumpkin this year! This pound cake was incredibly delicious and I love the subtlety of the pumpkin flavor. I am very tempted to make this cake again without the chocolate chips just so that the pumpkin can shine even more.

Make sure to check out all the other great cakes by visiting The Cake Slice blogroll!

Note: Half recipe yields 3 mini cakes. Bake about 30 min.

Pumpkin Pound Cake

Pumpkin Chocolate Chip Pound Cake
Source: Cake Keeper Cakes by Lauren Chattman
Makes one 9x5 loaf

1¾ cups all purpose flour
1 tsp baking soda
1 tsp baking powder
1 tsp ground cinnamon
½ tsp salt
¼ tsp ground cloves
Pinch nutmeg
½ cup (1 stick) unsalted butter, softened
1¼ cups sugar
3 eggs
1 cup canned pumpkin puree
1 tsp vanilla extract
1/3 cup milk
1 cup semisweet chocolate chips
1 cup chopped walnuts

Heat the oven to 350F. Coat the inside of a 9 x 5 inch loaf pan with nonstick cooking spray and dust with flour.

Combine the flour, baking powder, baking soda, cinnamon, salt, cloves and nutmeg in a medium mixing bowl.

Combine the butter and sugar in a large mixing bowl and cream with an electric mixer on medium high speed until fluffy, about 3 minutes, scraping down the sides of the bowl once or twice as necessary.
With the mixer on medium low speed, add the eggs, one at a time, scraping down the sides of the bowl after each addition. Stir in the pumpkin puree and vanilla. Stir in the milk.

Turn the mixer to low speed and add the flour mixture, ½ cup at a time, scraping down the sides of the bowl after each addition. Stir in the chocolate chips and walnuts.

Scrape the batter into the prepared pan and smooth the top with a rubber spatula. Bake the cake until it is firm to the touch and a toothpick inserted in the centre comes out clean, 55 minutes to 1 hour. Let the cake cool in the pan for 5 minutes, invert it onto a wire rack and then turn it right side up on a rack to cool completely.

Store uneaten cake in a cake keeper at room temperature for up to 3 days or in the refrigerator, wrapped in plastic for up to 1 week.
Pumpkin Pound Cake
Stephanie

Monday, September 20, 2010

Vote for my post on Mom Blog Network

The Cake Slice: Fresh Apple Cake with Brown Sugar Glaze

IMG_2032
This is the last month we bake out of Nancie McDermott's book. I thought I'd put together a special good-bye and made the Fresh Apple Cake with Brown Sugar Glaze into cupcakes with a dulce de leche filling. The cupcakes were delicious and made me wish for those cool fall days. You really can't go wrong with dulce de leche hidden within a warm apple cake.

As a side note, The Cake Slice will begin baking from a new book next month and membership is open once again. If you are interested, you can email Katie at ‘appleandspice[AT]hotmail.co.uk’ with ‘Cake Slice Member’ as the subject. Make sure to include your name, blog name and blog URL.
IMG_2019

Fresh Apple Cake with Brown Sugar Glaze
Source: Southern Cakes by Nancie McDermott

Fresh Apple Cake
3 cups all purpose flour
2 cups sugar
1 tsp baking soda
1 tsp salt
3 eggs
1½ cups vegetable oil
2 tsp vanilla extract
3 cups finely chopped apples
1 cup coarsely chopped pecans or walnuts

Brown Sugar Glaze
1 cup tightly packed light brown sugar
1/3 cup butter
1 tsp vanilla extract
2 tbsp evaporated milk, half-and-half or cream

Method – Fresh Apple Cake

Heat the oven to 350F. Grease a 13 by 9 inch pan or two 8-9 inch cake pans.
In a medium bowl combine the flour, sugar, baking soda and salt. Stir with a fork to mix everything together well.

In a large bowl, beat the eggs with a wooden spoon or a mixer at low speed until pale yellow and foamy. Add the oil and vanilla and beat well. Stir in the flour mixture with a wooden spoon and continue stirring the batter just until the flour disappears. Add the apples and nuts, stir to mix them into the batter until fairly uniform. Scrape the batter into the prepared pans.

Bake for 45-50 minutes or until the cake is golden brown, springs back when touched lightly near the centre and is beginning to pull away from the sides of the pan. Place the cake (still in the pans) on a wire rack and spoon over the glaze while still hot.

Method - Brown Sugar Glaze

Combine all the ingredients in a medium saucepan. Cook over medium heat, stirring often, until the mixture comes to a gentle boil. Then cook for 3-5 minutes.

Spoon the hot glaze all over the hot-from-the-oven cake. Let the glazed cake cool completely before serving straight from the pan.
IMG_2054
Stephanie

Friday, August 20, 2010

Vote for my post on Mom Blog Network

The Cake Slice: Tres Leches Cake

Tres Leches
We all know I am a Miami girl. I live, eat, and breathe Miami. I grew up in Miami and don't look forward to moving again in 4 years. Part of being a Miami girl is knowing about all kinds of Latin dishes. One dish in particular is the Tres Leches cake. You can go into any Cuban restaurant and most Latin restaurants and it's guaranteed that Tres Leches will be on the menu. Tres Leches, as I am used to eating it, is supposed to be a very wet cake. Every atom of the cake is drenched in the sweet milk. The cake is borderline soggy but that's how Tres Leches is supposed to be. Maybe the Miami Tres Leches is different from Tres Leches served in other areas with a Spanish population because the Tres Leches recipe chosen for this month's The Cake Slice is not what any Miami person is used to. I can make this statement because I had a few friends try the cake and the consensus was this: "Good cake, just don't call it Tres Leches." This cake was more like a pound cake with a milk syrup rather than a sponge cake with a milk bath. Or maybe it's user error and I did something wrong with the recipe.
Tres Leches

Tres Leches Cake
Recipe from Southern Cakes by Nancie McDermott
 
Cake
3 cups all purpose flour
1 tbsp plus 1 tsp baking powder
1 cup (2 sticks) butter, softened
2 cups sugar
4 eggs
1 cup milk

Three Milk Sauce
1½ cups milk
½ cup sweetened condensed milk
One 12ounce can evaporated milk
1 tbsp grated lime zest

Garnish
Sweetened whipped cream for garnish (optional)
Fresh fruit, such as kiwi or berries for garnish (optional)

Cake Method
Preheat the oven to 350F. Grease and flour a 13 by 9inch pan. In a medium bowl, combine the flour and baking powder and stir with a fork to mix well.

In a large bowl, combine the butter and sugar and beat with a mixer at high speed to mix well. Add the eggs one by one, beating well each time and stopping to scrape down the bowl now and then until the mixture is light, fluffy and smooth.
Add one third of the flour mixture and then half the milk, beating at low speed each time just until the flour or milk disappears into the batter. Add another third of the flour, the remaining milk and then remaining flour in the same way.

Pour the batter into the prepared pan and bake for 35 – 40 minutes, until the cake is golden brown, springs back when touched lightly in the centre and begins to pull away from the sides of the pan.
While the cake bakes, make the sauce. (You want the cakes to still be warm when you add the sauce)

Three Milk Sauce
Combine the milk, sweetened condensed milk, and evaporated milk a medium saucepan. Heat gently over medium heat, stirring often until the mixture forms a smooth, steaming hot sauce. Do not let it come to the boil. Allow to cool for 10 minutes before using.

To Finish
Cool the cake in the pan on a wire rack for 10 minutes. Sprinkle the lime zest over the cake. Punch holes with a toothpick in the top of the cake, about 1 inch apart.

Slowly pour the warm milk sauce over the warm cake, in stages, stopping to let the cake absorb the sauce before adding more. You may not need it all. You can add more later if needed.
Let the cake stand for 1 hour. Cover and refrigerate, allowing the cake to come to room temperature before you serve it. Cut into squares and serve right from the pan. Garnish with sweetened whipped cream and fresh fruit if desired.
 Tres Leches
Stephanie

Tuesday, June 22, 2010

Vote for my post on Mom Blog Network

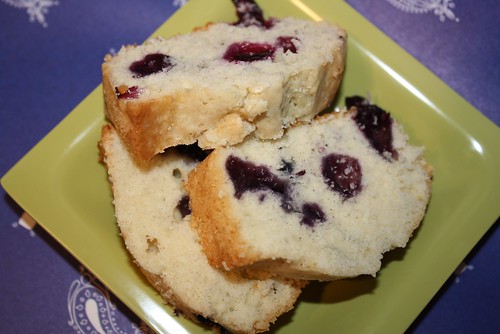
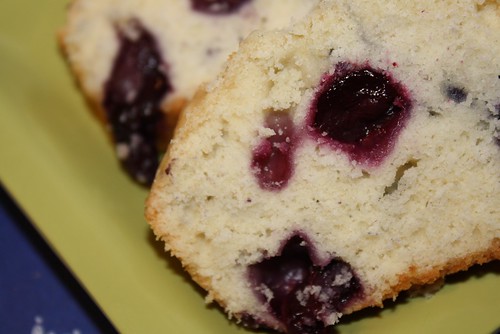
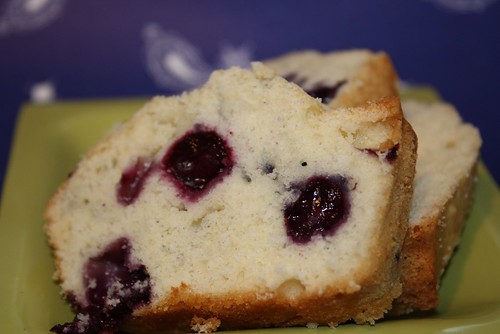
The Cake Slice: Shenandoah Valley Blueberry Cake


I can't remember the last time I participated in The Cake Slice. I feel horrible letting the groups I used to be a part of go. I want to bake more, I just can't. Cati has gotten a lot better with letting me do things in the kitchen but once she reaches her I-want-to-be-held point, there's very little I can do to get more time. And that's that I hold her A LOT less now than I used to. It also doesn't help that I am just behind on everything so I never really feel caught up.

This cake is perfect when you have very little time. Prep time is 10 minutes, tops, and you get something that makes those 10 minutes worth it. This cake was gone in 30 minutes of it being baked. Alex said it was one of the best "pound cakes" I have ever made. That's the best way to describe this cake; it's an extremely delicious and buttery blueberry pound cake.

Shenandoah Valley Blueberry Cake
(Recipe from Southern Cakes by Nancie McDermott)


1 2/3 cups all purpose flour

1 ½ tsp baking powder

¼ tsp salt

1/3 cup butter, softened

¾ cup plus 2 tbsp sugar

1 egg

1/3 cup milk

1 cup fresh or frozen blueberries (do not thaw)


Heat the oven to 375F and generously grease a 9 inch square or round pan.


Combine the flour, baking powder and salt in a small bowl and stir with a fork to mix well. In a medium bowl, combine the butter and sugar and beat with a mixer at high speed until well combined. Add the egg and beat well for 1 to 2 minutes, stopping to scrape down the bowl until the mixture is smooth and light.


Stir in half the flour mixture then half the milk, mixing just enough to keep the batter fairly smooth and well combined. Add the remaining flour, then the rest of the milk, mixing gently. Stir in the blueberries.


Scrape the batter into the prepared pan and bake at 375F for 30 minutes or until the cake is golden, springs back when touched gently in the centre and is pulling away from the sides of the pan.


Serve a square of cake right from the pan, warm or at room temperature. If its round, let the cake cool in the pan on a wire rack or folded kitchen towel for 10 minutes and then turn it out to cool, top side up.

Wednesday, January 20, 2010

Vote for my post on Mom Blog Network

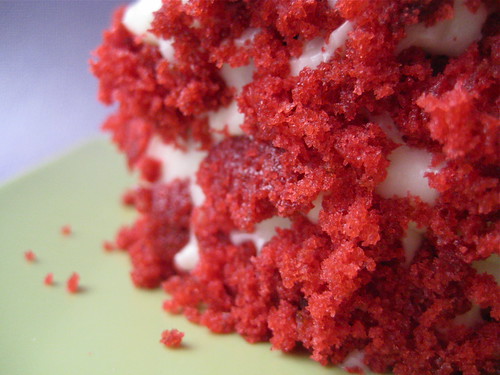
Cake Slice: Red Velvet

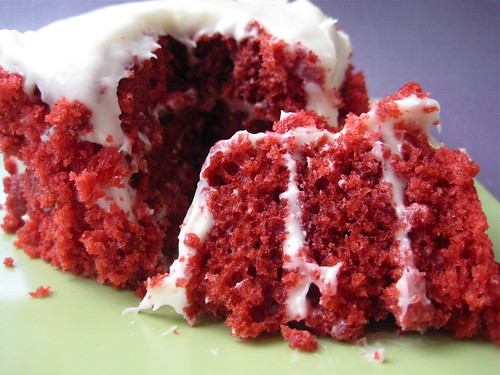
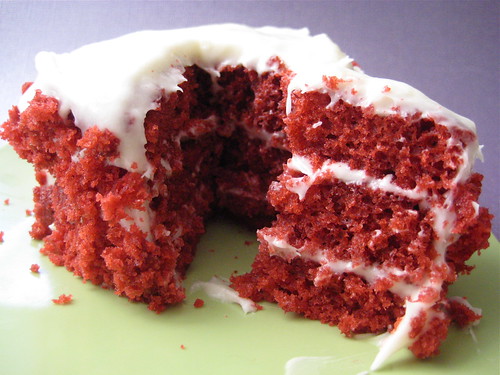
My introduction to red velvet came in high school when my drama teacher told me it was his favorite cake. I had never even heard of red velvet before and I had no clue what it tasted like. It didn't take me long to try this cake because a few weeks later a group of friends and I bought my drama teacher a red velvet cake for his birthday. I remember my first bite and the thoughts that occurred to me. The cake tasted like a chocolate cake but not as rich. And I couldn't get over the red coloring and the cream cheese frosting.
Making this cake took me back to high school. I love how food has the ability to transport you to a different place in time. The cake came out delicious and it didn't even last a day in our house. Although I must admit that it didn't last that long because I quartered the recipe (cook time was still about 20 minutes) and used this cream cheese frosting recipe instead. The cake was a beautiful shade of red with just the right amount of chocolate taste.

I've heard that red velvet cake traditionally got its red color from beets, anyone know anything about this?
January’s Cake: Red Velvet Cake

(Recipe from Southern Cakes by Nancie McDermott)


For the Red Velvet Cake

2½ cups all purpose flour

½ tsp salt

1 tsp vanilla extract

1 cup buttermilk (see note below)

2 tbsp cocoa powder

2 tbsp red food colouring

1 cup (2 sticks) butter

2 cups sugar

2 eggs

1½ tsp baking soda

1 tbsp cider vinegar or white vinegar


For the Coconut Pecan Icing

1 cup milk

2 tbsp all purpose flour

1 cup (2 sticks) butter, softened

1 cup sugar

1 tsp vanilla extract

1 cup sweetened shredded coconut

1 cup finely chopped pecans or walnuts


Method – Red Velvet Cake

To make the cake, heat the oven to 350F. Grease two 9-inch round cake pans and line them with waxed paper to kitchen parchment. Grease the paper and flour the pans.


Prepare three separate mixtures for the batter. Combine the flour and salt in a medium bowl and use a fork to mix them together well. Combine the cocoa powder and the red food colouring in a small bowl, mashing and stirring them together to make a thick smooth paste.


In a large bowl, beat the butter with a mixer at low speed for 1 minute until creamy and soft. Add the sugar and then beat well for 3 to 4 minutes, stopping to scrape down the bowl now and then. Add the eggs one at a time, beating after each one until the mixture is creamy, fluffy and smooth. Scrape the cocoa-food colouring paste into the batter and beat to mix it in evenly.


Add a third of the flour mixture and then about half the milk, beating the batter with a mixer at low speed. Mix only enough to make the flour or liquid disappear into the batter. Mix in another third of the flour, the rest of the milk and then the last of the flour in the same way.


In a small bowl, combine the baking soda and vinegar and stir well. Use a wooden spoon or spatula to quickly mix this last mixture into the red batter, folding it in gently by hand. Scrape the batter into the prepared pans.


Bake at 350F for 20 to 25 minutes until the layers are spring back when touched lightly in the centre and are just beginning to pull away from the sides of the pans.


Cool the cakes in the pans on wire racks or folded kitchen towels for 15 minutes. Then turn them out onto the racks, remove the paper and turn top side up again to cool completely.


Method – Coconut Pecan Icing

Combine the milk and flour in a small or medium saucepan. Cook over medium heat, whisking or stirring often until the mixture thickens almost to a paste, around 2 to 4 minutes. Remove from the heat and scrape it into a small bowl to cool completely.


Meanwhile, beat the butter with a mixture at high speed until light and fluffy. Add the sugar in thirds, beating well eacg time until the mixture is creamy and fairly smooth. Add the cooled milk and flour mixture and beat for 1 to 2 minutes, scraping down the sides now and then to combine everything well.


Using a large spoon or spatula, stir im the vanilla, coconut and pecans, mixing to combine everything well into a thick, fluffy, nubbly icing.


To Assemble

Place one cake layer top side down on a cake stand or serving plate. Spread a third of the icing on top. Place the second layer, top side up, on top. Frost the sides and then the top of the cake with the remaining icing. Refrigerate for 30 minutes to help the icing set.


NOTE: If you can’t find buttermilk, stir 1 tbsp lemon juice or vinegar into 1 cup of milk and leave to stand for 10 minutes before using.

Monday, December 21, 2009

Vote for my post on Mom Blog Network

The Cake Slice: White Chocolate cupCake

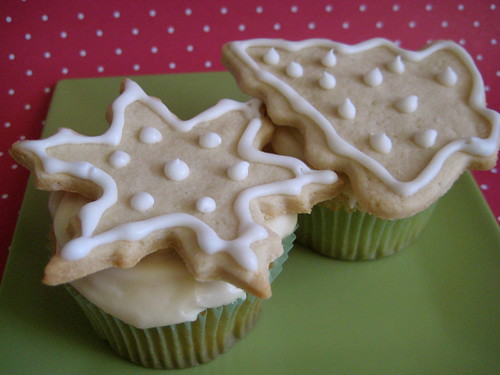
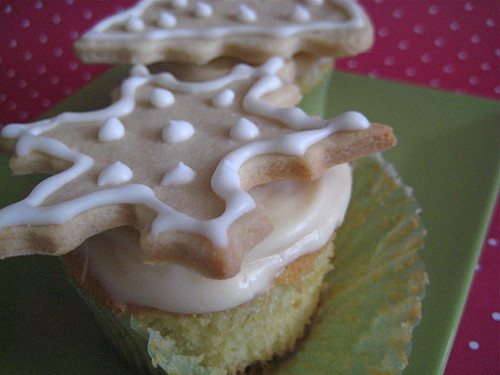
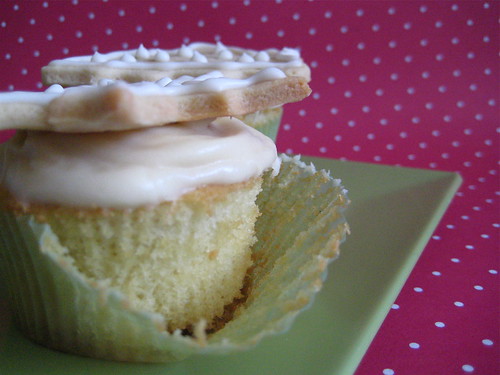
So I cheated a little with this month's selection. It was supposed to be a layer cake but I just didn't have it in me to (a) make the whole recipe and (b) make a layer cake. Instead, I quartered the recipe and had just enough batter to make 9 cupcakes (bake for 15-20 minutes). The cupcakes came out fantastic and they weren't as sweet as you'd expect them to be considering there is white chocolate in both the cake and frosting. After making this frosting I have decided that I like cream cheese based frostings the best; they aren't overly sweet and they have such a silky texture.
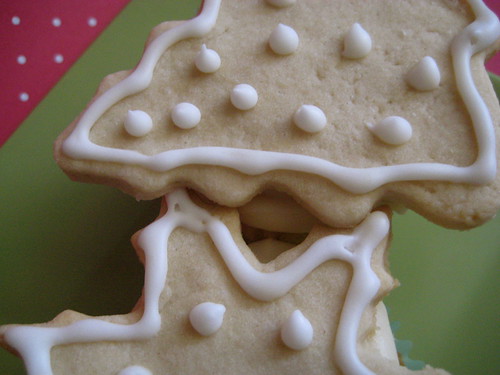
Since this is an all-white cake it was suggested that we decorate the cake with a "snow scene." Again, I kind of cheated and topped my cupcakes with roll out cookies shaped either as snowflakes or Christmas trees. I stuck with the white theme and decorated the cookies with white royal icing. The cupcakes looked adorable adorned with the cookies.

December’s Cake: White Chocolate Layer Cake

(Recipe from Southern Cakes by Nancie McDermott)

Makes 1 8-inch layer cake


For the White Chocolate Cake

2 ½ cups sifted cake flour

1 tsp baking soda

½ tsp salt

4 ounces white chocolate, finely chopped

½ cup boiling water

1 cup (2 sticks) butter, softened

2 cups sugar

4 eggs, separated

1 tsp vanilla extract

1 cup buttermilk (see note below)


For the White Chocolate Frosting

6 ounces white chocolate, finely chopped

12 ounces (1 ½ cups) cream cheese, softened

3 tbsp butter, softened

¾ tsp vanilla extract

3 cups confectioners sugar


Method – White Chocolate Cake

Heat the oven to 350F and grease three 8 inch round cake pans. Line the bottom of each pan with a circle of waxed paper or kitchen parchment and flour the pan.


Combine the flour, baking soda and salt in a medium bowl, and stir with a fork to mix them well.


Bring 3 inches of water to an active simmer in the bottom of a double boiler or a saucepan that will accommodate a medium heat proof bowl so that it sits snugly over the water. Melt the white chocolate in the top of the double boiler or in the bowl over the simmering water. Stir often, and then pour in the ½ cup of boiling water and stir to mix well. Remove from the heat.


In a medium bowl, combine the butter and the sugar and beat with a mixed at medium speed to mix them together well. Add the egg yolks, one by one, beating each time to keep the mixture smooth. Add the white chocolate and the vanilla, and stir well to mix.


Add about a third of the flour mixture, and then about half of the buttermilk, beating with a mixer at low speed just long enough after each addition to make the flour or buttermilk disappear. Mix in another third of the flour, remaining buttermilk and then the last of the flour.


In a medium bowl, beat the egg whites at medium speed until they are foamy and opaque. Continue beating at high speed until they swell into thick, pillowy mounds and hold peaks that are stiff, but not fry. Add one third of the egg white mixture to the bowl of batter, and fold it in gently using a spatula. Add the remaining egg whites and continue to fold with a light touch, until the egg whites are blended in well, with only a few streaks showing.


Transfer the batter to the prepared pans and bake at 350F for 25-30 minutes until the cakes are golden brown, spring back when touched gently in the centre and are beginning to pull away from the sides of the pans.


Cool the cakes in the pans on wire racks or folded kitchen towels for about 30 minutes. Turn them out onto the racks and peel off the paper and turn them back the right way up to cool completely.


Method – White Chocolate Frosting

In the top of a double boiler or a heatproof bowl, melt the white chocolate over hot, not simmering, water, stirring often. Remove from the heat once melted and let cool to lukewarm. Transfer the melted white chocolate to a large bowl, and add the cream cheese, butter and vanilla. Beat together at medium speed until you have a smooth sauce. Add the confectioners sugar and beat until smooth.

To Assemble

Place one layer, top side down on a cake stand or serving plate and spread it with about a fourth of the icing. Continue stacking and frosting each cake layer in the same way. Cover the sides of the cake with any remaining frosting.


Cover the cake and refrigerate for at least 1 hour. Set the cake out about 30 minutes before you want to serve it.


NOTE: If you can’t find buttermilk, stir 1 tbsp lemon juice into 1 cup of milk and leave to stand for 10 minutes before using.

Friday, November 20, 2009

Vote for my post on Mom Blog Network

The Cake Slice: Burnt Sugar Cake

I can't believe it's November 20th already. Thanksgiving is next week. December is a blink away. January is steadily creeping on us. February is right around the corner. My due date is in February. Oh my. Let me stop before I start freaking out. Let me focus on today. November 2oth. The Cake Slice posting day. Oh what a day to bake and post a delicious cake. Not just any cake either. A burnt sugar cake. Don't be fooled by the name. Just because the word "burnt" is in its name, it doesn't mean the cake tastes burnt. It's a cake with a pretty golden color and almost a sweet, nutty taste. I quartered the recipe and was able to get 4 single mini cakes (baked for 20 minutes). Like some of the other bakers I was apprehensive about the amount of sugar in the cake and quartering the frosting gave me just enough frosting to frost the middle an tops of my two cakes. I am especially happy about this adjustment because the cake was the perfect amount of sweet.

Burnt Sugar Cake

(Recipe from Southern Cakes by Nancie McDermott)


For the Cake

3 cups all purpose flour

1 tbsp baking powder

½ tsp salt

1 tsp vanilla extract

1 cup milk

1 cup (2 sticks) butter

1¾ cups sugar

4 eggs

½ cup Burnt Sugar Syrup (below)


For the Burnt Sugar Syrup

1 cup sugar

1 cup boiling water


For the Burnt Sugar Frosting

3¾ cups confectioners sugar

½ cup Burnt Sugar Syrup (above)

¼ cup (½ stick) butter

½ tsp vanilla extract

2 – 3 tbsp evaporated milk or normal milk


Method – Burnt Sugar Syrup

Heat the sugar in a cast iron skillet or another heavy bottomed pan with high sides. Heat over a medium-low heat, stirring occasionally, until the sugar melts into a clear brown caramel syrup. It should be the colour of tea. Gradually add the boiling water, pouring it down the sides of the pan so that if the syrup foams and bubbles up, you should be protected.

Continue cooking, stirring often, until the water combines with the syrup and turns a handsome brown syrup. Remove from the heat and set aside to cool. Store the cooled syrup in a sealed jar if not using straight away.


Method - Cake

Heat the oven to 350 degrees F. Grease and flour two 9 inch round cake pans.

In a medium bowl, combine the flour, baking powder and salt and stir with a fork to mix well. Stir the vanilla into the milk.

In a large bowl, beat the butter and the sugar with an electric mixer at high speed for 2 – 3 minutes, until they are well combined. Stop now and then to scrape the bowl down. Add the eggs, one by one, beating well each time. Pour in half a cup of the burnt sugar syrup and beat well. Add a third of the flour mixture and about half of the milk, beating at a low speed, until just incorporated. Mix in another third of the flour and the rest of the milk. Finally, add the remaining flour.

Divide the batter between the cake pans and bake at 350F for 20 to 25 minutes until the cakes are golden brown, spring back when touched gently in the centre and begin to pull away from the sides of the pan. Let the cakes cool in the pans on a wire rack for15 minutes. Turn out the cakes into the wire rack to cool completely.


Method – Burnt Sugar Frosting

In a large bowl, combine the confectioners sugar, the burnt sugar syrup, butter and vanilla. Beat with a mixer at medium speed for 2 to 3 minutes, scraping down the bowl now and then to bring the ingredients together. Add 2 tablespoons of the milk and continue beating until the frosting is thick, soft, smooth and easy to spread. Add a little more sugar if it is thin, and a little more milk if it is too thick.


To Assemble

Place one layer, top side down, on a cake stand or serving plate. Scoop about ¾ cup of the frosting onto the cake. Spread to the edges and place the second cake layer over it, top side down. Frost the sides of the cake, and then the top until it is evenly covered.

Wednesday, October 21, 2009

Vote for my post on Mom Blog Network

Cake Slice: Cinnamon Pecan Coffee Cake

Remember a while back how I mentioned getting back into a routine? Well, participating in The Cake Slice each month was part of getting back into my routine. It's been a while since I had participated and when I saw the cakes made by other Cake Slicers each month, I was reminded of how dumb it was of me to have not participated as well. Quite a bit has changed since I last baked along with this group. The biggest change is that they are baking from a new book, Southern Cakes. I was beyond thrilled when I saw this change because now we'll be making different kinds of cakes instead of just the layer cakes of Sky High.

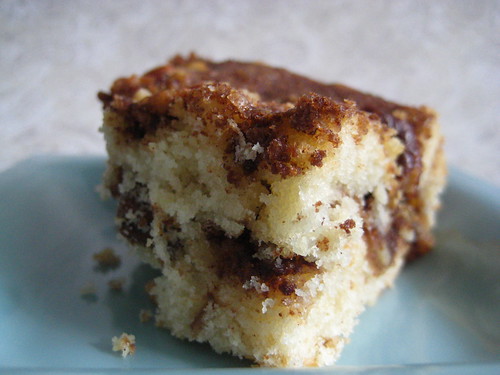
To kick off a new book and a new type of cake, this month's selection was the Cinnamon Pecan Coffee Cake. This cake is the perfect morning cake and it is just oozing with cinnamon-brown sugar goodness. Putting the cake together is easy and enjoying the aroma of it baking is something that makes you want to bake this cake every day of the year. My favorite part of the cake was the pecans in the middle. You know the pecans are there, but it's still a nice surprise when you bite into one and its flavor mixes with the cinnamon and the cake.


Cinnamon Pecan Coffee Cake

Source: Southern Cakes by Nancie McDermott

Makes a 13 x 9 inch sheet cake


For the Cake

3 cups all purpose flour

1 tbsp baking powder

1 tsp salt

1 tsp vanilla extract

1 cup milk

1 cup (2 sticks) butter, softened

1 cup sugar

2 eggs


For the Cinnamon Raisin Filling

1½ cups light brown sugar

3 tbsp all purpose flour

3 tbsp cinnamon

1½ cups raisins (I omitted)

1½ cups coarsely chopped pecans

¾ cup (1½ sticks) butter, melted


Method

Heat the oven to 350 degrees F. Grease and flour a 13 by 9 inch pan.


To make the filling, combine the light brown sugar, flour and cinnamon in a bowl and stir with a fork to mix everything well. Combine the raisins and pecans in another bowl and toss to mix them. Place the cinnamon mixture, nut mixture and melted butter by the baking pan to use later.


To make the cake batter, combine the flour, baking powder and salt in a bowl. Stir the vanilla into the milk. In a large bowl combine the butter and sugar and beat with a mixer on high speed until pale yellow and evenly mixed, about 2 minutes. Scrape down the bowl to ensure a good mix. Add the eggs and beat for another 2 minutes, scraping down the bowl now and then, until the mixture is smooth and light.

Use a large spoon or spatula to add about a third of the flour mixture to the butter mixture and stir only until the flour disappears. Add a third of the milk and mix in. Repeat twice more until all the flour and milk mixtures have been incorporated. Stir just enough to keep the batter smooth.


Spread half the batter evenly into the prepared pan. Sprinkle half the cinnamon mixture over the batter followed by half the melted butter. Scatter half the raisins and nuts over the top. Spread the remaining batter carefully over the filling, using a spatula to smooth the batter all the way to the edges of the pan. Top with the leftover cinnamon, butter and nut mixture, covering the cake evenly.


Bake for 45 to 50 minutes, until the cake is golden brown, fragrant and beginning to pull away from the edges of the pan. Place the pan on a wire rack and allow to cool in the pan for 5 to 10 minutes before serving in squares right from the pan. The cake is delicious hot, warm or at room temperature.

Mmmm...cinnamon-sugar goodness

Wednesday, May 20, 2009

Vote for my post on Mom Blog Network

Cake Slice: Mile-High Devil’s Food Cake

One word sums up this month's Cake Slice selection....incredible. I LOVED this cake. This has been, by far, the best chocolate cake I have ever made. The cake was fudgy, chocolaty, light, and oh so good. I actually preferred eating the cake without the frosting; the cake was that good. The frosting was great too. I ended up making a different recipe for the frosting because I didn't want to use eggs. I think the one I made was a great substitution and went with the cake perfectly. The ultra-sweet frosting paired well with the flavors of the chocolate.
Mile-High Devil’s Food Cake
From: Sky High: Irresistible Triple-Layer Cakes
By Alisa Huntsman and Peter Wynne
Makes an 8-inch triple layer cake:

1 cup of unsweetened cocoa NOT DUTCHED PROCESSED
1 and ¼ cups of hot water
3 cups of light brown sugar; packed
2 and 2/3 cups cake flour*
1 and ½ teaspoons baking soda
¾ teaspoon of salt
9 ounces of unsalted butter at room temperature [2 sticks plus 2 tablespoons]
3 large eggs
1 and ½ teaspoons of vanilla extract
¾ cup of cold water

Preheat the oven to 325 degrees F. Butter the bottoms and sides of three 8-inch round cake pans. Line the bottoms of the pans with parchment paper and grease the paper as well.

Place the cocoa in a medium bowl and add the hot water. Whisk until smooth and let it cool to room temperature.

In the bowl of an electric mixer, combine the sugar, flour, baking soda, and salt. With the mixer on low blend to combine. Add the butter and the dissolved cocoa. Then raise the mixer to medium speed and beat for 2 minutes until light and fluffy.

In a medium bowl whisk together the eggs, vanilla, and cold water until combined. Add this liquid to the batter in three additions scraping down the sides of the bowl between additions. Divide the batter among the three pans.

Bake for 35-45 minutes or until a cakes tester inserted into the almost comes out clean. There should be a few crumbs attached still. Cool the cakes in the pans for 15 minutes. Then invert and remove parchment paper and cool completely on a wire rack.
Brown Sugar Frosting
Recipe here

6 tablespoons butter
3/4 cup light brown sugar, packed
3 tablespoons half-and-half or evaporated milk
2 cups confectioners' sugar, sifted
1/2 teaspoon vanilla
hot water, as needed

In a saucepan over medium heat, melt 6 tablespoons of butter with 3/4 cup of brown sugar, stirring constantly. Bring to a boil; continue cooking for 2 minutes, stirring constantly. Add the 3 tablespoons of cream or milk and bring back to the boil. Remove from heat and stir in 1/2 teaspoon of vanilla. Let cool to lukewarm. Beat confectioners' sugar into the lukewarm brown sugar mixture, adding small amounts of very hot water if frosting is too stiff.
I can't stop myself from making cupcakes.