Monday, January 11, 2010

Vote for my post on Mom Blog Network

Reviewed: Shake Shack

IMG_4481
The quest continues for the perfect burger. We went to Shake Shack a few weeks ago. It was a beautiful day and we hadn't had lunch yet. There isn't a burger we can turn down so we decided to try out Shake Shack and see if all the hype is really worth it.

The burgers were delicious. A little on the salty side, but they are juicy and everything you could want from a burger. I love that the burgers are served with crinkle fries.
IMG_8394

The shake, on the other hand, was a disappointment. It was expensive for the type and size of shake. I have no problem paying $5 for a shake as long as it blows my socks off. Both Alex and I felt we could get just as good of a shake at McDonald's. I'm not joking either, the shake tasted like a McDonald's shake.
IMG_8398

Shake Shack is located at 1111 Lincoln Road in Miami Beach.
Stephanie
Vote for my post on Mom Blog Network

Italian Throwback

Many, many years ago Alex and I stumbled upon this Italian restaurant by his parent's house. We were instantly hooked and I declared their tiramisu the best tiramisu on the planet. We then moved to Boston and forgot all about Rotelli's as we had found Italian gold in Boston's North End. I recently went back to Rotelli's with my sister and was reminded of their deliciousness and their reasonableness. The food was just as good as I remembered it and Alex was jealous that he was stuck at the hospital and not able to join us for lunch.

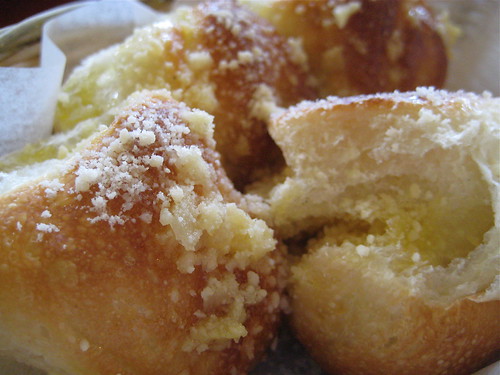
Lunch started off with some some rolls drenched in garlic and parmesan cheese. These babies were good. So good in fact that you didn't care if no one wanted to talk to you for the next few days. The rolls were warm and soft and everything you could ask for in a garlic roll.
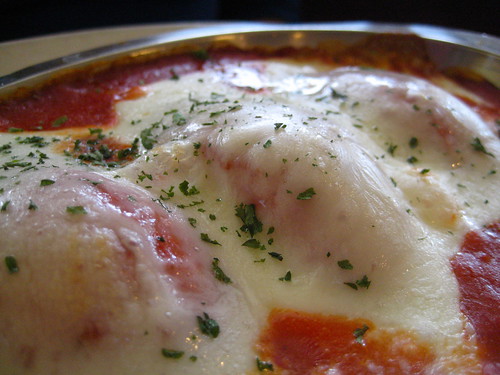
My sister ordered the stuffed shells. The shells were not only over stuffed with ricotta cheese but they were also covered in mozzarella cheese. The pasta shells were just there to hold everything together. The sauce was fresh and real tasting; it didn't taste like something out of jar.
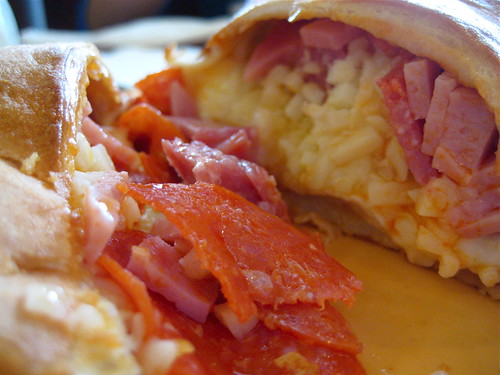
I ordered the stromboli. There were two reasons for me choosing this dish. One was that I liked everything it had it in (parmesan, mozzarella, ham, salami, and pepperoni) and the other was that I knew I'd have leftovers for Alex. This dish is basically a filled loaf of bread. The stromboli was longer than my forearm and hand. I loved making the first cut into it because everything just oozed out.
I can't wait to go back and have some tiramisu. I was too full after this trip to eat dessert and feel bad that I missed out on something I once declared the best. The Rotelli location I've gone to is 12850 SW 120th Street in Miami.

Tuesday, January 5, 2010

Vote for my post on Mom Blog Network

Happy 2nd Blog Birthday!

Two years ago today I started this blog. When I first started this blog I wanted it to be about food. It's obviously still about food, but I wanted it to be more of a place where I reviewed the places I ate at and less of a place about my cooking/baking. Seeing the blog turn more into the latter has been fun and it's amazing how a blog can take on a life of its own. I'm still eating out but eating out has dropped to a very low spot on my priority list since moving back to Miami. This has been a good thing because it has made me really focus on improving myself in the kitchen.
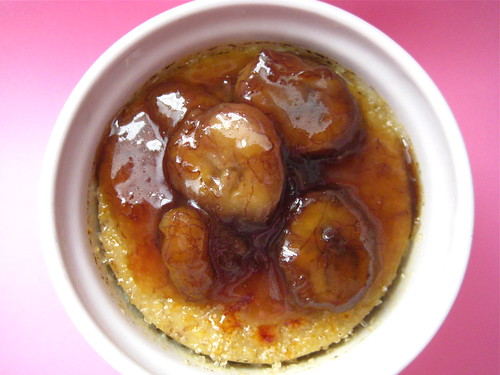
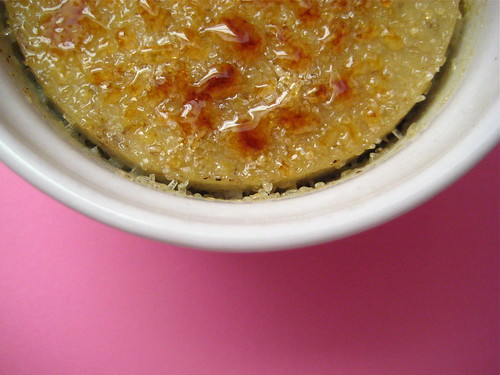
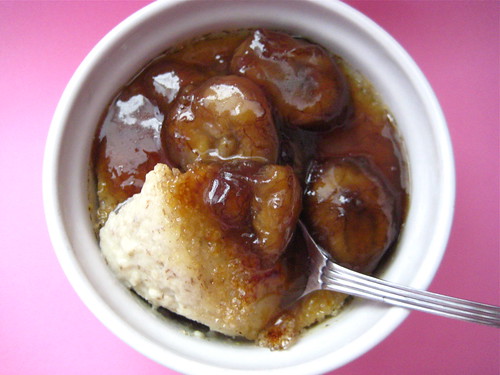
To celebrate this blog birthday I made something very special. I initially wanted to try another recipe for Banana Creme Brulee, but that recipe required a trip to the grocery store. The more pregnant I get, the more lazy I get and I was none too happy with the thought of having to leave the house to go to my always-packed grocery store. So I stayed home and made this recipe instead. The end product was something so delicious and so incredible that we both exclaimed it was one of the best desserts I had made in a long time. Now, I will caution you. If you are not a fan of bananas you will not like this dessert. This dessert is made for the banana lover and for someone who is looking for a new and exciting way to eat creme brulee. The custard itself was not as smooth as your traditional creme brulee but you can't really complain when you are eating pure banana deliciousness.

I want to do something extra special to celebrate the blog turning two so stay tuned for a post about that. Thanks for the support and words of encouragement along the way. I can't wait to see where the blog goes this year!
Hot Banana Creme Brulee
Source: Epicurious (here)

2 medium firm-ripe bananas
2 teaspoons fresh lemon juice
2 tablespoons granulated sugar
2 large egg yolks
1/2 cup heavy cream
about 1 tablespoon turbinado sugar such as Sugar in the Raw brand

Preheat oven to 350°F.

Break 1 banana into pieces and purée in a blender with lemon juice, granulated sugar, and yolks until smooth. In a very small saucepan heat cream over moderate heat until hot and add banana mixture, stirring until combined well. Divide mixture between two 2/3-cup ramekins. Put ramekins in a metal baking pan and fill pan with enough boiling-hot water to reach halfway up sides of ramekins. Put pan in middle of oven and lay a sheet of foil over each ramekin. Bake custards until set, about 30 minutes.

Set broiler rack so that custard tops will be 1 1/2 to 2 inches from heat and change oven setting to broil. Alternatively, have ready a blowtorch.

Just before serving, very thinly slice remaining banana and arrange slices, overlapping them, over each custard. Sprinkle turbinado sugar evenly over bananas and heat under broiler (or with blowtorch, moving flame evenly back and forth just over sugar) until sugar is melted and caramelized.

NOTE: I topped my custards with the caramelized banana recipe below and didn't return them to the oven.
Caramelized Bananas
Source: adapted from Epicurious (here)

1 banana
2 Tbsp butter
2 Tbsp brown sugar
1 Tbsp Kahlua

Slice the banana. Melt the butter and sugar in a skillet over medium heat until combined and slightly thickened. Add the sliced banana. Let the bananas cook in the sugar for about 5 minutes and then add the Kahlua.

Vote for my post on Mom Blog Network

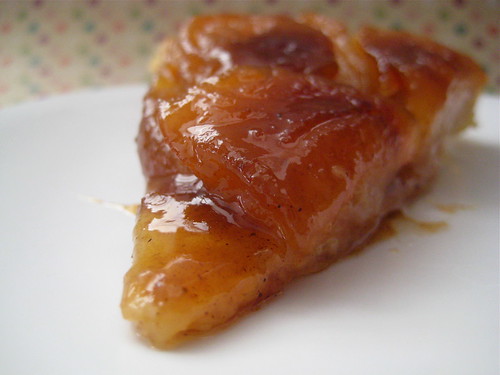
TWD Birthday: Tarte Tatin

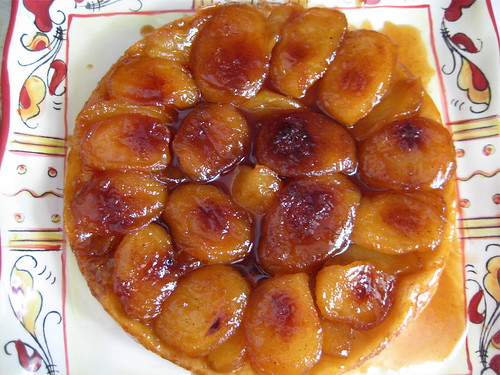
I can't believe it's already been two years since Laurie started Tuesdays with Dorie. Two years ago I didn't even know who Dorie Greenspan was and didn't know how to make about 3/4 of the recipes in her book. To say that I love Baking: From My Home to Yours is an understatement. If I'm ever in a need of a recipe that will surely be a hit, Dorie is the first resource I check. I'm so glad I joined TWD when I did because not only has my baking improved but my confidence in the kitchen has also improved.

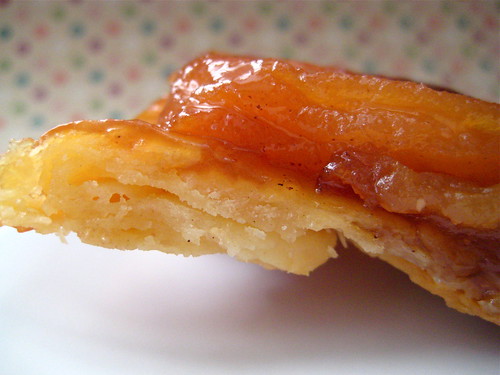
Laurie gave us the choice between two recipes to celebrate TWD turning two: Tarte Tatin and Cocoa Buttermilk Birthday Cake. I went with the Tarte Tatin because the thought of warm, caramelized apples sitting atop a flaky crust made my heart sing. This dessert is so beautiful and easy to put together that you wonder what took you so long to make it in the first place.The past two years have been great and I look forward to what year three has in store.
For the recipes for the Tarte Tatin and the Cocoa Buttermilk Birthday Cake head over to Laurie's blog Slush.

Saturday, January 2, 2010

Vote for my post on Mom Blog Network

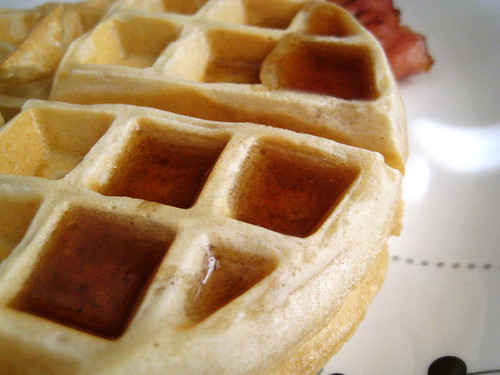
A Waffle Breakfast

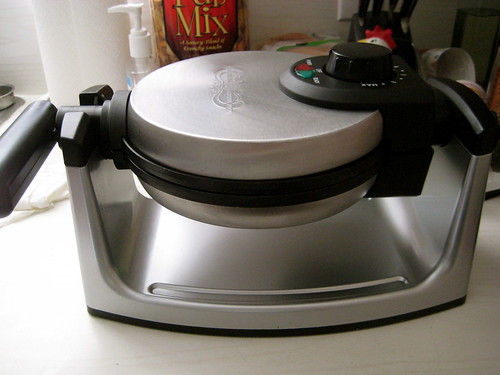
One of the gifts Alex received for Christmas was a waffle maker. He thinks waffles are the best breakfast food and for months he had been telling everyone he wanted a waffle maker. I always found this funny considering he wanted the waffle maker so I could make the waffles. You'd think with as badly as he wanted the waffle maker he would at least want to also make the waffles. I'm excited about the new kitchen toy but I chuckle every time I see Alex drooling over the appliance.
I made my first attempt at waffle making and I have to admit I was intimidated by the waffle maker. It's one of those flip ones and I couldn't figure out how to get the darn thing to open. I also didn't want to pour too much batter into the maker and I wasn't sure about what setting it should be on. It was definitely a learning experience and thank goodness I had a good recipe to break my waffle making virginity. I now know that I like the waffles made on a higher setting and that I need to be very generous with how much batter I pour for each waffle.

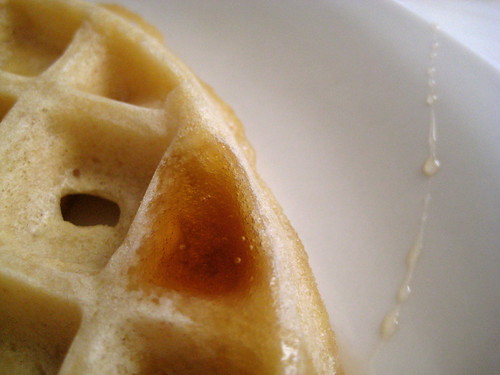
The waffles came out delicious and Alex was singing my praises all morning. The waffles were light and had a beautiful vanilla flavoring to them. I will definitely be making this recipe again but I am excited about trying new recipes and really exploring the world of waffle making.

Waffles
Source: All Recipes (here)
Note: Halving the recipe makes enough for 2 waffles

2 eggs
2 cups all-purpose flour
1 3/4 cups milk
1/2 cup vegetable oil (I used canola oil)
1 tablespoon white sugar
4 teaspoons baking powder
1/4 teaspoon salt
1/2 teaspoon vanilla extract

Preheat waffle iron. Beat eggs in large bowl with hand beater until fluffy. Beat in flour, milk, vegetable oil, sugar, baking powder, salt and vanilla, just until smooth.


Spray preheated waffle iron with non-stick cooking spray. Pour mix onto hot waffle iron. Cook until golden brown. Serve hot.

Thursday, December 31, 2009

Vote for my post on Mom Blog Network

Cookies for the New Year

Gosh, I feel so behind. I have spent the past few days just trying to catch up with my reader and I'm not even close to having everything read. I feel so out of the blogging loop. The past few days have been particularly hard because Perla has been sick and I'm feeling more and more uncomfortable each day. I can't believe tomorrow marks the beginning of the year our daughter will be born. I can't believe we have been in Miami for over 6 months now. We started the year living in Boston and are ending it living in Miami. It's crazy and amazing how quickly and drastically things can change. I'm excited to see what 2010 has in store for us.

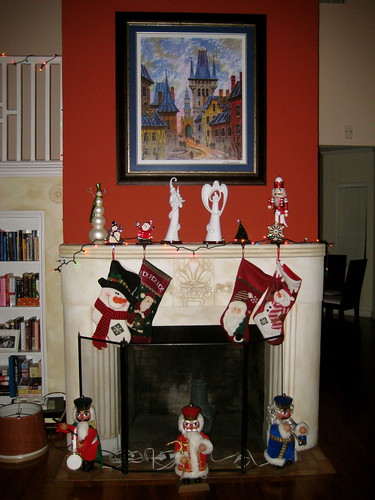
Christmas was only last week and it's already a blur. We had a lot of fun dressing the house up this year. It was great to have a real tree to put gifts under and a mantle to put up some of our favorite holiday pieces.
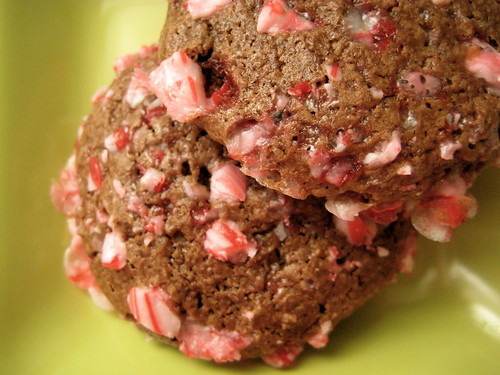
I also made cookies. These are cookies Santa would definitely approve of because they are like Christmas in a bite. Perfect with a glass of milk, these cookies are chocolaty with just the right amount of peppermint flavoring. My cookies puffed up instead of thinning out, but no one complained about that :)
Chocolate Peppermint Crunch Cookies
Source: Two Peas and Their Pod (here)

2 cups sifted all-purpose flour
2 teaspoons baking powder
1/2 teaspoon salt
1/4 cup canola oil
4 ounces 99% unsweetened chocolate, melted
2 cups granulated sugar
4 large eggs
2 teaspoons pure vanilla extract
5 candy canes-crushed up

1. Combine the flour, baking powder and salt. Set aside.

2. In the bowl of a stand mixer fitted with the paddle attachment, combine the oil, chocolate and granulated sugar and blend on medium speed. With the mixer running, add the eggs, one at a time, followed by the vanilla, scraping the sides of the bowl as necessary. There may be some small clumps of sugar in the batter at this point. Add the dry ingredients and mix on low speed, stopping once to scrape down the sides. Mix until just incorporated, 2 to 3 minutes. The dough will be sticky.

3. Gather the dough into a disk, wrap in plastic wrap and chill for at least 2 hours or overnight.

4. Position the racks in the lower and upper thirds of the oven and preheat to 350 degrees F. Line 2 baking sheets with Silpats or parchment paper.

5. Pour the crushed candy canes onto a plate or into a shallow bowl. Roll the dough into 1-inch balls and roll each ball into the candy cane pieces, so that all sides are covered. Place 2 inches apart on the prepared sheets.

6. Bake for 10 minutes for soft, chewy cookies, or 12 minutes for crisp cookies, rotating the pans halfway through baking. The cookies do set up, so if you want them soft, take them out at 10 minutes. Let cool completely on cooling racks. The cookies can be stored in an airtight container for 3 to 4 days.

I hope everyone had a great holiday season! 2010 is hours away (and in some places it's already 2010!) so I hope everyone is reflecting on 2009 and celebrating the end of the decade. Either way, here's to many great things in 2010!

Tuesday, December 29, 2009

Vote for my post on Mom Blog Network

Daring Bakers: Gingerbread House

The December 2009 Daring Bakers’ challenge was brought to you by Anna of Very Small Anna and Y of Lemonpi. They chose to challenge Daring Bakers’ everywhere to bake and assemble a gingerbread house from scratch. They chose recipes from Good Housekeeping and from The Great Scandinavian Baking Book as the challenge recipes.

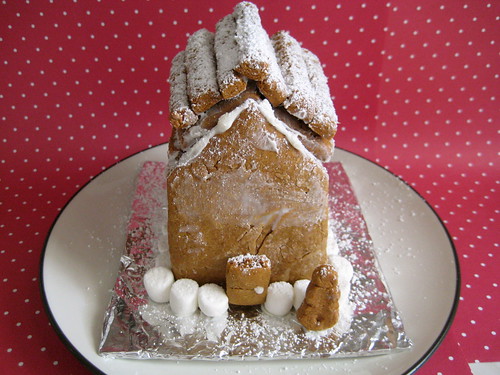
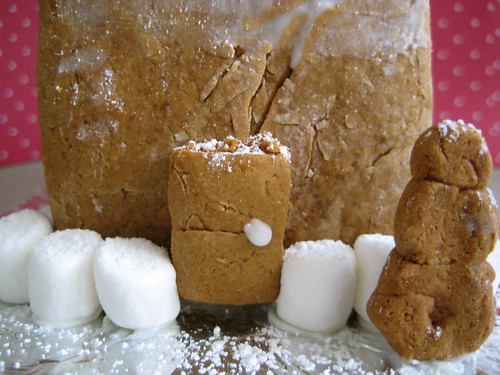
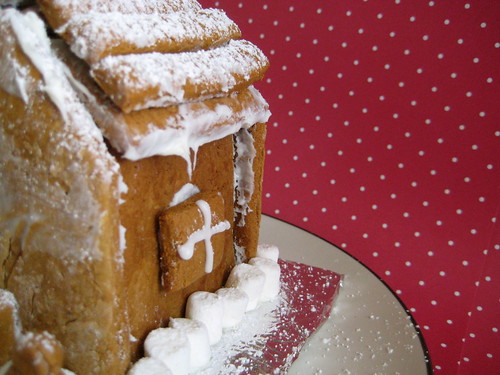
Maybe I am the problem. It's not the recipe or procedure, it's the baker. I made my gingerbread house on the same day as the pecan pie and I had problems with the dough; it just wouldn't come together. I added a little bit of water and my dough turned into a sticky play dough. I finally got it to a consistency that could be rolled out but the dough just looked icky. It wasn't smooth and as a result my house didn't have smooth walls. Building the house was a lot of fun, but don't be fooled, it does take some level of patience. I kept my house simple because creativity just wasn't in my cards for the day.
I used Anna's recipe because I had all the ingredients on hand. I cut the recipe down by a lot and had enough dough to make one little house. At first the gingerbread was hard but after sitting out for a day the gingerbread actually got softer and was edible.
Spicy Gingerbread Dough (from Good Housekeeping) http://www.goodhousekeeping.com/recipefinder/spicy-gingerbread-dough-157...

2 1/2 cups (500g) packed dark brown sugar
1 1/2 cups (360mL) heavy cream or whipping cream
1 1/4 cups (425g) molasses
9 1/2 cups (1663g) all-purpose flour
2 tablespoon(s) baking soda
1 tablespoon(s) ground ginger

Directions

1. In very large bowl, with wire whisk (or with an electric mixer), beat brown sugar, cream, and molasses until sugar lumps dissolve and mixture is smooth. In medium bowl, combine flour, baking soda, and ginger. With spoon, stir flour mixture into cream mixture in 3 additions until dough is too stiff to stir, then knead with hands until flour is incorporated and dough is smooth.

2. Divide dough into 4 equal portions; flatten each into a disk to speed chilling. Wrap each disk well with plastic wrap and refrigerate at least 4 hours or overnight, until dough is firm enough to roll.

3. Grease and flour large cookie sheets (17-inch by 14-inch/43x36cm)

4. Roll out dough, 1 disk at a time on each cookie sheet to about 3/16-inch thickness. (Placing 3/16-inch dowels or rulers on either side of dough to use as a guide will help roll dough to uniform thickness.)

5. Trim excess dough from cookie sheet; wrap and reserve in refrigerator. Chill rolled dough on cookie sheet in refrigerator or freezer at least 10 minutes or until firm enough to cut easily.

6. Preheat oven to 300 degrees F (149C)

7. Use chilled rolled dough, floured poster board patterns, and sharp paring knife to cut all house pieces on cookie sheet, making sure to leave at least 1 1/4 inches between pieces because dough will expand slightly during baking. Wrap and reserve trimmings in refrigerator. Combine and use trimmings as necessary to complete house and other decorative pieces. Cut and bake large pieces and small pieces separately.

8. Chill for 10 minutes before baking if the dough seems really soft after you cut it. This will discourage too much spreading/warping of the shapes you cut.

9. Bake 25 to 30 minutes, until pieces are firm to the touch. Do not overbake; pieces will be too crisp to trim to proper size.

10. Remove cookie sheet from oven. While house pieces are still warm, place poster-board patterns on top and use them as guides to trim shapes to match if necessary. Cool pieces completely before attempting to assemble the house.

Don't forget to head over to the DB blogroll to see the beauties created by the other bakers.

Monday, December 28, 2009

Vote for my post on Mom Blog Network

TWD: Pecan Pie

Oh boy. I am late with this one. I made this last week and it was served with dinner on the 24th. I meant to post about this on the 25th but I got distracted in doing other things. The past few days have been crazy and full of lots of interesting and unexpected events. I don't want to go into some of the things now because I'm still trying to process it all, but let's just say it was life changing.
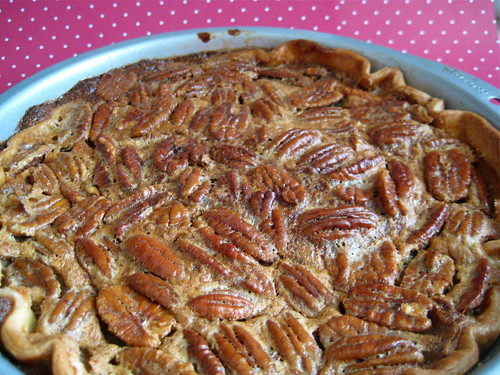
Anyway, back to the Pecan Pie selected by Beth of Someone's in the Kitchen with Brina. I don't even know what to say about this pie. I guess the first thing I should say is that I did not taste it. I couldn't bring myself to eat it after the mission I went through in trying to get it together. It wasn't a complete disaster because I did have a pie at the end, but the pie tried me in so many ways. My pie dough melted down the pan into a goopy mess, I spilled the melted butter all over my counter top, I almost dropped the entire thing in my hot oven, and the crust stuck to the bottom of the pan because I had way too much pecan filling. I was so disappointed in how it looked and how much trouble it gave me that I couldn't stand to eat it. I just didn't feel proud of this pie. Has that ever happened to you? Alex ate it and said it tasted good, so I guess this is a good pie.
Thanks to Beth for making last week's selection. I'm sure there are plenty of TWD bakers who had a completely successful pecan pie making experience, so make sure to stop by their blogs!

Tuesday, December 22, 2009

Vote for my post on Mom Blog Network

The Woof Baby

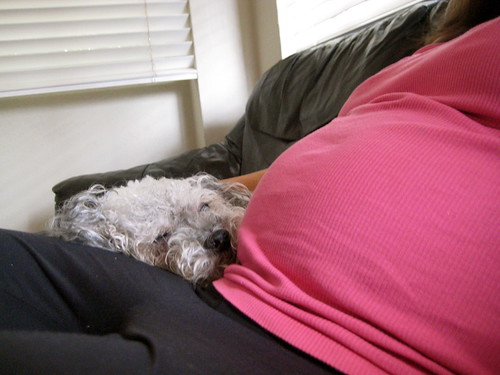
Pregnancy brings about all kinds of changes. Your body changes, your relationships change, your house changes, and even your dogs change. It's been fun to watch Perla change as my belly grows. She's always been attached to me and that's understandable considering I've had her since she was 8 weeks old and she's now 14.5 years old. But lately she has been really attached. I can't even go downstairs to get a glass of juice without her crying at the top of the stairs. She has to be with me at all times and if she isn't right next to me she has to be able to see where I am. It's cute to see her so attached. I wonder how she's going to react to having a baby here and to having to share my attention with a little one that can probably out cry her any day.
If I'm in the baby's room for any particular reason (lately it's been to organize and reorganize over and over again), Perla likes to lay down within a foot of the crib.
However, if I am sitting in the glider Perla likes to sit there with me too. I don't blame her on this one either because the glider is extremely comfortable. I feel like I am sitting on the clouds when I sit in this chair.
The reason this post is titled The Woof Baby is because of the following two pictures. I had been working on something in the dining room and I walked into the living room and found Perla hanging out in the baby's infant car seat. She was sitting up when I first saw her and looked at me as if I was disturbing her. The nerve of the little dog. I proceeded to take pictures and stare Perla down but she ignored me, made herself more comfortable, and went to sleep.
She obviously didn't get the memo that said the car seat was for human babies only. Or maybe we didn't get the memo that said the baby was already here?

By the way, have any of you read Love You Forever by Robert Munsch? I got this book as a gift and was told that it was a beautiful story that brought one to tears. We read it the very same day we got it and at first I was a little creeped out but then I got it. I cried and felt so full of love and sadness at the same time. So if you have a chance to read this book, I definitely recommend it.

Monday, December 21, 2009

Vote for my post on Mom Blog Network

The Cake Slice: White Chocolate cupCake

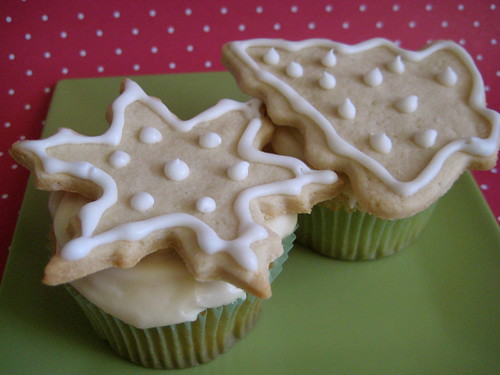
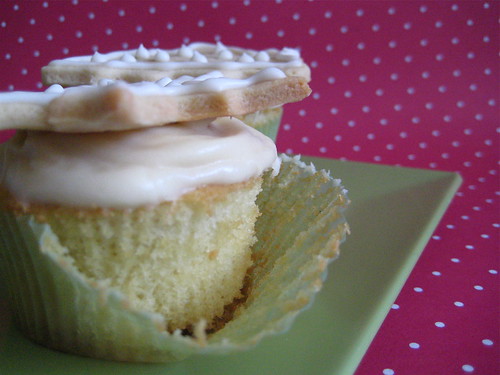
So I cheated a little with this month's selection. It was supposed to be a layer cake but I just didn't have it in me to (a) make the whole recipe and (b) make a layer cake. Instead, I quartered the recipe and had just enough batter to make 9 cupcakes (bake for 15-20 minutes). The cupcakes came out fantastic and they weren't as sweet as you'd expect them to be considering there is white chocolate in both the cake and frosting. After making this frosting I have decided that I like cream cheese based frostings the best; they aren't overly sweet and they have such a silky texture.
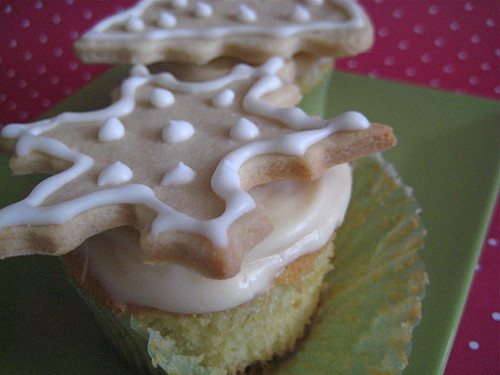
Since this is an all-white cake it was suggested that we decorate the cake with a "snow scene." Again, I kind of cheated and topped my cupcakes with roll out cookies shaped either as snowflakes or Christmas trees. I stuck with the white theme and decorated the cookies with white royal icing. The cupcakes looked adorable adorned with the cookies.

December’s Cake: White Chocolate Layer Cake

(Recipe from Southern Cakes by Nancie McDermott)

Makes 1 8-inch layer cake


For the White Chocolate Cake

2 ½ cups sifted cake flour

1 tsp baking soda

½ tsp salt

4 ounces white chocolate, finely chopped

½ cup boiling water

1 cup (2 sticks) butter, softened

2 cups sugar

4 eggs, separated

1 tsp vanilla extract

1 cup buttermilk (see note below)


For the White Chocolate Frosting

6 ounces white chocolate, finely chopped

12 ounces (1 ½ cups) cream cheese, softened

3 tbsp butter, softened

¾ tsp vanilla extract

3 cups confectioners sugar


Method – White Chocolate Cake

Heat the oven to 350F and grease three 8 inch round cake pans. Line the bottom of each pan with a circle of waxed paper or kitchen parchment and flour the pan.


Combine the flour, baking soda and salt in a medium bowl, and stir with a fork to mix them well.


Bring 3 inches of water to an active simmer in the bottom of a double boiler or a saucepan that will accommodate a medium heat proof bowl so that it sits snugly over the water. Melt the white chocolate in the top of the double boiler or in the bowl over the simmering water. Stir often, and then pour in the ½ cup of boiling water and stir to mix well. Remove from the heat.


In a medium bowl, combine the butter and the sugar and beat with a mixed at medium speed to mix them together well. Add the egg yolks, one by one, beating each time to keep the mixture smooth. Add the white chocolate and the vanilla, and stir well to mix.


Add about a third of the flour mixture, and then about half of the buttermilk, beating with a mixer at low speed just long enough after each addition to make the flour or buttermilk disappear. Mix in another third of the flour, remaining buttermilk and then the last of the flour.


In a medium bowl, beat the egg whites at medium speed until they are foamy and opaque. Continue beating at high speed until they swell into thick, pillowy mounds and hold peaks that are stiff, but not fry. Add one third of the egg white mixture to the bowl of batter, and fold it in gently using a spatula. Add the remaining egg whites and continue to fold with a light touch, until the egg whites are blended in well, with only a few streaks showing.


Transfer the batter to the prepared pans and bake at 350F for 25-30 minutes until the cakes are golden brown, spring back when touched gently in the centre and are beginning to pull away from the sides of the pans.


Cool the cakes in the pans on wire racks or folded kitchen towels for about 30 minutes. Turn them out onto the racks and peel off the paper and turn them back the right way up to cool completely.


Method – White Chocolate Frosting

In the top of a double boiler or a heatproof bowl, melt the white chocolate over hot, not simmering, water, stirring often. Remove from the heat once melted and let cool to lukewarm. Transfer the melted white chocolate to a large bowl, and add the cream cheese, butter and vanilla. Beat together at medium speed until you have a smooth sauce. Add the confectioners sugar and beat until smooth.

To Assemble

Place one layer, top side down on a cake stand or serving plate and spread it with about a fourth of the icing. Continue stacking and frosting each cake layer in the same way. Cover the sides of the cake with any remaining frosting.


Cover the cake and refrigerate for at least 1 hour. Set the cake out about 30 minutes before you want to serve it.

NOTE: If you can’t find buttermilk, stir 1 tbsp lemon juice into 1 cup of milk and leave to stand for 10 minutes before using.