Wednesday, March 31, 2010


Tuesday, March 30, 2010

Just a Reminder...
 I do bake! I know posting has been a little light around here but life with baby is everything but routine. Just when I get comfortable with a certain routine, Catarina switches things up. She loves to be with mama and loves to be awake. I've never seen a more alert baby in my life!
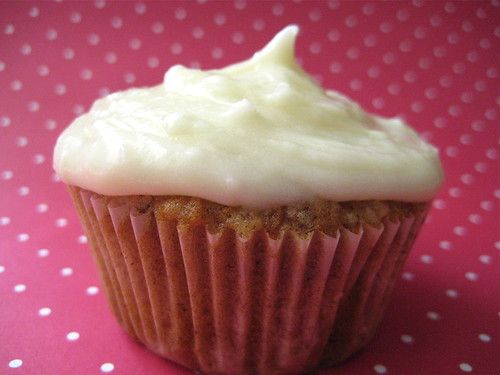
Anyway, this post is not about the baby, it's about carrot cake. Dorie's carrot cake to be exact. TWD made this a while ago (recipe here) and I made them again recently in cupcake form. The cake is delicious and just the right thing to satisfy that carrot cake craving. So make this cake!
 PS seeing as how baking is not happening as often around here, what else would you like to see on the blog? I want to post more but I don't know what you readers would find interesting.
PSS special thanks to Laurie of TWD and Katie of The Cake Slice for being so patient and understanding. I hope to get back into group baking form as soon as the little one decides she'd like to let mama back in the kitchen.

Sunday, March 21, 2010
Confessions of a New Mom
 I apologize in advance to those of you who come here looking for food. I also apologize for this blog taking a turn into mommy blogging land. I still haven't gotten back into my kitchen routine. If I bake once a week or if I cook more than 3 times a week I consider it a good week. Just when I think I'll be able to get back into the kitchen something happens to deflate those plans. It is extremely difficult to set up a solid routine when you have a baby, especially one that decides she only likes to sleep in hour-long increments during the day. So this post is about my experience with parenthood. The past 5 weeks with Catarina have been incredible and hard and I thought I'd share with you my reasons for why parenting is so hard in the beginning.
Note: this is based solely on my experience and some of the things I've listed might have been a none issue for others. Also, this is coming from my experience as Catarina's mother. Everyone's parenting experience will be different based on their child.

Reasons Why Parenthood is Hard During the First Month
1. You have to get used to not sleeping at night. Your sleeping occurs in naps from now on.
2. You have to get used to having this little person be completely dependent on you. Marriage is not the ball and chain, a child is (I don't mean this in a bad way). Your life is forever changed and you will be eternally connected to your child. You may spend a few hours away from your child, but you will never have a true break from them.
3. Your child is selfish. It's a lot of you giving and giving. What you get in return from your child is very little. You are responding to their cues and they don't care if you want to shower or eat. They just aren't considerate like that. It's not like the baby says thank you after every meal. It's your powerful and consuming love for the baby that helps you get through the day. Sure, the baby does cute things that make it all worth it (it's your reward for your hard work but you cant predict when you'll get it). It isn't until the baby starts interacting with you that you feel like your relationship with the baby isn't so one-sided. When Cati calms down at the sound of my voice I feel like a million bucks. She may not know I am her mother yet but she knows I am someone really important and someone she finds comfort in. That's her way of giving back to me for all that she receives from me.
4. Dads are great but they don't do as much as you do. You will be doing the majority of the work. That's just the way it is. Dads are there for support and to help you rationalize things (see #5), but you become a mother long before he becomes a father. It's not their fault, we carry the baby for 9 months and feel connected to the baby before they do.
5. The emotional investment is bigger than anything else you have been emotionally invested in and you are way more invested in the child in the beginning than the father is. Because this investment is so huge you worry about everything and you take everything personally. Baby doesn't latch? It's your fault. Baby isn't gaining weight? It's your fault. Baby isn't developing well? It's your fault. Everything feels like it's your fault even when it's not. With Cati's issues in the beginning I blamed myself and felt like a horrible mother. This was an isolating feeling because Alex didn't blame himself and he didn't feel like a failure as a father. But because he didn't feel the way I did he helped me step outside of my emotions so that I could see things more clearly.
6. Your reality is way different from your expectations. Sometimes it's hard to reconcile the two.
7. You are terrified of screwing up and being a horrible parent.
8. You realize the permanence of your decision to have a child. Once the baby is born there is no turning back. You will forever be that child's parent. You can't return the baby or wish it back in your belly. You have to leave the hospital and you have to take the baby with you. You have to adjust to the fact that everything in your life is different now that you have a child.
9. You don't know how to read the baby in the beginning. If you get frustrated when your dog gets sick and it can't communicate what's wrong, prepare to be completely overwhelmed when your child cries and you can't figure out why. You'll figure things out but those first few days of dealing with a crying baby and not knowing how to console him or her are heartbreaking.
10. The learning curve is huge. Just as the baby has to get to know you, you have to get to know the baby. What works one day may not work the next. They key is to try to ignore the comments/suggestions/advice of others and do what works for you and what your instinct tells you to do.
11. And lastly, and most importantly, no one tells you how hard it will be and how normal it is for things to feel hard. If someone is honest with you about their experience, latch onto them and go to them whenever you need someone to talk to. I feel good about parenting and caring for Cati NOW. A month ago I felt overwhelmed and like I wouldn't make it through another day. If it wasn't for my friends I don't know how I would have dealt with how I felt. I'd imagine I would have felt very isolated and alone in my feelings when the reality is that what I felt was completely normal. I really am amazed at how people either don't talk about the first few weeks with the baby or how pretty of a picture they paint.
 I would love to hear about your experiences with parenthood and what things top your list for why parenthood is so hard in the beginning.
PS a huge thank you goes out to Ale, Jen, Lauren, and Mon. You guys have been a great source of comfort and support and if it weren't for all your reassurances the past 5 weeks I don't know what I would have done. Thanks for reading my novel-sized emails and for inspiring me to come up with this list in the first place.

Monday, March 15, 2010
Quick Rice Krispy Cookies
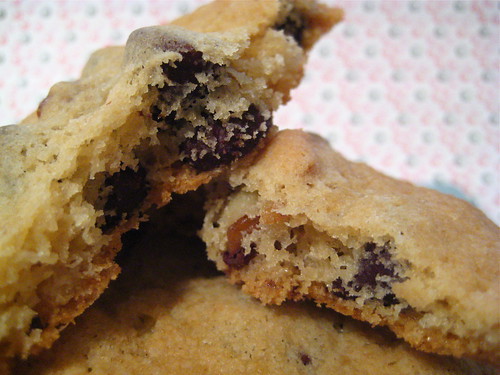
 The baking rule around here now is that I can only bake things that are quick to put together. Or at least that's the rule around here if I want to bake. This rule came into being because Catarina does not like to sleep for long stretches during the day. If I'm lucky she'll sleep a full hour before waking up to feed or just hang out. These rice krispy cookies were easy to put together and because they were so easy I decided to throw some marshmallows into the mix. The rice krispy gives the cookie a good crunch while the marshmallow gives the cookie a stick-to-the-roof-of-your-mouth-chewy goodness.
Rice Krispy Chocolate Chip Cookies
Source: Ice Cream Before Dinner (here) adapted from Imperial Sugar and Cookie Madness
makes about 24 cookies
1 stick unsalted butter, softened
1/2 cup light brown sugar, packed
1/2 cup granulated sugar
1 teaspoon vanilla
1 large egg, room temperature
1 1/4 cups all purpose flour
1/2 teaspoon baking powder
1/4 teaspoon baking soda
1/2 teaspoon sea salt
1 cup semi-sweet chocolate chips
1 heaping cup Rice Krispies cereal
Preheat to 350 degrees F. Line a baking sheet with parchment paper or a silicone mat.
Using an electric mixer, cream the butter and sugars together. Add the vanilla and egg, mixing just until incorporated.
In a separate bowl, whisk the flour, baking powder, baking soda and salt together to mix. Add flour mixture to sugar mixture and stir until almost blended. Add the chips and cereal and stir until mixed.
Drop by tablespoons, spacing 2 ½ inches apart, onto cookies sheets. Bake for 10-15 minutes or until slightly golden brown around edges.

Sunday, March 14, 2010
One Month
 My little love baby turns one month old today. I can't believe I have been a mom for a month now. I can't believe I was pregnant a month ago. Time has flown, which seems ironic considering how slowly time seems to move when you have a newborn. You live life in 3 hour spurts or in whatever spurts of time you have between feedings. I feel things started off rough with us and it took me some time to adjust. I loved my daughter from the moment she was born but the sense of overwhelming responsibility definitely caused anxiety. How am I supposed to care for her? How am I supposed to help her become a good person? How am I supposed to provide for her? How am I supposed to mother her? Can I even be a good mother?
 I also had to adjust to having this little human being be completely and utterly dependent on me. I've never had anyone need me as much as she does and that took some time to get used to. I care for her 24 hours a day. This is the hardest work I have ever done in my life. The first year of law school was a piece of cake compared to this. I am fortunate enough that I get to stay home with her but this doesn't mean I spend my days lounging around. I am constantly doing something for her or thinking about her. There is no true break from her.
 Being Catarina's mother for the past month has been the hardest and most rewarding thing. I've learned to love in a whole new way. My life has been enriched. I love that each day is a new opportunity for us to get to know one another. I love the bittersweet feeling of seeing my newborn grow and change into a baby. I love how her features have become more defined and she looks less and less like the child she was on February 14th. I love how she becomes fixated on my face when I feed her; her stare reassures me that each day she understands more and more that I am her mother. In short, I love everything about being her mother.
 My love for Alex has also grown in immeasurable ways. His support and praise have been the biggest ego boosters when I felt my weakest. He has made me feel like the most beautiful woman in the world. His love for our daughter has confirmed what I have always known: he was born to be a great father and I chose the right man to share my life with.
 It took me a few weeks but I finally feel competent and confident in myself. I finally feel like I am becoming a mother and I finally feel prepared to tackle everything parenthood has in store.
Wednesday, March 10, 2010
Hooray to Baking!
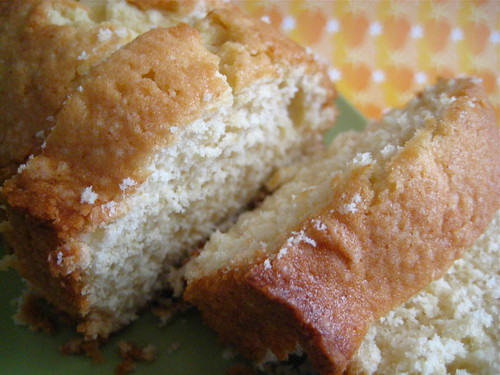
 I somehow managed to squeeze in this cake. I was itching to bake something and this cake fit the bill, especially since Nurit said it took her 15 minutes to get this cake together. She didn't lie! The cake was so easy to mix up and the baked cake was beyond delicious. The honey flavor is so subtle and yet it lingers in your mouth long after you've finished eating.
Hopefully this is the beginning of me getting into some kind of baking routine. Let's see how Catarina feels about this ;)
 Honey Vanilla Pound Cake
Source: 1 Family. Friendly. Food.
1/2 pound (2 sticks) unsalted butter, at cool room temperature
1 1/4 cups sugar
4 eggs, at room temperature
2 tablespoons honey
2 teaspoons vanilla extract
1 teaspoon grated lemon zest
2 cups sifted cake flour*
1 teaspoon kosher salt
1/2 teaspoon baking powder
Preheat oven to 350 F degrees (180°C.) Grease the bottom of an 8½ x 4½ x 2½ inch loaf pan and line the bottom with parchment paper.
In an electric mixer fitted with the paddle attachment, cream the butter and sugar on medium speed for 3-4 minutes, until light and fluffy.
In a separate bowl, put the eggs, honey, vanilla and lemon zest but do not combine. With the mixer on medium low speed, add the egg mixture, one egg at a time, allowing each egg to become incorporated and scraping the bowl with a spatula before adding the next one.
Sift together the flour, salt and baking powder. With the mixer on low speed, add it slowly to the batter until just combined.
Finish mixing the batter with a spatula and pour it into the prepared pan. Smooth the top.
Bake for 50-60 minutes until a toothpick inserted in the center.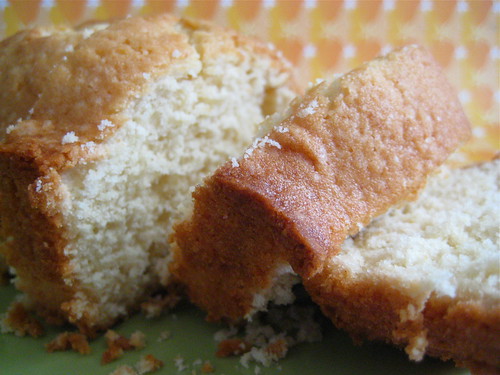
Friday, March 5, 2010
Each Day Gets Better
 I live for pictures like this one.
  Look! She's got a poodle on her!
 I LOVE every inch of her.
  She may look like she's smiling but she's really crying her little heart out.
Saturday, February 27, 2010
Daring Bakers: Tiramisu
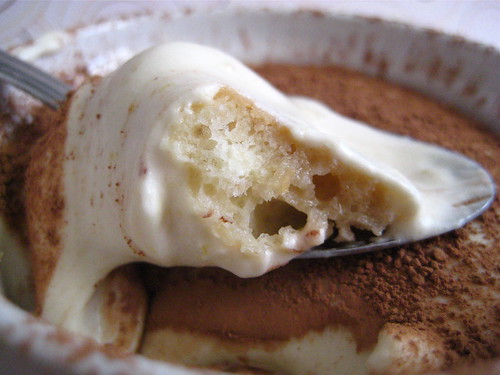 The February 2010 Daring Bakers’ challenge was hosted by Aparna of My Diverse Kitchen and Deeba of Passionate About Baking. They chose Tiramisu as the challenge for the month. Their challenge recipe is based on recipes from The Washington Post, Cordon Bleu at Home and Baking Obsession.
 I was so excited about this month's Daring Bakers challenge. Tiramisu is something I have long wanted to do. Alex loves this dessert and has asked me several times to make it and for some reason I have never made it. I think I was apprehensive because of one of the ingredients: Mascarpone cheese. Have you seen how much this cheese costs?? Luckily enough, the challenge included making your own mascarpone cheese and making the cheese is the simplest thing you will ever do. I will never turn away from a recipe that calls for mascarpone cheese now that I know how it make it from scratch.
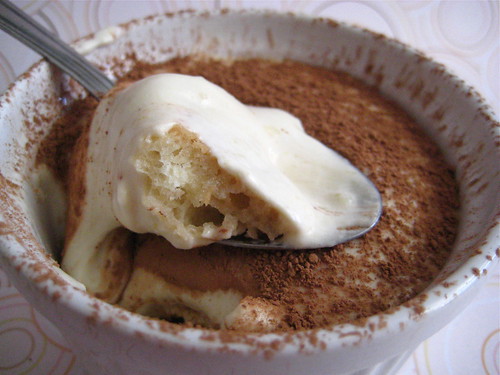
 This tiramisu has quite a few elements and requires some time because everything needs to rest in the fridge for a few hours or overnight. It's made up of zabaglione (an egg custard that reminded me of chewy caramel), vanilla pastry cream, mascarpone cheese, whipped cream, ladyfingers, and a coffee dipping mixture. One of the signature flavors of tiramisu is coffee, but since I am not a huge coffee fan I substituted it with Kahlua. This little change made the dessert sweeter and more appealing to Alex.
When I assembled the tiramisu I was afraid that something wasn't right. The mascarpone mixture was a little thick and it didn't taste like what I thought it should. The next day, however, it was perfect. The tiramisu really needs that time overnight so that all the flavors can blend and settle. Even the mascarpone mixture changed consistency and flavor; it turned into a sweet and light cream whose flavor was enhanced by the Kahlua dipped ladyfingers and the chocolate topping.
 PREPARATION TIME:
 Tiramisu is made up of several components which can be made separately and ahead of time and put together the day before serving.
Making tiramisu from scratch requires about 2 to 3 days (including refrigeration) from when you start making the mascarpone to the time the tiramisu is served.
Please read the instructions as you need to begin making the mascarpone at least a day in advance.
The zabaglione & pastry cream also need 4 hours to an overnight for chilling, as does the main dessert. The flavours mature after an overnight rest, and the dessert can be kept refrigerated for 2-3 days.
Once assembled, the tiramisu can be frozen till you need to serve it, in case you are not serving it immediately.
EQUIPMENT REQUIRED:
- A double boiler (a stainless steel bowl that fits inside a large saucepan/ pot without touching the bottom will do)
- Two or three large mixing bowls
- Whisk
- A medium sized heavy bottomed pan
- Fine meshed strainer (to remove lumps from pastry cream, if any)
- Electric mixer, hand held
- Serving dish (or dishes) of choice (8" by 8" should be fine)
- Spatula for folding and spoons as required
- Plastic wrap/ clingfilm
- Baking sheets
- Parchment paper or nonstick liners
- Pastry bag (can be disposable)
- Plain 3/4" pastry bag tip or cut the end of pastry bag to this size (If you don’t have a pastry bag and/or tips, you can use a Ziploc bag with the corner snipped off)
- Oven
- Cooling rack
- Thin-bladed spatula for removing ladyfinger biscuits from the baking sheets
- Instant-read thermometer (optional)
- Strainer
- Cheesecloth or cotton napkin for draining mascarpone
- Fine-mesh strainer for shaking cocoa powder on tiramisu
TIRAMISU
(Recipe source: Carminantonio's Tiramisu from The Washington Post, July 11 2007 )
This recipe makes 6 servings
Ingredients:
For the zabaglione:
2 large egg yolks
3 tablespoons sugar/50gms
1/4 cup/60ml Marsala wine (or port or coffee)
1/4 teaspoon/ 1.25ml vanilla extract
1/2 teaspoon finely grated lemon zest
For the vanilla pastry cream:
1/4 cup/55gms sugar
1 tablespoon/8gms all purpose flour
1/2 teaspoon finely grated lemon zest
1/2 teaspoon/ 2.5ml vanilla extract
1 large egg yolk
3/4 cup/175ml whole milk
For the whipped cream:
1 cup/235ml chilled heavy cream (we used 25%)
1/4 cup/55gms sugar
1/2 teaspoon/ 2.5ml vanilla extract
To assemble the tiramisu:
2 cups/470ml brewed espresso, warmed
1 teaspoon/5ml rum extract (optional)
1/2 cup/110gms sugar
1/3 cup/75gms mascarpone cheese
36 savoiardi/ ladyfinger biscuits (you may use less)
2 tablespoons/30gms unsweetened cocoa powder
Method:
For the zabaglione:
Heat water in a double boiler. If you don’t have a double boiler, place a pot with about an inch of water in it on the stove. Place a heat-proof bowl in the pot making sure the bottom does not touch the water.
In a large mixing bowl (or stainless steel mixing bowl), mix together the egg yolks, sugar, the Marsala (or espresso/ coffee), vanilla extract and lemon zest. Whisk together until the yolks are fully blended and the mixture looks smooth.
Transfer the mixture to the top of a double boiler or place your bowl over the pan/ pot with simmering water. Cook the egg mixture over low heat, stirring constantly, for about 8 minutes or until it resembles thick custard. It may bubble a bit as it reaches that consistency.
Let cool to room temperature and transfer the zabaglione to a bowl. Cover and refrigerate at least 4 hours or overnight, until thoroughly chilled.
For the pastry cream:
Mix together the sugar, flour, lemon zest and vanilla extract in a medium heavy-bottomed saucepan. To this add the egg yolk and half the milk. Whisk until smooth.
Now place the saucepan over low heat and cook, stirring constantly to prevent the mixture from curdling.
Add the remaining milk a little at a time, still stirring constantly. After about 12 minutes the mixture will be thick, free of lumps and beginning to bubble. (If you have a few lumps, don’t worry. You can push the cream through a fine-mesh strainer.)
Transfer the pastry cream to a bowl and cool to room temperature. Cover with plastic film and refrigerate at least 4 hours or overnight, until thoroughly chilled.
For the whipped cream:
Combine the cream, sugar and vanilla extract in a mixing bowl. Beat with an electric hand mixer or immersion blender until the mixture holds stiff peaks. Set aside.
To assemble the tiramisu:
Have ready a rectangular serving dish (about 8" by 8" should do) or one of your choice.
Mix together the warm espresso, rum extract and sugar in a shallow dish, whisking to mix well. Set aside to cool.
In a large bowl, beat the mascarpone cheese with a spoon to break down the lumps and make it smooth. This will make it easier to fold. Add the prepared and chilled zabaglione and pastry cream, blending until just combined. Gently fold in the whipped cream. Set this cream mixture aside.
Now to start assembling the tiramisu.
Workings quickly, dip 12 of the ladyfingers in the sweetened espresso, about 1 second per side. They should be moist but not soggy. Immediately transfer each ladyfinger to the platter, placing them side by side in a single row. You may break a lady finger into two, if necessary, to ensure the base of your dish is completely covered.
Spoon one-third of the cream mixture on top of the ladyfingers, then use a rubber spatula or spreading knife to cover the top evenly, all the way to the edges.
Repeat to create 2 more layers, using 12 ladyfingers and the cream mixture for each layer. Clean any spilled cream mixture; cover carefully with plastic wrap and refrigerate the tiramisu overnight.
To serve, carefully remove the plastic wrap and sprinkle the tiramisu with cocoa powder using a fine-mesh strainer or decorate as you please. Cut into individual portions and serve.
MASCARPONE CHEESE
(Source: Vera’s Recipe for Homemade Mascarpone Cheese)
This recipe makes 12oz/ 340gm of mascarpone cheese
Ingredients:
474ml (approx. 500ml)/ 2 cups whipping (36 %) pasteurized (not ultra-pasteurized), preferably organic cream (between 25% to 36% cream will do)
1 tablespoon fresh lemon juice
Method:
Bring 1 inch of water to a boil in a wide skillet. Reduce the heat to medium-low so the water is barely simmering. Pour the cream into a medium heat-resistant bowl, then place the bowl into the skillet. Heat the cream, stirring often, to 190 F. If you do not have a thermometer, wait until small bubbles keep trying to push up to the surface.
It will take about 15 minutes of delicate heating. Add the lemon juice and continue heating the mixture, stirring gently, until the cream curdles. Do not expect the same action as you see during ricotta cheese making. All that the whipping cream will do is become thicker, like a well-done crème anglaise. It will cover a back of your wooden spoon thickly. You will see just a few clear whey streaks when you stir. Remove the bowl from the water and let cool for about 20 minutes. Meanwhile, line a sieve with four layers of dampened cheesecloth and set it over a bowl. Transfer the mixture into the lined sieve. Do not squeeze the cheese in the cheesecloth or press on its surface (be patient, it will firm up after refrigeration time). Once cooled completely, cover with plastic wrap and refrigerate (in the sieve) overnight or up to 24 hours.
Keep refrigerated and use within 3 to 4 days.

LADYFINGERS/ SAVOIARDI BISCUITS
(Source: Recipe from Cordon Bleu At Home)
This recipe makes approximately 24 big ladyfingers or 45 small (2 1/2" to 3" long) ladyfingers.
Ingredients:
3 eggs, separated
6 tablespoons /75gms granulated sugar
3/4 cup/95gms cake flour, sifted (or 3/4 cup all purpose flour + 2 tbsp corn starch)
6 tablespoons /50gms confectioner's sugar,
Method:
Preheat your oven to 350 F (175 C) degrees, then lightly brush 2 baking sheets with oil or softened butter and line with parchment paper.
Beat the egg whites using a hand held electric mixer until stiff peaks form. Gradually add granulate sugar and continue beating until the egg whites become stiff again, glossy and smooth.
In a small bowl, beat the egg yolks lightly with a fork and fold them into the meringue, using a wooden spoon. Sift the flour over this mixture and fold gently until just mixed. It is important to fold very gently and not overdo the folding. Otherwise the batter would deflate and lose volume resulting in ladyfingers which are flat and not spongy.
Fit a pastry bag with a plain tip (or just snip the end off; you could also use a Ziploc bag) and fill with the batter. Pipe the batter into 5" long and 3/4" wide strips leaving about 1" space in between the strips.
Sprinkle half the confectioner's sugar over the ladyfingers and wait for 5 minutes. The sugar will pearl or look wet and glisten. Now sprinkle the remaining sugar. This helps to give the ladyfingers their characteristic crispness.
Hold the parchment paper in place with your thumb and lift one side of the baking sheet and gently tap it on the work surface to remove excess sprinkled sugar.
Bake the ladyfingers for 10 minutes, then rotate the sheets and bake for another 5 minutes or so until the puff up, turn lightly golden brown and are still soft.
Allow them to cool slightly on the sheets for about 5 minutes and then remove the ladyfingers from the baking sheet with a metal spatula while still hot, and cool on a rack.
Store them in an airtight container till required. They should keep for 2 to 3 weeks.

Friday, February 26, 2010
Introducing...
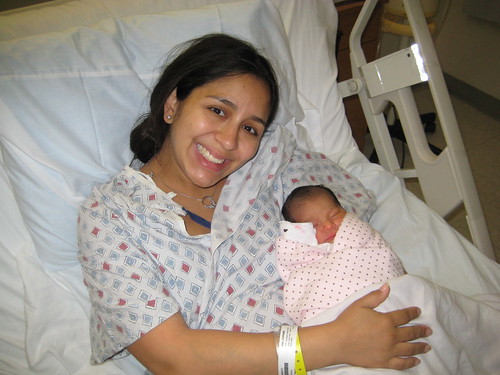 Little Ms. Catarina! This post is long overdue seeing as how Catarina was born on Valentine's Day. I can't believe she's already 12 days old. This new life with her has been everything but boring. I couldn't have asked for a better pregnancy and, truth be told, I kind of still wish I was pregnant because then I'd know the baby was always safe and developing well. Having her here, living in our world, is difficult because I am constantly worried about how much and how often she is eating, how many poopy and wet diapers she has a day. In short, I worry about things I didn't have to worry about when she was in my belly. Never again will I complain about pregnancy!
 I started having contractions on the 12th, which was Alex's birthday. I was excited at the prospect of active labor being hours away. I was wrong. I had painful, irregular contractions for close to 2 days. This was not what I thought labor would be like. Once I was admitted to the hospital things moved quickly. I was dilating at a great pace and then things stopped. I was stuck at 8 cm for 3 hours and I could feel every single contraction despite the epidural. I had never felt such pain before. There really is no way to describe the pain other than saying it feels very primitive and animalistic. I ended up having a c-section, which is not what I wanted, but once concerns for your well-being and the baby's come up you don't have a choice because that maternal instinct kicks in and tells you to do whatever is best to make sure your baby is ok. At that point it's not longer about you, it's all about that tiny human being inside you. Consider this the first of many moments where your child comes before everything else.
 Recovery has been great. I had no nasty side effects and I'm at my normal activity level. People were surprised by how quickly I bounced back. I blame it on motivation and determination. I am motivated and determined to live this new life as best as I can. I want to care for my daughter and still be self-sufficient and independent.
 It's hard to really describe how parenthood changes you. It changes you to your core. If you were an impatient person, parenthood will automatically make you the most patient person in the world. If you used to stress out about little things, parenthood changes your priorities and makes you focus on the more important things. Parenthood is a HUGE emotional investment. Not only do you fall deeply and madly in love with a person you don't even know, but you also spend nearly all your waking hours thinking about your child's past, present, and future. You think about all your fears, hopes, and dreams. You cry, you laugh, and you spend hours upon hours just staring at the little human you helped create.
 Parenthood is a rollercoaster. You have your good days and your bad days. I know I'm only 12 days in and my experience with parenthood is just a very small speck on the tip of the iceberg, but parenthood can be just as rewarding as it is upsetting. I had the joy of giving birth to a healthy baby girl but then I had the sadness of being discharged before her due to a case of jaundice. I had the joy of getting her to latch on for hour long breastfeeding sessions only to experience the sadness of seeing her weight quickly drop because she wasn't getting enough milk. So it's a rollercoaster. Things don't always go as planned, but parenthood isn't something you can plan for. You just have to go with it and try to enjoy each minute of it.
 I love having a newborn despite the sleep deprivation. I am, however, looking forward to seeing Catarina grown and become an interactive infant. I'm also looking forward to becoming more confident in my parenting and enjoying Catarina more without all the worries I have now.
Tuesday, February 16, 2010
TWD: My Best Chocolate Chip Cookies
 If I could only bake one thing for the rest of my life I would be completely content with baking chocolate chip cookies. There are so many variations on this cookie classic and I have yet to encounter one that doesn't satisfy. Sure, my preference is for a chewy cookie, but I will take a chocolate chip cookie in any form. I don't care if it's crispy, flat, or puffy.
 Needless to say, I was thrilled when I saw that Kait of Kait's Plate selected Dorie's chocolate chip cookies for us TWD bakers to make. Alex loved this cookie. He even proclaimed it the best chocolate chip cookie I have ever made. He says he prefers crispy cookies but I think was he really prefers are nuts in the cookies because I found this cookies to be more on the chewy side. Even more proof of my theory is the fact that he liked them better the next day when the cookies were chewier (and that's that I left them out in the open!).
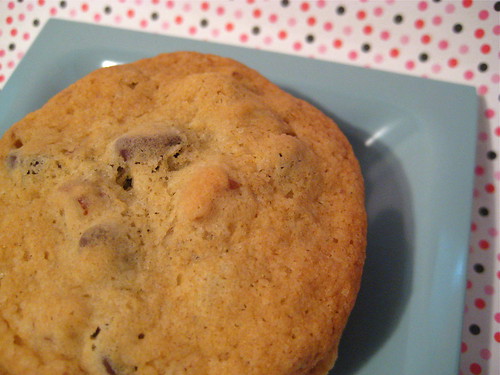 Thanks to Kait for a great selection! Don't forget to stop by TWD to see what everyone else thought about Dorie's take on this cookie classic.