Wednesday, November 30, 2011

Vote for my post on Mom Blog Network

Kahlua Brownie Balls

Kahlua Brownie Bites
I've been a bit of a mad woman lately because this is a busy school week for me and Cati is sick yet again. She didn't go to school on Monday and seemed better but after going to school yesterday she got bad again so I'm just going to keep her home so she can rest and be contained. Is it silly to say that I was afraid of being at home with her all day again? I thought I "forgot" how to do it but I haven't and that's a good thing because Baby D will be throwing me back into things in no time.

Anyway, here is the last of the brownies I baked for my friend. In addition to making something everyone, especially kids, could eat, I wanted to make something for the adults. This recipe was so easy to put together and I will admit to adding extra Kahlua because I wanted the brownie balls to really have the Kahlua flavor. I will also admit to eating about 1/2 teaspoon worth to taste test. These things were a hit at the party and I can't wait to make them at a time I can actually enjoy them!

Kahlua Brownie Balls
Source: The Brownie Project

¾ cup unsalted butter, cut into pieces
6 oz. bittersweet chocolate, chopped
3 large eggs
½ cup packed brown sugar
1 tsp vanilla extract
¼ tsp salt
¾ cup all purpose flour
¼ cup plus 1 tablespoon Kahlua liqueur

Preheat the oven to 350 degrees. Lightly grease a 9 x 13 pan with cooking spray.

Combine the butter and chocolate in a microwave safe bowl and heat on high power for 30 seconds. Stir, then heat for another 30 seconds. Stir again, and allow the residual heat to finish melting the chocolate. If necessary, heat again in 20 second increments until the chocolate is just about melted. Stir until smooth.

Whisk in the eggs, one at a time, then mix in the brown sugar and vanilla. Add the salt and flour, and mix gently using a rubber spatula just until the flour is absorbed. Pour the mixture into the prepared pan and bake until a tester comes clean from the middle, about 20-25 minutes.

Remove brownies from the oven and allow to cool completely. Break up the brownies into small pieces and put them in the bowl of an electric mixer fitted with the paddle attachment. With the mixer on low, add the Kahlua – and continue mixing until it all comes together – about a minute. Shape the mixture into 1 inch balls, roll in sanding sugar and chill until firm, about 2 hours. Serve cold or at room temperature.
Stephanie

Monday, November 28, 2011

Vote for my post on Mom Blog Network

This Week in Mommyhood

I have not been good with these weekly mommyhood posts. I am hoping once school ends in two (!!!) weeks I'll be able to get back to all those things I have been neglecting. So much has happened in the last couple of weeks too. Cati is just an explosion of development and every day is more and more fun than the last. She is such a sponge right now and I just love being able to have conversations with her. Worst of all is the nagging guilt of not wanting to start all over again with Baby D. This is more a reflection of me than it is of the baby because I am seriously dreading the newborn stage and the potential of feeling the same way I did when Cati was a newborn. I feel like I have reached my groove as a mother and I am enjoying this parenting thing so much that I am afraid of how much things will change with a newborn. Suffice it to say that bittersweet has come to mean something new and different as a mother to a toddler expecting another baby.

Anyway, here are Cati's developments over the last two weeks:

Home. Nothing makes you feel like you really have made a home until your toddler knows your house as home and calls it such.

Hide-and-Seek Game
. One day we were driving home and I gave Cati my gym ID to play with. All of a sudden and on her own initiative, she hid the ID under her thigh, said "donde esta?" (where is it?), and then grabbed the ID and said "ai esta!" (there it is). Now she loves hiding things and reproducing them. It's the funnest game to play.

Baby animals
. Cati has always loved animals but now she is able to grasp the differences between adult animals and baby animals. If you ask her what a baby wau wau is she will respond with puppy and if you ask her what a baby gato is she will respond with kitten.

Numbers, Letters, and Colors, Oh My! Cati is becoming increasingly interested in numbers, colors, and letters. She understands the number two and what it means for there to be two things. She knows the colors black, white, purple, yellow, and orange but gets confused with green, red, and blue. O seems to be her favorite letter and is starting to understand the letters in Cati.

Viene and Trabajando
. Cati loves to ask about different people in the family and likes to know if they are either coming or working.

Babe! This is just plain cute: whenever I'm on the phone with Alex, Cati yells out babe. She calls him daddy and papi but when it's me communicating with him, she knows he's called babe.

Order and Organization. It's amazing how much Cati pays attention to the things around her. She knows the place of things and likes things to be in there place. For example, I was doing laundry this past week and was sorting the clothes in the hallway. Cati saw the clothes out of the hamper, said "sucio," and then grabbed the clothes and put them back in the hamper.

Transportation. Cati is obsessed with buses and planes (avion). She points them out whenever we see them.

Holiday Spirit. I'm trying to get Cati to recognize the holiday things and so far she's got Santa and Snowman down. Can't wait for Christmas this year!

Healthy Mama. I will never worry about being dehydrated because Cati is very aware of my drinking habits. She will literally grab my water bottle, hand it to me, and say "Mama se" (mama thirsty) until I drink water.
IMG_5188

Here are Baby D's developments over the past two weeks:

Unknown Sex. Still don't know the sex but the heart beat at my last check up was in the 150s.

Baby Bumpin'. The belly is definitely out. My belly button is out and there is no denying I'm pregnant. The good thing is that the only maternity clothes I've been wearing are tops because my jeans still fit. Woo hoo!

Rolling Round the Belly. The baby still moves a lot less than Cati but the movements have gotten more pronounced lately. It's so weird to feel another baby rolling around inside me.


Glucose Test. Ahh the dreaded glucose test. My doctor gave me the window to do the test and I figured it would be best to it before the Thanksgiving feasting. I am hoping I don't have to do the 3-hour test like I did with Cati. Too bad I went into the test having drank a glass of OJ and eaten pumpkin waffles for breakfast.

Name Game. Our boy name is picked out. That's the easy one because it's Alex's grandfather's name. I thought we had the girl name picked out until I found out Alex couldn't remember the spelling of the name and the pronunciation changes based on the spelling (huge hint here for those playing the name game). Spelling is huge for me, thus why Cati is Catarina and not Katarina (or Caterina or Katerina) so I was just a teensy bit upset Alex didn't remember after all the thought I put into the name. To be fair, he likes whatever name I like but it still bothered me to think that maybe the reason he forgot the spelling was because he didn't really like the name to begin with. As it stands, either I'm the only one that knows what we are naming this child if it's a girl or the baby is just going to be called Baby D.

And just for fun here are recent belly comparison pictures. I think, if anything, the belly is a little smaller this time around.
Baby D
IMG_5207
Cati
27 weeks pregnant

I've done a better job of keeping track of things so I'm hoping I'm able to continue doing so over the next few weeks as things speed up and wind down.
Stephanie

Friday, November 25, 2011

Vote for my post on Mom Blog Network

Thanks & Giving

There is so much to be thankful for this year. I try to be mindful of everything I have to be thankful for each day, but Thanksgiving is a day where all that thankfulness is heightened because the mood is always jovial, the food delicious, and the company special. This year I was surrounded by more family than I was last year and everyone took time out to spend a few hours together despite hectic work schedules and multiple dining commitments.
IMG_5204
We did Thanksgiving at our house again this year and it was two days of cooking for me. The overall meal came together perfectly, but everything was cooked in such bits and pieces because I didn't want Cati to feel neglected. It always amazes me (1) how much longer things take when you have a kid and (2) how good it feels when you are able to accomplish something big when you have a kid. Thanksgiving is literally the only time of the year that I will cook and cook and cook without complaint. It's my favorite holiday and I just love that it means coming together as a family over good food.
IMG_5177
The menu this year was cinnamon rolls for breakfast, turkey and gravy, sweet potatoes, mashed potatoes, cornbread casserole, dinner rolls, stuffing, HoneyBaked ham, green bean casserole (my mother-in-law), crumb cake, pumpkin flan (Abuela), bread pudding (Alex's aunt), and an apple cider sangria that was supposedly delicious. The meal was beyond words delicious and everyone's favorite thing was the turkey (thank God!). Cati paid me the biggest compliment by eating a ton of turkey and liking my cornbread casserole.
IMG_5203
I can't believe our little threesome will be a foursome this time next year. It's fun to think about the three Thanksgivings we've had in our house: I was pregnant with Cati our first Thanksgiving, Cati was with us for our second Thanksgiving, and this year we have both Cati and a baby on the way.

And with all that said, I am thankful for my life and all the people in it. I am thankful for the husband who works his butt off every single day to provide for us, the daughter who fills me with unconditional love, the baby-on-the-way who reminds me of the beauty of life one nudge and roll at a time, the dog whose heart is still ticking 16.5 years later, the family who supports me and loves my little family, and the friends who like me for me even when I parade around Miami wearing Cati's hair bows.

I hope each and every one of you had a great Thanksgiving and were able to fill up on food and love.
Stephanie

Thursday, November 17, 2011

Vote for my post on Mom Blog Network

Twix Caramel Brownies

Twix Caramel Brownies
These Twix Caramel Brownies were the second type of brownie I made for my friend. While people were fans of the Cookie Dough Brownies, I was a huge fan of these brownies. The combination of chocolate and caramel was simply divine. By far, the best non-traditional brownies I have ever had. 

Twix Caramel Brownies
Source: Two Peas and Their Pod
Yields 24 brownies

1 cup (2 sticks) butter
2 cups granulated sugar
2 teaspoons vanilla extract
4 large eggs
3/4 cup cocoa
1 cup all-purpose flour
1/2 teaspoon baking powder
1/4 teaspoon salt
1 1/2 cups chopped Twix candy bars
1/3 cup caramel sauce (I used my favorite sauce, minus the nuts)

Heat oven to 350°F. Grease a 9 x 13 pan with cooking spray. Set aside.

Place butter in medium saucepan on the stove. Heat over medium heat until butter is melted. Remove from heat and stir in sugar and vanilla extract. Add eggs, one at a time, beating well with spoon after each addition. Add cocoa; stir until well blended. Add flour, baking powder and salt; stir until combined. Stir in Twix candy bar chunks. Pour batter into prepared pan.

Drizzle caramel evenly over the brownies. Using a toothpick, swirl caramel into brownies. Bake for 35-40 minutes or until brownies begin to pull away from sides of pan and a toothpick inserted in the middle comes out clean. Cool brownies completely in pan on a wire rack. Once cool, cut into squares and serve.
Stephanie

Wednesday, November 16, 2011

Vote for my post on Mom Blog Network

Cookie Dough Brownies

Cookie Dough Brownies
There's nothing better than baking for a friend. There's especially nothing better than baking for a friend who also loves to bake. I offered to bake brownies for my friend's kids' birthday and I thought I was a little exaggerated with baking four different kinds of brownies (other recipes coming soon), but then I got to her house and helped her set up of the dessert table. This was no regular table, it wasn't even a dessert buffet. It was a dessert feast. Every inch of the table was covered with decadent desserts. I have never seen so many sweets in one place before. This was definitely my kind of heaven:
IMG_9802
Back to these brownies. Of all the brownies I made these seem to have been the most popular. How could they not with the brownie-cookie dough combination, right? When I first made the "cookie dough" I wasn't sold on it actually tasting like cookie dough but after some chilling time, the flavor was spot on. I was so impressed! The brownie was chewy but what I really liked best is that this is the type of dessert you can store in the fridge with no fears about it getting hard. On the other hand, the cookie dough holds up better and the brownie gets very fudgy. And how cute was Cati at the party? I love her so much!
IMG_9809

Cookie Dough Brownies
Source: Beantown Baker

Yields: 24 brownies

Brownies:
1 cup (2 sticks) unsalted butter
2 1/4 cups sugar
4 large eggs
1 1/4 cups Dutch-process cocoa
1 teaspoon salt
1 teaspoon baking powder
1 teaspoon espresso powder, optional
1 tablespoon vanilla extract
1 1/2 cups all-purpose flour
2 cups chocolate chips

Cookie Dough:
3 sticks butter, softened
1 1/2 cup brown sugar
2/3 cup sugar
9 tbsp milk
3 cups flour
3 cups regular chocolate chips


Prepare Brownies:
Preheat the oven to 350°F. Lightly grease a 9" x 13" pan

In a saucepan set over low heat, melt the butter, then add the sugar and stir to combine. Return the mixture to the heat briefly, just until it's hot, but not bubbling; it'll become shiny looking as you stir it. Heating this mixture a second time will dissolve more of the sugar, which will yield a shiny top crust on your brownies.

Transfer the sugar mixture to a medium-sized mixing bowl, if you've heated it in a saucepan. Stir in the cocoa, salt, baking powder, espresso powder, and vanilla.

Whisk in the eggs, stirring until smooth.

Add the flour and chips, again stirring until smooth.

Spoon the batter into a lightly greased 9" x 13" pan.

Bake the brownies for about 30 minutes, until a cake tester inserted into the center comes out clean, or with just a few moist crumbs clinging to it. The brownies should feel set on the edges, and the center should look very moist, but not uncooked. Remove them from the oven and cool completely on a rack.

For cookie dough:
Cream the butter and sugars until light and fluffy. Beat in milk. With mixer on low, add flour and mix until well combined. Stir in mini chocolate chips.

To assemble:
Spread the cookie dough onto the cooled brownies. Chill the brownies until the cookie dough is firm. Cut into bars and serve.
Stephanie

Monday, November 14, 2011

Vote for my post on Mom Blog Network

Maple Pumpkin Cheesecake Bars & A Potluck

Pumpkin Cheesecake Bars
I had a potluck at my house last weekend and it was so much fun. I asked everyone who came to bring their favorite fall-inspired dish and everyone stepped up to the task. We had everything from broccoli casserole to pumpkin pie. It was a day full of delicious food and great company. I was so thankful for the friends who were able to make it and it was great seeing friends (and their kids!) again after so long.
IMG_5032
One of my contributions to the potluck were these Maple Pumpkin Cheesecake Bars. As soon as I saw this recipe I knew I wanted to make it and the potluck was a perfect time to make them. I almost followed the recipe exactly except my cookie crust was made out of graham crackers and I combined the filling ingredients in a bowl with a hand mixer instead of in the food processor. Also, I don't know if my baking pan was just too shallow, but I had about a third of the filling leftover that didn't fit into the pan. I baked the leftover filling so we had some extra pumpkin cheesecake. The bars themselves were really tasty and everyone seemed to enjoy them. I'm always amazed at how mellow pumpkin is once its baked. Alex said this dessert reminded him of the holidays in general and said it was a good dessert to bridge Thanksgiving and Christmas.
Pumpkin Cheesecake Bars

Maple Pumpkin Cheesecake Bars
Source: Sticky, Gooey, Creamy, Chewy
Yields 24 bars

For the cookie crust:
1 package Biscoff cookies (I made a graham cracker crust using about 1 1/2 cups graham cracker crumbs)
2 tablespoons sugar
5-6 tablespoons unsalted butter, melted


For the maple pumpkin filling:
1 8-ounce brick cream cheese, softened
2 large eggs
1 15-ounce can pure pumpkin puree (approximately 2 cups)
1 cup light brown sugar
1 12-ounce can evaporated milk
2 tablespoons pure maple syrup
1 teaspoon vanilla
1 teaspoon ground cinnamon
1/2 teaspoon ground ginger
1/8 teaspoon ground cloves
1/4 teaspoon kosher salt
Fresh whipped cream (optional)

Preheat oven to 350 degrees F. and place a rack in the center of the oven. Line the bottom and sides of a lightly buttered 9 x 13-inch baking pan with aluminum foil that extends at least 3-inches over each end of the pan. You will use this overlap to remove the baked bars from the pan. Lightly butter the foil.

To make the crust, pulse cookies and sugar together in a food processor until you have fine crumbs. Add 5 tablespoons melted butter and pulse a few more times to incorporate. The crumbs should look like wet sand and hold together when pinched. If the crumb mixture is too dry, add an additional teaspoon of butter at a time until the right consistency is achieved.

Press crumbs evenly into the prepared pan and bake for 10 minutes. Rinse and dry the bowl of the food processor.

While crust is baking, prepare the pumpkin filling. Combine all filling ingredients, except the whipped cream, together in the bowl of the food processor and process until smooth. Pour the filling over the pre-baked crust and tap the pan down on the counter a few times to release any air bubbles. Bake until the filling is set in the center, about 30 – 35 minutes. Remove from oven and set on a wire rack to cool.

Run a knife around the inside edges of the pan to loosen the pumpkin bars. Using the foil, carefully lift the bars from the pan and onto a cutting surface. Peel back the foil and cut into squares with a warm, sharp knife. Serve chilled or at room temperature, with a dollop of whipped cream and a candy corn on top, if desired.

The bars can be stored, covered, in the fridge for about 4 days.
Stephanie

Sunday, November 13, 2011

Vote for my post on Mom Blog Network

This Week in Mommyhood

As if having a toddler wasn't a reminder of the importance of living in the presence, this week Alex's great uncle passed away. He woke up one morning, seemingly fine, and then had a massive heart attack. It was a shock to everyone and completely unexpected. Losing someone always hurts but this loss has left all of us feeling like we need to work harder at truly appreciating the blessing that is each day because we never know which day will be our last. So I've been trying to be more patient and reflective the past few days. I've been trying to savor and enjoy the moment and spend less time being mad or upset. It's so easy to get worked up or bothered, especially when you have a child and are trying to learn to be a disciplinarian yourself. The frustrations aren't worth it and the focus should be on all the positives, joys, smiles, kisses, and rewards of parenthood. 
Photo on 2011-11-04 at 12.44 #2
Here are some fun Cati developments from the past couple of weeks:

Love You.
The sweetest words I could hear are "love you mama." They are even sweeter when unprompted.

Messes and Clean Up.
Cati is into everything and she loves making messes. From playing cards to candies to anything that was packaged compactly, Cati loves to undo things and spread them all over the house. My saving grace is that she is good at cleaning up and will sing "clean up clean up" as she cleans. I'm not the neatest person but having a toddler has brought new meaning to messy.

Teeth Galore.
Cati has gone on a teething spree. She's gotten six teeth in the last two months and her mouth is full of lots of cute teeth. I can't believe I'll never see her gummy smile again.

Chatterbox. The words coming out of Cati's mouth are amazing. She literally repeats everything and I can have full conversations with her. She's learning everyone's names but the real treat is hearing her sing "happy birthday" which comes out more like "appy day to you." This gets me excited for her birthday!

Here are some Baby D updates:

Still don't know the sex and that's ok because at the very least we have agreed on names. I was really struggling with a girl name until I remembered another name I loved. I'm not revealing the name but I will tell you it isn't a common name.

Other than that, I feel huge and uncomfortable. My body aches and I am constantly wondering how I will make it to the end. I'm measuring right on time so my belly is normal but I just feel huge and tight. I can't sleep at night and I have a slight waddle going on. I'm hoping a new work out routine of cardio and pilates will help alleviate some of this discomfort.

Here's to another few weeks of surviving and relishing the experience of being a pregnant mother to a wonderful little girl.
Stephanie

Saturday, November 12, 2011

Vote for my post on Mom Blog Network

Shutterfly Giveaway Winners

I'm sorry this is coming late in the day but it's been a busy few days around here. There's a lot to post but I wanted to make sure to announce the winners of the Shutterfly giveaway. Here are the three lucky winners of 25 free Shutterfly cards selected using Random.org:


Make sure to check your email and good luck getting your cards together!
Stephanie

Friday, November 11, 2011

Vote for my post on Mom Blog Network

Halloween Leftovers: Snickers Brownies

Umm, hello? Halloween was almost two weeks ago. I'm a little behind like always. Halloween was OK around here. Because Cati was battling a cold, I didn't want to take her out in the muggy, drizzly weather so instead I dressed her up so she could hand out candies. Unfortunately, and despite the letter we got announcing a flurry of trick-or-treaters, we only got four trick-or-treaters and Cati didn't get to pass out many candies. At least she looked cute and had fun wearing vampire teeth!
 IMG_9792
IMG_4990
I had been purposefully keeping my eye out for recipes that used candies just in case we had leftover candy and good thing I did because we have a bowl full of candy that's begging to be eaten. One of the recipes was for this Snickers Brownies and I was super excited about the prospect of fudgy brownies with caramel-nutty goodness in them. My brownies came out more chewy than I would have expected because I think the caramel in the Snickers hardened as the brownies cooled, but the brownies were still delicious. Served with a cup of milk and this is what I call the perfect use of leftover Halloween candy.
 Snickers Brownies
PS today's the last day to enter the Shutterfly Giveaway!

Snickers Brownies
Source: My Baking Addiction
Yields 12 brownies

4 ounces unsweetened chocolate; coarsely chopped
3/4 cup butter
1 ½ cups white sugar
3 eggs; lightly beaten
1 teaspoon vanilla extract
¼ teaspoon kosher salt
1 cup all-purpose flour
12 Fun Size Snickers Candy Bars; cut into fourths

Preheat oven to 350 degrees. Line an 8×8 inch baking pan with foil and spray with nonstick cooking spray.

Microwave chocolate and butter or margarine in large bowl at medium (50% power) for 3-4 minutes or until butter is melted.

Whisk until chocolate is melted. Stir in sugar. Add in eggs, extract and salt. Gradually add in flour and stir until just combined.

Spread ½ the batter into prepared pan. Add an even layer of Snickers and cover with remaining ½ of brownie batter. Bake for 30-35 minutes; do not over bake.

Remove to cooling rack. Allow to cool completely before cutting.
Stephanie

Wednesday, November 9, 2011

Vote for my post on Mom Blog Network

Chicken Cordon Bleu

Chicken Cordon Bleu
I don't know about you, but I always seem to struggle when it comes to chicken dishes. I feel like I never know what to do with chicken and I also feel like there are so many options when it comes to chicken. Then, on top of it all, I don't like dishes that involve too much prep work because it's hard to be in the kitchen at the same time as Cati. Dinner making time in our house is marked by Cati wanting to be constantly held by me so I need dishes that are quick to put together. I came across this Chicken Cordon Bleu recipe and it literally took me 10 minutes and a cutting board to put it together. I cheated and didn't do any pounding; instead, I cut my breasts in half. Easy peasy and super delicious. The mark of a truly successful dish in our house is Cati's response to it and she loved this chicken.

PS Don't forget to enter the Shutterfly Giveaway here!

Chicken Cordon Bleu
Source: Kiersten on Allrecipes.com

2 skinless, boneless chicken breast halves
1/8 teaspoon salt
1/8 teaspoon ground black pepper
3 slices Swiss cheese
2 slices cooked ham
1/4 cup seasoned bread crumbs

Preheat oven to 350 degrees F. Coat a baking dish with nonstick cooking spray.

Pound chicken breasts to 1/4 inch thickness. (I sliced them thin)

Sprinkle each piece of chicken on both sides with salt and pepper. Place 1 cheese slice and 1 ham slice on top of each breast. Roll up each breast, and secure with a toothpick. Place in baking dish, and sprinkle chicken evenly with bread crumbs.

Bake for 30 to 35 minutes, or until chicken is no longer pink. Remove from oven, and place 1/2 cheese slice on top of each breast. Return to oven for 3 to 5 minutes, or until cheese has melted. Remove toothpicks, and serve immediately.
Stephanie

Tuesday, November 8, 2011

Vote for my post on Mom Blog Network

Letter to My Children

Dear Children,

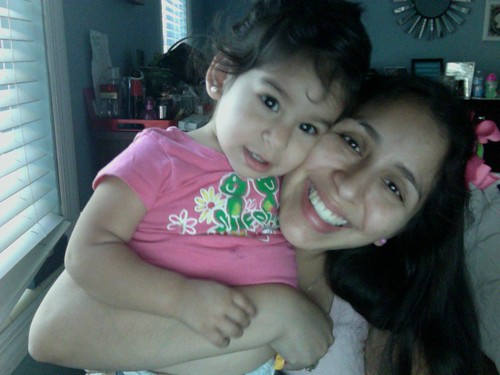
This is your mother. The woman God decided to gift you to. Catarina, you have known me as mama for almost 21 months now and little Baby D, you will know me as mama in no time. We have a whole lifetime to get to know one another but I wanted to write to you now to capture this moment in time. There is so much going on with me emotionally that I feel it's important for me to tell you about it now in case we never have the opportunity to talk about it later. My point in writing this letter is to tell you more about me as a mother, my hopes and dreams, and the things that influenced me. Whether this is useful for you I don't know but I wish my own mother had done something like this for me. Maybe we would understand each other better today.

First and foremost, I want you to know that I am not perfect. I am actually far from perfect so please don't ever hold me up on a pedestal. I am human. I make mistakes. Lots and lots of them! I will love you always, but I can't guarantee that love will always make me rational when it comes to you two. I can be lazy, messy, airheaded, rude, and mean. I don't always make the bed. I don't always want to brush my teeth. These are things that will continue as you get older but I will try to hide them so that I can set a good example for you. My biggest secret is that I don't always feel like an adult so forgive me if I don't always act like one.

Just as you will be trying to navigate the world and your place in it, so will I so don't be too mad at me when I don't have all the answers or the power to make you feel better. Life is hard and full of pain and I will try to protect you but sometimes pain is good. You will learn from it and become stronger because of it. I will always be here for you. I will always support you and I will love you no matter what so don't ever be afraid to turn to me. I can try to be a friend, but my goal will always be to be your mother so I'm sorry in advance if I ever come off as too "motherly."

Growing up my mother was strong. I admired her. Things changed, however, the older I got. You see, she has a different approach to motherhood than I do. I always disagreed with her and she would respond with "you don't know because you don't have kids." If I ever say this to you, kindly remind me to respect your personhood. If I had to sum up her approach/thoughts on motherhood it would be this:
  1. Your responsibility to your children ends once they turn 18. 
  2. Your children owe you. 
  3. It's better for your children to have a crappy father than no father at all.
Now, dear children, I want you to know and understand fully that I disagree with all those assertions. I disagree with them to the core of my being. These statements are repugnant to me and have no place in my definition of motherhood. I hope one day you agree with me too but I don't want you to do so blindly, so let me explain why I am so against these statements.

Assertion: Your responsibility to your children ends once they turn 18.
Your children will always need you. As you grow you will come to need me in different ways. As a baby you will have needed me to change your diaper, give you milk, give you affection, and help you develop into a well-functioning child. As a child, you will need me to help with your homework, give you affection, and help you develop into a peer-savvy teenager. As a teenager, you may or may not need me to help with homework but you will need someone to teach you how to drive, to give you spending money, help you fill out college applications, give you affection, and help you develop into a responsible young adult. As a young adult, you will probably still need money, but you will need guidance on picking a career and on starting your adult life; you will still need affection and for me to help you develop into a responsible adult who needs to manage the juggling act of career and family of later adulthood. As an adult, you will need me for support and maybe even as a safety net, you will need me as a babysitter for grandkids (if you have them), you will need my affection and help as you continue to develop into an amazing person. You will not always need me financially, but you will need me emotionally. One of my goals as your mother will be to make sure you understand that I will always feel a sense of responsibility to you. I will never abandon you and I will always be here when you need me. How you need me is something that will be defined as you age and as our relationship with one another changes, but the need for a loving and caring parent will always be there and my desire to fulfill that need will also always be there.

Assertion: Your children owe you. 
Let's be clear, this is my opinion and it may not be the opinion of other parents so do not take this as standard thinking for all parents. My mother has always felt that we owed her for all the struggles she experiences as a mother. The only way we could pay her back for everything she did was by lending her money or being there when she needed us and if we didn't do as she wanted, she would get angry, break up with us, or say she was dead to us. My view is that it is me who owes you. Your father and I decided to bring you into this world and raise you. We decided to bring you into this world despite all the badness, sadness, and suffering; despite all the disheartening things you might have to face. You were our choice, our gift from God. We are the ones who owe you the chance of a good life and of good opportunities. We owe it to you to help you navigate the world, a world you had no choice but to enter the day we decided you would be born. We chose to make sacrifices for you. We made the conscious decision to do so. Neither of us will ever ask you to make sacrifices for us. One of my goals as your mother will be to provide you with the opportunities to lead a better life than your father and I did. I don't expect you to ever "pay us back" or to feel in our debt. If we are great parents to you, then hopefully you will be great children to us. Not because you feel you owe us, but because it is something that comes naturally from our interactions.

Assertion: It's better for your children to have a crappy father than no father at all.
There is absolutely nothing wrong with single parenthood and, in a way, I am glad we live in a day and age where single parenthood is becoming a new norm for family systems. I feel my mother was a better mother to us when she was on her own than when she remarried. Don't ever let wanting your children to have two parents be an excuse for staying in a relationship where one of the parents is abusive or dysfunctional in some way. Sometimes it is better and healthier to be on your own. While it may be harder, your children are worth it.

So dear children, this is my letter to you. One of many that will surely capture me in the process of trying to become a better mother to you. One that will capture the struggles I am facing and all the heartache. Like I said earlier, I am not perfect. I never will be. And that's ok because I don't want to be perfect. I would never learn from you if I was. I am simply me and simply learning along the way, hoping that my unconditional love for you will help me to be the mother I have always dreamed of being. Hopefully you are patient and forgiving with me as I learn how to be the best mother to you two.

Love Always,
Mama

Monday, November 7, 2011

Vote for my post on Mom Blog Network

Holiday Cards & Shutterfly GIVEAWAY!

Hello November 7, 2011. When did November get here? Where did the year go? I know there are still two months left of the year, but I feel like they are going to fly right by us, which is why I am starting to think about our holiday cards now. Or rather, I am stressing out about our holiday cards because I need to organize a photo session with a husband/daddy who won’t have another day off until the middle of December. This year, we have a toddler who may or may not smile and who definitely will not let us put the Santa hat on her. This year we also have a pregnant mommy who is finding it increasingly difficult to feel pretty. If we manage to get a good picture of us I will be impressed (and relieved)!

Last year was easy because it featured pictures of Cati. This is still, hands-down, my favorite holiday card and my favorite photo session from Cati’s first year of life. I love the smiles and rolls and how cooperative she was. Looking back, I think it was great that I had the pictures I needed to fit into the card I liked the best from Shutterfly's selection.

To help us out this year again is Shutterfly with their great holiday card selection. Even better though is the fact that Shutterfly wants to be a part of your holiday celebrations too! Shutterfly is offering 25 cards to three lucky readers of my blog! 

1. Leave a comment with your email address or a way to contact you on this post by Friday, November 11, 2011. 
2. The winners will be chosen at random and announced on Saturday, November 12, 2011

If you need help with card selection, here are a few of my favorites. Note: My favorites only include one picture per card because I am anticipating only having one good family picture. 

 
 Vintage Joyeux Noel card. Tie for second choice.
 Classic Plaid Wishes card. Tie for second choice.
 Retro Merry Wishes card. This one is my top choice!

For more on Shutterfly's holiday selection, you can check out their Christmas cards, greeting cards, holiday gifts, holiday cards, photo books, and Christmas photo cards.

Don't forget to enter the giveaway and good luck!
Stephanie

Thursday, November 3, 2011

Vote for my post on Mom Blog Network

Red Velvet Cupcakes

Our household is currently under the biggest countdown: I am counting down until the end of the semester and Alex is counting down to the end of this rotation. I have either a test, paper, or presentation due every week from now until December 8th (the only exception is Thanksgiving week) and Alex is on the hardest rotation of the year. We are both mentally and physically exhausted and both terrified of messing up so big we either fail a class (me) or get kicked out the program (him). Nothing can be done other than getting the work done (or hoping it gets done), staying positive, and hoping to do well enough to pass.

On a more positive note, you must try these red velvet cupcakes. I took a batch of cupcakes to school and was asked for my number multiple times so that I could bake them for fellow students. People have liked what I've baked before, but these cupcakes were different. The praise was incredible and to the point where I know I've found my go-to red velvet recipe. I'm more of a straight-up vanilla or chocolate cake person, so my knowledge of red velvet is limited but I can tell you that these were definitely chocolaty.
Red Velvet Cupcakes
I made us a small cake and I should have known better when Cati was extra quiet. She's so tall that she managed to reach the cake, move it to the edge of the table, and eat two of the pumpkins and fingers-full of frosting. Because of this cake she now knows how to say "cake" and "ca-cake."
IMG_4912
IMG_4917
I also made a small batch of "mud velvet" cupcakes for school and they came out so cute. I was not surprised when I went to pick up Cati from school and she was eating a "ca-cake." There's nothing better than knowing that your baby girl is a huge fan of your baking :)
 Mud Velvet Cupcakes

Red Velvet Cupcakes
Source: Pink Parsley, who got the recipe from Rebecca Rather, The Pastry Queen Christmas
makes 24 large cupcakes (I got about 60 mini cupcakes and an 8" single layer cake)

1/4 cup (2 ounces) red food coloring
3 1/2 Tablespoons unsweetened cocoa powder
1 cup (2 sticks) unsalted butter, at room temperature
1 3/4 cups sugar
2 large eggs
2 cups cake flour
1 1/2 cups all-purpose flour
1 teaspoon kosher salt
1 teaspoon baking soda
2 teaspoons vanilla extract
1 cup buttermilk
1 cup sour cream
1 Tablespoon distilled white vinegar
    Preheat the oven to 350.  Line 2 cupcake pans with liners and spray with cooking spray.

    In a small bowl, combine the cocoa powder and food coloring with a fork, mashing and mixing until it forms a paste.  Set aside.

    In the bowl of a stand mixer fitted with a paddle attachment, cream the butter and sugar at medium-high speed until it is light and fluffy, about 2 minutes.  One at a time, add the eggs, stopping to scrape down the bowl as needed, and allowing each one to be fully incorporated.  Reduce the speed to low, and add the cocoa paste.  Increase to medium speed and beat the batter for about 4 minutes.

    Meanwhile, sift together the cake flour, all-purpose flour, salt, and baking soda.  Stir the vanilla into the buttermilk (this can be done in a measuring cup).

    Add the flour and buttermilk in increments, alternating between each addition.  Start and end with the dry ingredients.  Beat on medium speed until just combined.

    Add the vinegar and sour cream and beat at low speed until just combined.

    Divide batter evenly among the muffin tins, filling each one about 3/4 full.  Bake 17-22 minutes, only until the cupcakes feel firm to the touch  and a toothpick inserted into the center comes out clean.  Be careful not to overbake, as the cupcakes will dry out easily.

    Remove from oven and allow to cool in pans for 5 minutes.  Remove the cupcakes from pan and allow to cool completely before frosting.

    Cream Cheese Frosting
    from Annie's Eats, originally from Confections of a Foodie Bride

    12 ounces cream cheese (still cold - not softened)
    7 1/2 Tablespoons unsalted butter, softened
    1 Tablespoon vanilla extract
    3 3/4 cups confectioners sugar, sifted
      Cream the butter and cream cheese in the bowl of a stand mixer fitted with the paddle attachment, until creamy and smooth, 2-3 minutes.  Add the vanilla extract.  Gradually add the confectioners sugar over low speed, and when well combined, increase to medium.  Beat until smooth.
      Stephanie

      Wednesday, November 2, 2011

      Vote for my post on Mom Blog Network

      Pumpkin Bars

      IMG_4832
      I have been in a huge fall kick this year. Maybe it was our trip to Boston and seeing the changing of the leaves. Maybe it's the fact that fall means Thanksgiving. Maybe pregnancy just has me more in tuned with nature. Either way, I am loving all things fall this year and I am especially loving all things pumpkin. I was never a fan of pumpkins before, but I find myself longing for pie pumpkins so I can make some homemade pumpkin puree. I made these Pumpkin "Bars" (mine came out more like a pumpkin cake) with the first batch of pumpkin puree I made and they were a huge hit. As soon as I bit into a slice of this, I felt like fall was taking over my body and I felt happy, warm, cozy, and cinnamony. I highly recommend you try these, even if you only have enough for a quarter of this recipe.

      Pumpkin Bars
      Source: Paula Deen

      Bars:
      4 eggs
      1 2/3 cups granulated sugar
      1 cup vegetable oil
      15-ounce can pumpkin
      2 cups sifted all-purpose flour
      2 teaspoons baking powder
      2 teaspoons ground cinnamon
      1 teaspoon salt
      1 teaspoon baking soda

      Icing:
      8-ounce package cream cheese, softened
      1/2 cup butter or margarine, softened
      2 cups sifted confectioners' sugar
      1 teaspoon vanilla extract

      To make the bars: Preheat the oven to 350 degrees F.

      Using an electric mixer at medium speed, combine the eggs, sugar, oil and pumpkin until light and fluffy. Stir together the flour, baking powder, cinnamon, salt and baking soda. Add the dry ingredients to the pumpkin mixture and mix at low speed until thoroughly combined and the batter is smooth. Spread the batter into a greased 13 by 10-inch baking pan. Bake for 30 minutes. Let cool completely before frosting. Cut into bars.

      To make the icing: Combine the cream cheese and butter in a medium bowl with an electric mixer until smooth. Add the sugar and mix at low speed until combined. Stir in the vanilla and mix again. Spread on cooled pumpkin bars.
      Stephanie