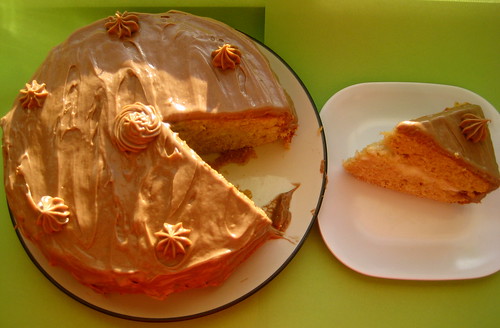
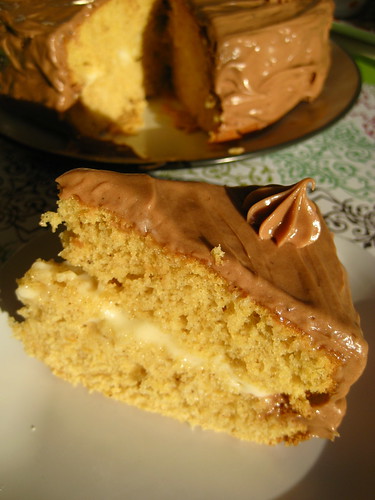
I nearly leaped for joy when I saw what Dolores of Chronicles in Culinary Curiosity, Jenny of Foray into Food, and Alex of Blondie and Brownie chose for this month's Daring Baker's challenge. They didn't just choose a recipe for a regular cake, the upped the ante by picking a Caramel Cake with Caramelized Butter Frosting. Doesn't that name just make you think of sugar heaven? In the post on the Daring Baker's Kitchen site, this month's hosts said that sugar was the star. The cake has more sugar in it than you can imagine, but that's because the cake is pure sugar perfection. I took the star comment a little too literally and made my cakes star shaped. They were so cute and the perfect size for shipping to Alex.
Thank you to Dolores, Jenny, and Alex for choosing such a great recipe and thanks to Shuna Fish London of Eggbeater for creating such a deliciously indulgent cake!
Caramel Cake with Caramelized Butter Frosting
Source: Shuna Fish London, published by Bay Area Bites (here)
Cake
10 Tbsp unsalted butter at room temperature
1 1/4 cups granulated sugar
1/2 tsp kosher salt
1/3 cup Caramel Syrup (see recipe below)
2 each eggs, at room temperature
splash vanilla extract
2 cups all-purpose flour
1/2 tsp baking powder
1 cup milk, at room temperature
Preheat oven to 350F
Butter one tall (2 – 2.5 inch deep) 9-inch cake pan.
In the bowl of a stand mixer fitted with a paddle attachment, cream butter until smooth. Add sugar and salt & cream until light and fluffy.
Slowly pour room temperature caramel syrup into bowl. Scrape down bowl and increase speed. Add eggs/vanilla extract a little at a time, mixing well after each addition. Scrape down bowl again, beat mixture until light and uniform.
Sift flour and baking powder.
Turn mixer to lowest speed, and add one third of the dry ingredients. When incorporated, add half of the milk, a little at a time. Add another third of the dry ingredients, then the other half of the milk and finish with the dry ingredients.
Take off mixer and by hand, use a spatula to do a few last folds, making sure batter is uniform. Turn batter into prepared cake pan.
Place cake pan on cookie sheet or 1/2 sheet pan. Set first timer for 30 minutes, rotate pan and set timer for another 15-20 minutes. Your own oven will set the pace. Bake until sides pull away from the pan and skewer inserted in middle comes out clean. Cool cake completely before icing it.
Cake will keep for three days outside of the refrigerator.
Caramel Syrup
2 cups sugar
1/2 cup water
1 cup water (for "stopping" the caramelization process)
In a small stainless steel saucepan, with tall sides, mix water and sugar until mixture feels like wet sand. Brush down any stray sugar crystals with wet pastry brush. Turn on heat to highest flame. Cook until smoking slightly: dark amber.
When color is achieved, very carefully pour in one cup of water. Caramel will jump and sputter about! It is very dangerous, so have long sleeves on and be prepared to step back.
Whisk over medium heat until it has reduced slightly and feels sticky between two fingers.
Note: For safety reasons, have ready a bowl of ice water to plunge your hands into if any caramel should land on your skin.
Caramelized Butter Frosting
12 Tbsp unsalted butter
1 pound confectioner’s sugar, sifted
4-6 Tbsp heavy cream
2 tsp vanilla extract
2-4 Tbsp caramel syrup
Kosher or sea salt to taste
Cook butter until brown. Pour through a fine meshed sieve into a heatproof bowl, set aside to cool.
Pour cooled brown butter into mixer bowl.
In a stand mixer fitted with a paddle or whisk attachment, add confectioner's sugar a little at a time. When mixture looks too chunky to take any more, add a bit of cream and or caramel syrup. Repeat until mixture looks smooth and all confectioner's sugar has been incorporated. Add salt to taste.
Note: Caramelized butter frosting will keep in fridge for up to a month. To smooth out from cold, microwave a bit, then mix with paddle attachment until smooth and light.
Saturday, November 29, 2008
Thursday, November 27, 2008
It's Turkey Day!
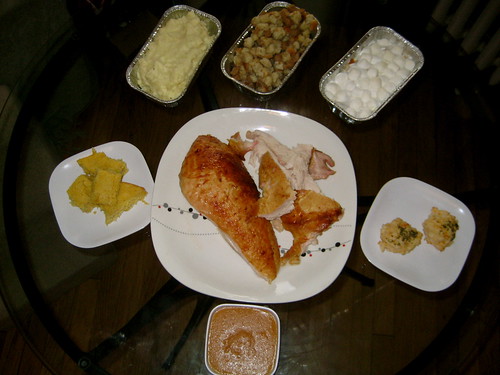
I love this holiday. I love how my apartment gets filled with all the delicious scents of traditional Thanksgiving food. I love how I get to spend the day thinking about everything I should be thankful for, including my husband, dog, family, friends, and life in general. This Thanksgiving has been different from past Thanksgivings because this is the first time I have spent the holiday alone. Well, not completely alone because I have been playing Bond movies all day, but he doesn't really count since he didn't eat any of the food I made. I now have enough leftovers to probably last for the next week which is perfect because I'm sure cooking will be the last thing on my mind while I'm studying for my five tests.
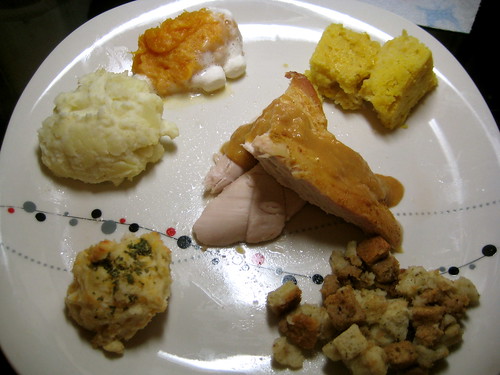
This year I made a turkey breast, cream cheese mashed potatoes, sweet potatoes, stuffing, cornbread (recipe here), cheddar biscuits (recipe here), and the Santa Pie for dessert.
I hope everyone else had a fabulous holiday and got to enjoy the company of their loved ones :)
This year I made a turkey breast, cream cheese mashed potatoes, sweet potatoes, stuffing, cornbread (recipe here), cheddar biscuits (recipe here), and the Santa Pie for dessert.
I hope everyone else had a fabulous holiday and got to enjoy the company of their loved ones :)
Baked Turkey: It preferred to be on its side
Labels:
Just Grubbin',
Thanksgiving
Wednesday, November 26, 2008
Guess Who's Coming??
Santa! One of my favorite Christmas songs is "Here Comes Santa Claus." Back in the day my mom, sister, and I would sit by the Christmas tree and get lost in the lights because not only where they colorful but they also played the tune of "Here Comes Santa Clause." We were naughty kids though. Every time my mom would leave us alone with the tree we would pick up the gifts, shake them around, and then very slowly remove the tape and try to take a peak inside to figure out what the gift was. Over the years, my mom learned about our little antics and the wrapping got more complicated and she would delay putting the gifts out until the very last moment. I remember one Christmas, about 15 years ago, we were at home sitting by the tree and there was a knock on the door. My mom said we could open the door so, of course, we rushed to the door and when we opened it, Santa Claus was there! We were so excited to see Santa; he was round and jolly and came with gifts! To this day I don't know who the Santa was, but I was so impressed with my mom's sneakiness in making such a grand gesture. Maybe she wanted to make Christmas extra special since it was the first after my parent's divorce. Either way and whatever her reasons were, that Christmas is forever burned in my memory and every time I hear "Here Comes Santa Clause" I think of that Christmas.
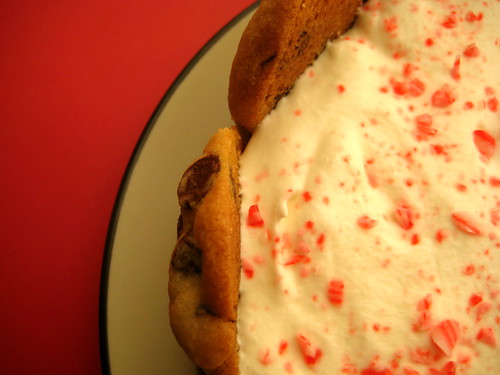
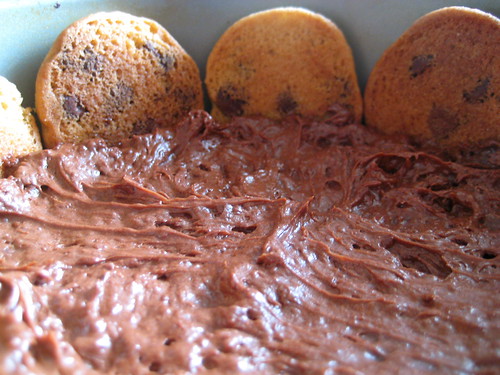
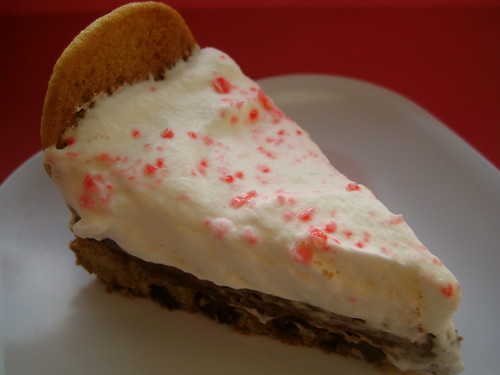
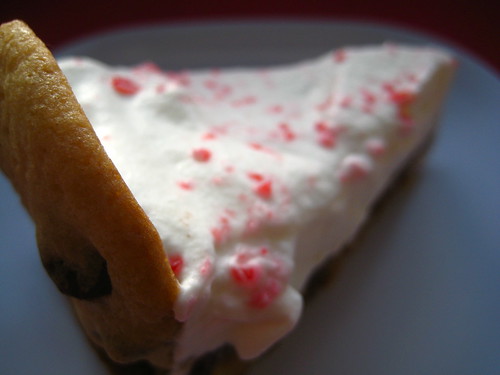
So, in honor of my favorite song, I made a Santa Pie for this month's You Want Pies With That? Anne of Anne Strawberry made the best decision when she chose holiday songs as this month's theme. I absolutely loved the theme because it allowed for so much creativity. The pie was supposed to be inspired by your favorite holiday song and it took me about 28.7 seconds to decide on a pie that in some way incorporated Santa's favorite cookie. The filling was easy because I figured if Santa loved chocolate chip cookies he'd had to love all things chocolate too. The pie was a lot of fun and so easy to make. This pie would be perfect for Santa because it would give him a sugar rush that would get him through his millions and billions of stops.
Santa Pie
Source: Me!
1/2 Recipe for chocolate chip cookies (I used this recipe)
Chocolate Mousse
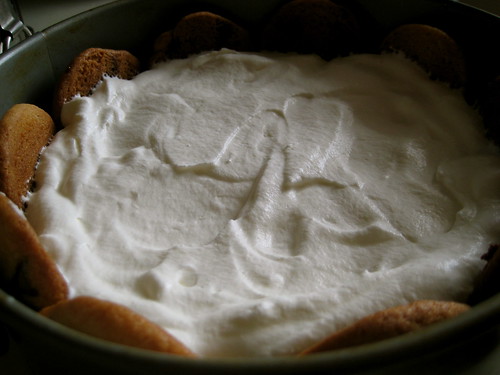
Whipped Cream
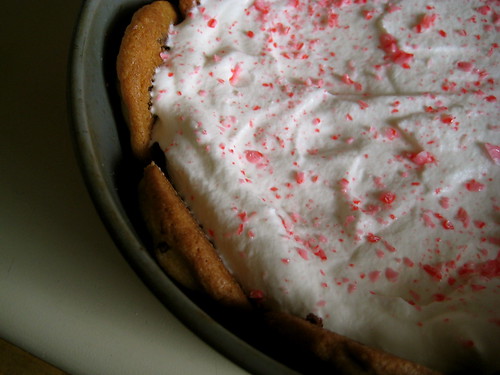
Crushed candy cane for decoration
Crust
Butter the bottom of a 7-inch springform pan. Use about half of the cookie dough to cover the bottom of the springform pan. Bake for about 15-20 minutes. (Bottom)
Make small, round cookies with the other half of the dough and bake for about 10 minutes. (Sides)
While the cookies are warm, stick the round cookies into the bottom. Let it cool completely.
Chocolate Mousse
6 oz of bittersweet or semi-sweet chocolate
1/3 cup heavy cream
Melt the chocolate in the top of a double boiler. Set aside and let it cool slightly.
Place the heavy cream in a medium bowl and beat with an electic mixer on medium high until it holds soft peaks.
Slowly fold the melted chocolate into the heavy cream until well blended.
Place in the fridge until ready to use.
Whipped Cream
2/3 cup heavy cream
1 Tbsp. powdered sugar
Combine the cream and sugar in a small bowl and beat with an electric mixer on medium high until it holds soft peaks. Place in fridge until ready to use.
Assembly
Once the crust has cooled completely spoon the mousse onto the cookie and spread evenly.
Then, spoon the whipped cream and spready evenly.
Top with crushed candy canes refrigerate for at least 30 minutes.
Enjoy!
All together.
A slice.
Labels:
Pie,
You Want Pies With That?
Tuesday, November 25, 2008
Turkey Day Preview
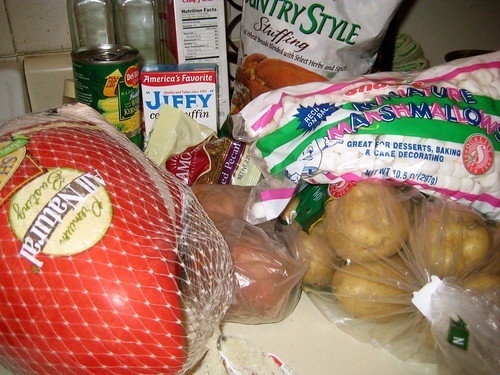
I did my turkey day shopping yesterday and I am so pumped! Even though I am celebrating Thanksgiving on my own this year, I can't let tradition slide especially when Thanksgiving is my favorite holiday of the year. The smallest turkey breast I could find was 7lbs so I will be eating turkey for the next week...yay! I love Thanksgiving leftovers. I'm a cheater when it comes to stuffing because stuffing isn't high on my favorite Thanksgiving foods list, but I still can't picture my meal without stuffing. I'm still trying to think of a dessert with my meal since I like to try a new dessert each year with my meal. Last year I made oreo truffles and cinnamon rolls, the year before that I made fruit ambrosia and banana bread, and the year before that I made cinnamon bread. I love having to make these kinds of decisions!
Labels:
Just Grubbin',
Thanksgiving
TWD: Twofer Pie
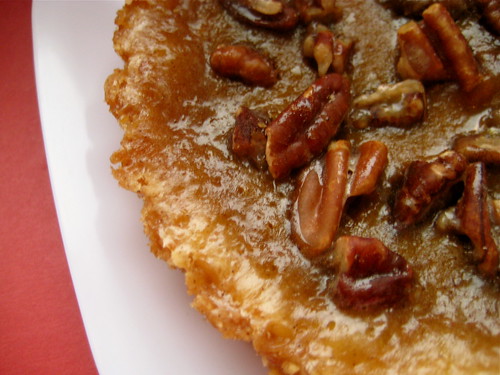
Vibi of La Casserole Carree definitely had Thanksgiving on the brain when she chose Dorie's Twofer Pie for us to make this week. I was excited to make this pie because it represented what I thought Thanksgiving was all about: sharing good food. Before making the pie I had reservations because I don't like pumpkin pie and I have never had pecan pie but I had faith in Dorie's ability to come up with a recipe for a good pie. Plus, I had already decided I would be sharing the spirit of Thanksgiving through this pie. I made four mini pies, kept one for myself, and gave away the other three. I tried a slice of my mini pie and while I thought the pie was good, it isn't a pie that I would make just for myself. However, one of the recipients of my pies said it was "glorious." :)
Make sure to check Vibi's blog for the recipe and TWD to see how the other bakers did.
Enjoy!
Labels:
Pie,
Tuesdays With Dorie
Monday, November 24, 2008
TWD Rewind
Back in May we made sticky buns for TWD. I was floored when I tried this recipe. I had never had sticky buns before and I was not ready for the taste bud overload. The buns are a lot of work and there is a lot of waiting around, but they are so worth it and so delicious. I've probably eaten about half of what I made and I know that I am going to be sad once they are all gone. These little suckers are seriously addictive so I am sure I will be making them again very soon.
For the recipe, click here.
Labels:
Bread,
Random Sweets,
Tuesdays With Dorie
Sunday, November 23, 2008
Craving Brownies
I was recently in the mood for brownies. It's funny how my craving came about too. I ended up having a dream about finding Godiva chocolate on sale and when I woke up I was in the mood for something very chocolatey, fudgy, and chewy. I went through the starred items in my Google Reader and decided on this recipe. These brownies are definitely some of the best brownies I have had and I think it's because it reminds me so much of the boxed stuff. They were exactly what I was craving and they went so went so well with milk. Yum!
Chocolate Fudge Brownies
Source: PheMom here
6 Tablespoons unsalted butter, plus more for pan
6 ounces coarsely chopped good-quality bittersweet (or semisweet) chocolate
1/4 cup unsweetened cocoa powder (not Dutch-process)
3/4 cups all-purpose flour
1/4 teaspoon baking powder
1/4 teaspoon salt
1 cups sugar
2 large eggs
2 teaspoons pure vanilla extract
Preheat oven to 350 degrees. Line a buttered 9x13-inch baking pan with foil, allowing 2 inches to hang over sides. Butter lining (excluding overhang); set pan aside.
Put butter, chocolate, and cocoa in a heatproof medium bowl set over a pan of simmering water; stir until butter and chocolate are melted. Let cool slightly.
Whisk together flour, baking powder, and salt in a separate bowl; set aside.
Put sugar, eggs, and vanilla in the bowl of an electric mixer fitted with the whisk attachment, and beat on medium speed until pale, about 4 minutes. Add chocolate mixture; beat until combined. Add flour mixture; beat, scraping down sides of bowl, until well incorporated.
Pour batter into prepared pan; smooth top with a rubber spatula. Bake until a cake tester inserted into brownies (avoid center and edges) comes out with a few crumbs but is not wet, about 35-40 minutes. Let cool slightly in pan, about 15 minutes. Lift out brownies; let cool completely on a wire rack before cutting into squares.
Doesn't that look great?!?
So pretty!
Labels:
Brownies
Thursday, November 20, 2008
The Cake Slice: Sweet Potato Cake
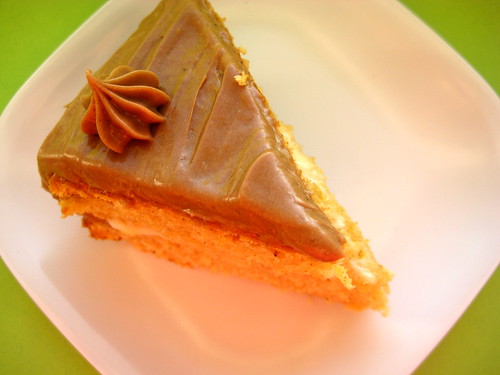
I know I have said it a million times but I love baking groups. Love them! One of the main reasons I love them so much (other than having a reason to bake) is because they have the tendency to choose recipes that are out of my baking comfort zone. Take this month's cake selection for The Cake Slice: Sweet Potato Cake. When I think of sweet potatoes I think of Thanksgiving and eating them topped with a thick layer of gooey, chewy marshmallows. I would have never thought about making a cake with sweet potato as the star of the show. This cake was absolutely delicious and the frosting was out of this world. The cake tasted similar to other sweets that call for pumpkin puree because of all the spices but, in my opinion, so much better. Now I can say I have another reason to love sweet potatoes.
Sweet Potato Cake
Source: Alisa Hunstman's Sky High
Cake:
2 medium or 1 large sweet potato (12 ounces)
3 cups of cake flour**
3 teaspoons of baking powder
1 and 1/2 teaspoons of ground cinnamon
3/4 teaspoon of ground nutmeg
1/4 teaspoon of cloves
5 eggs, separated
2 and 1/4 cups of sugar
1 stick plus 2 tablespoons of butter, at room temperature
1 and 1/2 teaspoons of vanilla
1 and 1/4 cups of milk
(**The recipe calls for cake flour and if you only have all-purpose flour on hand, you can substitute 3/4 cup (105 grams) all purpose flour plus 2 tablespoons (30 grams) cornstarch.)
(*If fresh sweet potato is not available where you live you may use canned sweet potato, yams, and pumpkin puree)
Makes a 9-inch triple layer cake, serves 16-20 people
1. Preheat the oven to 400F degrees. Prick the sweet potatoes in 2-3 places, place on a small baking dish and bake for 1 hour or until the potatoes are very soft. Remove from the oven and cool slightly.
2. Reduce the oven temperature to 350F degrees. Butter the bottoms and the sides of the pans and line with parchment paper. Butter the parchment paper also.
3. When the sweet potatoes are cool peel off the skin and remove any dark spots. Cut the potatoes into chunks and puree in a food processors. Puree until smooth. Measure out one cup of potato puree and set aside.
4. Sift the flour, baking powder, cinnamon, nutmeg, and ground cloves. Set aside.
5. In the bowl of electric mixer add the egg whites and attach whip attachment. Beat on medium speed until egg whites are frothy. raise the speed to high and gradually beat in 1/4 cup of sugar. Continue to beat until the egg whites are moderately stiff.
6. In another large bowl with the paddle attachment, combine the sweet potato, butter, vanilla, and remaining sugar. Beat until light and fluffy. Add the egg yolks one at a time. Make sure to scrape the sides of the bowl after each egg yolk is added. With the mixer on low speed, add the dry ingredients and milk in alternately in 2-3 additions. making sure to begin and end with the dry ingredients.
7. With a large spatula, fold in one fourth of the egg whites into the batter to lighten. Then fold in the remaining egg whites until no streaks remain. Making sure to not over mix or this will deflate the batter. Divide the batter among of the three pans.
8. Bake for 25-30 minutes or until a cake tester comes out clean. Let the cake layers cool in the pan for 10 minutes. Then turn out the cake layers onto a wire rack and cool completely at least 1 hour.
9. To assemble the cake, place one layer flat side up on to a cake stand. With a pastry bag fitted with a 1/2 inch round tip and filled with chocolate cream cheese icing, pipe border around the edge of the cake. Fill the center with the orange cream filling smoothing it to the edge of the border. Place the second layer on top and repeat the process.Place the third layer on top and use all the chocolate cream cheese frosting to cover the top and sides of the cake.
Chocolate Cream Frosting:
makes 3 cups
10 ounces cream cheese*** at room temperature
1 stick of butter at room temperature
16 ounces of powdered sugar; sifted
1 and 1/2 ounces of unsweetened chocolate melted and slightly cooled
(***1 cup of cream cheese maybe substituted with 1 cup pureed cottage cheese OR 1 cup plain yogurt, strained overnight in a cheesecloth OR equal amounts of neufatel cheese)
1. In a large mixing bowl, beat together the cream cheese and butter until fluffy. Slowly add the powdered sugar to cream cheese butter mixture. Making sure to scrape down the sides the sides of the bowl. Then beat until light fluffy 2-3 minutes.
2. Measure out 1 cup of frosting and set aside.
3. Add the melted chocolate to the remaining icing in the bowl and beat until well combined.
Orange Cream Filling:
1 cup of reserved cream cheese icing from above.
2 tablespoons of frozen orange juice concentrate, thawed
1/4 teaspoon of orange extract
1. Stir together all the ingredients until well mixed.
The filling was divine!
I had some extra batter so I made a cupcake.
Labels:
Cake,
The Cake Slice
Wednesday, November 19, 2008
Tuesday, November 18, 2008
And She's Married!
This weekend was girl Alex's wedding. This is a day that has been 9 months in the making and it came out absolutely beautiful. I am so happy to have been a part of the wedding as Alex's matron of honor. Now I know exactly how she felt as the maid of honor in my wedding and I am even happier to know that she has experienced the joy of being a bride. The whole weekend was dedicated to celebrating the end of Alex's singlehood as we celebrated her bachelorette party on Friday, went to a girls only class on Saturday, and danced the night away at her wedding on Sunday.
Alex, you were absolutely gorgeous and everything turned out beautifully. I hope you enjoyed your wedding as much as I did and I hope you are enjoying yourself in Honduras. Thank you for being an amazing friend and letting me be a part of such a special moment in your life. You have no idea how happy it makes me to see one of your dreams come true and to know that you are in good and loving hands. I know you don't need reminder, but I am claiming your first born as my godchild :)
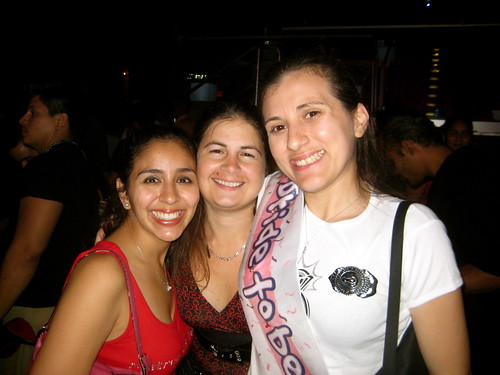
Saturday night with the soccer bride.
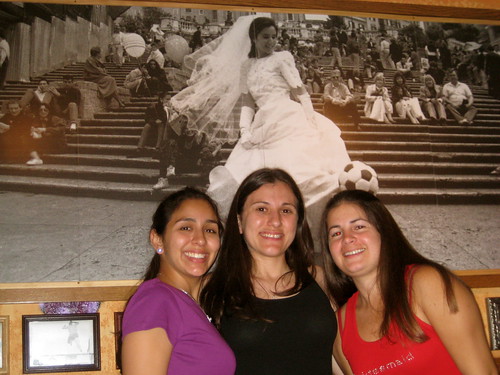
Me and my amazing MOH gift.
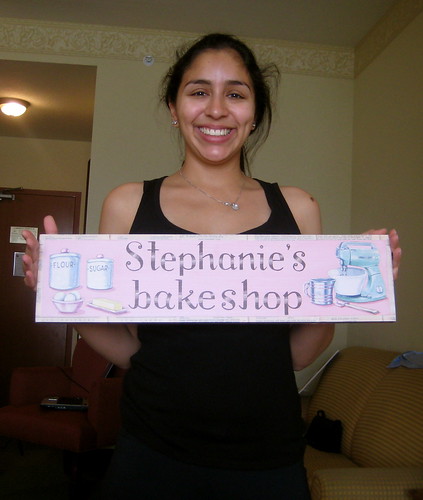
My other amazing gift.

Alex getting ready. This is one of my favorite pictures of her.

Sweetheart table centerpiece.

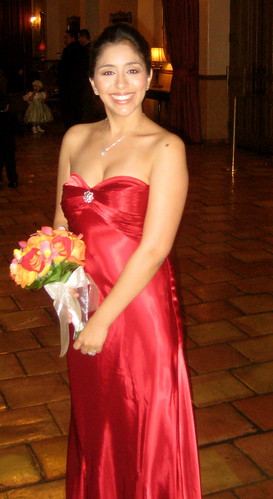
I felt so pretty.
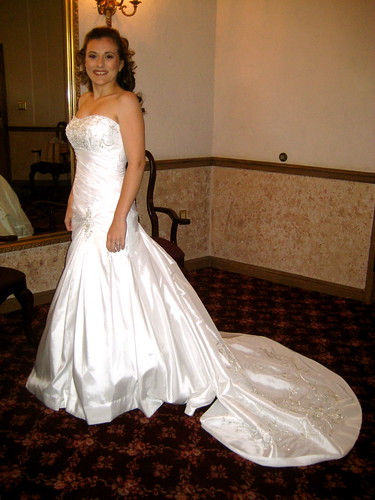
Isn't she a vision? I feel like crying just looking at her.
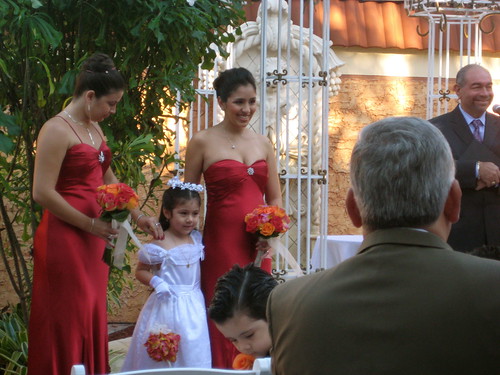
Bridal party waiting for the Bride.
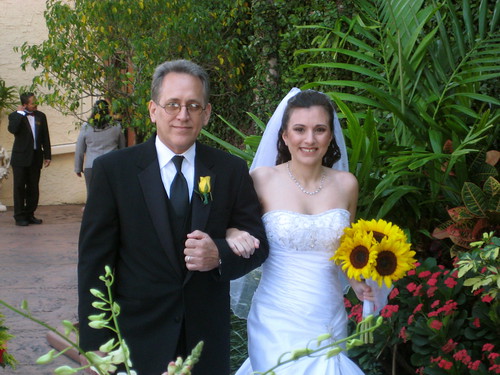
Making her entrance.
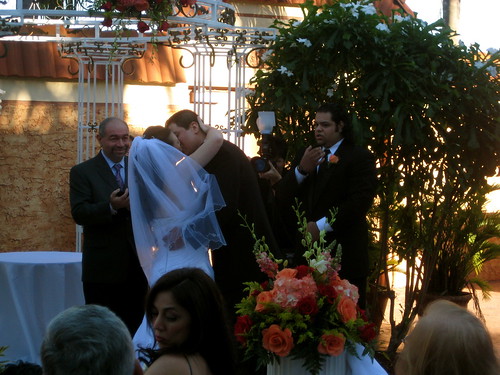
It's official!
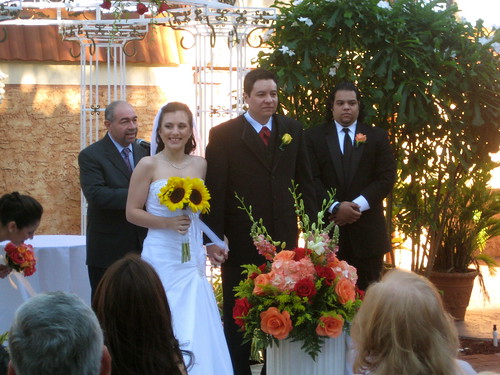
After almost 7 years of waiting...Mr and Mrs!!
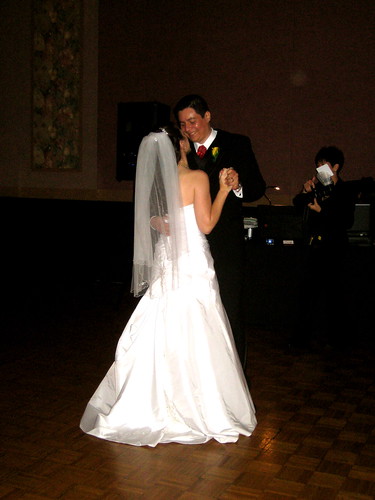
First Dance.
Celebrating with the Bride.
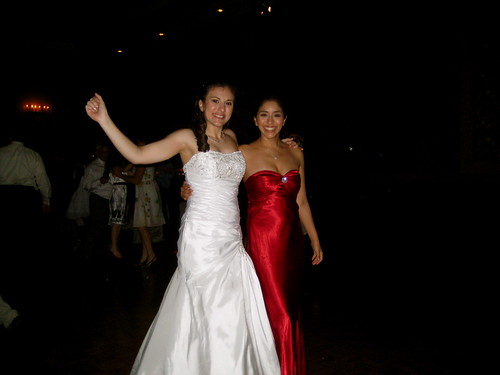
Proof that Alex can dance!

Cake Cutting.

Alex, you were absolutely gorgeous and everything turned out beautifully. I hope you enjoyed your wedding as much as I did and I hope you are enjoying yourself in Honduras. Thank you for being an amazing friend and letting me be a part of such a special moment in your life. You have no idea how happy it makes me to see one of your dreams come true and to know that you are in good and loving hands. I know you don't need reminder, but I am claiming your first born as my godchild :)
Friday Night.(Me, Daniela, and Alex)

Saturday night with the soccer bride.

Me and my amazing MOH gift.

My other amazing gift.

Alex getting ready. This is one of my favorite pictures of her.

Sweetheart table centerpiece.

I felt so pretty.

Isn't she a vision? I feel like crying just looking at her.

Bridal party waiting for the Bride.

Making her entrance.

It's official!

After almost 7 years of waiting...Mr and Mrs!!

First Dance.

Celebrating with the Bride.

Proof that Alex can dance!

Cake Cutting.

Congratulations to the newlyweds!
Labels:
Just Because
Subscribe to:
Posts (Atom)
