Showing posts with label Cookies. Show all posts

Wednesday, August 13, 2014

Vote for my post on Mom Blog Network

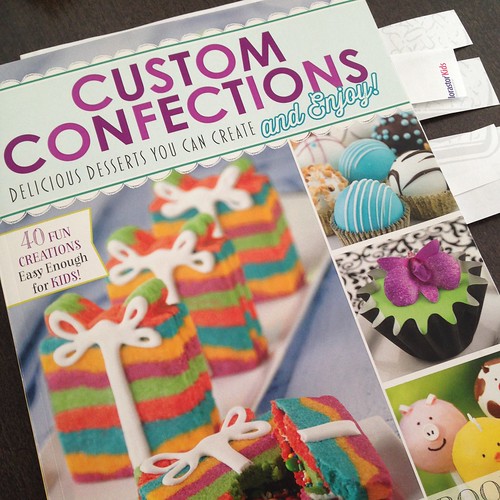
Book Review: Jen Besel's Custom Confections

I was sent a copy of Jen Besel's book, Custom Confections: Delicious Desserts You Can Create and Enjoy, to review and, as usual, I am thankful for any reason to bake. Part of what really had me excited about the book was that it claimed to have recipes that were easy enough for kids. Now that my girls are older, especially Cati at almost 4.5 years old, they are very interested in everything that I do in the kitchen and are constantly asking to help add and mix ingredients. As soon as Cati saw the book she grabbed it, sat down, and started leafing through the pages. Right off the bat, the book's cover is eye-catching and I can't blame Cati for being immediately drawn to it.
The meaning behind the name, Custom Confections comes from Besel's view that everyone can make custom desserts. With this view, Besel has developed recipes with easy-to-find ingredients, short prep time, and shortcuts to creating showstopping desserts. The book is divided into five sections and includes recipes for everything from cakes to cookies to bars to popsicles to frosting. Like a good cookbook (or at least my favorite ones), there s a conversion chart and a list of tools that not only are useful for a fully stocked kitchen, but also for making the recipes in Custom Confections.

Aesthetically, the book is gorgeous to look at with pictures for every single recipe and fun colors and fonts. For the majority of the recipes you can lay the book flat on the counter and have the picture on one side and the recipe on the other. For someone who has baked as much as I have, it's always been a bit of a pet peeve when recipes are pages long and I have to flip back and forth to check the ingredient list and see where it matches up with the directions. Besel gives a one-sentence intro/commentary to every dessert, making you want to try every single dessert.

The only issue I had with the book was that the serving amount wasn't identified or clear. This is an issue for me because I usually cut recipes down so we don't have too many sweets in the house at a given time.

As part of my review I picked five recipes from the book. Recipes were chosen based on what I thought the family would like, tools I had, ease of making, and involvement of kids. The five recipes were Molten Caramel Cake, PB & J Cheesecake Brownies, Stained Glass Cookies, Stuffed Strawberries, and Ooey, Gooey Turtle Cake.

Molten Caramel Cake

Eight ingredients, 10 steps, and about 20-25 minutes from prep to table. Cati was able to help with unwrapping the caramel candies, adding them to the batter, and sprinkling with sea salt. This recipe was, by far, the favorite for everyone in the family. I baked for 12 minutes, but my cakes (4) could have used an extra minute or two in the oven. The leftover cake was put in the fridge and reheated the next day and tasted just as good as it did fresh out of the oven. This dessert is perfect for the chocolate lover and I loved that sea salt was added as caramel-sea salt is one of my favorite combinations. I've made molten cakes before and, while they are one of my favorite desserts, I rarely make them because the recipes I have tried before have been too involved. This recipe solves that problem for me and now molten cakes will be a dessert that I make more frequently.

PB & J Cheesecake Brownies

Nine ingredients, eight steps, and at least 40 minutes from prep to table. Instead of making an 8x8 pan of brownies, I made 12 brownie cups, quartered the cream cheese recipe, and added PB & J to half of the cups so that I could get a good taste of the finished cheesecake (plus, I'm not a fan of peanut butter in desserts). I also added a chocolate drizzle to the cups to make them look even prettier. The cups baked for 25 minutes and neither of the girls helped with the prep work for this dessert. The finished dessert was a hit and it was hard to get the girls to only have one for dessert. The brownie portion is made from a mix, but the cheesecake is made from scratch and, when baked, the cheesecake was smooth and didn't crack when cooled! The only thing I would change about this recipe is heating up the jam before putting it in the cheesecake mixture so that it mixes easier.
 

Stained Glass Cookies

Four ingredients, eight steps, and about 25 minutes from prep to table. This recipe was probably the funnest one for the girls as they got to unwrap the candies, help break them up into small pieces, place them in the hole of the cookie, and decorate their own cookies. They even sat in front of the oven, looking in to watch the candy melt. Once the cookies were out of the oven I was surprised by how hard the candies were! For some reason, I thought the candies would melt and become more pliable, but once cooled, the melted candy became hard again. My mistake with this recipe was thinking I had cookie cutters when I went to buy the ingredients and not actually checking to see if I did so my cookies did not end up with the wide opening I would have wanted. 

Stuffed Strawberries

Five ingredients, eight steps, and about 20 minutes from prep to table. I made half the filling recipe and had enough filling to "stuff" a dozen small- and medium-sized strawberries. The girls helped with this recipe by eating the cut-off tips. The finished product was so beautiful that it was almost a shame to eat. But eat them we did, and I am so happy we did because the strawberries were delicious and I fell in love with the tart-tangy-sweet combination. We ate all the stuffed strawberries in one sitting so I would call this recipe a complete success.
 
Ooey, Gooey Turtle Cake 

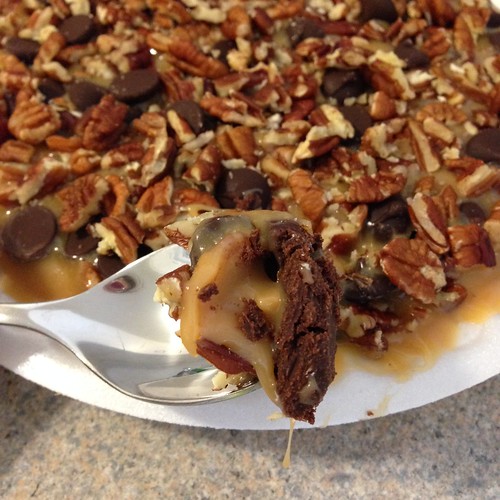
Five ingredients, nine steps, 10 minutes prep, and a torturous four hours to table. I made half the recipe and refrigerated the cake to expedite the process. The girls helped with unwrapping the caramel candies and sprinkling the cake with the pecans. I will warn you now, this dessert is completely addictive and incredibly dangerous. This was the simplest of the recipes I tried and, along with the Stuffed Strawberries, one of the recipes that I think best exemplifies Besel's efforts at creating easy-to-make custom desserts.
Custom Confections: Delicious Desserts You Can Create and Enjoy by Jen Besel will be available for purchase September 1st, 2014 for $12.95 USD ($14.95 CAD).

A copy of this book was provided to me by IWPR and the publisher, Capstone Young Readers, free of charge. The views and opinions in this review, however, are my own.

For more on my baking adventures follow me on Facebook and Instagram @thecookierunner. 
Stephanie

Wednesday, January 22, 2014

Vote for my post on Mom Blog Network

Giveaway Winner & Consolation Cookies

A solid two days late posting the winner. Yikes! I used to be a punctual person, but lately, I am always late. Late to school. Late for internship. Late to dinner. Late to blog. Late. Late. Late. To be fair, I have a lot going on. The 31st is my fundraising deadline and to help me reach my goal, I decided to plan another Cupcake Camp Miami event. Except, instead of giving myself three months to plan the event, I only gave myself one. So I've been busy and my priorities have been a little scrambled. I am so looking forward to stuffing my face with cupcakes this weekend!

According to good old random.org, the winner of the giveaway is Jessie Emeric!

Thank you to everyone who entered the giveaway. Winner, make sure to email me at confessionsofacityeater@gmail.com so I can get that entry code to you.

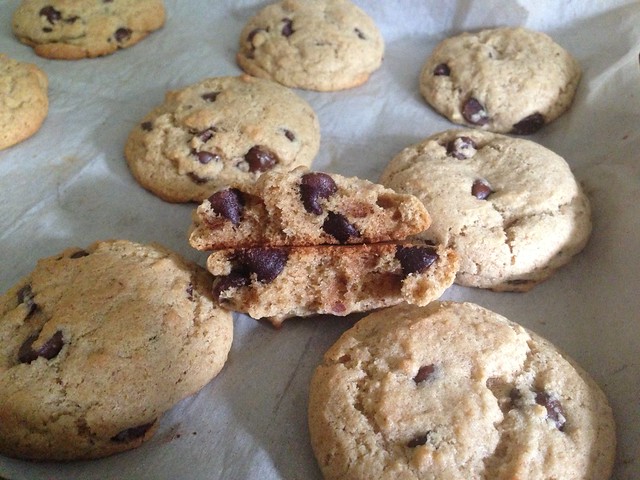
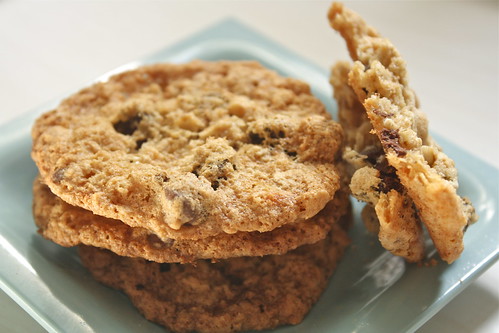
For all my non-winners out there I bring you some chocolate chip cookies. I love trying different variations of chocolate chip cookies and couldn't resist this recipe that used sea salt. The finished cookie was a hit with Alex as it was crispy and chewy. I was just happy to have "regular" chocolate chip cookies in the house!

Chocolate Chip Cookies
Source: Savory Sweet Life 
Yields 48 Cookies

1 cup (2 sticks) salted butter, softened
½ cup sugar
1½ cup packed brown sugar
2 eggs
2 tsp. vanilla extract
2¾ cups (12 oz) all-purpose flour
¾ tsp. smallish-medium coarse sea salt
1 tsp. baking soda
1½ tsp. baking powder
2¼ cups semi-sweet chocolate chips

Preheat oven to 360 degrees. Line two baking sheets with parchment paper.

Cream butter, sugar, and brown sugar until it is nice and fluffy, about 3 minutes. Add eggs and vanilla and beat for an additional 2 minutes. Add baking soda, baking powder, salt, and flour until cookie batter is fully incorporated. Finally add chocolate chips until well distributed.

Using a medium cookie scoop, drop the batter onto a baking sheet lined with parchment paper. There should be 2 inches of space between drops. Bake for 12-14 minutes until the edges are golden brown.

Remove from over and allow the cookies to stay on the cookie sheet for an additional 2 minutes. Transfer cookies to a cooling rack and allow the cookies to cool before serving.
Follow me on Facebook and Instagram! Instagram

Stephanie

Wednesday, January 8, 2014

Vote for my post on Mom Blog Network

Whiskey-Bacon Chocolate Chip Cookies

I don't let bacon go to waste so you know I saved the bacon used in my whiskey infusion. I also don't like to let bacon fat go to waste either so I had a container in the fridge just begging to be used. Enter this recipe and we have a match made in bacon heaven. I had always been curious about bacon chocolate chips and really didn't know what to expect out of these cookies, especially since the bacon wasn't regular bacon but whiskey tasting bacon. The cookies are definitely a novelty and not anything I would be able to eat a ton of in one sitting, but they sure were good. Alex didn't like the cookies but everyone else who tried them did like the cookies. If you want to start a conversation, definitely give someone one of these cookies!

Whiskey-Bacon Chocolate Chip Cookies
Source: Slightly adapted from Recipe Girl
Yields 2 dozen cookies

Half of leftover whiskey-infused bacon
1 1/4 cups all-purpose flour
1/2 teaspoon baking soda
1/2 teaspoon salt
1/8 teaspoon baking powder
1/4 cup unsalted butter, at room temperature
1/4 cup bacon fat, chilled
6 Tbsp granulated white sugar
6 Tbsp packed brown sugar
1 1/2 Tbsp whiskey
1/2 teaspoon vanilla extract
1 large eggs
1/2 cup chocolate chips

Preheat the oven to 375 degrees F. Line two baking sheets with parchment paper.

In a medium bowl, whisk together the flour, baking soda, salt and baking powder.

In a separate large bowl, use an electric mixer to combine the butter, bacon fat, sugars, whiskey and vanilla. Mix in the eggs, one at a time, until well combined. Beat in the flour mixture. Then stir in the bacon and chocolate chips.

Drop by rounded tablespoonfuls onto parchment or silpat-lined baking sheets- about 2 inches apart. Bake 9 to 11 minutes, or until the cookies are lightly browned.

Remove from oven and let stand on the cookie sheets for about 5 minutes, then remove the cookies to a cooling rack to cool completely

Store cookies in an airtight container for up to 5 days, or store in a covered container or zip bag in the freezer for up to 6 weeks.
Follow me on Facebook and Instagram! Instagram

Stephanie

Friday, November 22, 2013

Vote for my post on Mom Blog Network

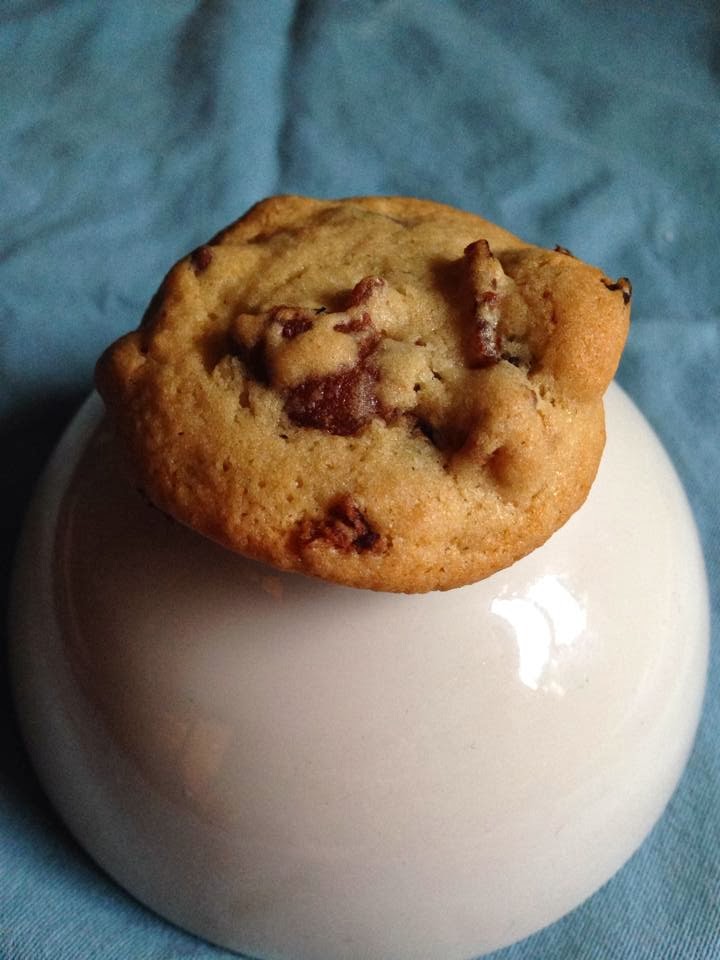
Salted Caramel Chocolate Chip Cookies

Around Halloween Target had caramel squares on sale. I bought them. I didn't know what I was going to do with them but I figured I would find something. After a particularly stressful day this week, I asked the family what they wanted me to bake them and they all said, "cookies." I decided I would find a recipe using caramel squares and make them cookies. Imagine my happiness when I found a caramel chocolate chip cookie recipe. I love chocolate chip cookies! These cookies were simply amazing. Everyone loved them and you could tell right off the bat they had caramel in them. Cati has already requested that I make them again!

Salted Caramel Chocolate Chip Cookies 
Source: Two Peas and Their Pod
Yields: 3 dozen cookies

2 cups all-purpose flour
2 teaspoons cornstarch
1 teaspoon baking soda
1/2 teaspoon sea salt
3/4 cup unsalted butter, at room temperature
1 cup brown sugar
1/4 cup granulated sugar
1 large egg
2 teaspoons vanilla extract
1 cup semi-sweet chocolate chips
1/2 cup Kraft Caramel Bits (or chopped up caramel squares)
Sea salt, for sprinkling on cookies

Preheat oven to 350 F. Line a large baking sheet with a Silpat baking mat or parchment paper and set aside.

In a large bowl, whisk flour, cornstarch, baking soda and sea salt together. Set aside.

In the bowl of a stand mixer, cream together butter and sugars until smooth and creamy, about 3 minutes. Add egg and vanilla extract and beat until combined. Slowly mix in the dry ingredients.

Stir in the chocolate chips and caramel bits. Form cookie dough into tablespoon balls and place on prepared baking sheet, about 2 inches apart. Sprinkle each cookie with sea salt.

Bake cookies for 10 minutes, or until slightly golden brown around the edges. Let the cookies cool on the baking sheet for two minutes. Transfer to a wire cooling rack and cool completely.
Follow me on Instagram! Instagram

Stephanie

Thursday, September 26, 2013

Vote for my post on Mom Blog Network

Pumpkin Week: Pumpkin Oatmeal Chocolate Chip Cookies

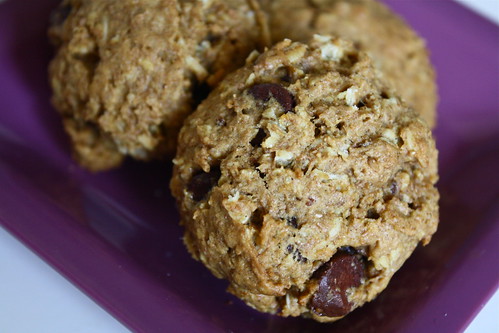
Day two of Pumpkin Week and this just might be my favorite pumpkin recipe of the week. I'm a cookie lover, especially a chocolate chip cookie lover, so this recipe was a no brainer for me. The cookies were super soft cookies and subtle in their pumpkin flavor. I think me eating about six cookies right out of the oven is proof enough of how great the cookies were. The kids loved them too!


Day 1: Pumpkin Bread


Pumpkin Oatmeal Chocolate Chip Cookies
Source: The Sweet Life
Makes 18 cookies

1 cup flour
1 cup rolled oats
1/2 tsp baking soda
1/2 tsp baking powder
1 tsp cinnamon
1/8 tsp ginger
1/8 tsp nutmeg
1/8 tsp cloves
1/4 tsp salt
1/2 cup butter
1/2 cup brown sugar
1/2 cup white sugar
1/2 cup + 3 Tbsp pumpkin puree
1/2 tsp vanilla extract
1/2 cup chocolate chips


Preheat oven to 350 degrees F. Line two baking sheets with parchment paper or a silicone mat.
In a medium bowl combine flour, oats, baking powder and soda, spices, and salt. Mix together and set aside.
In a large bowl, with a handheld mixer or stand up mixer, beat the butter and sugars together until light and fluffy. Add pumpkin puree and vanilla. Stir to combine.  Slowly add the dry ingredients, mixing together until combined. Fold in the chocolate chips.
Drop cookies onto baking sheet, about 2 tbsp each. Press down lightly and bake for 10-12 minutes, until edges golden.

Follow me on Instagram! Instagram

Stephanie

Friday, June 14, 2013

Vote for my post on Mom Blog Network

Running for Charity & Cookies!

IMG_0810
It's summer break! I am simultaneously excited about and overwhelmed by spending all summer long with both girls at home. In the last week alone, we have  gone to the zoo once, the beach once, and the seaquarium twice. The playground has become an almost daily occurrence. I'm exhausted by the end of the day and, needless to say, so are the girls. But, oh are they having fun. My brain can't keep up in its efforts to record into memory all the funny, sweet, and cute things the girls are doing.

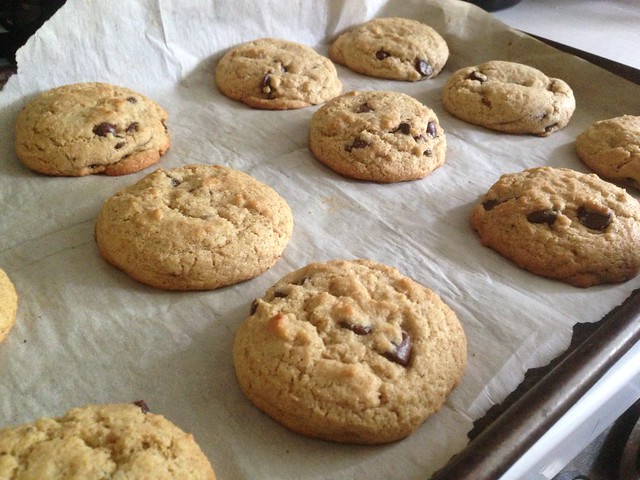
To help combat the long days and give us a healthier sweet snack, I came up with this Whole Wheat Protein Chocolate Chip Cookie. I've made these cookies twice in as many weeks and everyone in the house loves them. Well, almost everyone because Alex says "they taste healthy." These cookies fall on the thick-and-chewy spectrum of chocolate chip cookies. I don't taste healthy like Alex does, but I do taste deliciousness, especially when they are eaten straight out of the oven.


IMG_0804

In other news, I decided to run for charity for next year's Disney Princess Half Marathon. I'll be doing the Glass Slipper Challenge, which is a 10k (6.2 miles) on Saturday and the half-marathon (13.1 miles) on Sunday and I am really excited. I've never ran that much in back-to-back runs so the training is going to be fun. My goal is to raise $3,000 for Give Kids The World so if you can make a donation, please do so! And please feel free to share. This is my Fundraising Page. I'm nervous about running for a cause this time around and really hope I am able to meet my fundraising goals. Talk about giving myself an extra challenge! Now all my training runs will have much more meaning. 


Protein Oatmeal Chocolate Chip Cookies
Source: Me! 
Yields: 12 Cookies
1/2 cup white flour
1/2 cup whole wheat
1/4 cup protein powder
1 tsp baking soda
1/4 tsp salt
6 tbs unsalted butter, softened 
1/4 cup granulated sugar
1/4 cup brown sugar
1 egg
2 tsp vanilla extract

1- to 3/4-cup  semi-sweet chocolate chips

Preheat oven to 350 degrees. Line two cookie sheets with parchment paper.


Combine with the flours, protein powder, baking soda, and salt in a small bowl. 


In a large bowl, cream the butter and sugar until fluffy, about 2 minutes. Add the egg and vanilla and beat for a minute.


Mix in the dry ingredients until combined and then stir in the chocolate chips. (The dough may appear sandy but it comes together once packed into the cookie scoop.)


Scoop out tablespoon-sized balls of cookie dough and place on the cookie sheets, about 3 inches apart. Bake for 12-15 minutes or until golden. Remove from oven and allow to cool some before eating. 


Enjoy!
Stephanie


Tuesday, April 23, 2013

Vote for my post on Mom Blog Network

Red Velvet Chocolate Chip Cookies

IMG_2750
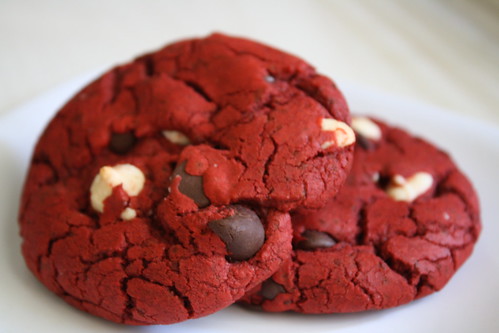
It's been a long time since I posted. Way too long. Between the girls and school, I've been finding it hard to come up with real "me time." The semester ends next week so hopefully I'll be able to get back to a more stable routine that includes more time focusing on the things I enjoy doing, such as baking and blogging. Or at least a few weeks of overindulging before the grind of a new semester gets going.

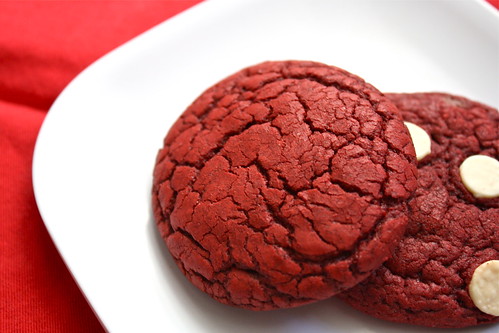
Apparently, I have a bit of an obsession with red velvet cookies and I have made four different types of red velvet cookies in the past year, including this one (red velvet crinkle cookies, red velvet cookies, and red velvet cookies with cream cheese frosting). This recipe is actually very similar to one of the other ones I made, but, if I remember correctly enough to compare, these cookies were more chewy than the other ones. These cookies were so good that I have spent the last 24-hours in between paper writing thinking about making these cookies again. Seriously, give these easy cookies a try.

Red Velvet Chocolate Chip Cookies 
Source: How Sweet It Is 
Yields about two dozen cookies

1 box Red Velvet cake mix
2 eggs
1 teaspoon vanilla
1/3 cup vegetable oil
1/2 cup semisweet chocolate chips
1/2 cup white chocolate chips

Preheat oven to 350.

Combine cake mix, oil, eggs, and vanilla. Mix until a dough forms. Fold in chocolate chips.

Roll into balls and bake at 350 for 8 minutes.
Stephanie

Monday, February 25, 2013

Vote for my post on Mom Blog Network

Red Velvet Crinkle Cookies

IMG_2590
If I could describe things right now in one word it would be overwhelming. A third of the way through the semester and I am still worried about managing it all. Cati broke her collarbone close to four weeks ago and that was scary. Luckily, she is almost 100% healed and I am looking forward to planning the girls a very delayed birthday party. Despite all the feelings of being overwhelmed, I have been in search of moments of happiness that help drive me through the long days. One of those moments came when I made these cookies. Cati helped mix the batter, spoon out dough, and rolled each cookie in powdered sugar. Tantrums were suspended for an hour and I was able to remember how awesome of a kid Cati has become. The tantrums of a three-year old are so much worse than the tantrums of a two-year old and it was wonderful having a moment of clarity and simply being with my daughter. Then, it was great sitting on the floor with her and eating these soft cookies together.

Red Velvet Crinkle Cookies
Source: Two Peas and their Pod
Yields: 24 cookies

 1 box red velvet cake mix (I used Duncan Hines)
2 tablespoons all-purpose flour
2 large eggs
1/2 cup canola oil
1 teaspoon vanilla extract
Powdered sugar, for rolling the cookies

Preheat oven to 350 degrees F. Line a large baking sheet with parchment paper or a Silpat and set aside.

In a large bowl, combine cake mix and flour. Whisk until clumps disappear. In the bowl of a stand mixer, mix together cake mix, flour, eggs, oil and vanilla extract. Mix until smooth.

Take about 1 tablespoon of cookie dough and form into a ball. Roll the ball in powdered sugar until fully coated.

Place cookie dough balls on prepared baking sheet. Bake for 10 minutes, or until edges are set and cookies begin to crack.

Let cookies sit on baking sheet for 2 minutes. Transfer cookies to a wire cooling rack and cool completely.
Stephanie

Wednesday, December 19, 2012

Vote for my post on Mom Blog Network

Protein Oatmeal Chocolate Chip Cookies

IMG_2388
I'm trying to combine the two things that I love to do for myself: fitness and baking. Now that I'm trying to be more fit and live a healthier life, I'm constantly on the search for recipes that taste good and sneak in extra goodness for the body. I guess this is a natural follow-up to the lactation-friendly recipes I used to make that loaded up on the flaxseed and Brewer's yeast. This particular recipe is great because it has protein and it actually tastes really good. So good in fact, that Alex didn't even realize there was protein in the cookies and Cati loved eating the cookies. I made my cookies thin and crispy because that's how the majority of people in my household like them, but if you want a denser cookie, you can simply add more oats. Next time I make these cookies I will be adding whole wheat flour just so I can get even more goodness in them.
IMG_2388

Protein Oatmeal Chocolate Chip Cookies
Source: Slightly adapted from Dashing Dish

2 cups oats
1/4 cup protein powder
1 tsp baking soda
1/4 tsp salt
6 tbs unsalted butter, softened 

3/4 cup granulated sugar
1 egg
2 tsp vanilla extract
3/4 cup  semi-sweet chocolate chips

Preheat oven to 350 degrees. Line a cookie sheet with parchment paper.


Place 1/2 of the oats (1 cup) in a food processor, and grind until oats are ground into a flour. Combine with the rest of the oats, protein powder, baking soda, and salt. 

In a large bowl, cream the butter and sugar until fluffy, about 2 minutes. Add the egg and beat for a minute. Add the vanilla and mix for another minute.


Mix in the dry ingredients just until combined.  Stir in the chocolate chips. 

Scoop out teaspoon-sized balls of cookie dough. Place on the cookie sheet, about 3 inches apart (these cookies spread quite a bit). Bake for 10-12 minutes or until golden. Remove from oven and allow to cool. 


PS don't forget about the giveaway!
Stephanie

Monday, November 19, 2012

Vote for my post on Mom Blog Network

Red Velvet Cookies

IMG_2085
So I have been on a bit of a red velvet kick around here. Soon after making the red velvet brownies I went ahead and made these cookies. The best part about this recipe was its simplicity of ingredients. For as much as I like baking things 100% from scratch, I also enjoy baking things that come together quickly by using cake mix. The original recipe had these cookies rolled in powdered sugar but instead of doing that I added white chocolate chips. I'd say that was a great change and now I can add red velvet chocolate chip cookies to my chocolate chip cooking baking obsession.

Red Velvet Cookies 
Source: The Novice Chef
Yield about two dozen cookies

6 tablespoons butter, melted and cooled
2 large eggs
18.25 oz box Red Velvet Cake Mix
1/2 to 3/4 cup white chocolate chips

 Preheat oven to 375°F and line two cookie sheets with a silicon mat or parchment paper.

In a large bowl, combine butter, eggs and red velvet cake mix until there are no large lumps left. Stir in white chocolate chips.

Roll dough into 1 inch balls (about 1 tablespoon worth of dough) and place on cookie sheets, leaving about 2 inches for spreading.

 Bake for 8-10 minutes, or until the tops have cracked and the tops look set (the centers will still be gooey). Let sit for 5 minutes and then transfer to a cooling rack. Serve warm or store in an airtight container for up to 5 days.
Stephanie

Thursday, November 8, 2012

Vote for my post on Mom Blog Network

M&M Confetti Cookies

IMG_1973
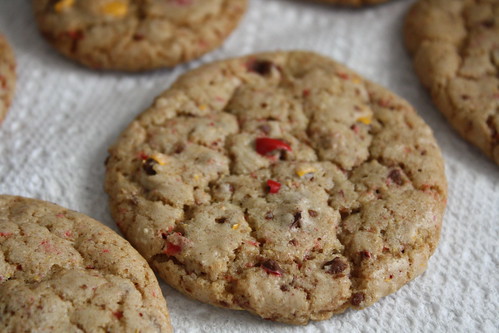
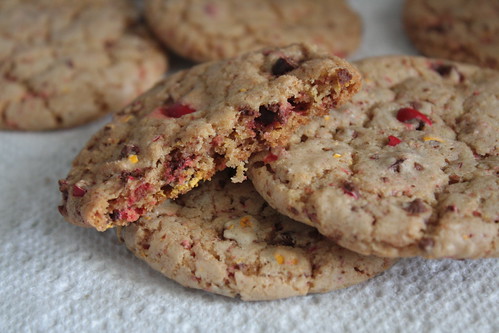
I have been baking and, at the same time, I really haven't been baking. I bake about once a week now and it's usually cookies because I like to bake cookies and they seem to be the type of dessert that fits in well with our lifestyle, especially the grab-and-go lifestyle of two kids almost always on the move. I came across this recipe and knew I would wait until a special day to make them for Cati because M&Ms are her favorite candy. I made these while she was at school and, as soon as she was strapped into her car seat, I told her I had something special waiting for her at home. The funny thing is that she somehow knew I had baked cookies. The best part is that she knew exactly what was in the cookies just by looking at them. These cookies are crunchy and chewy and were a big hit at home and at my school. I can't wait to make them again with more colorful M&Ms. 
IMG_1995


M&M Confetti Cookies
Source: Just Baked
Makes about 30 cookies 

2 cups plus 2 tablespoons (10 5/8 ounces) unbleached all-purpose flour
1/2 teaspoon baking soda
1/2 teaspoon salt
12 tablespoons (1 1/2 sticks) unsalted butter, melted and cooled until warm
1 cup packed (7 ounces) light brown sugar   
1/2 cup (3 1/2 ounces) granulated sugar
1 large egg and 1 egg yolk
2 teaspoons vanilla extract
8 oz bag of M & Ms, crushed (more or less to your liking)

Adjust the oven racks to the upper- and lower-middle positions.  Preheat the oven to 325 degrees. Line 2 large baking sheets with parchment paper.

Whisk the flour, baking soda, and salt together in a medium bowl. Set aside.

Either by hand or with an electric mixer, mix the butter, brown sugar, and granulated sugar until thoroughly blended. Beat in the egg, the yolk, and vanilla until combined. Add the dry ingredients and beat at low speed (or mix by hand with a spatula) just until combined. Crush the M&Ms in a big Ziploc bag with a rolling pin (or any other heavy object you have handy) . Stir in the crushed M&Ms.

Using a cookie scoop, scoop out dough and place on the prepared baking sheets, spacing them 2 1/2 inches apart. 

Bake until the cookies are light golden brown, the outer edges start to harden, and  yet the centers are still soft and puffy, about 15 minutes, rotating the baking sheets front to back and top to bottom halfway through the baking time. Cool the cookies on the sheets.  Remove the cooled cookies from the baking sheets with a wide metal spatula.
Stephanie

Monday, October 8, 2012

Vote for my post on Mom Blog Network

Pumpkin Lactation Cookies

Pumpkin Lactation Cookies
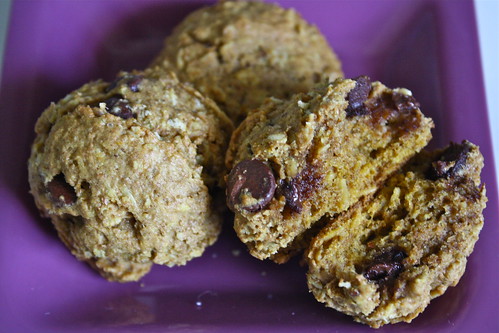
A couple of months ago my good friend sent me two of these cookies. She made them for herself and wanted to share their deliciousness with me. I'm so glad she did because if I would have come across this recipe on my own I would have thought twice about making it myself. I like pumpkin in desserts but I'm still not sure what desserts exactly I like pumpkin in. The pumpkin flavor in the cookies is mild and what the pumpkin really does for these cookies is make them soft and cakey.
Pumpkin Lactation Cookies

Pumpkin Lactation Cookies
Source: WhyClothDiaper.com
Yields about 6 dozen cookies

4 cups whole wheat flour
3 cups old-fashioned oats (uncooked)
2 tsp baking soda
3 tsp cinnamon
1 tsp sea salt
1 1/2 cups unsalted butter (softened)
2 cups firmly packed brown sugar
4 Tbsp water
1 Tbsp flaxseed meal
2-4 Tbsp brewer’s yeast
1 egg
1 tsp. vanilla
1 16oz. can of pumpkin
1 cup semi-sweet chocolate chips
1 cup chopped walnuts or pecans (I omitted)

Preheat oven to 350 degrees.

In a small bowl combine the water and the flaxseed meal; let sit for 5 minutes.

In one bowl, combine flour, baking soda, yeast, cinnamon, and salt. Set aside.

In a large mixing bowl, beat the softened butter until creamy. Slowly beat in the sugars. Add vanilla, egg, and flaxseed mixture. Beat until smooth. Add pumpkin and mix well. Slowly add your dry ingredients and beat until well mixed. Stir in oats, chocolate chips, and nuts.

Place dough in 1.5 inch lumps, 1-2 inches apart, with a medium scoop. You can use a spoon, but the scoop makes awesome looking cookies! Bake for 13-15 minutes on an ungreased cookie sheet. Remove from oven and transfer from cookie sheet immediately to a cooling rack.
Stephanie

Saturday, October 6, 2012

Vote for my post on Mom Blog Network

The Best Chocolate Chip Cookies Ever

IMG_9581
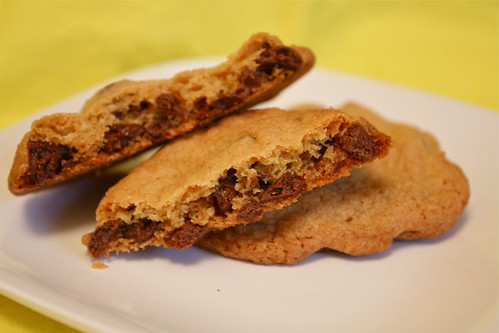
Here's a crispy chocolate chip cookie recipe for you. You can never go wrong with any chocolate chip cookie recipe and because of that I've made so many different kinds. It took me copying the recipe into this post to realize that I did something different. Instead of using dark brown sugar, I used light brown sugar. I've never used dark brown sugar in a chocolate chip cookie recipe so I will definitely be trying this recipe again just to taste the difference in flavor.

The Best Chocolate Chip Cookies Ever
Makes 4 dozen cookies
Source: My Kitchen Addiction

1 cup (2 sticks) unsalted butter, at room temperature
1/2 cup granulated sugar
1 1/2 cups firmly packed dark brown sugar
2 eggs
2 teaspoons pure vanilla extract
2 3/4 cups all purpose flour
1 1/2 teaspoons baking powder
1 teaspoon baking soda
3/4 teaspoon sea salt
2 1/4 cups semisweet chocolate chips

Preheat the oven to 360°F.  Line a cookie sheet with parchment paper.

Using a hand or stand mixer, cream the butter, granulated sugar, and brown sugar together on medium-high speed for 3 minutes, until nice and fluffy.  Beat in the eggs one at a time, then add the vanilla, and mix for 2 minutes.  Reduce the mixer speed to medium-low and add the flour, baking powder, baking soda, and salt.  When the cookie dough has absorbed the dry ingredients, stir in the chocolate chips and mix until they are well distributed.

Drop 2 tablespoons of dough (or use a medium cookie scoop) onto the cookie sheet for each cookie, spacing them 2 inches apart.  Bake for 15 minutes, or until the edges are nice and golden brown. Remove the cookie sheet from the oven and allow the cookies to cool for 2 minutes.  Then, slide the parchment paper, with the cookies still on top, onto a wire rack to cool completely.
Stephanie

Saturday, September 29, 2012

Vote for my post on Mom Blog Network

Dulce de Leche Chocolate Chip Cookies

IMG_0276
After I made dulce de leche at home I realized I had nothing to do with it other than eat it straight. I went in search for dulce de leche recipes and came across this recipe that made me stop looking. I cannot resist a chocolate chip cookie and I promise if you make these you won't be able to resist either. The dulce de leche gives the cookies another layer of salty and sweet. Plus, the cookie itself so great that you can make it without the dulce de leche and still enjoy.

Dulce de Leche Chocolate Chip Cookies
Source: My Madison Bistro
http://mymadisonbistro.com/archives/dulce-de-leche-chocolate-chip-cookies

8 tablespoons unsalted butter
1/2 cup light brown sugar, packed
1/4 cup granulated sugar
1 large egg yolk
1 teaspoon pure vanilla extract
1 cup all purpose flour
1/2 teaspoon baking soda
1/2 teaspoon salt
1 cup semi-sweet chocolate chips
1 can dulce de leche (I used about half a cup)
Preheat oven to 375F/190C. Line baking sheet with parchment.
In medium bowl, cream butter and sugars until fluffy, about 3-4 minutes. Add the egg yolk, stir until incorporated. Add vanilla, stir to combine.
In a small bowl, sift the flour, baking soda, and salt. Add to the sugar mixture and stir until just a few streaks of flour remain. Add chocolate chips, fold to combine.
Divide the dough into 12 balls. Flatten each ball and spoon a small amount of dulce de leche in the center. Wrap dough around the caramel to reform a ball and seal the edges. Repeat with remaining dough.
Bake 9-13 minutes and cool slightly on pan.
Stephanie

Friday, September 21, 2012

Vote for my post on Mom Blog Network

Funfetti Cookies

IMG_9764
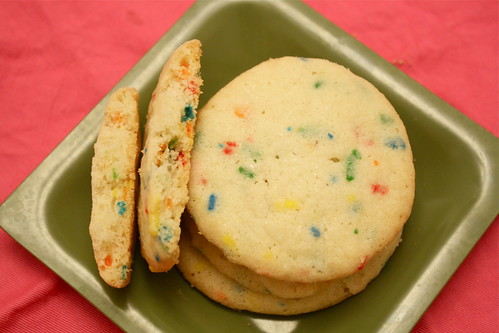
I don't think you can ever go wrong with anything funfetti. Sprinkles alone make these kinds of recipes fun to make. I personally loved these cookies and found them to be really buttery. Alex, on the other hand, continues his unlike-relationship with almond extract and wasn't a fan of the cookies. The recipe calls for two types of sprinkles but I only used jimmies.

Funfetti Cookies
Source: Two Peas and Their Pod on Tasty Kitchen
Yields:

1 cup Butter, Room Temperature
1-¼ cup Sugar
2 teaspoons Vanilla Extract
1 teaspoon Almond Extract
1 whole Egg
2-½ cups Flour
¼ cups Cornstarch
¾ teaspoons Baking Soda
½ teaspoons Salt
½ cups Rainbow Jimmie Sprinkles
2 Tablespoons Nonpareil Sprinkles

Preheat the oven to 375ºF.

Cream the butter and sugar in your stand mixer (or hand mixer) for about 2 minutes, until fluffy. Add the vanilla, almond, and egg. Beat until well combined.

In a separate bowl, sift in the flour, cornstarch, soda, and salt. Slowly add the flour mixture to the butter mixture, and continue on low speed until it’s all added and combined. Mix in the sprinkles (don’t overmix or the sprinkles will start to bleed into the dough).

Using an ice cream scoop, scoop cookie dough onto cookie sheets, about 1 1/2 inches apart (fits 8 cookies per sheet). Bake for about 15 minutes. (Note: Only bake until they very slightly start to turn light golden brown just on the edges. You don’t want them to totally turn golden or they’ll be crisp cookies. Check them around 10 minutes, then 12, and so on.)

Cool on a wire rack. Store in an airtight container up to 4 days.
Stephanie