Showing posts with label Random Sweets. Show all posts

Saturday, August 16, 2014

Vote for my post on Mom Blog Network

Miami to Chicago: Arroz Con Leche

 I finally did it. I made a dessert that I grew up eating and it actually tasted just like the dessert my mom used to make. I grew up eating Arroz Con Leche and have great memories of standing by the stove in the kitchen watching the rice cook into a sweet and sticky dessert. The last time I tried to make Arroz Con Leche it took forever and my rice was hard so I gave up on this dessert. Then, shortly after moving to Chicago I went to my aunt's house and she made it and I was inspired to try again. I ended up making this recipe because it was so simply and simple is what I remember my mom doing with few ingredients. The end result was amazing and everyone in the family was singing my praises the day I made this Arroz Con Leche. Making this dessert was a reminder that traditions and culture are not limited to a physical place, but are actually something we can carry with us wherever we go.

Arroz Con Leche
Source: Taste of Home
Serves 4

1-1/2 cups water
1/2 cup uncooked jasmine rice
1 cup sweetened condensed milk
Ground cinnamon, to taste

In a small saucepan, combine the water and rice. Bring to a boil. Reduce heat; simmer, uncovered, for 15-20 minutes or until water is absorbed.

Stir in milk. Bring to a boil. Reduce heat; simmer, uncovered, for 10-15 minutes or until thick and creamy, stirring frequently.

Serve warm or cold. Add cinnamon to taste.

For more on my move to Chicago and my baking adventures, follow me on Facebook and Instagram @thecookierunner 
Stephanie

Friday, June 27, 2014

Vote for my post on Mom Blog Network

Easy Chocolate Mousse

 
The majority of our things are on their way to Chicago. It's hard to believe that the time is nearing for our big move up north. It's even harder for me to believe that this is the second big interstate move in five years and third in nine years. First it was Boston and now it's Chicago; I'm starting to think the north really wants us.

One of the frustrating things about this move has been having to plan what goes, what stays, and what we can live without for two weeks. A lot of my kitchen things went up so I am left having to be creative and making recipes that don't require much kitchen equipment. This recipe for Chocolate Mousse fits that bill perfectly as it doesn't require baking and the ingredients are minimal. The best part is that it comes together quickly and tastes amazing.

 
Easy Chocolate Mousse
Source: WonkyWonderful
Serves 4

16 oz cold heavy cream
2 Tablespoon powdered sugar
1½ cup semi-sweet chocolate chips

Melt chocolate chips in the microwave, stopping every 30 seconds to stir. Once the chocolate is melted, set aside to cool slightly.

Whip the heavy cream in your stand mixer using the whisk attachment until it thickens and peaks appear.

Add the powdered sugar and melted chocolate. Whip for another 30 seconds or until the mousse is thick and fully blended.

Transfer to serving dishes. Garnish with whipped cream or chocolate shavings. Serve and enjoy.

Note: the Mousse can also be refrigerated and served later.
Follow me on Facebook and Instagram @thecookierunner 
Stephanie

Monday, May 19, 2014

Vote for my post on Mom Blog Network

Spartan Up! with a Whiskey Caramel Sauce

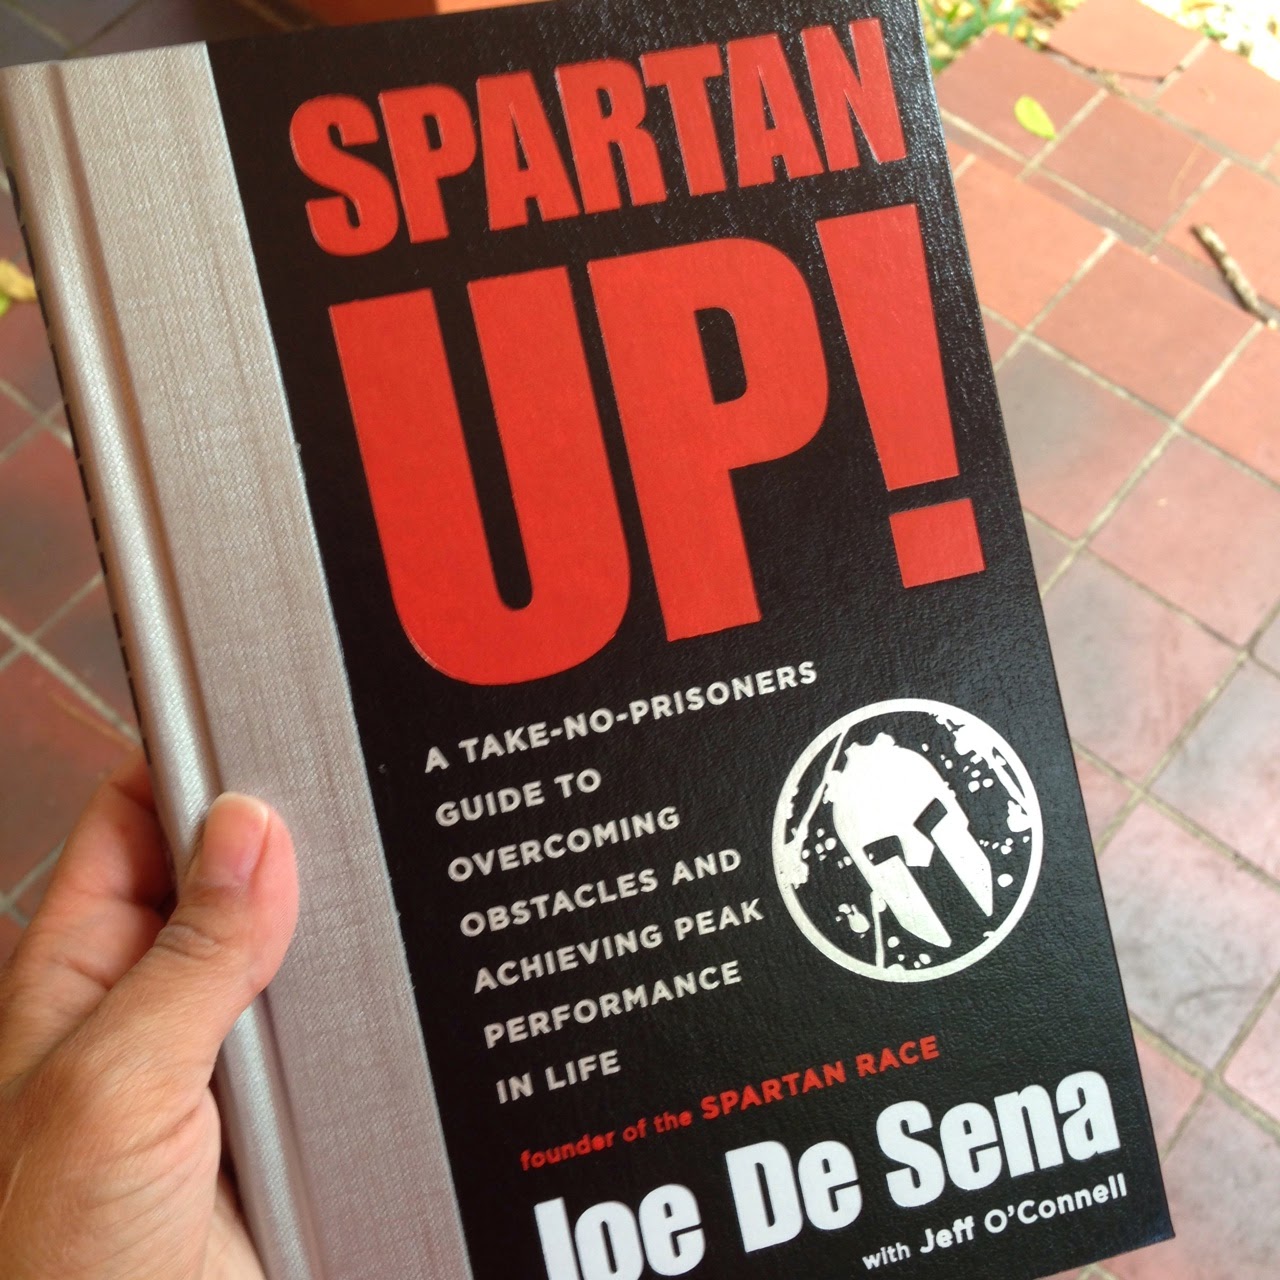
Today has been a great day. I had an awesome workout this morning, I was able to catch up on this poor neglected blog before lunchtime, and I've handled tantrums so well today that I actually looked forward to picking up the girls from school. On top of that, I received my copy of Spartan Up!, the new book from Joe De Sena, the founder of Spartan Race. If you didn't know, running a Spartan Race is on my bucket list of races and I'm hoping to cross that off my list come September with the Chicago Super.  I can't wait to read the book and find more gems like this one:


"If you don’t shift your frame of reference, 
you become closed off to the 
magic and joy life has to offer." 

To celebrate today and really make it great, I got in the kitchen and whipped up my favorite caramel sauce. I was talking about it with a friend yesterday and, then today, I thought "Why wait? Why not today?" In the last week, I have felt like a very strong runner, I have gotten in the kitchen to bake three times, and I started reading a new book. I am loving not having the responsibility of school or clients anymore and am starting to feel a little more like myself. 


Whiskey Caramel Sauce
Source: Jill O'Connor's Sticky, Chewy, Messy, Gooey
Makes 1 cup

1 cup granulated sugar
1/4 cup whiskey
1/2 tsp lemon juice
1 cup heavy cream
1/4 tsp salt
1/2 Tbsp vanilla extract

Combine the sugar, whiskey, and lemon juice in a heavy bottom saucepan over medium heat. Cook, gently swirling the pan occasionally, until the sugar dissolves and starts to turn color. Increase the heat to high and boil until the syrup turns a deep amber color, 4 to 5 minutes. Watch carefully, as it can burn  quickly.

Immediately remove the pan from the heat and pour in the cream and salt. Carefully stir in cream, as caramel has a tendency to hiss and splash as the cold cream hits it. Place pan over low heat and cook, stirring constantly, until caramel thickens, 7 to 10 minutes. The mixture should be the consistency of thick cream. Remove from heat and stir in the vanilla.

Let cool.

Follow me on Facebook and Instagram @thecookierunner 

Note: the book was given to me by Spartan Race but the opinions in this post are all my own. 
Stephanie

Sunday, September 1, 2013

Vote for my post on Mom Blog Network

Easy Peasy Fudge


I have been so dedicated to exercising and eating healthy that it feels as if it has been a very long time since I used granulated sugar and white flour in my kitchen. I remember the days when it felt weird not to have butter, eggs, sugar, or flour always in stock. When they say that "being healthy is a lifestyle" they aren't lying. I guess I was able to get away with that in the summer because I was just taking classes and staying home with the girls and going on our daily adventures. But once school started again two weeks ago, along with also starting my internship and getting ready for both girls to start school, I have been feeling that need to get back into the kitchen to bake. It's not even about eating what I bake; it's about getting in touch with that relaxed and happy feeling I get when I do bake.

So this weekend we stocked up on all the baking essential and I asked Cati what she wanted me to bake her and she, surprisingly, said "brownies." We have a song for cookies and cupcakes so I was expecting one of those two, but I was more than happy to make her some brownies. I made my go-to brownies and really kicked it up a notch by also make a fudge sauce. This sauce is truly amazing and could you really doubt a recipe that came from Smitten Kitchen? It was so easy to make and everyone in the house was eating it like it was their job. Because this was a dessert Cati requested, no dessert is complete without sprinkles.


Hot Fudge Sauce
Source: Smitten Kitchen
Yields 2 1/2 cups

4 ounces unsweetened chocolate
3 tablespoons butter, unsalted
2/3 cup water
1/3 cup sugar
6 tablespoons corn syrup
Pinch of salt

Melt the chocolate and butter very slowly in a double boiler or in the microwave, stirring frequently until combined.

Meanwhile, heat the water to boiling in the small, heavy saucepan.

When the butter and chocolate have melted, stir the mixture into the boiling water. Add the sugar, corn syrup and salt and mix until smooth.

Turn the heat up and stir until mixture starts to boil; adjust heat so that sauce is just maintained at the boiling point, stirring occasionally. Allow sauce to boil for nine minutes (mine was good to go after about 5-6 minutes).

Remove from heat and cool for 15 minutes.

PS although the blog is quiet, there's lots of pictures on Instagram (@confessionscityeater)! 

Stephanie

Tuesday, August 6, 2013

Vote for my post on Mom Blog Network

Dessert Quesadillas

Dessert Quesadilla
Little by little I have been making changes to the way we eat in our house. You're more likely to find whole wheat products in our house now and my pantry is full of foods like chia seeds, quinoa, and flaxseed. If we are all going to be working out and staying active, then our diets should change to reflect a healthier lifestyle. My Achilles heal, however, is and will always be desserts.  I have this need for desserts after dinner and I have yet to figure out what to eat as a dessert that won't tempt me into eating 10 of it. Luckily, it seems like I may have found a dessert that can do the trick every now and then. These Dessert Quesadillas are easy and quick to make and completely kid-friendly. They were just the right amount of sweet that I needed and one slice was good enough to satisfy my sweet craving.

By the way, I'm on Instagram now if you want to follow me there!

Dessert Quesadillas 
Source: How Sweet It Is

2 whole wheat tortillas
1 tablespoon butter
2 teaspoons cinnamon
2 tablespoons natural peanut butter
2 tablespoons chocolate chips

Spread butter on one side of each tortillas and sprinkle with cinnamon. Heat a skillet on medium heat, spray with cooking spray and crisp until golden brown. While still warm, spread one tortilla (cinnamon side up) with peanut butter and top with chocolate chips. Place other tortilla on top.

Serve and enjoy!
Stephanie

Friday, September 14, 2012

Vote for my post on Mom Blog Network

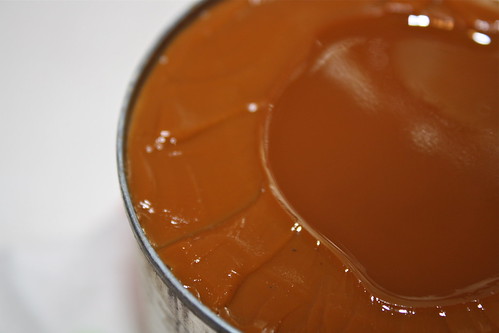
Homemade Baked Dulce de Leche

IMG_0140
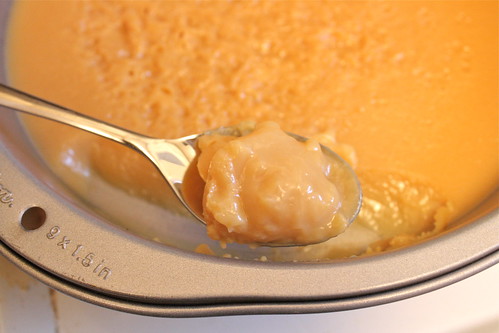
There's nothing much I can say about this other than make it and you won't be disappointed.

Homemade Baked Dulce de Leche
Source: David Lebovitz
Yield:  14 ounces

1 (14 ounce) can sweetened condensed milk
pinch of sea salt

Adjust the oven rack to the lowest third position.  Place a shallow rimmed baking sheet on the oven rack.  Preheat the oven to 425˚F.

Pour the can of sweetened milk into a glass pie plate and stir in a pinch of salt.  Cover tightly with foil.  Place the pie plate on the baking sheet, then pour hot water into the baking sheet, around the pie plate, so the water fills up to about halfway up the sides of the plate.

Bake for 1 hour and 15 minutes, or until the caramel is a deep golden brown.  Add more water to the baking pan as necessary.

Remove the pie plate from the oven and let cool on a wire rack.  Once cool, whisk until smooth.  Store in the fridge, in an air-tight container, until ready to use.  When ready to serve, warm gently in the microwave.
Stephanie

Saturday, May 5, 2012

Vote for my post on Mom Blog Network

Baked Churros

Baked Churros
 Alex and I used to have a ritual surrounding our Costco trips. As soon as we stepped into the store we would split up: one of us gets started on the shopping list while the other goes and waits in line for churros. We did this every single time. We switched to BJs and the ritual didn't translate because the churros tasted different.
Baked Churros
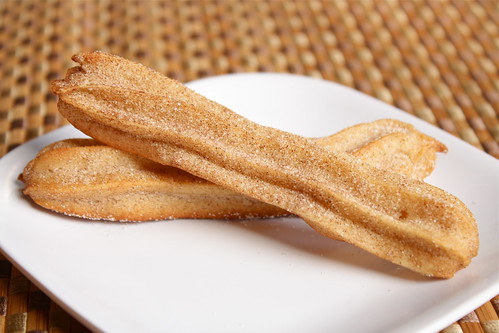
I had been wanting to give churros a try but was always hesitant because of the frying. I know frying is what makes them deliciously crispy but I don't like the mess frying makes in my kitchen. So I was really happy when I saw this recipe for Baked Churros and thought they would be perfect to make for Cinco de Mayo. These churros were really good and super easy to make. Definitely lighter and more like a puff pastry but I think that has everything to do with them being baked. Alex and Cati both loved these and Alex described them as a snickerdoodle mixed with a cloud and like grabbing heavenly cinnamon-sugar clouds.

Baked Churros
Source: The Baker Chick
Yields approximately a 8" dozen churros

1/2 cup unsalted butter
1/2 teaspoon salt

1 cup water
1 cup all purpose flour

3 eggs

1 teaspoon vanilla
1/2 cup cinnamon sugar
cooking spray

Preheat oven to 350 degrees.

In a medium saucepan combine the butter, salt and water. Bring to a boil over medium high. Remove from heat add the flour and stir to combine. Leave dough in the saucepan, but beat it on low with a hand mixer, adding one egg at a time, mixing well before adding another.
 
When all the eggs are are combined add the vanilla. Spoon the dough into a pastry bag fitted with a large star tip. Lightly spray a cookie sheet and pipe 8 inch rows of the dough with at least 1 inch between each churro. Bake in the oven for 15-20 minutes or until golden brown, and when a toothpick comes out clean. Spray churros lightly with cooking spray, and one at a time, transfer them to a square tupperware, or shallow baking dish and sprinkle with cinnamon sugar. Shake it around to make sure they are well-coated.
Stephanie

Wednesday, February 1, 2012

Vote for my post on Mom Blog Network

Tiramisu Trifles

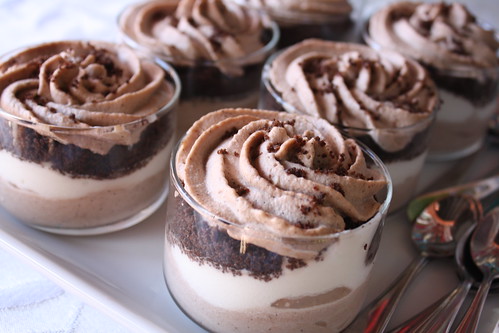
IMG_6190
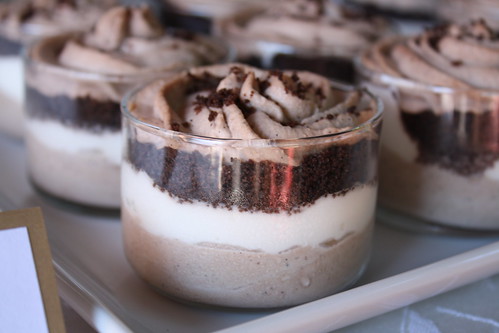
I have been dying to make a dessert-in-a-jar type dessert. They look so pretty and I love anything that's a miniaturized, single serving. I wanted whatever I made to be something different so I picked these Tiramisu Trifles. I actually put a lot more Kahlua than the recipe calls for, but that's the only major change I made. I also made my own chocolate cookies based on this Oreo Cookie recipe because if I was going to something as delicious and divine as tiramisu, I was going to go all out. And let me tell you, this dessert was spot on and tasted just like tiramisu.
IMG_6193

Tiramisu Trifles
Source: My Baking Addiction
Yields: 4 servings (Note: I doubled the recipe and had enough for about 5.3 oz 14 trifles)

For the base
1 cup heavy whipping cream
1/4 cup granulated sugar
1 cup ricotta cheese, any style
1 tablespoon unsweetened cocoa powder
1 tablespoon Kahlua (I added about 1/4-1/3 cup Kahlua to the doubled recipe)
1 teaspoon instant espresso granules

In a large bowl, Combine whipping cream and sugar beat until stiff, about four minutes. Transfer whipped cream to a medium bowl and set aside. (Do not clean bowl of food processor.)

Combine cheese, cocoa powder, Kahlua and instant espresso granules in bowl and beat until combined.

Add cheese mixture to bowl with whipped cream; fold in with rubber spatula until no white streaks remain.

For the layering
Whipped Cream: 1 cup heavy cream, whipped with 2 tablespoons granulated sugar until stiff
Chocolate Wafer Cookies: 1/2 cup chocolate cookie crumbs

Trifle Assembly
Spoon Tiramisu base and then layer with whipped cream and cookie crumbs. Top with leftover cookie crumbs or any other topping.
Stephanie

Thursday, January 26, 2012

Vote for my post on Mom Blog Network

Big Easy Beignet

Big Easy Beignet
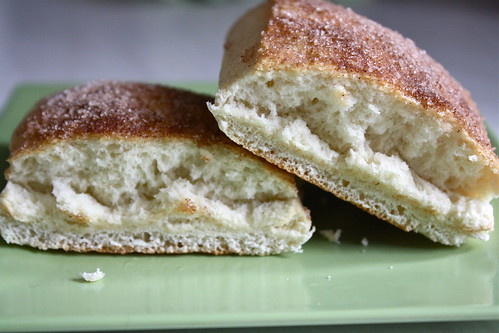
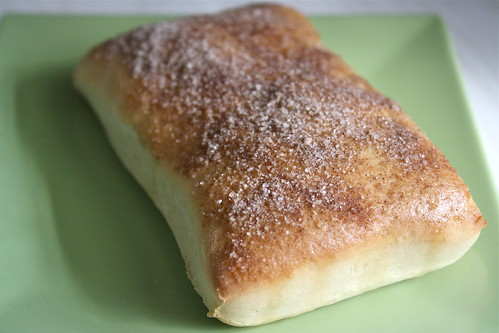
I don't remember the first time I had a Beignet but I do remember where it came from (La Provence Bakery) and I remember instantly falling in love. It was literally the best $2.75 I had spent on something edible in a long time. This version is baked as opposed to fried and that makes a difference. While this version was delicious, there's just something special about a fried beignet. Also, I think frying would have made it easier for the dipping-in-cinnamon-sugar part because I had to go back and brush butter on my baked beignet before sprinkling cinnamon-sugar on them in order to get the sugar to stick. Otherwise, perhaps sprinkling them with the sugar before baking would have made more sense.
 Big Easy Beignet

Big Easy Beignet
Source: Sugar Plum
Makes 6 beignet

1/3 cup warm milk (not hot)
1 teaspoon active dry yeast
1 large egg, room temperature
1/4 cup granulated sugar
1 tablespoon unsalted butter, softened
1 teaspoon vanilla extract
1/4 teaspoon salt
1 3/4 cups all purpose flour
4 teaspoons oil, divided use
3 tablespoons granulated sugar mixed with 1 teaspoon ground cinnamon

Whisk together milk and yeast in the bowl of a stand mixer and allow to sit for 10 minutes, or until slightly bubbly.

Add egg, sugar, butter, vanilla and salt, and mix until well combined. Add flour and mix on medium speed for 8 minutes or until dough is smooth and elastic. Transfer dough to a large greased bowl, lightly cover with plastic wrap, and allow to rise in a warm area for 1-1 1/2 hours or until doubled in bulk.

Brush a cookie sheet with 2 teaspoons oil. On a clean work surface, pat dough into a 1/2-inch thick rectangle, and slice into 6 equal squares. Transfer squares to oiled cookie sheet. Lightly cover and allow to rise for 1 hour.

Heat oven to 400 degrees F. Brush dough squares with additional 2 teaspoons oil. Bake 10 minutes or until well risen and golden brown. Dip beignet into cinnamon sugar mixture.
Stephanie

Thursday, January 19, 2012

Vote for my post on Mom Blog Network

Easy Sour Cream Cinnamon Rolls

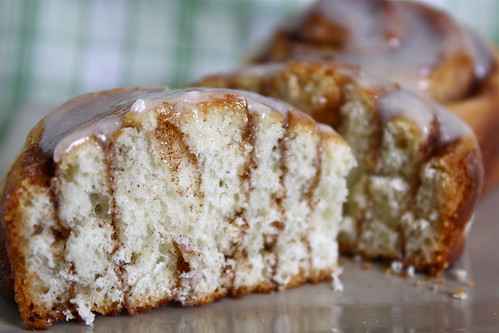
Sour Crean Cinnamon Rolls
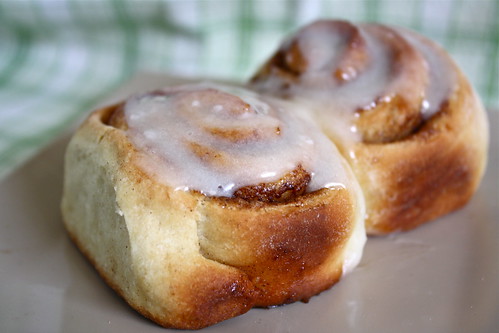
I made these Sour Cream Cinnamon Rolls last week and I wish I would have the energy or desire to make them this week because they are the perfect sweet treat to ease the sadness by appealing to the taste buds. They are simply lovely and make you feel all kinds of warm inside. My favorite part of making these rolls was having Cati help me along the way. I love how now when I get into the kitchen to bake, she asks for the stairs so she can be level with the counter.
 Sour Crean Cinnamon Rolls
Thank you to all those who reached out to me yesterday. Perla's passing has been hard but I'm doing well and there have been no tears so far today (yesterday I was a red eye, puffy mess though). Explaining to Cati what happened was probably the hardest thing I had to do as a mother. I tried to explain to her where Perla was in a way she would understand so now Perla went bye bye and night night with Baby Jesus and Perla is with the "luna, sol, y estrellas" (moon, sun, and stars). I don't know how much she really gets, it's such an abstract thing to explain. This morning she asked for Perla twice. First, when I told her Perla was bye bye, Cati responded with "Perla abajo" or "Perla downstairs" because she's used to Perla being downstairs waiting for us to come down to have breakfast. I tried my Baby Jesus--luna-sol-estrella explanation. Once downstairs, I guess reality dawned on her and she said, in a voice thisclose to tears, "Perla night night."Again, my explanation and she repeated it back to me. This is part of the adjustment and I'm proud I didn't break down in tears.

Easy Sour Cream Cinnamon Rolls
Source: Sugar Plum
Yields 12 rolls

1/4 cup warm water (not hot)
2 teaspoons active dry yeast
1 teaspoon granulated sugar + 2 tablespoons
1 large egg
1/3 cup low fat sour cream + 2 tablespoons, divided use
2 1/2 tablespoons unsalted butter, melted, divided use
1 teaspoon baking powder
1/2 teaspoon salt
2 cups all purpose flour
1/4 cup packed brown sugar
1 1/2 teaspoons ground cinnamon
1/3 cup confectioners' sugar
1/4 teaspoon vanilla extract

Whisk together water, yeast and 1 teaspoon granulated sugar in a large mixing bowl; allow to sit 5 minutes. Stir in additional 2 tablespoons sugar, egg, 1/3 cup sour cream, 1 tablespoon melted butter, baking powder and salt until well combined. Stir in flour until well combined and a dough ball forms. Lightly cover bowl and allow dough to rise in a warm area for 45 minutes.

Roll dough out into a thin rectangle on a floured surface, using a floured rolling pin. Brush dough with 1 tablespoon melted butter. Sprinkle brown sugar and cinnamon on top. Roll dough up and slice into 12 equal pieces. Place on a large greased cookie sheet. Lightly cover and allow dough to rise in a warm area for 30 minutes.

Heat oven to 350 degrees F.

Brush cinnamon rolls with remaining 1/2 tablespoon melted butter. Bake 20 minutes or until golden brown. Transfer rolls to a wire rack or serving platter.

To make the glaze, mix together remaining 2 tablespoons sour cream, confectioners' sugar and vanilla until well combined. Drizzle over cinnamon rolls.
Stephanie

Thursday, December 22, 2011

Vote for my post on Mom Blog Network

Chocolate Nutella Fudge with Sea Salt

Chocolate Nutella & Sea Salt Fudge
This Chocolate Nutella Fudge with Sea Salt is the other fudge I made in addition to the chocolate peppermint fudge I posted about yesterday. Like I said in yesterday's post, I found this one harder to work with because the fudge started melting as I was cutting it. I let it sit in the fridge overnight so I don't know what happened. At least, it's a really tasty bit of fudge and it is ridiculously creamy.

Chocolate Nutella Fudge with Sea Salt
Source: Cookin' Canuck

Butter, for greasing pan
1 (14 oz. ) can sweetened condensed milk
1 tsp vanilla extract
8 oz. high-quality bittersweet (60% cacao) chocolate chips
1 cup Nutella, room temperature
3 tbsp unsalted butter, room temperature, cut into 1/2-inch pieces
Sea salt, approximately 1/2 tsp

Grease the bottom and sides of an 8- by 8-inch baking pan with butter. Line the pan with parchment paper, leaving a 2-inch overlap on the sides.

In a medium glass or stainless steel bowl, stir together sweetened condensed milk, vanilla, bittersweet chocolate chips, Nutella, and butter.

Form a double-boiler by setting the bowl on a medium pot of gently simmering water. The water level should be low enough that the bottom of the bowl does not touch the water. Stir until the chocolate chips are melted and the mixture is smooth, 5 to 7 minutes.

Scrape the mixture into the prepared pan, spread the top smooth with a spatula, and sprinkle with sea salt. Refrigerate until the fudge is firm, at least 2 hours.

Run a knife under hot water, dry it off, and run it around the edges of the pan to loosen the fudge. Using the overhanging parchment paper, lift the fudge out. Peel off the parchment paper. Cut the fudge into 3/4-inch squares. Store in the refrigerator in an airtight container or wrapped well in plastic wrap and foil.

Makes approximately 50 3/4-inch squares.
Stephanie

Wednesday, December 21, 2011

Vote for my post on Mom Blog Network

Chocolate Peppermint Fudge

Chocolate Peppermint Fudge
I've been a little bit on a mad dash to get some holiday baking done before this weekend. I thought I would have more trouble getting things done with Cati at home this week, but she has been so helpful. She likes to pull the step ladder up to the counter and watch what I'm doing. Today she even helped me pour flour into the bowl! She'll be a little baker in no time!

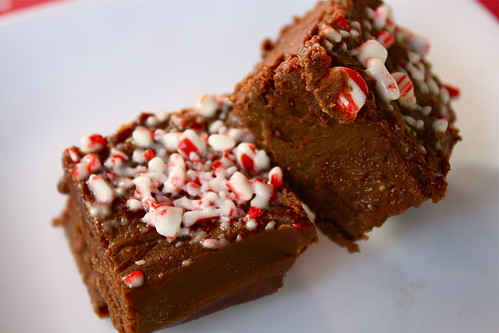
One of the things that I made that I have been wanting to try is fudge. For some reason, I thought it would be difficult to make but it's actually pretty easy. You just need to act fast when moving the warm fudge into the pan. I made two types (second type coming tomorrow) and, of the two, this one was easier to work with and tasted more like the fudge that I'm used to getting at the store. This fudge is very chocolaty and, as is the case with fudge, I was all set with one slice. I topped mine with crushed candy canes to give it more of a holiday feel and that was enough to peppermint flavor to balance out of the chocolate flavor.

Chocolate Fudge
Source: Baked Bree
Yields about 30 2x2 squares

2 cups sugar
1 teaspoon salt
6 Tablespoons butter
1 cup cream
3 1/2 cups mini marshmallows
3 cups semisweet chocolate chips
1 teaspoon vanilla
sprinkles (optional)
crushed peppermint (optional)

Line an 8x8 pan with parchment paper or aluminum foil. Set aside.

Add the sugar, salt, butter, cream, and marshmallows to a large saucepan. Cook the mixture over medium heat until the marshmallows and butter begin to melt, about 5 minutes.

Once the marshmallows have melted, bring the mixture to a boil, and boil for 5 minutes. It will begin to brown and will bubble all over the place. Take the pan off of the heat.

Add the chocolate chips and vanilla.

Mix it all together until the chocolate has melted and everything is nice and smooth. Pour into prepared pan. Sprinkle with desired toppings and let sit at room temperature for 3 hours before you slice.
Stephanie

Sunday, March 27, 2011

Vote for my post on Mom Blog Network

Apple Crisp

Apple Crisp
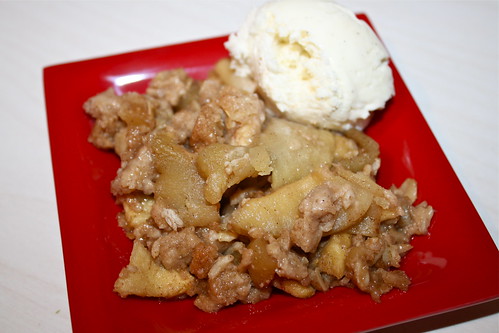
It's all about the little things in life. Those little wet baby kisses to fill you with joy. Those tender touches from your loved one to fill you with love. That small "thank you" at the end of the day to make you feel like it was all worth it. This Apple Crisp to make you feel all warm and cozy inside. You really can never go wrong with a dessert like this. I made it last week and this was one of the best crumbs recipe I've had in a while. My aunt even said we could eat just the crumbs with ice cream.

Apple Crisp
Source: Rhonda on Allrecipes.com

Crumbs
1/2 cups all-purpose flour
1/2 cups rolled oats
1/4 teaspoon ground cinnamon
1/8 teaspoon ground nutmeg
1/4 cup plus 2 Tbsp packed brown sugar
6 Tbsp butter

Apples
4 medium to large apples, cored and slice
1 Tbsp brown sugar
1 tsp brown sugar

Preheat oven to 350 degrees F (175 degrees C).

In a large bowl, combine the flour, oatmeal, cinnamon, nutmeg and brown sugar. Cut butter into mixture until crumbly.

Take half of the mixture and pat it into the bottom of a 9x13 inch baking dish.

Cover crumb mixture with apple slices, then sprinkle apple slices with remaining crumb mixture.

Bake at 350 degrees F (175 degrees C) for 45 to 50 minutes or until apples are tender.
Stephanie

Friday, February 18, 2011

Vote for my post on Mom Blog Network

Dessert Table Sweet: S'Mores Pops

IMG_0103c
Here's another "on a stick" dessert treat. I thought these S'mores Pops inspired by White on Rice Couple were going to be hard but they were actually really easy.  It's basically dipping, rolling, sticking, and torching. It took me less than an hour from start to finish to create 40 of these pops. Like I did with the Oreo Truffles, I added a bit of butter and corn syrup to make the chocolate thinner and easier for dipping.

Other dessert tables sweets include Oreo Truffles, Apple Pie Pops, and Chocolate Chip Cookies.

S'Mores Pops
Source: White on Rice Couple and Gimme Some Oven

4-6 oz semi-sweet chocolate
2 Tbsp butter
1 Tbsp corn syrup
40 large marshmallows
About 5 graham crackers processed into crumbs (~ 3/4 cups)
Lollipop sticks

Combine the chocolate, butter, and corn syrup in a double boiler or medium bowl set over a saucepan containing simmering water. Place cracker crumbs in a bowl and keep close to the chocolate mixture.

By hand dip a marshmallow into the chocolate, covering half. Then, roll in graham cracker crumbs and set on a cooling rack. Repeat with every single marshmallow.

Push a stick through the center of the marshmallow. The chocolate should have had enough time to harden a bit. Place the marshmallow pop in a cup that's been filled with dry rice or beans; this helps to keep it in an upright position so you can torch the top.

Torch the marshmallow on the low setting to desired crispness, making sure to blow out any flare ups.

Serve and enjoy!

Note: I made the S'mores Pops the Thursday before the party and they were still crispy and chocolaty.

Stephanie

Wednesday, February 16, 2011

Vote for my post on Mom Blog Network

Dessert Table Sweet: Apple Pie Pops

IMG_0119c
Here's another dessert table favorite. And really, how could it not be? Everyone loves apple pie, especially ones that are cute and bite-sized. These were the most time intensive of the desserts I made but the effort was worth it because they were beautiful and delicious.

Other Dessert Table Sweets include Easy Oreo Truffles

Apple Pie Pops
Source: Our Best Bites
Yields approximately 30-2" round pops

2 sheets of  store bought pie crust dough
6" lollipop stick
Small bowl of water
2 tablespoons butter, melted
Course sugar or sprinkles for top
Apple pie filling
Cutter: I used a shot glass to cut out the circles


Apple Pie Filling (combine all ingredients below):
1 medium tart green apple, peeled and grated
1/4 tsp ground cinnamon
1 tablespoon packed brown sugar
1 tablespoon flour
1/2 tablespoon lemon juice
1 tablespoon cold butter, grated

Preheat oven to 375 degrees. Line a baking sheet with parchment or a silicone baking mat if desired.

Roll out pie dough on a floured surface about 1/8 inch thick. Cut out shapes and place them on your baking sheet. Place about 1 tsp of filling on one cut out, keeping it away from the edges. Place 6 inch lollipop stick in center of shape, with the top of the stick near the top of the shape. Wet your finger in a small bowl of water and wet the edge of the pie dough shape. Wet the edges of a 2nd pie dough shape (one without filling) and place on top of the other. Press together gently with your fingers to seal the pieces together. Use a fork to crimp edges, being careful to seal edges around the stick. Poke a fork into top of pie one time so steam can vent. If desired, brush top of pie in melted butter and sprinkle with sugar.

Bake pies for 15-20 minutes until barely golden brown. Cool for a few minutes and then transfer to a cooling rack. Cool completely before packaging. If desired, place in cellophane bags and tie with ribbons and labels.
Stephanie

Tuesday, February 15, 2011

Vote for my post on Mom Blog Network

Dessert Table Sweet: Easy Oreo Truffles

IMG_0100c
I want to wait until I get the professional pictures to show you all the party pictures but I don't want to wait until then to share the recipes for the desserts I made. Most of the recipes are my go-to recipes and have made their appearance on the blog before but I think it's time for a refresher. First up, was the overwhelming favorite of the day: Oreo Truffles. Everyone loved them and one of my friends even called me after the party asking for directions on how to make the truffles. If you haven't tried these truffles then I urge you to make them right this instance. They are simply divine and outrageously good.

It was for this dessert that I used the toppers Sarah (Aspire to Be) sent us. This made the dipping part so much easier and it really dressed up the truffles and added a nice visual touch to the dessert table.

Easy Oreo Truffles
Source: Kraft Recipes

1 pkg. (8 oz.) PHILADELPHIA Cream Cheese, softened
1 pkg. (16.6 oz.) OREO Cookies, finely crushed (about 4-1/4 cups), divided
2 pkg. (8 squares each) BAKER'S Semi-Sweet Chocolate, melted

Mix cream cheese and 3 cups cookie crumbs until well blended.

Shape into 48 (1-inch) balls. Dip in melted chocolate; place on waxed paper-covered baking sheet. Sprinkle with remaining cookie crumbs.
Refrigerate 1 hour or until firm. Store in tightly covered container in refrigerator.

Notes:
  • I mixed ALL the crumbs with the cream cheese and topped my truffles with pink edible balls.
  • I used about 5 oz of chocolate total for the dipping. When I made this in the past the chocolate was really hard to work with because it was very thick so this time around I made it more like a ganache by melting the chocolate with 2 Tbsp of butter and about a Tbsp of heavy cream. This made the chocolate a million times easier to work with and it helped the truffles get a more smooth and even coating.
Stephanie

Saturday, September 18, 2010

Vote for my post on Mom Blog Network

Crock Pot Dulce de Leche

Dulce de Leche
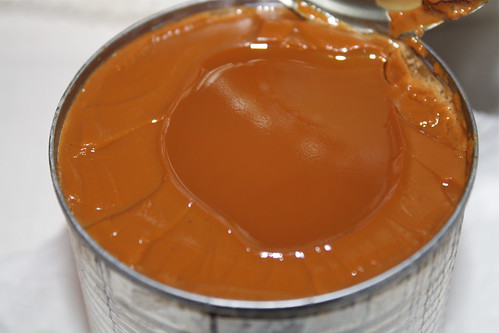
I grew up calling dulce de leche arequipe because that's what Colombians call dulce de leche. I used to eat it straight out of the little container or on a cookie similar to a pizzelle. It was always a treat to have arequipe in our house because the sugary goodness was not cheap and it definitely was not a necessity. I have always wanted to try to make dulce de leche but I didn't have the energy or desire to cook it on the stove top.  When I cam across this recipe I jumped for joy. All you do is stick a can of condensed milk in a slow cooker filled with water and a few hours later you have caramel gold. This is a lot cheaper than buying the pre-made dulce de leche.

Crock Pot Dulce de Leche
Source: A Year of Slow Cooking (here)

2 cans sweetened condensed milk
Water

Take label off cans. Put cans in the bottom of your crock pot. Add enough water to completely cover the can. Cover and cook on low for 8 hours.
Dulce de Leche
 Stephanie

Thursday, September 2, 2010

Vote for my post on Mom Blog Network

Chocolate Croissant Pudding

Chocolate Croissant Pudding
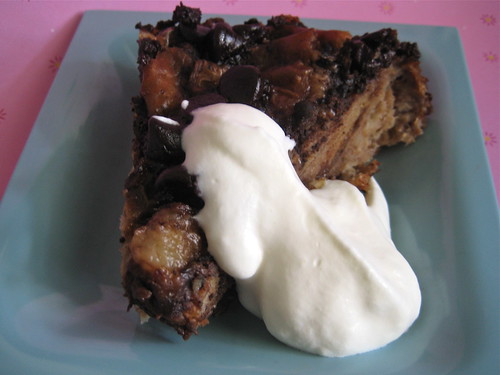
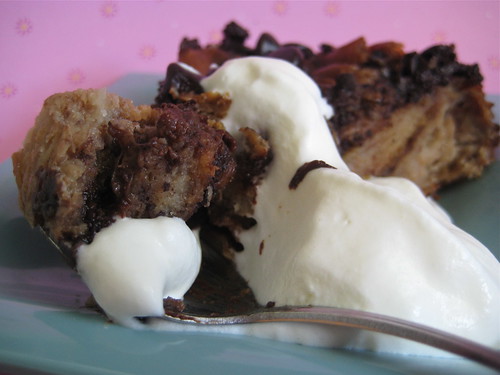
I love my crock pot. I rediscovered its awesomeness and now I'm hooked. I made this dessert because I really wanted to try to make a dessert in the crock pot. The dessert itself was a success. The preparation? Not so much. It was all my fault though because I didn't have the proper equipment. I ended up losing quite a bit of my custard because I used a springform pan instead of a casserole dish. I guess the dish didn't need as much custard liquid because it was pretty darn good. The croissants soaked up just enough fluid and the chocolate chips added bitterness to the sweet croissants and added a different texture to the dessert. Served with homemade whipped cream and you can honestly do no wrong.

Chocolate Croissant Pudding

Chocolate Croissant Pudding
Source: Best Loved Slow Cooker Recipes by Crock Pot

1 1/2 cups milk
3 eggs
1/2 cup sugar
1/4 cup unsweetened cocoa powder
1/2 tsp vanilla
1/4 tsp salt
2-3 plain croissants, cut into 1" pieces, divided
1/2 cup chocolate chips, divided
Whipped cream

Prepare 1-quart casserole, souffle dish or other high sided baking pan that will fit in your slow cooker by coating it with nonstick cooking spray.

Beat milk, eggs, sugar, cocoa powder, vanilla, and salt in a medium bowl. Layer half of croissants, 1/4 cup chocolate chips, and half of egg mixture into prepared casserole. Repeat layers with remaining croissants, chocolate chips, and egg mixture.

Place a rack or trivet into slow cooker; pour in 1 cup of water. Place casserole on rack. Cover; cook on low 3-4 hours.

Remove casserole from slow cooker. Spoon bread pudding into bowls. Top with whipped cream.

Chocolate Croissant Pudding
Stephanie

Tuesday, January 5, 2010

Vote for my post on Mom Blog Network

TWD Birthday: Tarte Tatin

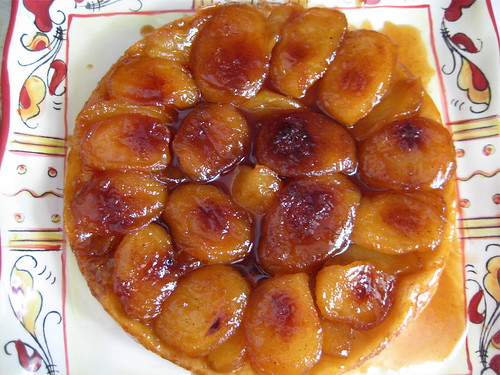
I can't believe it's already been two years since Laurie started Tuesdays with Dorie. Two years ago I didn't even know who Dorie Greenspan was and didn't know how to make about 3/4 of the recipes in her book. To say that I love Baking: From My Home to Yours is an understatement. If I'm ever in a need of a recipe that will surely be a hit, Dorie is the first resource I check. I'm so glad I joined TWD when I did because not only has my baking improved but my confidence in the kitchen has also improved.

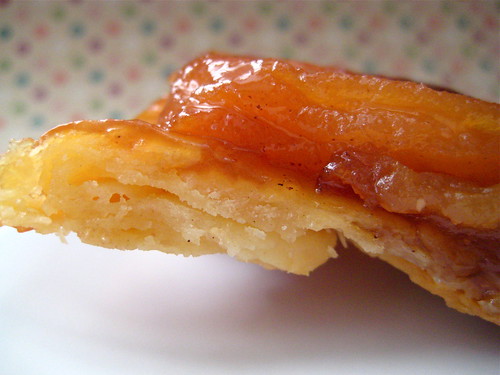
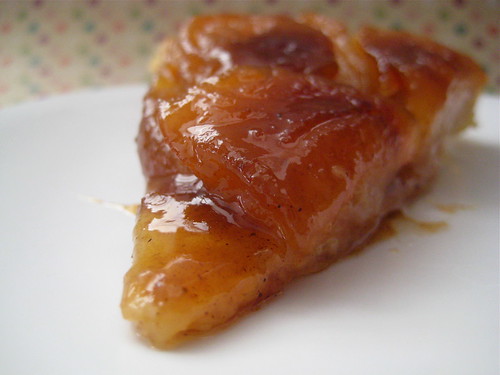
Laurie gave us the choice between two recipes to celebrate TWD turning two: Tarte Tatin and Cocoa Buttermilk Birthday Cake. I went with the Tarte Tatin because the thought of warm, caramelized apples sitting atop a flaky crust made my heart sing. This dessert is so beautiful and easy to put together that you wonder what took you so long to make it in the first place.The past two years have been great and I look forward to what year three has in store.
For the recipes for the Tarte Tatin and the Cocoa Buttermilk Birthday Cake head over to Laurie's blog Slush.