Monday, March 31, 2008

Vote for my post on Mom Blog Network

I See Stars!

I am feeling the love! I came home to such a wonderful surprise after class on Friday. My dearest, closest friend Christina sent me the best birthday present ever. Christina and I have known each other for close to 6 years now (wow...time flies!). We met in college and she was my big sister in our sorority. One of her big sister responsibilities was to give me a nickname. She had to use her knowledge of what I liked and who I was to come up with a name to describe me. Since I love all things Italian and have an obsession with stars she chose Stella as my name. It was such a great choice because the nickname has stuck. Every time I see Stella I immediately think of Christina.

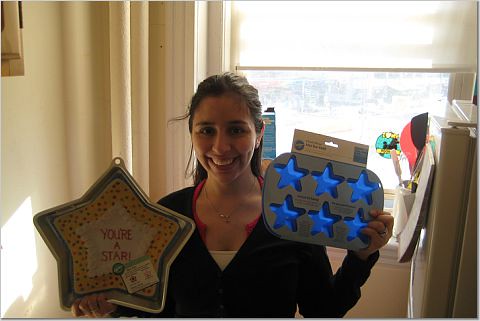
Well this year she came up with a gift that incorporated stars and my love of baking. She sent me goodies from Wilton (!!!!!); I got a star shaped cake pan and a mini star mold. I could barely contain my excitement. Alex looked at me with a face that said, "did you just win the lotto or something?!" He didn't get the excitement for a second. I cannot wait to use them!

Thank you soooo much Christina for thinking of me. You are the best big sister a girl could ever ask for :)

Me and the goods


Close up of the goods


xoxo!
Vote for my post on Mom Blog Network

I'm Corny.

I had class this past weekend and it sucked. I won't even bore you with the details, so you're just going to have to trust me on it. The only good thing about having class is that I got to bake. When we first had the class over two months ago we had to sign up to bring food in on certain days and I signed up for the last class meeting. I woke up extra early on Saturday to make muffins for my class. I figured something homemade would be better than anything store bought. Plus, I'm cheap, had all the ingredients, and didn't feel like going to the store. So I made the muffins, wrapped them up while they were still warm, and left for class. Unfortunately, it was so frigidly cold in Boston that by the time I got to class the muffins were cold. Nonetheless, everyone had a muffin and enjoyed them. I was so happy I brought in muffins because whoever else signed up brought in chips and candy.

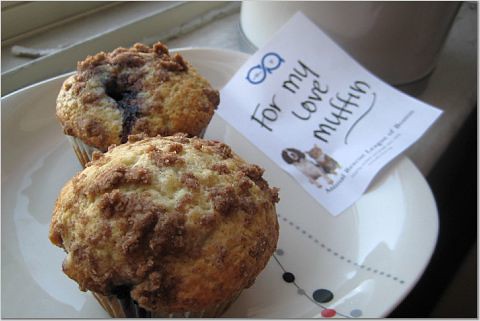
Now for the reason why I say I'm corny. Alex was able to sleep in on Saturday. I made sure to set two muffins aside so that he would have something to eat when he woke up. I tried to think of something clever so that I could leave him a note. Apparently it was too early for me to formulate any kind of thought so the best I could come up with was 'love muffin.' I put the little note next to the muffins, left them on the stove, and left the house. As I walked to class I laughed at myself. Did I really leave a note saying 'love muffin' on it next to two muffins? Yes I did. I can't believe I couldn't come up with something better. I think anything would have been better than something as obvious as 'love muffin.'

I originally got this recipe from Annie's blog Annie's Eats. It is so simple to make and the muffins really are better than anything you'd buy in the store. The first time I made the recipe I followed it exactly, this time I was distracted while measuring and added more milk. I think it was a good mistake because I felt like the muffins were fluffier.

Blueberry Muffins
Source: Annie's Eats (here)

For the muffin:
1 1⁄2 c. flour
3⁄4 c. sugar
1⁄2 t. salt
2 t. baking powder
1/3 c. vegetable oil
1 egg
~1/3 c. milk (I added almost 1 cup)
1 cup blueberries (or more)

Streusel topping:
1⁄4 c. sugar
2 T. and 2 t. flour
2 T. butter, cubed
3⁄4 t. cinnamon


1. Preheat the oven to 400°. Grease or line 8 muffin wells with muffin liners. (I only have a cupcake pan, so the recipe yielded 16 muffins)
2. Combine flour, sugar, salt and baking powder. Place vegetable oil into a 1 cup measuring cup; add the egg and enough milk to fill the cup. (I used a 2 cup measuring cup and put enough milk to reach 1 1/4 cup) Mix this with flour mixture. Fold in blueberries. Pour into lined muffin cups; fill to the top.
3. To make streusel topping, combine listed ingredients and mix well with a fork until crumbly. Sprinkle over tops of muffins.
4. Bake at 400° for 20-25 minutes.
5. Enjoy!
Pretty Muffin


Nice picture of the blueberry

My corny-ness


Sunday, March 30, 2008

Vote for my post on Mom Blog Network

My Husband is Spoiled

I don't know what it is about the man, but it's intoxicating. When we first started dating I couldn't understand all the love his family felt for him, especially the women in his family. He was the baby of the house and will always be the baby. He is the only person on this planet that I know who has a grandmother that would make him a grilled cheese sandwich at 2am. I am his wife and there's no way I'd make him a grilled cheese sandwich at 2am. If he wants it that bad, my response to him would be "you know where the stuff is, go make it yourself" and, if I'm feeling especially daring, I'd tell him to make me one as well. I don't think the latter part would come across well, but who asks for a grilled cheese sandwich at 2am?!?

After this week I came to a startling realization. I have officially joined the women in his family. All I want to do is spoil and pamper him. That means that not only do I want him to be happy (Josie would approve), but I also want to feed him all the time (Abuela would approve). While you won't catch me making him sandwiches when I should be dreaming about sipping pina coladas on some remote island, he's got me wrapped around that perfectly formed pinky of his. He asks for stuff and he gets it almost immediately. The latest request was oatmeal cookies. I don't like raisins so I told him I would make him oatmeal chocolate chip cookies. The darling man had never heard of oatmeal chocolate chip cookies. I was amazed and stumped. I knew that I had to find a recipe good enough to introduce him to the cookie.

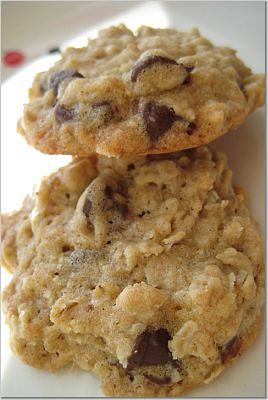
Luckily, I found a recipe and finally got to use the cookie scoop my friend Shanna gave me for Christmas. Alex enjoyed the cookies, as did I. They were chewy and sweet and crispy.

Oatmeal Chocolate Chip Cookies
Source: AllRecipes.com (here)

1 cup butter, softened
1 cup packed light brown sugar
1/2 cup white sugar
2 eggs
2 teaspoons vanilla extract
1 1/4 cups all-purpose flour
1/2 tsp baking soda
1 tsp salt (I used 1/2 tsp)
3 cups quick-cooking oats (I used old fashioned)
1 cup chopped walnuts (I omitted)
1 cup semisweet chocolate chips

1. Preheat the oven to 325 degrees F (165 degrees C).
2. In a large bowl, cream together the butter, brown sugar, and white sugar until smooth. Beat in eggs one at a time, then stir in vanilla. Combine the flour, baking soda, and salt; stir into the creamed mixture until just blended. Mix in the quick oats, walnuts, and chocolate chips. Drop by heaping spoonfuls onto ungreased baking sheets.
3. Bake for 12 minutes in the preheated oven. Allow cookies to cool on baking sheet for 5 minutes before transferring to a wire rack to cool completely.
4. Enjoy!

A tip I learned from reading the reviews of this recipe was to chill the batter for an hour to prevent getting cookies that are flat. The tip was a good one and it made scooping easier.

Trying to be artistic


Yummy Cookies


I saved you one :)
Vote for my post on Mom Blog Network

Mmmm Pizza

We went to Crazy Dough's today. Alex suggested pizza for lunch and I just went along with it. We pass by Crazy Dough's at least twice a week but have never gone in. I like pizza but I hate the way I feel after eating the pizza. I feel gross thinking about all that grease circulating around inside of me. Today, though, I found a pizza that I can eat and actually feel good afterward. The pizza at Crazy Dough's tasted so natural. All the ingredients tasted so fresh and the pizza was not greasy at all. The pizza even had a bay leaves in it! I was pleasantly surprised and never thought I'd find a pizza I'd feel good about. I think we'll be going there more often whenever we need that pizza fix.
Vote for my post on Mom Blog Network

Perfect Party Cake

I joined another baking group called Daring Bakers. Each month a recipe is chosen and there's a specific day you have to post about it on. Well this month creeped up on me and today is the day to post. Luckily enough, I made this month's challenge as soon as I found out what it was.

This month's challenge was a Dorie recipe for the 'Perfect Party Cake.' I was excited to make my first layer cake. As I was making the cake I realized why the group is called Daring Bakers. The recipe is daring because it pulls you out of your comfort zone and introduces you to new things...like cake flour. I didn't even know cake flour existed until this recipe. I had seen the box for it where the other flours are but it never registered.

Creating the layers was the hardest part for me since I'm a perfectionist . I couldn't get the filling between the layers to be even enough where you could see both the preserves and the buttercream. Once the cake was all assembled I was proud that I made it because it is a pretty looking cake and it tastes great. There's lemon in both the cake and the frosting but it's subtle. The sweets critic of the house liked it despite the fact that there was shredded coconut on it.

Perfect Party Cake
Source: Dorie Greenspan's 'Baking From My Home to Yours'

For the Cake
2 1/4 cups cake flour
1 Tbs baking powder
1⁄2 tsp salt
1 1⁄4 cups whole milk or buttermilk
4 large egg whites
1 1⁄2 cups sugar
2 tsp grated lemon zest
1 stick (8 tablespoons or 4 ounces) unsalted butter, at room temperature
1⁄2 tsp pure lemon extract

For the Buttercream
1 cup sugar
4 large egg whites
3 sticks (12 ounces) unsalted butter, at room temperature
1⁄4 cup fresh lemon juice (from 2 large lemons)
1 tsp pure vanilla extract

For Finishing
2/3 cup seedless raspberry preserves stirred vigorously or warmed gently until spreadable
About 1 1⁄2 cups sweetened shredded coconut

Getting Ready
Center a rack in the oven and preheat the oven to 350 degrees F. Butter two 9 x 2 inch round cake pans and line the bottom of each pan with a round of buttered parchment or wax paper. Put the pans on a baking sheet.

To Make the Cake
1. Sift together the flour, baking powder and salt.
2. Whisk together the milk and egg whites in a medium bowl.
3. Put the sugar and lemon zest in a mixer bowl or another large bowl and rub them together with your fingers until the sugar is moist and fragrant.
4. Add the butter and working with the paddle or whisk attachment, or with a hand mixer, beat at medium speed for a full 3 minutes, until the butter and sugar are very light.
5. Beat in the extract, then add one third of the flour mixture, still beating on medium speed.
6. Beat in half of the milk-egg mixture, then beat in half of the remaining dry ingredients until incorporated.
7. Add the rest of the milk and eggs beating until the batter is homogeneous, then add the last of the dry ingredients.
8. Finally, give the batter a good 2- minute beating to ensure that it is thoroughly mixed and well aerated. Divide the batter between the two pans and smooth the tops with a rubber spatula.
9. Bake for 30-35 minutes, or until the cakes are well risen and springy to the touch – a thin knife inserted into the centers should come out clean
10. Transfer the cakes to cooling racks and cool for about 5 minutes, then run a knife around the sides of the cakes, unfold them and peel off the paper liners.
11. nvert and cool to room temperature, right side up (the cooled cake layers can be wrapped airtight and stored at room temperature overnight or frozen for up to two months).

To Make the Buttercream
1. Put the sugar and egg whites in a mixer bowl or another large heatproof bowl, fit the bowl over a plan of simmering water and whisk constantly, keeping the mixture over the heat, until it feels hot to the touch, about 3 minutes.
2. The sugar should be dissolved, and the mixture will look like shiny marshmallow cream.
3. Remove the bowl from the heat.
4. Working with the whisk attachment or with a hand mixer, beat the meringue on medium speed until it is cool, about 5 minutes.
5. Switch to the paddle attachment if you have one, and add the butter a stick at a time, beating until smooth.
Once all the butter is in, beat in the buttercream on medium-high speed until it is thick and very smooth, 6-10 minutes. During this time the buttercream may curdle or separate – just keep beating and it will come together again.
6. On medium speed, gradually beat in the lemon juice, waiting until each addition is absorbed before adding more, and then the vanilla.You should have a shiny smooth, velvety, pristine white buttercream. Press a piece of plastic against the surface of the buttercream and set aside briefly.

To Assemble the Cake
1. Using a sharp serrated knife and a gentle sawing motion, slice each layer horizontally in half.
2. Put one layer cut side up on a cardboard cake round or a cake plate protected by strips of wax or parchment paper.
3. Spread it with one third of the preserves.
4. Cover the jam evenly with about one quarter of the buttercream.
5. Top with another layer, spread with preserves and buttercream and then do the same with a third layer (you’ll have used all the jam and have buttercream leftover).
6. Place the last layer cut side down on top of the cake and use the remaining buttercream to frost the sides and top.
7. Press the coconut into the frosting, patting it gently all over the sides and top.

The cakes ready to get filled


Finished cake


Serving
The cake is ready to serve as soon as it is assembled, but I think it’s best to let it sit and set for a couple of hours in a cool room – not the refrigerator. Whether you wait or slice and enjoy it immediately, the cake should be served at room temperature; it loses all its subtlety when it’s cold. Depending on your audience you can serve the cake with just about anything from milk to sweet or bubbly wine.

Would you like a slice?

Storing
The cake is best the day it is made, but you can refrigerate it, well covered, for up to two days. Bring it to room temperature before serving. If you want to freeze the cake, slide it into the freezer to set, then wrap it really well – it will keep for up to 2 months in the freezer; defrost it, still wrapped overnight in the refrigerator.

Playing Around
Since lemon is such a friendly flavour, feel free to make changes in the preserves: other red preserves – cherry or strawberry – look especially nice, but you can even use plum or blueberry jam.

Fresh Berry Cake
If you will be serving the cake the day it is made, cover each layer of buttercream with fresh berries – use whole raspberries, sliced or halved strawberries or whole blackberries, and match the preserves to the fruit. You can replace the coconut on top of the cake with a crown of berries, or use both coconut and berries. You can also replace the buttercream between the layers with fairly firmly whipped sweetened cream and then either frost the cake with buttercream (the contrast between the lighter whipped cream and the firmer buttercream is nice) or finish it with more whipped cream. If you use whipped cream, you’ll have to store the cake the in the refrigerator – let it sit for about 20 minutes at room temperature before serving.

I just think this picture's cool because you can see the sky in it.


Enjoy!
Monday, March 24, 2008

Vote for my post on Mom Blog Network

Abuela Would Be Proud!

I recently joined Tuesdays With Dorie which is a baking group that bakes their way through Dorie Greenspan's Baking: From My Home to Yours. They make a different recipe each week and I picked the perfect week to join because this week's recipe was a flan. Thanks to Steph from A Whisk and a Spoon for making the selection!

I was never a fan of flan. In fact, I wasn't much of a fan of custard desserts. But then I met this wonderful little lady who made the best flan ever. She made it with love and even mixed it up by adding cream cheese (my favorite!). Then I married her grandson and vowed to never make flan. I just didn't want to compete. Truth be told, when it comes to Abuela I like to lay low. That little lady can get feisty! I remember our dating days and baking a cake to impress Alex's family. I thought I was going to throw up as Abuela cut herself a piece of my cake. Then I thought I was going to pass out as the spoonful of cake was on its way to her mouth. Then I wished that I could disappear as the cake was in her mouth. Then she opened her mouth to speak. Dear Lord, please let oxygen rush back into my lungs. She liked it! Success! Even with that one moment of success it still freaks me out to make anything and have her taste it. I find comfort in knowing that I must be doing something right, her grandson has maintained a healthy weight since living off of my food. I'm sure if Alex could post here, he'd say I'm making him fat with all the sweets I make. (By the way, Alex if you read this, you are perfection!)

Back to the flan. Because of how intimidated I am of Abuela's great flan I have always been afraid to make it. This week's pick of flan has caused me to face my fear. It wasn't as bad as I thought it would be. It was actually good! It didn't taste like Abuela's (this recipe has a strong vanilla flavor), but I'd say it was a good introduction to flan making. Now just don't ask me to make this for Abuela ;-)

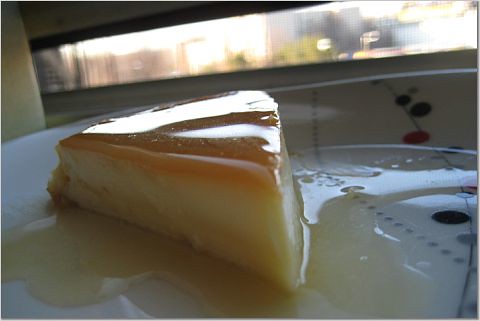
Caramel Topped Flan
Source: Dorie Greenspan’s Baking: From My Home to Yours

Makes one 8x2 flan (I used a 9x2 cake pan).

For the caramel: (I doubled this)
1/3 cup sugar
3 Tbsp water
squirt of fresh lemon juice

For the flan:
1 1/2 cups heavy cream
1 1/4 cups whole milk
3 large eggs
2 large egg yolks
1/2 cup sugar
1 tsp pure vanilla extract

Getting ready:
1. Center a rack in the oven and preheat the oven to 350ºF. Line a roasting pan or 9x13 baking pan with a double thickness of paper towels. Fill a teakettle with water and put it on to boil; when the water boils, turn off heat.
2. Put a metal 8x2 round cake pan– not a nonstick one– in the oven to heat while you prepare the caramel. (All I had was a nonstick pan and it came out fine)

To Make the Caramel:
1. Stir the sugar, water and lemon juice together in a small heavy-bottomed saucepan. Put the pan over medium-high heat and cook until the sugar becomes an amber-colored caramel, about 5 minutes-remove the pan from the heat at the first whiff of smoke.
2. Remove the cake pan from the oven and, working with oven mitts, pour the caramel into the pan and immediately tilt the pan to spread the caramel evenly over the bottom; set the pan aside.

To Make the Flan:
1. Bring the milk and heavy cream just to a boil.
2. Meanwhile, in a 2-quart glass measuring cup or in a bowl, whisk together the eggs, yolks and sugar. Whisk vigorously for a minute or two, and then stir in the vanilla. Still whisking, drizzle in about one quarter of the hot liquid-this will temper, or warm, the eggs so they won’t curdle. Whisking all the while, slowly pour in the remainder of the hot cream and milk. Using a large spoon, skim off the bubbles and foam that you worked up.
3. Put the caramel-lined cake pan in the roasting pan. Pour the custard into the cake pan and slide the setup into the oven. Very carefully pour enough hot water from the kettle into the roasting pan to come halfway up the sides of the cake pan. (Don’t worry if this sets the cake pan afloat.) Bake the flan for about 35 minutes, or until the top puffs a bit and is golden here and there. A knife inserted into the center of the flan should come out clean. (Small, individual molds will take less time– start checking for doneness around the 25-minute mark).
4. Remove the roasting pan from the oven, transfer the cake pan to a cooking rack and run a knife between the flan and the sides of the pan to loosen it. Let the flan cool to room temperature on the rack, then loosely cover and refrigerate for at least 4 hours.
5. When ready to serve, once more, run a knife between the flan and the pan. Choose a rimmed serving platter, place the platter over the cake pan, quickly flip the platter and pan over and remove the cake pan–the flan will shimmy out and the caramel sauce will coat the custard.
6. Enjoy!!

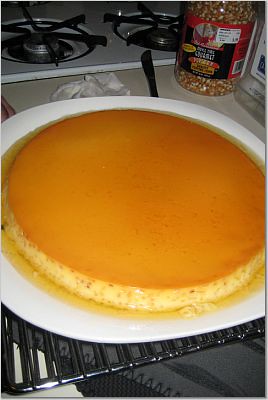
Freshly Flipped


Look at all that caramel, sugary goodness.


What a pretty slice.


Go ahead. Don't resist the urge to lick your computer screen.


And this is the lady that instilled flan-fear in me.

Vote for my post on Mom Blog Network

Onions, onions, and more onions!

One of my New Year's resolution was to incorporate more veggies into our diet. Three months into the year and I've only recently started using veggies. I figured I'd start off with a vegetable that's pretty versatile. The onion has been just the vegetable. I have used it in at least one meal a week (this is huge for us). Last week I used it twice and Alex said, "you're really liking onion, huh?" to which I retorted "I bet your colon doesn't mind." Maybe I should backtrack on that colon comment. During one of Alex's rotation a doctor asked him if he ate any vegetables and he replied that he didn't. The doctor told him that he should eat more vegetables if he wanted to keep his colon healthy. So there are the origins of my colon comment.

Anyway, back to the onions. I made a chicken on a bed of onions that was delicious. The key to this dish is to eat the chicken with the onions because the chicken itself doesn't have much flavor. The onions are very tender and full of flavor. The second dish was a beer cheese soup that was incredible. It was so easy to make and perfect with your favorite bread.

Black Pepper Citrus Chicken
Source: Cooking Light (here)

1 Tbsp canola oil, divided
1 1/4 tsp freshly ground black pepper, divided
1/4 tsp salt
4 (6-oz) skinless, boneless chicken breast halves (I used 2-8oz chicken breasts)
1 cup vertically sliced onion
2 tsp bottled minced garlic
1/4 cup white wine
2 Tbsp fresh orange juice
1 Tbsp fresh lemon juice
2 Tbsp chopped fresh parsley (I omitted)

1. Heat 1 tsp oil in a large non-stick skillet over medium-high heat. Sprinkle 1/2 tsp pepper and salt over chicken. Add chicken to pan; cook 2 minutes on each side or until browned. Remove chicken from pan and keep warm
2. Add 2 tsp oil to pan. Add onion and garlic to pan and saute for 2 minutes. Add wime and cook 1 minute.
3. Return chicken to pan. Add 3/4 tsp pepper and juices. Cover, reduce heat, and simmer until chicken is done.
4. Sprinkle with parley.
5. Serve and enjoy!


Beer Cheese Soup
Source: Unknown (I got this recipe from the What's Cooking Board? If this recipe is yours, please let me know so I can credit you properly)

1 Tbsp butter
1/2 cup chopped onion
1/2 tsp minced garlic
3 Tbsp cornstarch
3 Tbsp water
1 tsp Worcestershire sauce
1 bottle of beer (I used Bud)
1 can chicken broth
2 cup Half and Half
2 cup shredded sharp cheddar cheese

1. Melt butter. Add onion, Worcestershire sauce, and garlic and saute for 2-3 minutes.
2. Add the beer and boil for 3 minutes.
3. Add chicken broth, return to boil, then lower heat and simmer.
4. Combine cornstarch with the water and blend until smooth. Set aside.
5. Add the half and half and cheese to soup. Stir constantly until cheese melts.
6. Stir in cornstarch mixture.
7. Stir until soup is thick, about 5 minutes.
8. Serve with your favorite bread and enjoy!

Vote for my post on Mom Blog Network

A Little Change

I'm going to start posting more about my cooking/baking adventures. I've come across some great recipes and figured I'd share them. Stay tuned!
Vote for my post on Mom Blog Network

Hello Brasserie Jo

I hadn't made reservations for dinner this past weekend; being sick makes you forgetful. After a day of shopping at the Wrentham outlets, we both wanted a good meal. I picked Brasserie Jo because it was close to the house and we had a good experience there the last time we went.

At first Alex didn't like the waiter because the waiter seemed disappointed that we did not order any drinks (alcoholic). Alex almost always drinks water when we go out. I usually have a drink but because of my cold I wasn't in the mood for alcohol. The waiter eventually won Alex over (at my expense), but more of that later.

My favorite thing about this restaurant is that they bring out a warm loaf of Parisian bread and carrots. The carrots are in some kind of vinegar and herbs concoction and I always eat them all.

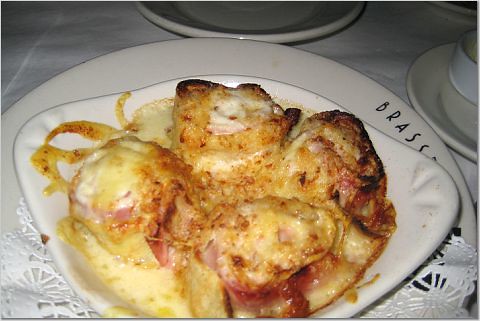
As soon as Alex laid his beautiful eyes on 'French Ham Crepe Gratin' he had to have it. I am so glad we ordered it because it was amazing. It was ham and cheese pinwheels and they were delicious. This is the perfect appetizer for cheese lovers because it was covered in melted, ooey-gooey goodness. Alex dubbed it "the best appetizer ever."

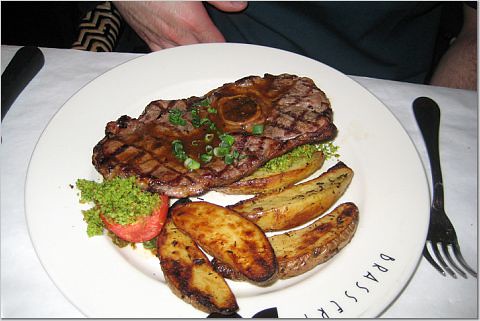
Despite bad experiences with lamb, Alex decided to order a lamb steak. After he ordered he was apprehensive about his choice to ask for it medium because he was afraid they would bring out the steak raw. It didn't come out raw, in fact, it came out more cooked than what he had expected. This dish was so good it has changed his previous view of lamb (he wasn't much of a fan). Also, notice the hand. I was lucky I even got this picture.

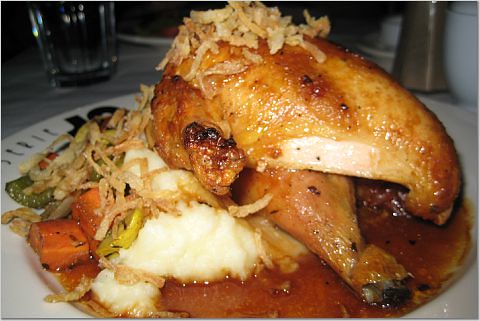
My dish was perfection. It was the perfect dish for a sick person. I had the roasted chicken with mashed potatoes. The chicken had a great flavor and it was so juicy and tender. I was a little disappointed in myself that I couldn't eat all of it because of how good it was.

Speaking of disappointment...the waiter was disappointed that I didn't eat the whole dish. He came to our table and said he would give me 5 more minutes to finish eating. I was beyond full and couldn't eat anymore. This city eater had to leave room for dessert! Well, one of the other waiters came around and cleared our table. Thank goodness. Or so I thought. Our waiter came back and told me that I cheated. He had given me 5 minutes to finish up my dish and I had it taken away before the 5 minutes had passed. I told him I was saving room for dessert and that I promised to eat it all. Big mistake! Little did I know that the dessert I ordered was the size of Montana. Not really, but it was big. He said that if I didn't eat the whole dessert I'd have to pay for two of them.

So Alex ordered the Crepe Suzette. This is one of his favorite desserts. It's a treat for him every time he gets it. This dessert is basically a crepe flambeed in liquor.

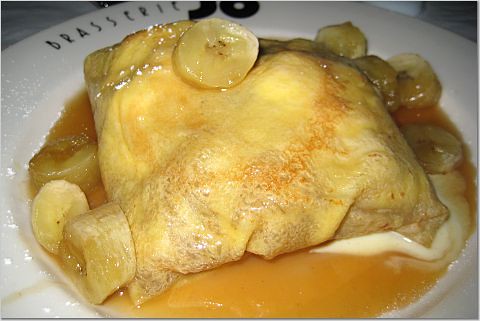
I ordered the crepe with bananas and caramel. I honestly thought it was going to just like Alex's dessert but with bananas on top and caramel drizzled over it all. Little did I know it was going to this huge crepe stuffed with 3 scoops of ice cream and bananas. No wonder the waiter was surprised when I said I'd eat the whole thing. My darling husband, bless his heart, tried to help me eat the dessert. No luck. That monstrosity could only be tackled by an empty stomach. When the waiter came back to see my dismal performance, I told him just that. Alex had a good laugh at my expense and said that "anyone who could make fun of his wife like that, was cool."


Please no pictures. I'm a dessert eating failure.
This was the second time we've gone to Brasserie Jo. I was sick this weekend and wanted to go somewhere that would have comfort food. Alex took a gamble on his dish and it paid off. I almost cost Alex $8.00 that night because of my big mouth. It was definitely a good dining experience.
Vote for my post on Mom Blog Network

Restaurant Week Dinner

We went to Azure for Restaurant Week this year. This restaurant is located in the beautiful Lenox Hotel. As soon as we walked through the revolving doors we were like, "wow, this is beautiful." The hotel and restaurant have a very relaxed, yet glamorous feel.

We were seated promptly and decided to get some drinks. I ordered the Pomegranate martini and it was soo good. You could barely taste the alcohol in it although you felt it. Alex was adventurous and ordered the infused tequila. It was supposed to be infused with mango, lime, and pineapple and although it had a hint of it that I could taste, Alex couldn't taste anything other than tequila.
The menu for Restaurant Week was great. This has to have been the most extensive menus I have ever seen for Restaurant Week. Most restaurants give you a choice between 2 or 3 items, but here you had a nice selection of items. For the appetizers we ordered 'Crab Taquitos' and 'Thinly Sliced La Quercia Prosciutto.' The taquitos were really good. They had a good amount of crab in them and were nice and crispy. What really made this dish for me was the guacamole. The guacamole was delicious; it was creamy, light, and lemony. The best part (for me) was that it had no other veggies in it. I don't like guacamole with tomatoes or onions in it.
You can never go wrong with prosciutto and melons. Alex ate that appetizer quicker than I have ever seen him eat anything before.
For the entrees Alex ordered the 'Grilled Hanger Steak' and I ordered the 'Baked Sole.' At first glance Alex was disappointed with his dish because of the portion size. His actual response was "Are we in the South End?" That's how small he felt his portion was. He felt they gave him enough mashed potatoes but not enough meat. Although it was a good dish, he would have liked more steak.
My dish was good at first. The fish was placed on top of mashed potatoes and everything was covered with a mint bearnaise sauce. The sole was very soft and full of flavor. It was rolled up and had onion in between the layers. The reason why I say that it was good at first is because at one point the bearnaise sauce became overwhelming. It was too sweet. I ended up not finishing the fish because of how sweet the sauce was.
Dessert was fun. Alex ordered the 'Mango Creme Brulee' and I ordered the 'Mexican Chocolate Cake.' The creme brulee was just what you expect out of a creme brulee. It was a creamy custard with a hard sugary crust. You really couldn't taste the mango in it (it was very subtle) but it was still good.
The chocolate cake is exactly what I expected it to be. Before it came out I told Alex that I wouldn't be surprised if it had mole in it. The cake had a kick to it and it sent your taste buds going with all the spices.

Overall, the restaurant was good. They seemed to have a lot of fun with the ingredients they use. It's a beautiful location. I would really like to go back and try their regular menu.

Tuesday, March 18, 2008

Vote for my post on Mom Blog Network

A Tropical Reminder

I finally got around to making one of the desserts that's in my Cooking Light Annual Recipes 2008 book that my friend Shanna gave me. After looking through the book for about an hour last night trying to find the perfect recipe, I decided to make a dessert that will transport me back to the warm weather and beaches... Piña Colada Cheesecake Bars!

Another attraction to this recipe was that I could use it to participate in Joelen of Joelen's Culinary Adventures monthly event Tasty Tools. The kitchen tools this month were a grater and microplane. I have two microplanes and love using them! They make baking and cooking so much fun.


Piña Colada Cheesecake Bars

Crust:
1 cup graham cracker crumbs
2 Tbs coconut flour or all-purpose flour
2 Tbs turbinado sugar
1/2 tsp ground ginger
2 Tbs butter, melted
1 Tbs canola oil
1 Tbs water
Cooking spray

Filling:
1 cup 2% low-fat cottage cheese
1/2 cup sugar
1/4 cup (2 oz) block-style fat-free cream cheese, softened
1 1/2 Tbs grated lemon rind
1 Tbs fresh lemon juice
1 Tbs pineapple juice
1/2 tsp vanilla extract
Dash of salt
3/4 cup egg substitute

Remaining Ingredients:
1 cup chopped free pineapple
1/4 cup unsweetened shredded coconut, toasted

1. Preheat over to 350 degrees
2. To prepare crust, combine first 4 ingredients in a bowl. Add butter, oil, and water; toss well. Press mixture onto the bottom of an 8-inch square baking pan (I used a cake pan since that's all I had) coated with cooking spray. Bake at 350 degrees for 10 minutes. Cool completely on a wire rack.
3. To prepare filling, place cottage cheese and next 7 ingredients in a food processor, and process until smooth. Add egg substitute, and process until blended. Spread cheese mixture over cooled crust. Bake at 350 degrees for 33 minutes or until set. Cool 10 minutes on a wire rack. Refrigerate 2 hours or until thoroughly chilled. Top with pineapple and coconut.
4. Cut into 16 bars (or slices) and enjoy!


Make sure to enjoy the first bite. There are tons of flavors in this recipe. The crust leaves you with a hint of ginger and the filling has a subtle lemon flavor. The pineapple ties in all the flavors and is a good balance to the lemon filling.


A Picture of the dessert and the microplane :)

Friday, March 14, 2008

Vote for my post on Mom Blog Network

Warning: Inappropriate Images Follow


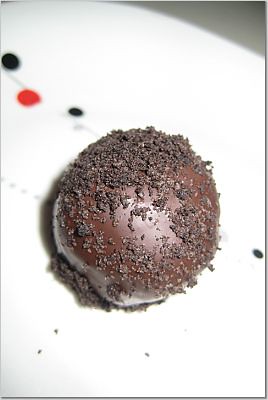
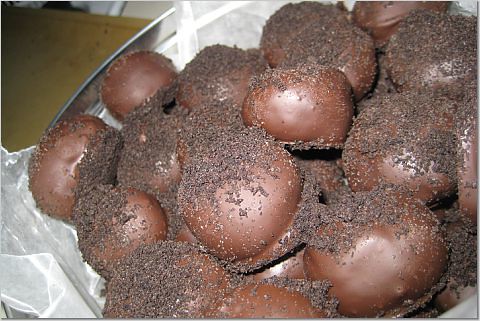
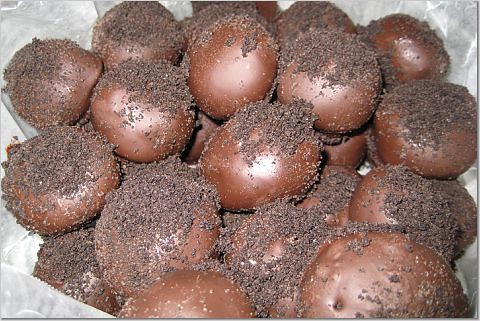
Ok they really aren't that inappropriate, but it's pretty close. These little desserts are heaven. They will make your eyes roll backwards into your head as they melt over your taste buds. They are that good and so easy to make.

It all started one day when hub's was talking about the Oreo truffles I make with some of his classmates. For the longest time I have offered to make some sweets for him and those on the rotation with him. Who knows? Maybe the sweets will reduce the competitiveness? Or maybe it will just make them nicer to the patients? Either way, I love to bake and I always make too much for just the two of us. So the day that he shared the deliciousness of the truffles with his classmates he asked me if I could make them for him to take in. I did this last night and they came out great. It's the prettiest batch I have ever made. I almost felt bad packaging them up in a container and bidding them adieu.


I first found out about this recipe in 2006 when it was all over the place in the What's Cooking? board of The Nest. You can find the recipe here on Kraft's website. I love Oreos so I knew I would love this dessert.


Easy Oreo Truffles

Ingredients

1 package Oreo cookies, finely crushed and divided

1 package (8 ounce) Philadelphia cream cheese, softened

2 package (8 squares each) Baker's Semi-Sweet Baking Chocolate, melted (I only used 1 Package)

Directions
1. Take 6 of the cookies, finely crush them, and set aside (This can be done in a food processor)
2. Take the rest of the cookies and finely crush them
3. Mix the crushed cookies and the cream cheese until well blended. Shape into 42 (1-inch) balls. After this I stick them in the freezer for a little bit so that they harden up. It makes it easier when it comes to dipping.
4. Melt the chocolate over a double boiler and dip the balls in the melted chocolate. Place the balls on a wax-covered baking sheet and then sprinkle with the crumbs that were set aside.
5. Refrigerate until firm.
6. Enjoy!

Freshly Sprinkled.


Hello Little Ball.


Look at all that crushed goodness!


All packaged and ready to go!


Sunday, March 9, 2008

Vote for my post on Mom Blog Network

Just because...

I am obsessed with my dog and none of my posts have had pictures lately. She recently spent a day at the doggy spa and what a change it was. She looks so cute now!

Before:


After:


Vote for my post on Mom Blog Network

A great find!

You.Must.Go.Here.

I think I have a new favorite sub shop! It's called Temptations Cafe. I discovered this place one weekend when I had class and one of my classmates took me to it. I had been dying to take Alex to it and finally got a chance to do it this weekend and he loved it!

They have two locations in the Boston area. One of them is at 1028 Brookline St across the street from the St Mary's T stop. The other is at 311 Huntington Ave by the Northeaster T stop.

Go check them out!
Vote for my post on Mom Blog Network

Sel de la Terre = Carb Heaven

Warning: No pictures again!!

We switched things up a bit this past weekend and went out to dinner on Friday night instead of Saturday night. We have known about Sel de la Terre for a while because we would pass by it whenever we went to the Faneuil Hall area. It wasn't until a month or so ago that we decided we wanted to check it out. So I went to OpenTable to check out what reservations were available. The downtown location requires you to leave credit card information when making a reservation and since I don't feel comfortable with that I made the reservation for the location at the Natick Collection. This was great because the Natick Collection is our favorite mall up here.

This Sel de la Terre location is absolutely gorgeous. It looks like a beach house on the inside with all the white wood and tables and chairs. Our waiter was so nice and he knew exactly what to do to make us feel special. He kept running to the kitchen to check for new breads to bring out to us....he must have known that we are bread people! I don't remember all the breads that were brought out but the most interesting ones were an olive bread and a fig bread. As I ate the olive bread I wondered if James Bond would like it ;-)

I had the French kiss martini which tasted like a spiked strawberry soda. I knew it must have been a tough week because even Alex had a drink.

For the appetizer I got the potato leek soup with shrimp. This soup was creamy and perfect for the winter. The shrimp in it were huge and had a crispy, fresh taste to them. Alex ordered their flatbread pizza. This pizza was topped with chicken, Gouda, and goat's cheese. Alex + cheese = happy husband.

For the entree I ordered their mahi mahi. The fish was so delicious! It was tender and cooked to perfection. Alex ordered their steak frites and rosemary fries. He said it was the best steak frites he'd ever had because the steak came in some kind of sauce (an au jus perhaps?). Noticing a trend yet? I eat fish and Alex eats steak when we go out.

My favorite part of the meal was the dessert. I had initially ordered the creme brulee but they ran out and instead offered me a chocolate fondant cake. I am so happy they ran out of the creme brulee because this dessert was divine! It was basically a chocolate lava cake and the insides were oozing perfection. Alex ordered their white chocolate parfait. This dessert was layers of chocolate and raspberry topped with homemade whipped cream . Alex said it was good but that he was in the mood for something more bitter. He did eat it all though.

It was a great dinner and a nice way to end an extremely stressful work week. We even got the scoop on the restaurants opening up in the new Mandarin Oriental this summer.

Thursday, March 6, 2008

Vote for my post on Mom Blog Network

Obsession of the Week

I just have to share because this has to be one of my favorite websites. She's got awesome recipes and takes some of the best food pictures. Enjoy!
Culinary Concoctions by Peabody
Vote for my post on Mom Blog Network

Where Have you Been the Past 3 Years?

I am a bad blogger! Not only have I not posted in a few weeks now but I have no pictures to share. Please forgive me ;-)

Two weekends ago we ventured out to the 'burbs. I took advantage and used my new blackberry (I broke my old phone the day hub's got into an accident) to guide us there. It was so much better having the directions on my phone than on a print out.

Anyway, we went to Arlington to eat at Tango. This is an Argentinian restaurant with a real Argentinian feel. It's a very lively restaurant and it's flowing with some of the best sangria I have ever had. We got there on time and checked in with the host. I don't know what it is I said, but the host immediately picked up on it and started talking to me in Spanish. Normally I am shy about speaking Spanish but the host was so nice and reminded me of some of my favorite people in Miami that I couldn't help but speak Spanish. From that point on everyone spoke to us in Spanish. One cool detail they had which we loved is that they had silly Spanish sayings framed on the walls. One of them was about being handsome or something and we immediately thought of Alex's father (special shout out to Manny!). Unfortunately, we forgot to take a picture but I'm sure when the in-laws come up we'll be taking them there.

So we have a seat and they bring out bread. Alex was confused because there was no butter, but I think they do this so you can try their chimichurri sauce. Oh.My.God. The chimichurri sauce is soooo good. I've had quite a few chimichurri sauces in my life and this one was the best. Yum!

We started off with empanadas and steak/egg/pepper appetizers. The empanadas were really good. It reminded me of home and all the little Colombian bakeries I used to love going to with my mom. The steak/egg/pepper appetizer was an egg wrapped in steak wrapped in red and yellow peppers with some kind of cream sauce. It was good but not as good as the empanadas.

Since this is an Argentinian restaurant and Argentina is famous for their churrasco, I did the unexpected. I ordered a churrasco.Usually I order seafood since this isn't something I cook at home, but I couldn't pass up this opportunity. Even Alex was surprised that I got it. I don't regret getting the steak either. It was tender and it had a nice grilled taste to it. Add the chimichurri sauce and it was amazing.

Dessert was absolutely the best part of this meal. If you ever want to know what heaven tastes like, you need to go to Tango and order their "Panqueque con Dulce de Leche." This is a crepe filled with dulce de leche and wow, was it delicious. This has to be one of the best desserts we have ever had. Pure heaven.

I cannot wait to go back here. Food was great, drinks were awesome, and the staff felt like home. It had a very familiar feel to it and it was nice to feel that up here.