Sunday, January 31, 2010

Vote for my post on Mom Blog Network

Classic Waffles

I am still having fun with my, umm I mean Alex's, waffle maker. I finally got the hang of it and now I understand how it works. I'm still not sold on whether the waffle maker needs the flip function (in fact, I gave up on that) but I am enjoying trying out new waffle recipes. It's great to have a new type of breakfast item to add to my cooking rotation. Alex has been one happy man with the addition of this new toy to our kitchen.

After making the gingerbread waffles I decided to try out a more classic recipe. The recipe I used was simple and the flavoring of the waffles was perfect for experimenting with toppings and sauces. Now I am even more excited about testing out recipes for syrups, butters, and toppings.

One thing this recipe taught me is that I prefer waffles that have a thicker batter. Thinner batters result in more spillage and waffles that aren't as thick and golden.

Classic Buttermilk Waffles
Source: Pancakes & Waffles by Lou Seibert Pappas
Yields 3 waffles

1 cup all-purpose flour
1 tsp baking powder
1/4 tsp baking soda
1/8 tsp salt
2 large eggs, separated
1 cup buttermilk
2 Tbsp unsalted butter, melted, or canola oil

Preheat waffle iron. In a large bowl, whisk together the flour, baking powder, baking soda, and salt. In another bowl, beat the egg whites until soft peaks form. In another bowl, beat or whisk together the egg yolks, buttermilk, and butter. Add the buttermilk mixture to the dry ingredients and mix until just combined. Fold in the egg whites.

Spoon or pour about 1 cup of batter onto the waffle iron. Close the lid and bake until the waffle is golden brown, about 4 minutes. Remove with a fork to a warm plate. Serve at once or keep warm on a baking sheet in a 200 degrees F oven. Repeat with remaining batter.

Serve with any flavored butter, sauce, or syrup.

Friday, January 29, 2010

Vote for my post on Mom Blog Network

Irish Soda Bread

Many moons ago in another lifetime Alex and I went to Stephanie's On Newbury in Boston. It was the first time either of us had had Irish Soda Bread. We were instantly hooked and Stephanie's must have known how good their bread was because they gave you the recipe for it. At some point I lost the recipe and then at some later point I forgot about this amazing bread.

Flipping through one of my cookbooks I found a recipe for Irish Soda Bread and promptly made it. I even added the raisins because I remember the bread at Stephanie's having raisins. I made rolls (bake time is about 20 minutes) instead of a loaf because I couldn't wait to taste this bread. While the bread was warm it was exactly how I remembered it to be. Once it cooled it didn't taste the same to me and the raisins had a more pronounced taste that I didn't like. Alex later lectured me on how cruel of a person I was because I left a plate full of perfectly good raisins. If you make this, I recommend eating them fresh out of the oven slathered in butter instead of letting them come to room temperature.

Irish Soda Bread
Source: Carole Bloom's The Essential Baker
Yields one 8-inch round loaf

3 cups all-purpose flour
2 Tbsp granulated sugar
2 Tbsp caraway seeds (optional)
1 tsp baking soda
1/2 tsp salt
1 cup raisins
1 1/4 cup buttermilk

Center a rack in the oven and preheat to 425 degrees F. Line a baking sheet with parchment paper or a non-stick liner.

In the bowl of a food processor fitted with the steel blade, combine the flour, sugar, caraway seeds (if using), baking soda, and salt. Pulse a few times to blend.

Add the raisins to the flour mixture and pulse a few times to mix.

With the food processor running, pour the buttermilk through the feed tube and process until the dough forms itself into a ball, about 30 seconds.

Dust a large piece of waxed or parchment paper with flour and turn the dough out onto it. Knead the dough briefly and form it into an 8-inch round, about 1/2 inch thick. Use a knife to cut a shallow X in the top of the round.

Transfer the soda bread to the lined baking sheet.

Bake for 35 minutes, until golden and set. If a cake tester is inserted in the center, it will come out clean.

Remove the baking sheet from the oven and cool completely on a rack.

Wednesday, January 27, 2010

Vote for my post on Mom Blog Network

POM Iced Coffee

A very, very long time ago POM Wonderful sent me samples of their iced coffee. I was so excited to try this product because I was running on the high you only get from drinking their pomegranate juice. They sent me samples of the Cafe au Lait, Vanilla, and Chocolate iced coffees. They didn't last too long in my house because Alex is a sucker for iced coffees. Every day he asked me if he could drink the coffees and every day he would pout when I said "No, I need to taste them first so I can blog about them." After about a week of this he started to become restless. I don't know why he couldn't just ignore the bottles in the fridge. I even made sure to put them in the back of the fridge, out of sight. I guess out of sight did not mean out of mind for him.

POM Wonderful boasts the healthiness of their beverages, but how do they taste? Read on!

First, I must say that I am not a coffee drinker. I drink coffee maybe once a month so I am no expert on coffee. I can't tell you which coffee is the best and I probably wouldn't be able to taste the difference between brands. So my review of the iced coffees are based on the palette of someone who doesn't drink coffee but who likes sweets.

The first coffee I sampled was the Cafe au Lait. This was my least favorite of the three flavors because the coffee taste was too strong. To me it felt like it lacked sweetness. I don't think this is the right drink to have if you are new to iced coffees; it might turn you off from tasting the other flavors. The second coffee I sampled was Vanilla. This coffee reminded me of the Starbucks Vanilla Frappuccino blend you pick up at the grocery store, but without the strong coffee flavoring. I found this coffee to be refreshing and a great pick-me-up without the bitter coffee after taste.
I somehow managed to save the best for last in my taste testing. The Chocolate iced coffee was by far the most delicious and the drink I would actually buy. It was very chocolaty and it tasted more like a healthy chocolate milk than a chocolate coffee. I drank more of this coffee than I did of the others. I couldn't get enough of it. This is the type of drink that I can see myself drinking on a more regular basis.
A huge thank you to POM Wonderful for sending me samples of the iced coffees. I enjoyed being introduced to more of their products.

Tuesday, January 26, 2010

Vote for my post on Mom Blog Network

TWD: Coco Nana Bread

Internet, I must tell you something. I am in love. Devastatingly in love. I haven't felt this way in a long, long time. Sure, there have been moments of infatuation and near-love, but nothing like this. What am I in love with, you ask? I am in love with this week's TWD selection, the Coco Nana Bread. It's chocolaty banana, feels amazing in your mouth goodness. This cake was delicious served warm and at room temperature. It was delicious with a glass of milk. And to be honest I don't know what else it was good with it because I ate it so quickly it was gone an hour after I made it. I saved a slice for Alex because that's all I could manage to save. It broke my heart to see the bread sitting on the counter without it being enjoyed (by me) so I had to hide the slice I saved for Alex from view.
I can't stop thinking about this bread and I can't wait to make it again. In fact, I have bananas that are ripening as this post goes up. A huge thank you to Steph of Obsessed with Baking. You absolutely must go to her blog and get the recipe for this bread. You also should check out the blogs of the other TWDers to read their reactions to this week's choice.

Monday, January 25, 2010

Vote for my post on Mom Blog Network

Spaghetti Carbonara

Here's a quick and delicious savory recipe for you. I used to be apprehensive about making carbonara but now I feel comfortable with it because of this recipe. Other than maybe the bacon, the ingredients are all things you should have in your kitchen. The sauce has a nice texture and taste because of how the parmesan cheese and the cream balance each other out. The bacon gives the pasta a salty and almost smokey flavor.


Spaghetti Carbonara
Source: Martha Stewart's Everyday Food: Great Food Fast
Serves 4

1 pound spaghetti
8 ounces (8 slices) bacon, cut 1 inch thick crosswise
Coarse salt and freshly ground pepper
3 large eggs
3/4 cup grated Parmesan cheese, plus more for serving
1/2 cup half-and-half (I use heavy cream)

Set a large pot of water to boil (for pasta). In a large skillet, cook bacon over medium heat, stirring occasionally, until crisp, 8 to 12 minutes; transfer to a paper-towel-lined plate.

Salt boiling water generously; add pasta and cook until al dente, according to package instructions.

Meanwhile, in a large bowl, whisk together eggs, Parmesan, and half-and-half. Set aside.

Drain pasta, leaving some water clinging to it. Working quickly, add hot pasta to egg mixture. Add bacon; season with salt and pepper, and toss all to combine (heat from pasta will cook eggs).

Serve immediately, sprinkled with additional Parmesan cheese.

Sunday, January 24, 2010

Vote for my post on Mom Blog Network

Reviewed: Sea Siam

Not too long ago I posted a rant about Miami dining and not having any go-to places down here. I still don't feel like I have any go-to places for a lot of different cuisines but then it dawned on me that maybe I was confusing go-to places with favorite places. There is this one restaurant we always go to for Thai food and, in fact, it's the only restaurant we have repeatedly introduced others to. We like the restaurant because the food is always good, the price is right, and the service is always great. So why is it that this restaurant slips my mind when I try to list out my go-to places? Maybe it's because I consider it too far from my house (about a 20-25 min drive) when I was so used to my go-to restaurants in Boston being a walk away? Is that part of the transition to Miami life I haven't gotten to?

Every time we go to Sea Siam we order the exact same thing. We start off with crunchy spring rolls that make us feel healthy because we are eating vegetables despite the rolls being fried. Then we order chicken fried rice that is always perfectly soy-sauced with the right ratio of chicken chunks to vegetable chunks. My favorite thing about this fried rice is that it has a hint of sweetness to it that you don't get with other fried rices.
The volcano (extra hot please) chicken is a must. You can't go to Sea Siam and not have this dish. The chicken is crispy and topped with a sweet and spicy pepper sauce. The sauce is so good you can't resist pouring it all over your fried rice. This dish is what best represents Thai food for me; it's a dish that starts off with one flavor and then ends in another but the flavors flow smoothly into one another. It's like a rainbow where the colors transition beautifully and seamlessly into one another.
For dessert you can never go wrong with Thai donuts. Fried dough dipped in condensed milk is the perfect end to any Thai meal.
Sea Siam is located at 12735 South Dixie Highway. I definitely recommend going and if you ever need someone to go with, I'm your girl!

Saturday, January 23, 2010

Vote for my post on Mom Blog Network

Sweet Breakfast Biscuits

I love making cinnamon rolls but I often don't like the time you have to invest in making them. There are times when I want cinnamon rolls but I don't want to wait while they rise. I came across this recipe and it's a great alternative to your more traditional recipes. They are called cinnamon biscuits because they don't have the soft and chewy feel of cinnamon rolls. They are also denser, but they have all the right elements of a delicious cinnamon roll.

Glazed Cinnamon Biscuits

Source: All Recipes (here)

2 cups all-purpose flour
4 teaspoons baking powder
1/2 teaspoon salt
6 tablespoons butter or margarine, divided
3/4 cup milk
1/4 cup sugar
1 teaspoon ground cinnamon

GLAZE:
1 cup confectioners' sugar
1 tablespoon butter or margarine, melted
5 teaspoons milk
1/8 teaspoon vanilla extract

Preheat oven to 450 degrees. Grease an 8-inch square baking pan.

In a large bowl, combine dry ingredients. Cut in 4 tablespoons of the butter until mixture resembles coarse crumbs. Stir in milk just until moistened. Turn onto a lightly floured surface; knead gently 8 to 10 times. Roll into an 11-in. x 8-in. rectangle about 1/2 in. thick.

Melt remaining butter; brush 1 tablespoon over dough. Combine sugar and cinnamon; sprinkle over butter. Roll up jelly-roll style, starting with long edge. Cut into 12 equal slices. Place with cut side down in a greased pan. Brush with remaining butter.

Bake for 18 to 20 minutes or until golden brown. Cool for 5 minutes.

Combine glaze ingredients; spread over warm biscuits. Serve immediately.

Friday, January 22, 2010

Vote for my post on Mom Blog Network

Reviewed: Wing Stop

Have you ever seen a place advertised for on the TV and wondered where it was? That happens to me all the time with Sonic. I see commercials for it almost every time I watch TV and yet I don't know of a location anywhere in Miami. Wing Stop was like a Sonic for me. I had seen commercials for it but never knew where one was located. We stumbled upon one and decided to check them out. I'm always open to having wings, especially hot ones, so I was curious about how this place stood in comparison to all the other wings we've had. First, I must say that I was so entertained by the decor of Wing Stop; it kind of reminded me of the show Wings. Do you remember that show?
They offer wings in all kinds of flavors, from spicy to sweet to cajun. But I am purist when it comes to my wings and I like them hot and spicy. We shared a platter of wings and fries because the wings don't come cheap at Wing Stop. In fact, you pay nearly twice the price of bone-in wings for half the amount of boneless wings. The wings were good; crispy and saucy. Our biggest complaint was the size of the wings and this lead to a conversation about how a person should be able to buy wings individually at a set price, say $.50 per wing.
The fries were great. I love fries that taste fresh and are chunky. These fries tasted like real potatoes and were served with their own twist of cajun spices. What lacked in the serving size of wings was made up for in the serving size of fries. But are fries enough of a reason to go back?
While the food was good, I don't know if I will go back because of the price and size of the wings. I can't see myself going back to a wings place solely for the fries. Because Wing Stop has locations throughout the country, I'd like to know if you've been and what your experience was like.

Wednesday, January 20, 2010

Vote for my post on Mom Blog Network

Cake Slice: Red Velvet

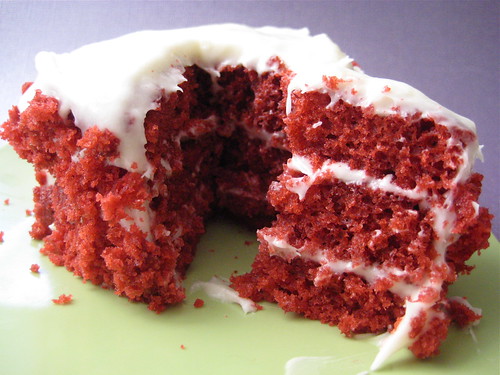
My introduction to red velvet came in high school when my drama teacher told me it was his favorite cake. I had never even heard of red velvet before and I had no clue what it tasted like. It didn't take me long to try this cake because a few weeks later a group of friends and I bought my drama teacher a red velvet cake for his birthday. I remember my first bite and the thoughts that occurred to me. The cake tasted like a chocolate cake but not as rich. And I couldn't get over the red coloring and the cream cheese frosting.
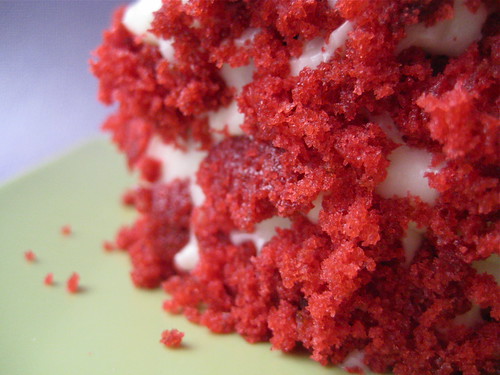
Making this cake took me back to high school. I love how food has the ability to transport you to a different place in time. The cake came out delicious and it didn't even last a day in our house. Although I must admit that it didn't last that long because I quartered the recipe (cook time was still about 20 minutes) and used this cream cheese frosting recipe instead. The cake was a beautiful shade of red with just the right amount of chocolate taste.

I've heard that red velvet cake traditionally got its red color from beets, anyone know anything about this?
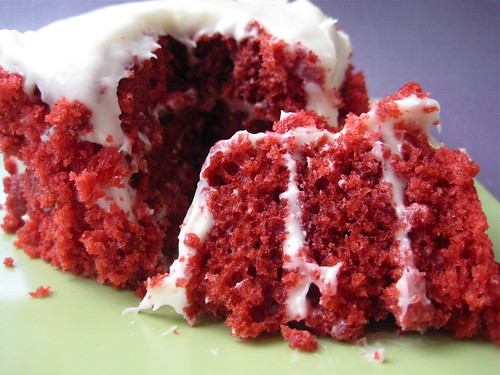
January’s Cake: Red Velvet Cake

(Recipe from Southern Cakes by Nancie McDermott)


For the Red Velvet Cake

2½ cups all purpose flour

½ tsp salt

1 tsp vanilla extract

1 cup buttermilk (see note below)

2 tbsp cocoa powder

2 tbsp red food colouring

1 cup (2 sticks) butter

2 cups sugar

2 eggs

1½ tsp baking soda

1 tbsp cider vinegar or white vinegar


For the Coconut Pecan Icing

1 cup milk

2 tbsp all purpose flour

1 cup (2 sticks) butter, softened

1 cup sugar

1 tsp vanilla extract

1 cup sweetened shredded coconut

1 cup finely chopped pecans or walnuts


Method – Red Velvet Cake

To make the cake, heat the oven to 350F. Grease two 9-inch round cake pans and line them with waxed paper to kitchen parchment. Grease the paper and flour the pans.


Prepare three separate mixtures for the batter. Combine the flour and salt in a medium bowl and use a fork to mix them together well. Combine the cocoa powder and the red food colouring in a small bowl, mashing and stirring them together to make a thick smooth paste.


In a large bowl, beat the butter with a mixer at low speed for 1 minute until creamy and soft. Add the sugar and then beat well for 3 to 4 minutes, stopping to scrape down the bowl now and then. Add the eggs one at a time, beating after each one until the mixture is creamy, fluffy and smooth. Scrape the cocoa-food colouring paste into the batter and beat to mix it in evenly.


Add a third of the flour mixture and then about half the milk, beating the batter with a mixer at low speed. Mix only enough to make the flour or liquid disappear into the batter. Mix in another third of the flour, the rest of the milk and then the last of the flour in the same way.


In a small bowl, combine the baking soda and vinegar and stir well. Use a wooden spoon or spatula to quickly mix this last mixture into the red batter, folding it in gently by hand. Scrape the batter into the prepared pans.


Bake at 350F for 20 to 25 minutes until the layers are spring back when touched lightly in the centre and are just beginning to pull away from the sides of the pans.


Cool the cakes in the pans on wire racks or folded kitchen towels for 15 minutes. Then turn them out onto the racks, remove the paper and turn top side up again to cool completely.


Method – Coconut Pecan Icing

Combine the milk and flour in a small or medium saucepan. Cook over medium heat, whisking or stirring often until the mixture thickens almost to a paste, around 2 to 4 minutes. Remove from the heat and scrape it into a small bowl to cool completely.


Meanwhile, beat the butter with a mixture at high speed until light and fluffy. Add the sugar in thirds, beating well eacg time until the mixture is creamy and fairly smooth. Add the cooled milk and flour mixture and beat for 1 to 2 minutes, scraping down the sides now and then to combine everything well.


Using a large spoon or spatula, stir im the vanilla, coconut and pecans, mixing to combine everything well into a thick, fluffy, nubbly icing.


To Assemble

Place one cake layer top side down on a cake stand or serving plate. Spread a third of the icing on top. Place the second layer, top side up, on top. Frost the sides and then the top of the cake with the remaining icing. Refrigerate for 30 minutes to help the icing set.


NOTE: If you can’t find buttermilk, stir 1 tbsp lemon juice or vinegar into 1 cup of milk and leave to stand for 10 minutes before using.
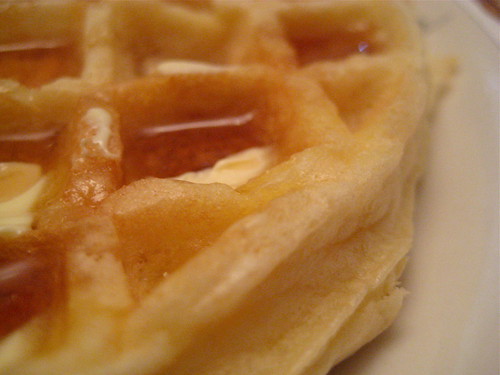
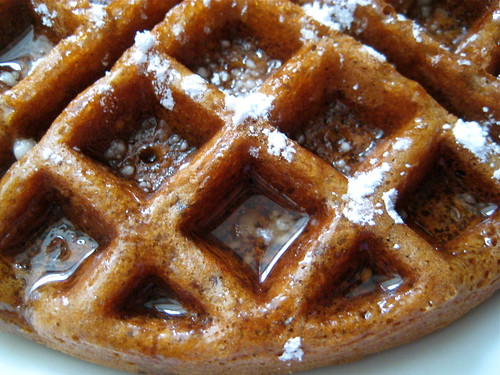
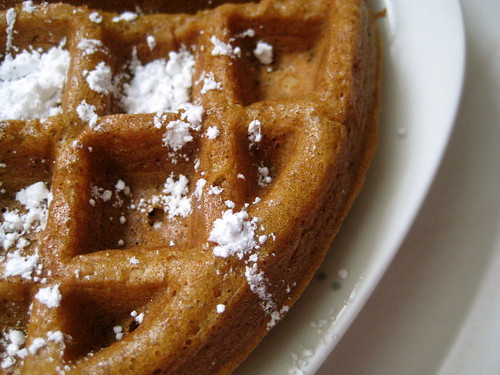
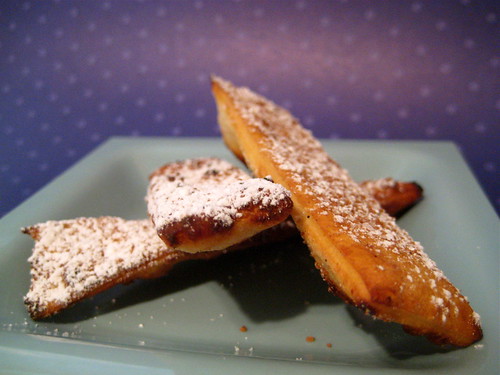
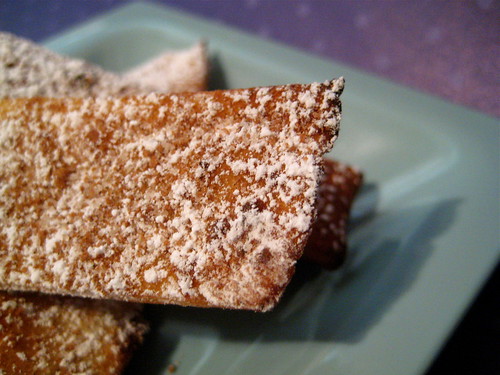
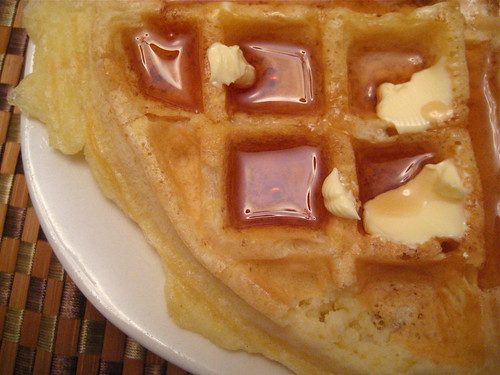
Tuesday, January 19, 2010

Vote for my post on Mom Blog Network

Gingerbread Waffles

My sincerest apologies to TWD this week. I really wanted to make the Chocolate Oatmeal Almost Candy Bars selected by Lillian of Confectiona’s Realm but I couldn't find the motivation to go to the store to buy the missing ingredients. Instead I bring you waffles. Not just any waffles either. These are gingerbread waffles. I know it feels like gingerbread season has passed us, but trust me when I say you will want to try these waffles. They are deliciously fluffy and, to me, they tasted like ultra soft gingerbread cookies. To Alex they tasted like they had banana in them. Go figure!
Gingerbread Waffles
Source: All Recipes (here)
Yields 3 waffles

1 cup all-purpose flour
1 1/2 teaspoons baking powder
1 teaspoon ground ginger
3/4 teaspoon ground cinnamon
1/2 teaspoon ground allspice
1/2 teaspoon baking soda
1/4 teaspoon dry mustard
1/4 teaspoon salt
1/3 cup packed brown sugar
1 egg, separated
3/4 cup buttermilk
1/4 cup molasses
3 tablespoons butter or margarine, melted
1/3 cup chopped raisins
1/8 teaspoon cream of tartar

In a bowl, combine flour, baking powder, ginger, cinnamon, allspice, baking soda, mustard and salt; set aside. In a large mixing bowl, beat brown sugar and egg yolk until fluffy. Add buttermilk, molasses and butter; stir into dry ingredients just until combined. Add raisins. In a small bowl, beat egg white and cream of tartar until soft peaks form. Gently fold into batter. Bake in a preheated waffle iron according to manufacturer's directions until golden brown.

Monday, January 18, 2010

Vote for my post on Mom Blog Network

Baby Talk: Random Thoughts & Nursery

Four weeks left to Due Date! I can't believe time has flown by this quickly. It feels like I found out I was pregnant yesterday and now we are trying to keep ourselves entertained as we await Catarina's arrival. It still amazes me that we are going to have a daughter and that the hospital is going to let us bring her home. When did we become responsible enough to take care of another life?! I move between feeling confident about parenting to feeling scared that I will somehow screw up this little person. We are both curious as to who the little one is going to look like. What do you think? (Try squinting if you can't see her little face and arm)
Obviously, the ultrasound isn't the best indication as to looks but I swear Cati looks like Alex. I was watching him sleep one night (not in a creepy way, but in a "I can't wait to see this man become a father" way) and his face made me think so much of the ultrasound picture. All I hope for is that she has a little bit of me in her; it will make all the months dedicated to growing her feel even more worth it.
When they say pregnancy gets more and more uncomfortable as time passes, they aren't lying. I was doing really well up until a week ago. I was tired and my back hurt at the end of the day, but I felt great. I wasn't getting up at all hours of the night to go to the bathroom, I was sleeping heavily through the night, and I didn't feel particularly big. Now I wake up several times at night, I sleep lightly (every position change wakes me up), my back hurts all day long, and my belly feels harder than a basketball. My hands and feet are so swollen they hurt, which leads me to another thing: Waddling. I don't think I've been waddling but I now understand why a pregnant woman would waddle. She waddles for one of following reasons or maybe even a combination: (1) lower back pain so bad that you don't know if you should walk with your back arched in either direction or stick straight, (2) baby's head is pushing really hard down in your pelvis and you try to move your hips to get the baby to move to a more comfortable position, (3) feet so swollen it hurts to step down.
I've also been extra irritable. I hate that the first thing anyone asks me is how I feel. I hate that people actually think we won't tell them when I'm in labor. I hate the unsolicited advice. I think, in general, I just hate the increased concern. No one cared what I ate or what I wore before. Now, everyone is concerned and has opinion. I'm snappy (I can go to the bathroom without an entourage waiting for my outside) and most of the time I want to yell "Leave me alone!" Why is it that having a baby brings out the crazy in people?? Or is it just me?

We are officially prepared for Cati's arrival. The car seat has been installed and her pediatrician has been selected. Her nursery is complete (minus a table) and all her stuff has been washed, folded, and put away. When I first started thinking about her nursery I knew I wanted a vintage Paris poodle theme. I had a lot of ideas, but with a tight budget, I also had to get very creative. Wal-Mart and Marshall's were my best friends. We saved a lot of money by refinishing our old dresser, stalking the clearance section of furniture stores, and jumping on online specials. I also had a lot of fun incorporating things from our childhoods into the room. Here are some pictures of her finished room:

This is her dresser (refinished by me!). It's topped with the changing pad, a basket for her diaper things (Marshall's), a lamp (Target), monitor, sound spa (I love this thing!), and a few of her stuffed friends. The artwork is a large framed damask print (Marshall's and Michael's) in the middle surrounded by smaller framed pictures of vintage Paris (Etsy and Michael's). This is a side view of the room. See that book case? It cost us $56 and it's solid mahogany. No assembly required :)
This is her crib (Wal-Mart). I didn't want a set for the bedding so I combined pieces that I found. You can't really tell from this picture but the crib skirt is damask print. The flower holders on the crib are from our wedding and I was really happy about including this memento into Cati's room. This is the view of the room from the door. We loved the look of a chandelier for the room so I searched high and low to find this one. This was the splurge in the room and it's not that bad of a splurge at $78. I wanted a rug for the floor but couldn't swallow the prices so instead we bought a large, black damask print throw/blanket and lined it with a rug saver (Marshall's). I posted about the artwork above her crib here. The shadow boxes (Marshall's) will be filled with mementos of Cati's childhood but for now they contain my baby shoes. This is my favorite spot in the room. I absolutely adore it. The glider (Wal-Mart) is extremely comfortable. We like to hang out in the room just to sit on the glider because it's so comfortable. Above the glider is an area for prints. The top frame will contain Cati's prints (right now it's just a picture of us). Under that is the mold of Alex's hand at four years old and under his mold is the mold of my hand at four years old. Last, but not least, is the clothes. Cati has gotten a lot of clothes as gifts and she has also inherited a lot of my baby clothes. Four out of the seven drawers in the dresser are full of clothes for her. Drawer organizers (Ikea) are the best way to go for organizing the clothes (I organized according to age).
Poor girl can't have it all though. She has to share the closet with her dad. I'm impressed she was able to take up half the space in the closet. She isn't here yet and she's already putting our wardrobe to shame.
There are so many more details and thoughts I want to share, but if I do, this will go down in blog history as the longest post ever. If you made it to the end of this post, thank you for sharing my excitement! I can't wait for Baby Girl to be here and to finally see her sweet face.

Wednesday, January 13, 2010

Vote for my post on Mom Blog Network

Breakfast Cup

Have I told you how much I am loving the month of January? I don't love it because it's the beginning of a new year or because it's the month people make their resolutions in, I love it because Alex has the ENTIRE month off. I couldn't have asked for a better way to spend the last few weeks of this pregnancy. It's nice to sleep in with him every day and not have to worry about a pager, phone call, or text message interrupting our meals. It amazes me how much time I can spend with him and how I still feel like there wasn't enough time.

One of the perks of having him home with me is that I can really have fun in the kitchen. I've been trying to get in as much kitchen time now because I know I won't be seeing much of it in a few weeks (or days!). My favorite meal of the day has always been breakfast. I love everything about breakfast and how that one meal can help set the tone for the day. Pancakes, eggs, bacon, toast, waffles, the list goes on and on. These are all perfect starts to any day. I decided to make these Bacon, Egg, and Toast Cups one fine morning and they were so good. Easy to put together and delicious to eat, this is a breakfast item that has it all.
Bacon, Egg, and Toast Cups
Source: Annie's Eats (here)
Yields 2

2 slices of bacon
2 slices of bread
Shredded cheese
2 eggs
Salt and pepper

Preheat the oven to 400° F. Grease 2 wells of a muffin pan with butter.

In a frying pan, cook bacon about 3-5 minutes, until partially cooked but not completely crispy. Transfer to a paper towel-lined plate.

Cut out rounds of bread using 3.5-inch round cookie cutter or a drinking glass. Press the bread rounds into the greased muffin wells. Curl a piece of bacon around the periphery of each piece of bread, positioning it between the bread and the muffin tin to help keep it in position. Sprinkle a small amount of shredded cheese in the center of each piece of bread. One at a time, crack an egg, removing about half of the white, and dropping the remaining white and yolk over each piece of bread, being careful not to break the yolks. (Note: I used the entire egg)

Once all the bread pieces have been topped with eggs, bake until eggs are cooked through to your liking (about 6-10 minutes) and bacon is crispy. Run a knife around the edge of each muffin well and pop the egg cups out. Season with salt and pepper to taste and serve immediately.

Tuesday, January 12, 2010

Vote for my post on Mom Blog Network

TWD: Mrs. Vogel’s Scherben

What can I tell you about these cookies? There's nothing in the name that will clue you into what these cookies are. Basically, they are fried dough showered in cinnamon, sugar, and powdered sugar. They are supposed to be crispy. I say "supposed to be" because mine came out only slightly crispy. The ones that came out really crispy were the ones I burned. Oops. Lesson learned: don't try to fry and sugar coat at the same time. Mine also didn't look nearly as pretty as the picture in the book. Instead of pretty crispy, textured cookies, my cookies looked more like sticks covered in sugar. But where they good? Oh yes, they were. We ate them all. In one sitting. And then I spent 15 minutes eating away at the leftover sugar.
Thanks to Teanna of Spoon or Fork? for this week's selection. I'm sure the TWD bakers have helped introduce the world to Scherben :)
Make sure to stop by the other TWD bakers' sites so you can see how pretty these cookies can look.