Thursday, October 30, 2008

Vote for my post on Mom Blog Network

Fashion, Err, Pie Disaster


I love baking groups and I'm constantly searching for new groups to be a part of. The most recent group I joined was You Want Pies With That? What I love about this group is that you are baking pies (obvious, right?) with themes. Last month's theme was favorite movie. This month's theme is fashion. I rattled my brain trying to figure out how to express fashion in a pie. I had initially wanted to do a wedding fashion pie so I chose a pie that would be white. Since, you know, brides wear white.

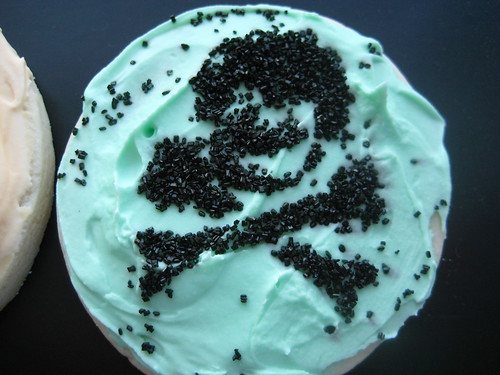
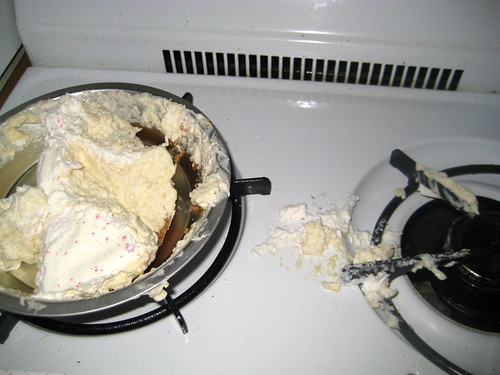
I had the pie and all I had to do was decorate it. The pie itself was perfect. I wish I would have stopped at just making a pie. But no, I had a fashion theme to work with. So I took out my handy dandy bridal dress cookie cutter and silver shimmer stuff. But, because I am a genius I only made one bridal dress cookie. As I was decorating the cookie it broke. In trying to reattach the part that broke I messed up the decorating that I had done. The only frosting I had leftover was light orange. At this point I was so frustrated with my broken orange dress that I threw pink sugar on it. Why? Because pink stuff always makes me feel better. I finally got over my dress mishap and, as if the dress breaking wasn't bad enough, I dropped the pie. There was pie all over my stove. Some even made its way inside my stove. It was a disaster and I was incredibly bummed. I managed to save a piece of pie that looked decent (or decent enough with a decapitated dress on it).

Now I had to figure out how and if I even could make this disaster relate to fashion. I came up with something but you will have to be creative and just go along with me. My pie is a fashion disaster. It represents all those days where you feel like nothing looks or fits right. It is a pie for those days where you stand in front of the mirror trying on a million different outfits. It's for those days when you stand in front of your closet full of clothes and still feel like you have nothing to wear. But mostly it's for those days you wish you could go out into the world naked. The pie represents the human body. It was perfectly fine being naked. It tasted and looked great. The moment I tried to dress it up, things went wrong. No matter what I tried to put on it, it just didn't work. The orange frosting on the dress was all wrong. It didn't go with the white pie at all. Pink sprinkles didn't go with silver shimmer. It was just wrong. It was a horrible mix and match of things. At least it tasted good! At least...

This is a stretch right? Oh well. If you can think of something better please let me know because that's all I could think of. Hopefully my pie fare better next month.


Coconut Cream Pie with Cookie Crust

Source: Carole Bloom's The Essential Baker


Crust

7 ounces (about 30 cookies) vanilla wafer cookies

2 Tbsp. granulated sugar

3 ounces (6 Tbsp) unsalted butter, melted and cooled


Place the wafers and sugar in the food processor and pulse until the wafers are finely ground. Transfer the crumbs to a medium bowl and add the butter. Use a rubber spatula to toss the mixture together to moisten all the crumbs. Using your fingers, press the crumbs evenly into the bottom and partway up the sides of the pie pan. Chill the crust in the freezer for 15 minutes.


Preheat the oven to 350 degrees. Place the pie pan on a baking sheet and bake the crust for 15 minutes, until set. Remove fom the oven and cool completely on a rack.


Filling and Topping

2 cups heavy whipping cream

2 Tbsp granulated sugar

1 recipe vanilla pastry cream (see below)

1 ½ cups sweetened, shredded or flaked coconut


Place the cream in a chilled bowl and whip on medium speed until frothy. Add the sugar and whip on medium-high speed until the cream holds, firm but not stiff peaks. Remove 1 cup of the whipped cream and set aside (used for topping)


Whisk the pastry cream to break up any lumps. Fold the remaining whipped cream into the pastry cream and blend well, then fold in the coconut. Spread this mixture evenly in the cookie shell. Spread the reserved whipped cream over the top of the filling.


Chill the pie in the refrigerator for up to 3 hours.


Pastry Cream

1 cup whole milk

1 vanilla bean

3 extra-large egg yolks, at room temperature

1/3 cup granulated sugar

2 Tbsp. sifted cornstarch


Place the milk in 3-quart heavy-duty saucepan. Use a small knife to slice the vanilla bean open lengthwise. Use the back of the knife to scrape out the vanilla seeds and add the vanilla bean to the milk. Warm over medium heat until tiny bubbles begin to form around the edges of the pan, about 5 minutes.


Place the egg yolks in a large bowl. Whip the eggs on medium-high speed until they are frothy. Add the sugar and whip together until the mixture is very thick and pale colored and holds a slowly dissolving ribbon as the beater is lifted, about 3 minutes.


Turn the mixer to low and add the cornstarch. Scrape down the sides and bottom of the mixture. Return the mixer speed to medium and whip until the cornstarch is thoroughly blended.


Turn the mixer to low again and add ¼ cup of the hot milk to the egg yolk mixture. Whip together to blend.


Transfer the egg mixture to the milk in the saucepan. Stir the mixture constantly with a whisk so it doesn’t burn. Cook until the mixture starts to bubble and pop.


Remove the saucepan from the heat and immediately transfer the pastry cream to a bowl. Cover the top of the cream with a piece of wax paper to prevent a skin from forming. Cover the bowl with plastic wrap and place the bowl on a cooling rack. Let it cool to room temperature then refrigerate until cold before using.

Oops.


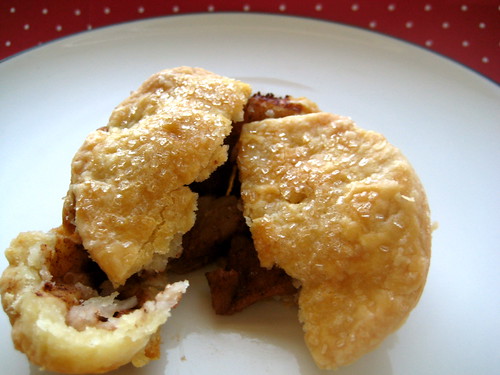
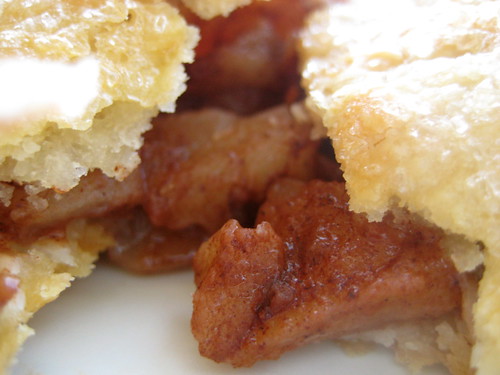
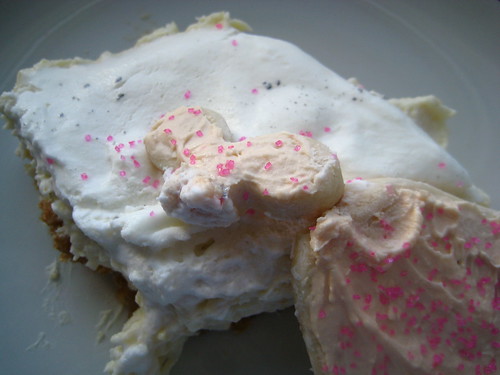
The piece that survived the crash.
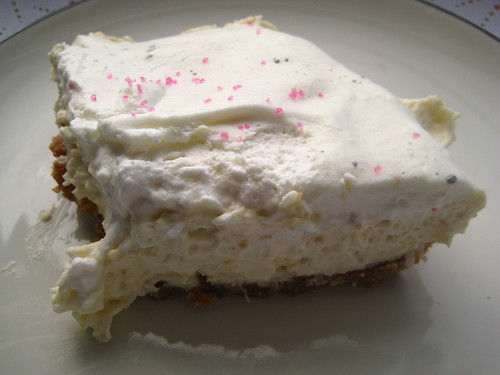
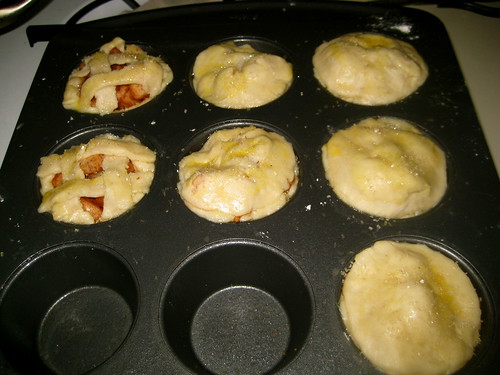
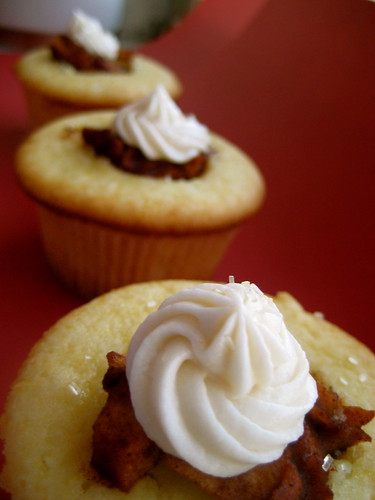
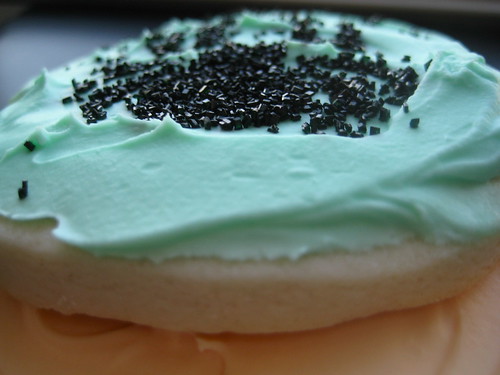


All together.


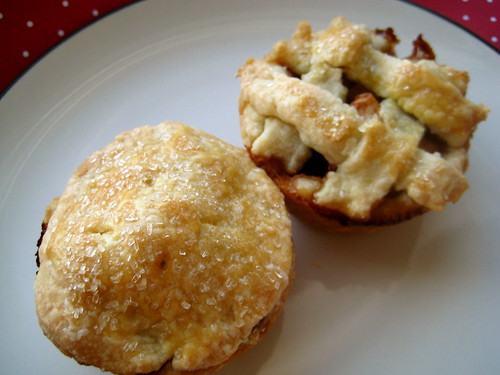
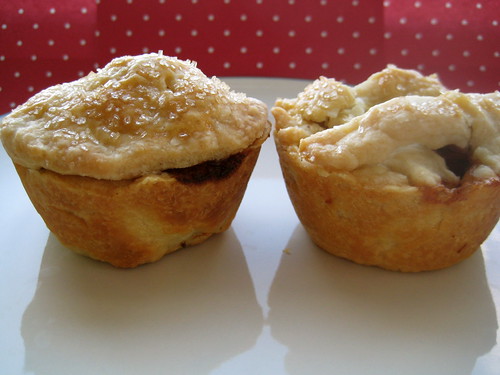
Every model has a good side...
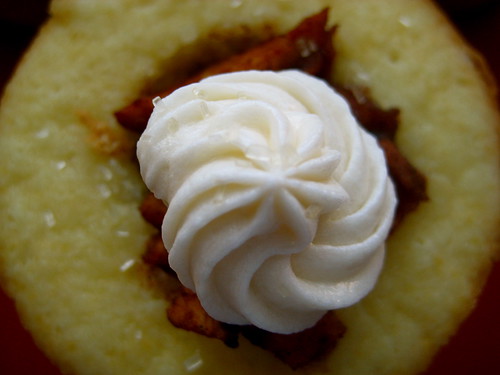

...And a bad side.

Vote for my post on Mom Blog Network

Apple Cuteness


What does a person with a million pounds of apples do? Make apple pie! But not just a regular apple pie, mini apple pies. I saw the idea for this on Jayne's blog (The Barefoot Kitchen Witch) and fell in love. I think anything that is miniaturized is awesome and I am a huge fan of making single-sized servings. It's all mental too. I feel better eating 3 mini apple pies than half an apple pie. It's not like I can see evidence of my indulgence if I eat 3 individual servings of mini apple pies that have no connection to one another. With a whole apple pie you can see the damage you've done. In fact, the half that wasn't eaten stares at you wondering why you didn't eat it too.

For the pies I used Carole Bloom's pie dough recipe and McIntosh apples. The little pies were adorable and tasted incredible.

Mini Apple Pies
Pie dough
Apple filling
1 egg, beaten
Sugar for topping (I used Turbinado sugar).

Preheat over to 350 degrees.

Place 4-inch dough circles in the
cavities of greased cupcake/muffin pan (press it in to cover the entire cavity and a little above the cavity). Fill the cupcakes with the apple filling. Top the cupcakes with the 3-inch dough circles and press the edges together to seal the pie. Cut small slits in the dough. With a pastry brush or spoon, brush the top of the pies with the egg and then sprinkle with sugar.

Bake for 25-30 minutes until golden. Remove from oven and cool on racks.

Pie Dough
Source: Carole Bloom's The Essential Baker

1 ¼ cups all-purpose flour
1 Tbsp granulated sugar
¼ tsp salt
4 ounces (8Tbsp) unsalted butter, chilled
4 ounces cream cheese, chilled
2 to 3 Tbsp heavy whipping cream

In a food processor combine the flour, sugar, and salt. Pulse briefly to blend.

Cut the butter into small pieces and freeze for 20 minutes.

Cut the cream cheese into small pieces and add to the food processor. Pulse to cut the cream cheese into very tiny pieces. The texture should be sandy with very tiny lumps throughout

Add the butter to the food processor. Pulse until the butter is cut into pea-sized pieces, about 30 to 45 seconds.

Sprinkle 2 Tbsp of the cream. Pulse for 10 seconds. Squeeze a small amount of the dough in your hand. If it holds together, don’t add anymore cream. If the dough is still very crumbly, add another tbsp of cream, pulse to blend, then check the dough again.

Roll the dough into a ball and wrap in plastic wrap. Chill in the refrigerator for 2 hours. Take the dough out of the refrigerator and on a well floured surface roll out the dough to about 1/4-inch thickness. Using a 4-inch cookie cutter or a large cup, cut out six circles (these will be the crust). Gather the dough and roll it out again. Using a 3-inch cookie cutter or a smaller cup, cut out six circles (these will be the pie tops).

Apple Filling
2 large apples, peeled, cored, and cut into chunks
Lemon juice
~3 Tbsp. cinnamon
~1 Tbsp. Sugar

Combine the apples and the lemon juice. Then add the cinnamon and sugar and toss until the apples are coated.

Before the bake.


All done.


Delicious!


The stars of the show.

Vote for my post on Mom Blog Network

Daring Bakers: Pizza


I have to hand it to Rosa of Rosa's Yummy Yums for picking a fun challenge for this month's Daring Bakers. I have yet to meet a person who does not like pizza. I personally love pizza and I am at a great point in my life for loving pizza because every school event I have gone to has served pizza. What really made this challenge fun was the tossing of the pizza. I didn't think my fists were made to toss a pizza but I managed to do it. It took a few tosses to get a hang of it and even then my pizzas didn't have that nice circular shape (they were more oval). The dough was great and I loved the ability to get creative with the toppings. I kept it simple though and made a cheese pizza with homemade sauce and a cinnamon and sugar pizza. Alex was so impressed with the pizzas and I was impressed that I made them.

Thanks Rosa for a great challenge! Don't forget the other Daring Bakers; they did some amazing pizzas that will make your mouth water.

Basic Pizza Dough
Original recipe taken from “The Bread Baker’s Apprentice” by Peter Reinhart.

Makes 6 pizza crusts (about 9-12 inches/23-30 cm in diameter).

Ingredients:
4 1/2 Cups (20 1/4 ounces/607.5 g) Unbleached high-gluten (%14) bread flour or all purpose flour, chilled - FOR GF: 4 ½ cups GF Flour Blend with xanthan gum or 1 cup brown rice flour, 1 cup corn flour, 1 cup oat flour, 1 ½ cup arrowroot, potato or tapioca starch + 2 tsp xanthan or guar gum
1 3/4 Tsp Salt
1 Tsp Instant yeast - FOR GF use 2 tsp
1/4 Cup (2 ounces/60g) Olive oil or vegetable oil (both optional, but it’s better with)
1 3/4 Cups (14 ounces/420g or 420ml) Water, ice cold (40° F/4.5° C)
1 Tb sugar - FOR GF use agave syrup
Semolina/durum flour or cornmeal for dusting

DAY ONE

Method:
1. Mix together the flour, salt and instant yeast in a big bowl (or in the bowl of your stand mixer).

2. Add the oil, sugar and cold water and mix well (with the help of a large wooden spoon or with the paddle attachment, on low speed) in order to form a sticky ball of dough. On a clean surface, knead for about 5-7 minutes, until the dough is smooth and the ingredients are homogeneously distributed. If it is too wet, add a little flour (not too much, though) and if it is too dry add 1 or 2 teaspoons extra water.

NOTE: If you are using an electric mixer, switch to the dough hook and mix on medium speed for the same amount of time.The dough should clear the sides of the bowl but stick to the bottom of the bowl. If the dough is too wet, sprinkle in a little more flour, so that it clears the sides. If, on the contrary, it clears the bottom of the bowl, dribble in a teaspoon or two of cold water.
The finished dough should be springy, elastic, and sticky, not just tacky, and register 50°-55° F/10°-13° C.

Or

2. FOR GF: Add the oil, sugar or agave syrup and cold water, then mix well (with the help of a large wooden spoon or with the paddle attachment, on low speed) in order to form a sticky ball of dough.

3. Flour a work surface or counter. Line a jelly pan with baking paper/parchment. Lightly oil the paper.

4. With the help of a metal or plastic dough scraper, cut the dough into 6 equal pieces (or larger if you want to make larger pizzas).

NOTE: To avoid the dough from sticking to the scraper, dip the scraper into water between cuts.

5. Sprinkle some flour over the dough. Make sure your hands are dry and then flour them. Gently round each piece into a ball.

NOTE: If the dough sticks to your hands, then dip your hands into the flour again.

6. Transfer the dough balls to the lined jelly pan and mist them generously with spray oil. Slip the pan into plastic bag or enclose in plastic food wrap.

7. Put the pan into the refrigerator and let the dough rest overnight or for up to thee days.

NOTE: You can store the dough balls in a zippered freezer bag if you want to save some of the dough for any future baking. In that case, pour some oil(a few tablespooons only) in a medium bowl and dip each dough ball into the oil, so that it is completely covered in oil. Then put each ball into a separate bag. Store the bags in the freezer for no longer than 3 months. The day before you plan to make pizza, remember to transfer the dough balls from the freezer to the refrigerator.

DAY TWO

8. On the day you plan to eat pizza, exactly 2 hours before you make it, remove the desired number of dough balls from the refrigerator. Dust the counter with flour and spray lightly with oil. Place the dough balls on a floured surface and sprinkle them with flour. Dust your hands with flour and delicately press the dough into disks about 1/2 inch/1.3 cm thick and 5 inches/12.7 cm in diameter. Sprinkle with flour and mist with oil. Loosely cover the dough rounds with plastic wrap and then allow to rest for 2 hours.

Or

8. FOR GF: On the day you plan to eat pizza, exactly 2 hours before you make it, remove the number of desired dough balls from the refrigerator. Place on a sheet of parchment paper and sprinkle with a gluten free flour. Delicately press the dough into disks about ½ inch/1.3 cm thick and 5 inches/12.7 cm in diameter. Sprinkle the dough with flour, mist it again with spray oil. Lightly cover the dough round with a sheet of parchment paper and allow to rest for 2 hours.

9. At least 45 minutes before making the pizza, place a baking stone on the lower third of the oven. Preheat the oven as hot as possible (500° F/260° C).

NOTE: If you do not have a baking stone, then use the back of a jelly pan. Do not preheat the pan.

10. Generously sprinkle the back of a jelly pan with semolina/durum flour or cornmeal. Flour your hands (palms, backs and knuckles). Take 1 piece of dough by lifting it with a pastry scraper. Lay the dough across your fists in a very delicate way and carefully stretch it by bouncing it in a circular motion on your hands, and by giving it a little stretch with each bounce. Once the dough has expanded outward, move to a full toss.

Or

10. FOR GF: Press the dough into the shape you want (about 9-12 inches/23-30 cm in diameter - for a 6 ounces/180g piece of dough).

NOTE: Make only one pizza at a time.
During the tossing process, if the dough tends to stick to your hands, lay it down on the floured counter and reflour your hands, then continue the tossing and shaping.
In case you would be having trouble tossing the dough or if the dough never wants to expand and always springs back, let it rest for approximately 5-20 minutes in order for the gluten to relax fully,then try again.
You can also resort to using a rolling pin, although it isn’t as effective as the toss method.


11. When the dough has the shape you want (about 9-12 inches/23-30 cm in diameter - for a 6 ounces/180g piece of dough), place it on the back of the jelly pan, making sure there is enough semolina/durum flour or cornmeal to allow it to slide and not stick to the pan.

Or

11. FOR GF: Lightly top it with sweet or savory toppings of your choice.

12. Lightly top it with sweet or savory toppings of your choice.

Or

12. FOR GF: Place the garnished pizza on the parchment paper onto the stone in the oven or bake directly on the jelly pan. Close the door and bake for about 5-8 minutes.

NOTE: Remember that the best pizzas are topped not too generously. No more than 3 or 4 toppings (including sauce and cheese) are sufficient.


13. Slide the garnished pizza onto the stone in the oven or bake directly on the jelly pan. Close the door and bake for abour 5-8 minutes.

Or

13. FOR GF: Follow the notes for this step.

NOTE: After 2 minutes baking, take a peek. For an even baking, rotate 180°.

If the top gets done before the bottom, you will need to move the stone or jelly pane to a lower shelf before the next round. On the contrary, if the bottom crisps before the cheese caramelizes, then you will need to raise the stone or jelly.

14. Take the pizza out of the oven and transfer it to a cutting board or your plate. In order to allow the cheese to set a little, wait 3-5 minutes before slicing or serving.


Savory.


Sweet.

Tuesday, October 28, 2008

Vote for my post on Mom Blog Network

Apple Pie Cupcakes


This is another recipe that I saw on Annie's blog (by the way, if you haven't gone yet, check out her blog). These cupcakes just looked to cute for words and it was incredibly creative of Fatty Fat Fats to come up with this cupcake idea. The cupcakes themselves were so much fun to make and it was a great way to use up some of the apples I brought home from my apple picking adventure. The cupcakes are a great base for your basic cupcake; very rich, dense, and moist. If you like apple pie, then you would will like the apple filling. Combining the cupcake with the apple pie filling and then topping it with buttercream is shear genius and dessert deliciousness. The apple filling is such a treat and a great way to turn your standard cupcake into something unexpected. This is definitely a dessert to make when you want people to say "wow, that is so cool!"

Apple Pie Cupcakes

Source: Recipe copied from Annie's Eats (here) which was adapted from Fatty Fat Fats (here)

Yields ~30 cupcakes


For the cupcakes:

3 cups sifted cake flour

1 tbsp. baking powder

½ tsp. salt

1 cup butter, at room temperature

2 cups sugar

4 eggs

1 ½ tsp. vanilla extract

1 cup milk


For the apple filling:

2 tbsp. butter

2 tsp. cinnamon

2-3 tbsp. sugar

3 large Granny Smith apples, peeled, cored and diced (I used golden delicious)


For decorating:

My go to recipe for vanilla buttercream (here)


Directions:

To make the cupcakes, preheat the oven to 350°. Line two cupcake pans with paper liners.


In a medium bowl, sift together the cake flour, baking powder and salt. In the bowl of an electric mixer, cream the butter and sugar together on medium-high speed until light and fluffy, about 2 minutes. Beat in the eggs one at a time, mixing well and scraping down the sides of the bowl after each addition. Add the vanilla extract and mix well to combine. Add in the dry ingredients alternately with the milk, beginning and ending with the dry ingredients. Stir until just combined.


Divide the batter evenly among the cupcake liners, filling them about 2/3-3/4 full. Bake until golden and a toothpick inserted in the center comes out clean, about 18 to 22 minutes. Remove from the oven and allow to cool for 5 minutes in the pans. Transfer to wire racks to cool completely.


To make the apple filling, heat the butter a medium skillet over medium-high heat. Add the cinnamon and sugar and cook for a minute, until the mixture begins to bubble. Lower the heat to medium and stir in the apples. Mix well. Cook until the apples are somewhat tender, about 10 minutes. Remove from heat and let cool.


While the apple mixture is cooling, use the cone method to remove a chunk from the center of each cupcake, making sure to leave a rim around the top of the cupcake. Fill the holes with the cooled apple mixture. To decorate, top each cupcake with a swirl of vanilla buttercream.


These cupcakes were gorgeous.


All the goods.


Enjoy!


Vote for my post on Mom Blog Network

An Affair with Almond Extract


I had seen this sugar cookie recipe on Annie's blog and put it on my baking to do list. The thought of adding almond extract intrigued me but I had been too cheap to actually buy almond extract. I finally broke down this weekend and bought the extract. I was in love with the scent. Not only are almonds good to eat, but they smell fantastic. Little did I know that I was about to embark on a new food affair. I made the dough, and as I usually do, I tasted it. The first word that came to mind? Sinful. I thought I was doing something horribly wrong. I mean, it had to be wrong to enjoy this dough as much as I did. I was afraid to tell Alex how good the dough was because I was afraid he would want to eat some too. I didn't want to share and I wanted to keep it my little secret. As if the dough was not good enough, the baked cookies were even better. I could not get over how amazing the cookies smelled and how they tasted so strongly of the almond extract. This might just be my go to recipe for sugar cookies now.

Ella's White Sugar Cookies
Source: Annie's Eats (here)

Yields 40 cookies

1 cup butter
1 cup powdered sugar
1 egg, beaten
1 1/2 tsp. almond extract
1 tsp. vanilla extract
1 tsp. salt
2 1/2 cups sifted flour

Cream butter and add powdered sugar. Blend in egg, extracts, salt and flour.

Chill dough until firm. Roll to 1/4-inch thickness on a floured surface and cut with cookie cutters. Place on greased cookie sheets. Bake at 375 degrees for 8-10 minutes (cookies should not brown). Remove from oven, cool to room temperature and decorate.

Enjoy!

Decorated for Halloween.

Amazing!


Vote for my post on Mom Blog Network

TWD: Chocolate-Chocolate Cupcakes


I love chocolate. I could eat chocolate all day long. I don't discriminate either; I am just as happy with a piece of white chocolate as I am with dark chocolate. So I was thrilled when I saw that Clara of I *heart* food 4 thought picked Chocolate-Chocolate Cupcakes. These cupcakes came out very chocolatey and moist and the ganache topping made the cupcakes even better. I am happy I only made half the recipe because, if not, I wouldn't be around to post this week because of a chocolate-induced coma.

Make sure to go to Clara's blog for the recipe and to check out TWD to see what the others made (there are some cool Halloween ones!).

So pretty.


I ate all of them.


Monday, October 27, 2008

Vote for my post on Mom Blog Network

Obsession of the Week


I have done nothing but think about going apple picking this past week. Ever since I made my Boston To Do list I have been obsessing about when I am going to get certain things done. Other than apple picking, I haven't done anything on my list. But it's ok. I still have time! Well, sort of. If I hadn't gone apple picking this weekend I would have missed it and would have waited until next year and since I don't know where we will be living a year from now, it was a now or never type of thing. I was determined to go rain or shine and I had no problem going alone. Luckily enough, I didn't have to go alone since my friend Edgar volunteered to go with me. That's a good thing too, because we left with about 35 lbs of apples and I don't think I would have been able to carry that around by myself.

We went to Shelburne Farm in Stow, MA and it was such a surreal experience for me. I had never been to a farm and didn't know what to expect. I thought it would smell like poop and it didn't. I didn't think there would actually be tractors on the land and there were. Heck, I didn't even expect them to accept credit card and they did. I couldn't believe all the apples. I have never seen so many apples in my life. I was so used to seeing glossy apples that I was thrown off by seeing them in their natural form. I felt like a kid and truly enjoyed myself...I didn't want to leave!

Cortland Apple Tree


Delicious Apple Cider Donut


Pumpkin Patch


Holy Huge.


Apple Seeds (correction: these are milkweed seeds)


Golden Delicious Apple Tree


Me Picking!


Mutsu and McIntosh Apples


The Goods


PS expect lots of apple recipes :)
Vote for my post on Mom Blog Network

Finally...Montien


I have heard so many good things about Montien. Countless people have recommended this restaurant to either Alex or myself. You would think that with both of us going to school downtown we would have explored downtown eating more, but we haven't. So I took the initiative and told Alex that we would be eating at Montien and we did! The food was great and the price was even better. The restaurant was a little older looking than I had expected, but I think I built up the restaurant in my mind based on everything I had heard about Montien from others. Maybe I was expecting a flashy restaurant that lived up to the hype? Whatever it was, the restaurant wasn't what I expected. It was red walls and brown furniture with paper place mats, plastic covered menus, and a fully stocked bar.

Despite the atmosphere not being what I expected, the food was more than I expected. I was afraid the food wouldn't be as good, especially since the restaurant had been built up so much in my mind. But it was good food! We started off with spring rolls that came out quicker than we could say "feed me!" The rolls were crunchy and stuffed with veggies. Spring rolls get better each time I have them and these were even better because of the sweet and sour sauce. This sauce was thick and spicy and had red pepper flakes in it that gave it its kick.


Alex ordered the Chicken Chop Chop. This is definitely the most perfect dish for clearing up the sinuses. It is so spicy that you feel like you are melting. The chicken is ground up and served in a hot basil sauce. At first the heat doesn't hit you; all you taste is the sweetness of the basil. Then your taste buds get knocked upside down and you are begging for more water. The heat is so worth it!


I ordered Thai Fried Rice and I ate the WHOLE thing by myself. Thai fried rice is my absolute favorite type of fried rice. To me, Thai fried rice has the perfect combination of salt and sugar.


I don't know what took us to long to go to Montien, but I am glad we finally did. It was great food at a great price.
Vote for my post on Mom Blog Network

Bangkok Dining

A few weeks ago Alex and I went to Bangkok City. We have known about this restaurant for about as long as we have lived in Boston but have never gone. Whenever we get in the mood for Chinese/Thai food we usually just head out to China Sky in Wellesley. Since there was a Red Sox game on this particular weekend, we decided to stay local and go to Bangkok City. The restaurant itself has such a retro, lounge feel with its deep blue walls and wooden decore. The service is quick and the food is great.

We started off the dinner with spring rolls. I was never a fan of spring rolls because the vegetable quotient was high but Alex got me hooked on these things. They were crisp, crunchy, and packed with veggies. The rolls came with a tangy sauce that went perfectly with the heat of the rolls.


We also ordered chicken tempura. While this appetizer was good, there was no chicken! It was mostly broccoli and mushrooms and I am not a fan of either of those vegetables. The batter was thick and it swallowed up some of the veggies and chicken.


For the entrees we shared fried rice and spicy chicken. The fried rice was great. It was actually a little more than great, it was awesome. It had a hint of sweetness that made the fried rice something more than just rice and soy sauce.


The chicken was also great. It was tender and covered in a spicy sauce that tasted like it was made from sweet bell and chili peppers.


For dessert we shared fried ice cream. The best way to describe how this dessert tasted like was imagining a Krispy Kreme donut stuffed with vanilla ice cream. So good but oh so bad for you!


Bangkok City
is reasonably priced and incredibly delicious. Go check them out!