Showing posts with label Brownies. Show all posts

Wednesday, August 13, 2014

Vote for my post on Mom Blog Network

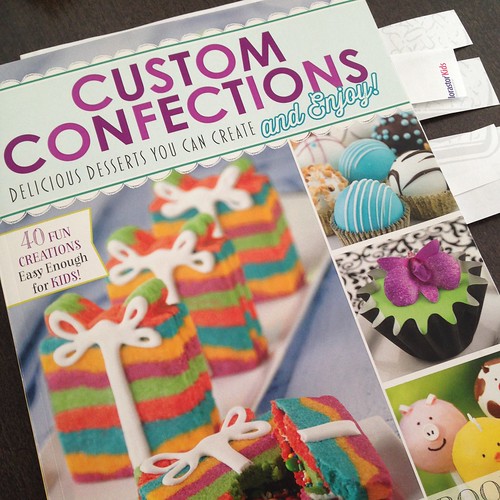
Book Review: Jen Besel's Custom Confections

I was sent a copy of Jen Besel's book, Custom Confections: Delicious Desserts You Can Create and Enjoy, to review and, as usual, I am thankful for any reason to bake. Part of what really had me excited about the book was that it claimed to have recipes that were easy enough for kids. Now that my girls are older, especially Cati at almost 4.5 years old, they are very interested in everything that I do in the kitchen and are constantly asking to help add and mix ingredients. As soon as Cati saw the book she grabbed it, sat down, and started leafing through the pages. Right off the bat, the book's cover is eye-catching and I can't blame Cati for being immediately drawn to it.
The meaning behind the name, Custom Confections comes from Besel's view that everyone can make custom desserts. With this view, Besel has developed recipes with easy-to-find ingredients, short prep time, and shortcuts to creating showstopping desserts. The book is divided into five sections and includes recipes for everything from cakes to cookies to bars to popsicles to frosting. Like a good cookbook (or at least my favorite ones), there s a conversion chart and a list of tools that not only are useful for a fully stocked kitchen, but also for making the recipes in Custom Confections.

Aesthetically, the book is gorgeous to look at with pictures for every single recipe and fun colors and fonts. For the majority of the recipes you can lay the book flat on the counter and have the picture on one side and the recipe on the other. For someone who has baked as much as I have, it's always been a bit of a pet peeve when recipes are pages long and I have to flip back and forth to check the ingredient list and see where it matches up with the directions. Besel gives a one-sentence intro/commentary to every dessert, making you want to try every single dessert.

The only issue I had with the book was that the serving amount wasn't identified or clear. This is an issue for me because I usually cut recipes down so we don't have too many sweets in the house at a given time.

As part of my review I picked five recipes from the book. Recipes were chosen based on what I thought the family would like, tools I had, ease of making, and involvement of kids. The five recipes were Molten Caramel Cake, PB & J Cheesecake Brownies, Stained Glass Cookies, Stuffed Strawberries, and Ooey, Gooey Turtle Cake.

Molten Caramel Cake

Eight ingredients, 10 steps, and about 20-25 minutes from prep to table. Cati was able to help with unwrapping the caramel candies, adding them to the batter, and sprinkling with sea salt. This recipe was, by far, the favorite for everyone in the family. I baked for 12 minutes, but my cakes (4) could have used an extra minute or two in the oven. The leftover cake was put in the fridge and reheated the next day and tasted just as good as it did fresh out of the oven. This dessert is perfect for the chocolate lover and I loved that sea salt was added as caramel-sea salt is one of my favorite combinations. I've made molten cakes before and, while they are one of my favorite desserts, I rarely make them because the recipes I have tried before have been too involved. This recipe solves that problem for me and now molten cakes will be a dessert that I make more frequently.

PB & J Cheesecake Brownies

Nine ingredients, eight steps, and at least 40 minutes from prep to table. Instead of making an 8x8 pan of brownies, I made 12 brownie cups, quartered the cream cheese recipe, and added PB & J to half of the cups so that I could get a good taste of the finished cheesecake (plus, I'm not a fan of peanut butter in desserts). I also added a chocolate drizzle to the cups to make them look even prettier. The cups baked for 25 minutes and neither of the girls helped with the prep work for this dessert. The finished dessert was a hit and it was hard to get the girls to only have one for dessert. The brownie portion is made from a mix, but the cheesecake is made from scratch and, when baked, the cheesecake was smooth and didn't crack when cooled! The only thing I would change about this recipe is heating up the jam before putting it in the cheesecake mixture so that it mixes easier.
 

Stained Glass Cookies

Four ingredients, eight steps, and about 25 minutes from prep to table. This recipe was probably the funnest one for the girls as they got to unwrap the candies, help break them up into small pieces, place them in the hole of the cookie, and decorate their own cookies. They even sat in front of the oven, looking in to watch the candy melt. Once the cookies were out of the oven I was surprised by how hard the candies were! For some reason, I thought the candies would melt and become more pliable, but once cooled, the melted candy became hard again. My mistake with this recipe was thinking I had cookie cutters when I went to buy the ingredients and not actually checking to see if I did so my cookies did not end up with the wide opening I would have wanted. 

Stuffed Strawberries

Five ingredients, eight steps, and about 20 minutes from prep to table. I made half the filling recipe and had enough filling to "stuff" a dozen small- and medium-sized strawberries. The girls helped with this recipe by eating the cut-off tips. The finished product was so beautiful that it was almost a shame to eat. But eat them we did, and I am so happy we did because the strawberries were delicious and I fell in love with the tart-tangy-sweet combination. We ate all the stuffed strawberries in one sitting so I would call this recipe a complete success.
 
Ooey, Gooey Turtle Cake 

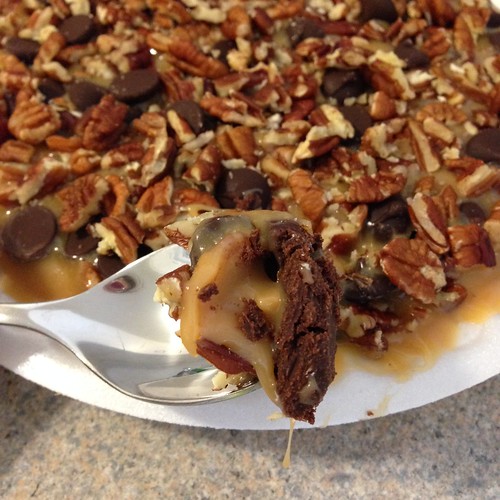
Five ingredients, nine steps, 10 minutes prep, and a torturous four hours to table. I made half the recipe and refrigerated the cake to expedite the process. The girls helped with unwrapping the caramel candies and sprinkling the cake with the pecans. I will warn you now, this dessert is completely addictive and incredibly dangerous. This was the simplest of the recipes I tried and, along with the Stuffed Strawberries, one of the recipes that I think best exemplifies Besel's efforts at creating easy-to-make custom desserts.
Custom Confections: Delicious Desserts You Can Create and Enjoy by Jen Besel will be available for purchase September 1st, 2014 for $12.95 USD ($14.95 CAD).

A copy of this book was provided to me by IWPR and the publisher, Capstone Young Readers, free of charge. The views and opinions in this review, however, are my own.

For more on my baking adventures follow me on Facebook and Instagram @thecookierunner
Stephanie

Sunday, September 1, 2013

Vote for my post on Mom Blog Network

Easy Peasy Fudge


I have been so dedicated to exercising and eating healthy that it feels as if it has been a very long time since I used granulated sugar and white flour in my kitchen. I remember the days when it felt weird not to have butter, eggs, sugar, or flour always in stock. When they say that "being healthy is a lifestyle" they aren't lying. I guess I was able to get away with that in the summer because I was just taking classes and staying home with the girls and going on our daily adventures. But once school started again two weeks ago, along with also starting my internship and getting ready for both girls to start school, I have been feeling that need to get back into the kitchen to bake. It's not even about eating what I bake; it's about getting in touch with that relaxed and happy feeling I get when I do bake.

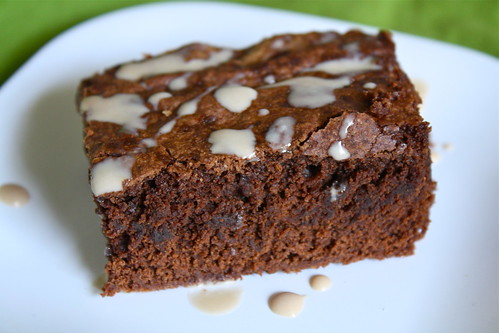
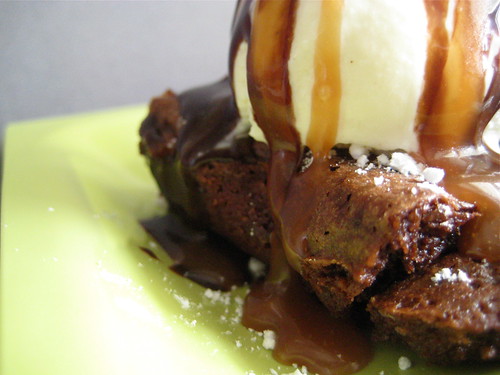
So this weekend we stocked up on all the baking essential and I asked Cati what she wanted me to bake her and she, surprisingly, said "brownies." We have a song for cookies and cupcakes so I was expecting one of those two, but I was more than happy to make her some brownies. I made my go-to brownies and really kicked it up a notch by also make a fudge sauce. This sauce is truly amazing and could you really doubt a recipe that came from Smitten Kitchen? It was so easy to make and everyone in the house was eating it like it was their job. Because this was a dessert Cati requested, no dessert is complete without sprinkles.


Hot Fudge Sauce
Source: Smitten Kitchen
Yields 2 1/2 cups

4 ounces unsweetened chocolate
3 tablespoons butter, unsalted
2/3 cup water
1/3 cup sugar
6 tablespoons corn syrup
Pinch of salt

Melt the chocolate and butter very slowly in a double boiler or in the microwave, stirring frequently until combined.

Meanwhile, heat the water to boiling in the small, heavy saucepan.

When the butter and chocolate have melted, stir the mixture into the boiling water. Add the sugar, corn syrup and salt and mix until smooth.
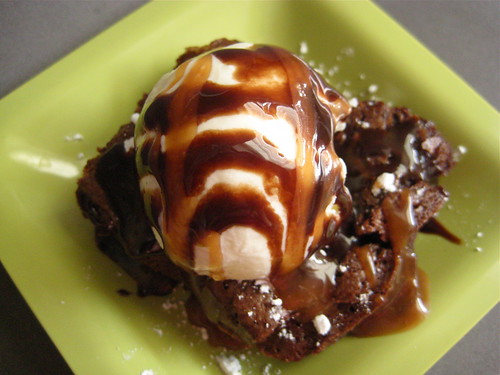
Turn the heat up and stir until mixture starts to boil; adjust heat so that sauce is just maintained at the boiling point, stirring occasionally. Allow sauce to boil for nine minutes (mine was good to go after about 5-6 minutes).

Remove from heat and cool for 15 minutes.

PS although the blog is quiet, there's lots of pictures on Instagram (@confessionscityeater)! 

Stephanie

Thursday, November 15, 2012

Vote for my post on Mom Blog Network

Red Velvet Brownies

IMG_1748
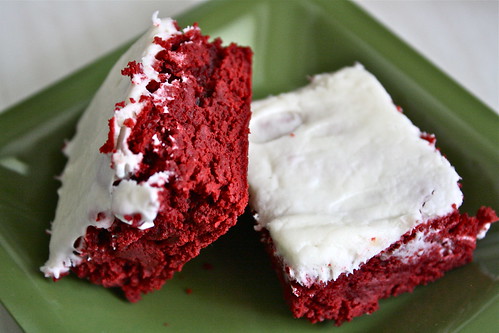
I love red velvet. I love red velvet in all its forms. Here are some red velvet brownies that were simply perfect. I made the full recipe of the frosting but only used half of it because I'm not a big frosting eater. Even so, there was enough frosting to create that classic red velvet-cream cheese combination. This is the type of dessert I wish everyone could eat. I think the world would be a happier place if that were possible.
Red Velvet Brownies
Source: What Megan's Making


Brownies:
1/2 c. (1 stick) unsalted butter
3 oz. bittersweet chocolate, chopped
1-1/2 c. sugar
3 large eggs
1 tsp. vanilla
1/4 tsp. salt
1 oz. liquid red food coloring
1 c. flour
1/2 tsp. baking powder


Cream Cheese Frosting:

8 oz. cream cheese, at room temperature
4 T. butter, at room temperature
1 tsp. vanilla
1-1/2 c. sifted powdered sugar

Preheat oven to 325°. Line a 9x9 baking pan with aluminum foil, leaving an overhang so you can lift out the brownies when they're done. Spray foil with nonstick spray.


In a large saucepan over low heat, stir together butter and chocolate until chocolate is melted. Remove from heat and whisk in the sugar and eggs. Stir in the vanilla, salt, and food coloring. Sift flour and baking powder over mixture and stir to blend well. Transfer batter to prepared pan.


Bake 35 to 40 minutes, or until the top springs back when touched and a tester inserted into center comes out with moist crumbs. Cool completely in pan on rack.


For the frosting: In a large bowl, beat the cream cheese and butter until light and fluffy. Beat in the vanilla and powdered sugar. Remove the brownies from the pan using the foil and cover with the frosting. Cut into bite size squares to serve.


Stephanie

Thursday, July 5, 2012

Vote for my post on Mom Blog Network

Campfire S'mores Brownies

Campfire S'mores Brownies
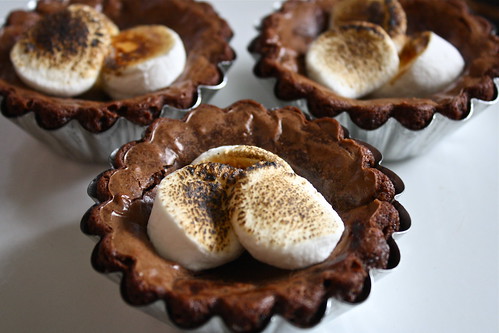
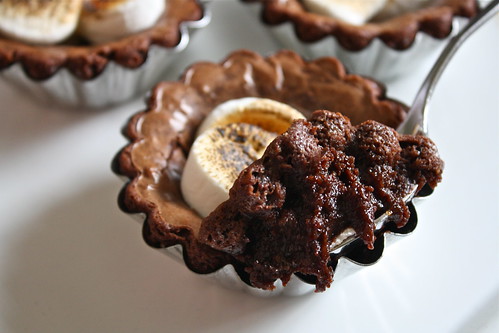
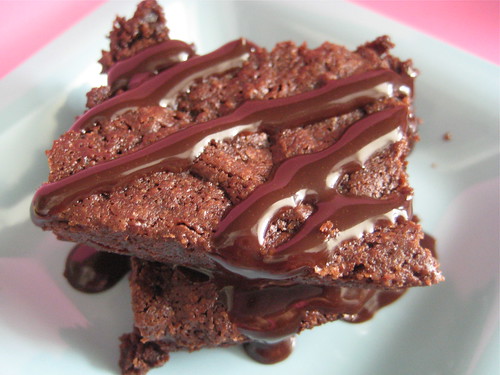
Can you think of a better summer treat than s'mores? Aside from all the wonderful fruit that's in season, I am a sucker for anything s'mores. I knew I had to make these Campfire S'mores Brownies as soon as I came across them. This was the best baking decision I had made in a long time. The brownies are spectacular and are a cross between brownies and puddings, which is exactly what you want when it comes to s'mores. I made tiny changes to the recipe that include making six little brownie tartlettes (baked for about 20 minutes), using regular marshmallows (sliced into three), and torching the marshmallows instead of broiling.
Campfire S'mores Brownies

Campfire S'mores Brownies
Source: Pastry Affair
Yields 1 8x8-inch pan

2 1/2 cups (1 lb) dark chocolate, chopped in pieces
1/2 cup (8 tablespoons) butter
4 large eggs
1 cup brown sugar, packed
2 teaspoons vanilla extract
1/2 cup all-purpose flour
1 teaspoon baking powder
1 cup crushed graham crackers (large chunks are okay)
1 cup mini marshmallows
Chocolate, melted (for drizzling)

Preheat oven to 350 degrees F (180 degrees C).

In a medium saucepan over low heat, melt together dark chocolate and butter, stirring until smooth. Remove from heat and set aside.

In a large mixing bowl, whisk together the eggs, brown sugar, and vanilla extract. Stir in the melted chocolate until combined. Fold in the flour, baking powder, and crushed graham crackers. Pour brownie batter into a 8x8-inch baking pan and bake for 30-35 minutes, or until brownies do not jiggle when the pan is shaken (even when baked completely, a toothpick may not come out clean). Do not overbake. If using a larger pan, decrease the baking time; likewise, if using a smaller pan, increase the baking time.

Remove brownies from oven and turn oven onto broil. Spread mini marshmallows evenly over the top of the brownies and place on the top oven rack to toast marshmallows. The marshmallows will brown in 1-2 minutes. Remove from oven and drizzle with melted chocolate, if desired.
Stephanie

Friday, June 1, 2012

Vote for my post on Mom Blog Network

Bailey's Irish Cream Brownies

Bailey's Brownies
Somewhere along the line I forgot I had made Bailey's Irish Cream to give away as gifts for Christmas so imagine my surprise and joy in having found a small bottle of it tucked away in our fridge. I immediately knew I wanted to bake something with it and decided on these brownies. I made an excellent decision because the brownies were fudgy and chocolaty with the Bailey's giving it more of a dark chocolate flavor.

Bailey's Irish Cream Brownies
Source: Gimme Some Oven

1 cup all-purpose flour
1/2 cup unsweetened cocoa powder
1 tsp. instant coffee powder (optional)
1/4 tsp. baking soda
1/4 tsp. salt
heaping 1/3 cup bittersweet or dark chocolate chips
1/4 cup butter
2 eggs
1 cup sugar
1/3 cup Baileys Irish Cream
1 tsp. vanilla extract

Preheat oven to 350°F. Line an 8×8-inch pan with aluminum foil and lightly spritz with cooking spray; set aside.

In a medium bowl, whisk together flour, cocoa, instant coffee powder, baking soda, and salt until combined. Set aside.

Place chocolate and butter in a large microwave-proof bowl and melt in 30 second spurts, stirring in between each interval until completely melted. Set aside to cool a bit. (Alternatively, melt chocolate and butter in a saucepan set over low heat, stirring frequently until melted. Set aside to cool.)

Once the chocolate mixture is warm (not hot!), add eggs one at a time, whisking constantly to incorporate. Whisk vigorously for about 10 seconds to incorporate fully. Add sugar, vanilla, and Bailey’s and whisk until combined. Add the flour mixture into the chocolate mixture, folding until just combined.

Pour batter into the prepared pan, using a spatula to smooth out the top. Bake at for about 18-20 minutes, or until a toothpick comes out with a few moist crumbs attached. Let cool, and dust with powdered sugar if desired.
Stephanie

Wednesday, November 30, 2011

Vote for my post on Mom Blog Network

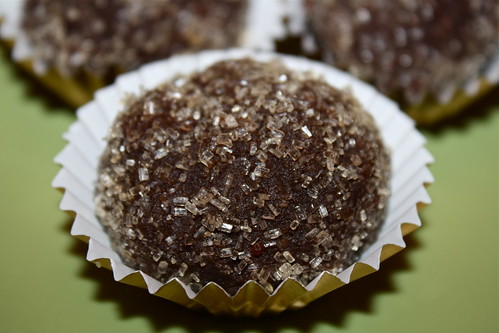
Kahlua Brownie Balls

Kahlua Brownie Bites
I've been a bit of a mad woman lately because this is a busy school week for me and Cati is sick yet again. She didn't go to school on Monday and seemed better but after going to school yesterday she got bad again so I'm just going to keep her home so she can rest and be contained. Is it silly to say that I was afraid of being at home with her all day again? I thought I "forgot" how to do it but I haven't and that's a good thing because Baby D will be throwing me back into things in no time.

Anyway, here is the last of the brownies I baked for my friend. In addition to making something everyone, especially kids, could eat, I wanted to make something for the adults. This recipe was so easy to put together and I will admit to adding extra Kahlua because I wanted the brownie balls to really have the Kahlua flavor. I will also admit to eating about 1/2 teaspoon worth to taste test. These things were a hit at the party and I can't wait to make them at a time I can actually enjoy them!

Kahlua Brownie Balls
Source: The Brownie Project

¾ cup unsalted butter, cut into pieces
6 oz. bittersweet chocolate, chopped
3 large eggs
½ cup packed brown sugar
1 tsp vanilla extract
¼ tsp salt
¾ cup all purpose flour
¼ cup plus 1 tablespoon Kahlua liqueur

Preheat the oven to 350 degrees. Lightly grease a 9 x 13 pan with cooking spray.

Combine the butter and chocolate in a microwave safe bowl and heat on high power for 30 seconds. Stir, then heat for another 30 seconds. Stir again, and allow the residual heat to finish melting the chocolate. If necessary, heat again in 20 second increments until the chocolate is just about melted. Stir until smooth.

Whisk in the eggs, one at a time, then mix in the brown sugar and vanilla. Add the salt and flour, and mix gently using a rubber spatula just until the flour is absorbed. Pour the mixture into the prepared pan and bake until a tester comes clean from the middle, about 20-25 minutes.

Remove brownies from the oven and allow to cool completely. Break up the brownies into small pieces and put them in the bowl of an electric mixer fitted with the paddle attachment. With the mixer on low, add the Kahlua – and continue mixing until it all comes together – about a minute. Shape the mixture into 1 inch balls, roll in sanding sugar and chill until firm, about 2 hours. Serve cold or at room temperature.
Stephanie

Thursday, November 17, 2011

Vote for my post on Mom Blog Network

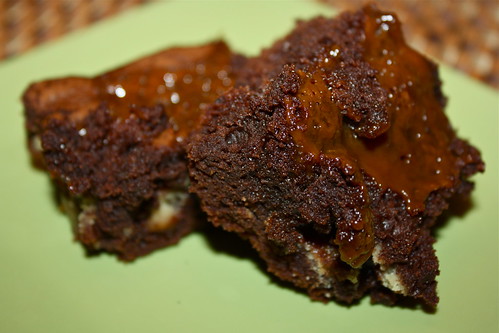
Twix Caramel Brownies

Twix Caramel Brownies
These Twix Caramel Brownies were the second type of brownie I made for my friend. While people were fans of the Cookie Dough Brownies, I was a huge fan of these brownies. The combination of chocolate and caramel was simply divine. By far, the best non-traditional brownies I have ever had. 

Twix Caramel Brownies
Source: Two Peas and Their Pod
Yields 24 brownies

1 cup (2 sticks) butter
2 cups granulated sugar
2 teaspoons vanilla extract
4 large eggs
3/4 cup cocoa
1 cup all-purpose flour
1/2 teaspoon baking powder
1/4 teaspoon salt
1 1/2 cups chopped Twix candy bars
1/3 cup caramel sauce (I used my favorite sauce, minus the nuts)

Heat oven to 350°F. Grease a 9 x 13 pan with cooking spray. Set aside.

Place butter in medium saucepan on the stove. Heat over medium heat until butter is melted. Remove from heat and stir in sugar and vanilla extract. Add eggs, one at a time, beating well with spoon after each addition. Add cocoa; stir until well blended. Add flour, baking powder and salt; stir until combined. Stir in Twix candy bar chunks. Pour batter into prepared pan.

Drizzle caramel evenly over the brownies. Using a toothpick, swirl caramel into brownies. Bake for 35-40 minutes or until brownies begin to pull away from sides of pan and a toothpick inserted in the middle comes out clean. Cool brownies completely in pan on a wire rack. Once cool, cut into squares and serve.
Stephanie

Wednesday, November 16, 2011

Vote for my post on Mom Blog Network

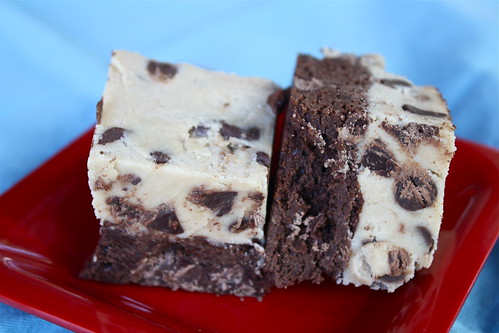
Cookie Dough Brownies

Cookie Dough Brownies
There's nothing better than baking for a friend. There's especially nothing better than baking for a friend who also loves to bake. I offered to bake brownies for my friend's kids' birthday and I thought I was a little exaggerated with baking four different kinds of brownies (other recipes coming soon), but then I got to her house and helped her set up of the dessert table. This was no regular table, it wasn't even a dessert buffet. It was a dessert feast. Every inch of the table was covered with decadent desserts. I have never seen so many sweets in one place before. This was definitely my kind of heaven:
IMG_9802
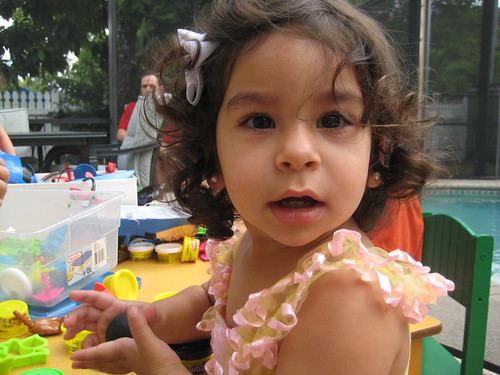
Back to these brownies. Of all the brownies I made these seem to have been the most popular. How could they not with the brownie-cookie dough combination, right? When I first made the "cookie dough" I wasn't sold on it actually tasting like cookie dough but after some chilling time, the flavor was spot on. I was so impressed! The brownie was chewy but what I really liked best is that this is the type of dessert you can store in the fridge with no fears about it getting hard. On the other hand, the cookie dough holds up better and the brownie gets very fudgy. And how cute was Cati at the party? I love her so much!
IMG_9809

Cookie Dough Brownies
Source: Beantown Baker

Yields: 24 brownies

Brownies:
1 cup (2 sticks) unsalted butter
2 1/4 cups sugar
4 large eggs
1 1/4 cups Dutch-process cocoa
1 teaspoon salt
1 teaspoon baking powder
1 teaspoon espresso powder, optional
1 tablespoon vanilla extract
1 1/2 cups all-purpose flour
2 cups chocolate chips

Cookie Dough:
3 sticks butter, softened
1 1/2 cup brown sugar
2/3 cup sugar
9 tbsp milk
3 cups flour
3 cups regular chocolate chips


Prepare Brownies:
Preheat the oven to 350°F. Lightly grease a 9" x 13" pan

In a saucepan set over low heat, melt the butter, then add the sugar and stir to combine. Return the mixture to the heat briefly, just until it's hot, but not bubbling; it'll become shiny looking as you stir it. Heating this mixture a second time will dissolve more of the sugar, which will yield a shiny top crust on your brownies.

Transfer the sugar mixture to a medium-sized mixing bowl, if you've heated it in a saucepan. Stir in the cocoa, salt, baking powder, espresso powder, and vanilla.

Whisk in the eggs, stirring until smooth.

Add the flour and chips, again stirring until smooth.

Spoon the batter into a lightly greased 9" x 13" pan.

Bake the brownies for about 30 minutes, until a cake tester inserted into the center comes out clean, or with just a few moist crumbs clinging to it. The brownies should feel set on the edges, and the center should look very moist, but not uncooked. Remove them from the oven and cool completely on a rack.

For cookie dough:
Cream the butter and sugars until light and fluffy. Beat in milk. With mixer on low, add flour and mix until well combined. Stir in mini chocolate chips.

To assemble:
Spread the cookie dough onto the cooled brownies. Chill the brownies until the cookie dough is firm. Cut into bars and serve.
Stephanie

Friday, November 11, 2011

Vote for my post on Mom Blog Network

Halloween Leftovers: Snickers Brownies

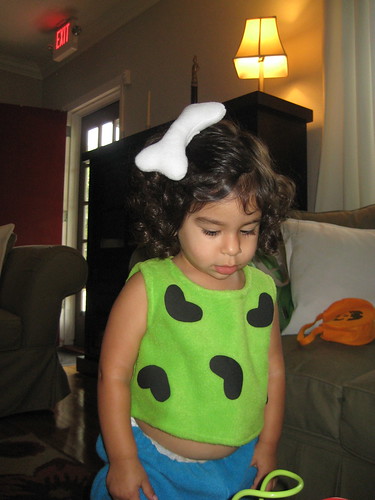
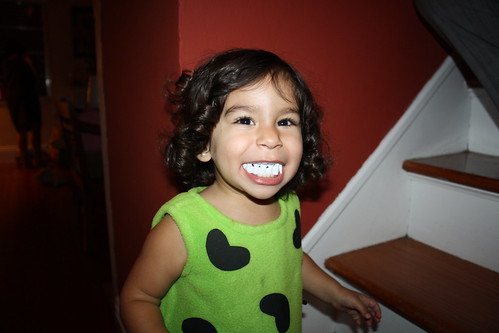
Umm, hello? Halloween was almost two weeks ago. I'm a little behind like always. Halloween was OK around here. Because Cati was battling a cold, I didn't want to take her out in the muggy, drizzly weather so instead I dressed her up so she could hand out candies. Unfortunately, and despite the letter we got announcing a flurry of trick-or-treaters, we only got four trick-or-treaters and Cati didn't get to pass out many candies. At least she looked cute and had fun wearing vampire teeth!
 IMG_9792
IMG_4990
I had been purposefully keeping my eye out for recipes that used candies just in case we had leftover candy and good thing I did because we have a bowl full of candy that's begging to be eaten. One of the recipes was for this Snickers Brownies and I was super excited about the prospect of fudgy brownies with caramel-nutty goodness in them. My brownies came out more chewy than I would have expected because I think the caramel in the Snickers hardened as the brownies cooled, but the brownies were still delicious. Served with a cup of milk and this is what I call the perfect use of leftover Halloween candy.
 Snickers Brownies
PS today's the last day to enter the Shutterfly Giveaway!

Snickers Brownies
Source: My Baking Addiction
Yields 12 brownies

4 ounces unsweetened chocolate; coarsely chopped
3/4 cup butter
1 ½ cups white sugar
3 eggs; lightly beaten
1 teaspoon vanilla extract
¼ teaspoon kosher salt
1 cup all-purpose flour
12 Fun Size Snickers Candy Bars; cut into fourths

Preheat oven to 350 degrees. Line an 8×8 inch baking pan with foil and spray with nonstick cooking spray.

Microwave chocolate and butter or margarine in large bowl at medium (50% power) for 3-4 minutes or until butter is melted.

Whisk until chocolate is melted. Stir in sugar. Add in eggs, extract and salt. Gradually add in flour and stir until just combined.

Spread ½ the batter into prepared pan. Add an even layer of Snickers and cover with remaining ½ of brownie batter. Bake for 30-35 minutes; do not over bake.

Remove to cooling rack. Allow to cool completely before cutting.
Stephanie

Monday, February 21, 2011

Vote for my post on Mom Blog Network

Dessert Table Sweet: Brownies

IMG_0112c
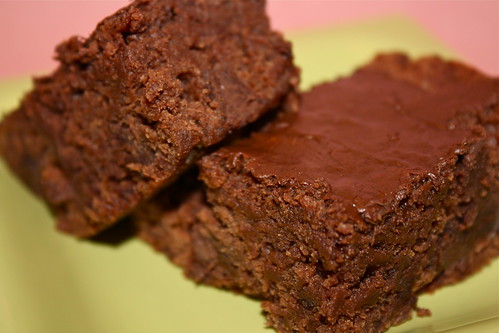
Here's the last of the desserts I made for the dessert table. Who doesn't love brownies? Especially ones as chocolaty and fudgy as these? This is my favorite brownie recipe because they have the right balance of crunchy topping and chewy everything else.. I promise you pictures of the entire table are coming up soon

Other dessert tables sweets include Oreo Truffles, Apple Pie Pops, Chocolate Chip Cookies, S'mores Pops, and M&M Cookies.

Chocolate Fudge Brownies
Source: PheMom here


6 Tablespoons unsalted butter, plus more for pan
6 ounces coarsely chopped good-quality bittersweet (or semisweet) chocolate
1/4 cup unsweetened cocoa powder (not Dutch-process)
3/4 cups all-purpose flour
1/4 teaspoon baking powder
1/4 teaspoon salt
1 cups sugar
2 large eggs
2 teaspoons pure vanilla extract

Preheat oven to 350 degrees. Line a buttered 9x13-inch baking pan with foil, allowing 2 inches to hang over sides. Butter lining (excluding overhang); set pan aside.

Put butter, chocolate, and cocoa in a heatproof medium bowl set over a pan of simmering water; stir until butter and chocolate are melted. Let cool slightly.

Whisk together flour, baking powder, and salt in a separate bowl; set aside.

Put sugar, eggs, and vanilla in the bowl of an electric mixer fitted with the whisk attachment, and beat on medium speed until pale, about 4 minutes. Add chocolate mixture; beat until combined. Add flour mixture; beat, scraping down sides of bowl, until well incorporated.

Pour batter into prepared pan; smooth top with a rubber spatula. Bake until a cake tester inserted into brownies (avoid center and edges) comes out with a few crumbs but is not wet, about 35-40 minutes. Let cool slightly in pan, about 15 minutes. Lift out brownies; let cool completely on a wire rack before cutting into squares.
Stephanie

Saturday, October 2, 2010

Vote for my post on Mom Blog Network

Ovaltine Brownies

Ovaltine Brownies
Here's a different and delicious brownie recipe for you. It's easy to make and it's loaded with malted goodness. It's chocolaty without being overly rich and it's malty without being overpowering. This is also a fudgy brownie that goes perfectly with a glass of milk.
Ovaltine Brownies

Ovaltine Brownies
Source: Nestle (here


1 cup granulated sugar
1/2 cup (1 stick) butter, melted
2 tablespoons water
2 large eggs
1 teaspoon vanilla extract
1 1/3 cups all-purpose flour
1 1/2 cups Ovaltine Rich Chocolate Mix
1/2 teaspoon baking powder
1/4 teaspoon salt
1 cup (6 ounces) Semi-Sweet Chocolate Mini Morsels, divided


PREHEAT oven to 325° F. Grease 9-inch-square baking pan.

COMBINE sugar, butter and water in large bowl; stir well. Stir in eggs and vanilla extract. Combine flour, Ovaltine, baking powder and salt in medium bowl; stir into sugar mixture. Fold in 1/4 cup morsels. Spread into prepared baking pan.

BAKE for 35 minutes or until wooden pick inserted in center comes out slightly sticky. Sprinkle remaining 3/4 cup morsels over top of brownie; let stand for 5 minutes. Spread morsels over brownie with small spatula. Cool completely in pan on wire rack. Cut into bars.
Ovaltine Brownies
Stephanie

Tuesday, July 13, 2010

Vote for my post on Mom Blog Network

TWD: Brrr-ownies


I am seriously on a roll. I don't remember the last time I made a TWD recipe right. I got confused with this week's selection of Brrrr-ownies and instead of getting peppermint patties I got mint cookies. I realized my mistake after I cut up the cookies. I thought the chocolate in the brownies would completely mask the little bit of peppermint flavor in the cookies but it didn't. The brownies had a very obvious and definite mint taste. I also thought the cookies would make the brownies hard and crunchy but they didn't. My brownies were still fudgy and delicious. So my mistake wasn't that big. Woo hoo!

Thanks to Karen of Welcome to our Crazy Blessed Life for this week's selection. Don't forget to stop by the TWD site so you can check out what the other bakers thought of Brrrr-ownies.

Tuesday, June 1, 2010

Vote for my post on Mom Blog Network

TWD: White Chocolate Brownies

I'm just going to come out and say it. There's no point in beating around the bush. I don't understand brownies that are called blondies like this one or made out of white chocolate like these brownies. I'm so used to traditional brownies and their textures that everything else just tastes off. They don't taste fudgy or have that crispy top. Instead they taste more like cake to me and that's exactly what these White Chocolate Brownies tasted like. Alex even said they tasted like a pound cake.
I didn't do the meringue top because I honestly didn't want to use up another egg just to get the egg white and I used strawberries instead of raspberries. I also skipped the part of mixing together the sugar with the orange zest. The resulting brownie was really good, but like I said earlier, it tasted more like a cake than a brownie. Maybe that's what makes nontraditional brownies so special?Either way, thanks to Marthe of Culinary Delights for this week's selection. Make sure to check out her blog for the recipe and the TWD site to read about everyone else's experiences with this brownie.

Friday, April 23, 2010

Vote for my post on Mom Blog Network

Fudge Brownies

I love brownies. I have yet to meet a brownie I don't like. They are the perfect little dessert when you need (or want) that chocolate fix and you don't have any chocolate candy bars around. I had been wanting to make brownies for days and just when I was about to make them the baby would wake up and basically cry out, "No kitchen for you lady! I need you NOW!" This happened several times because I was overly hopeful when it came to her taking a long nap.
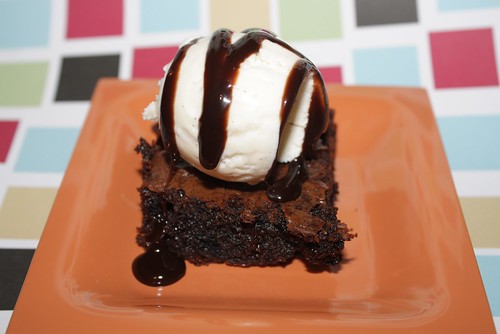
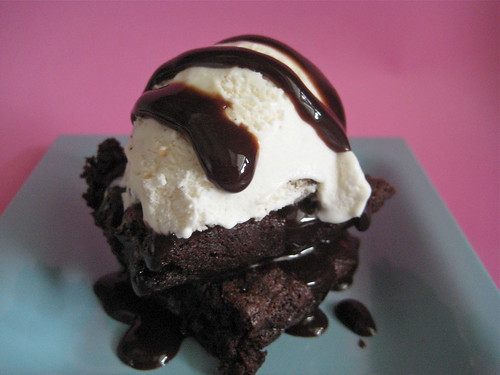
I finally baked some brownies and the recipe came from my newest cookbook, Deep Dark Chocolate. The brownies are called fudgy brownies and the name couldn't have been more perfect. After Alex's first bite he proclaimed these "very fudgy" brownies as good. For me, the brownies were rich but I find almost anything made with dark chocolate as rich. I topped my brownies with ice cream because, if you are going to indulge in something as rich as fudgy brownies, might as well go all the way and add some ice cream and chocolate sauce.

Good Ol' Fudgy Brownies
Source: Sara Perry's Deep Dark Chocolate

5 oz premium dark chocolate, chopped
1/2 cup (1 stick) unsalted butter, cut into pieces
1/2 cup premium unsweetened cocoa powder
1 cup granulated sugar
Pinch of salt
2 large eggs, at room temperature
1/2 cup all-purpose flour

Preheat the oven to 350 degrees F. Lightly grease an 8x8-inch baking pan with cooking spray.

Place the chocolate and butter in a medium heat-proof bowl and set in a wide pan or skillet of hot water. Set aside for 5 minutes, stirring 4 or 5 times, and let the chocolate melt completely. Stir until smooth. Remove from heat and whisk in the cocoa powder, sugar, and salt. Whisk in the eggs, and then stir in the flour until just blended. Scrape the batter into the prepared pan and spread evenly. Bake until a tester inserted in the middle comes out with a few moist crumbs, clinging to it, about 35 minutes. Do not overbake. Transfer to a wire rack and let the brownies cool completely. Cut into squares.

Tuesday, February 9, 2010

Vote for my post on Mom Blog Network

TWD: Rick Katz’s Brownies for Julia

Before I say anything else, I must tell you that you absolutely have to make these brownies. Wow. At first I was skeptical because it seemed like too many steps and too many dirty dishes. Was I the only one that had to read the directions a few times to figure out what mixed into what? I even read the directions out loud because I just wasn't getting it; I felt like a baking idiot.
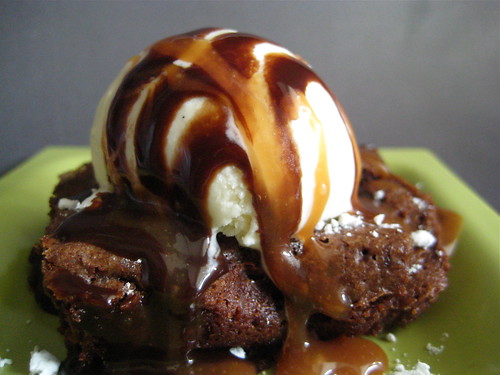
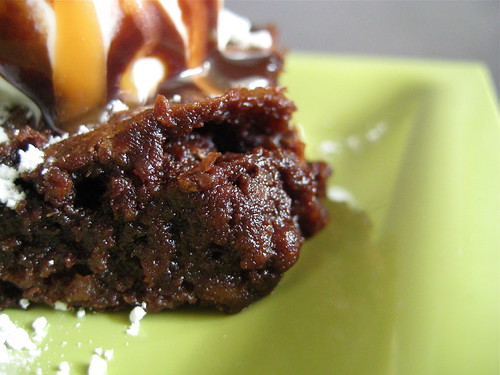
Once I figured it all out and got everything baked away I was blown away by the brownies. They were intensely chocolaty and oh so gooey. These brownies are perfect for serving up with some ice cream (and fudge and caramel), which is exactly what I did. Alex's first bite was the first bite every baker/cook wants to see: the closing of the eyes, the savoring of flavors, and the "mmmmmm that's amazing." I couldn't help but to react the same way and be thankful to Tanya of Chocolatechic for her incredible choice.Stop by Tanya's blog for the recipe. I promise you will not regret it. And while you're at it, stop by TWD to read about everyone else's thoughts on this week's selection.