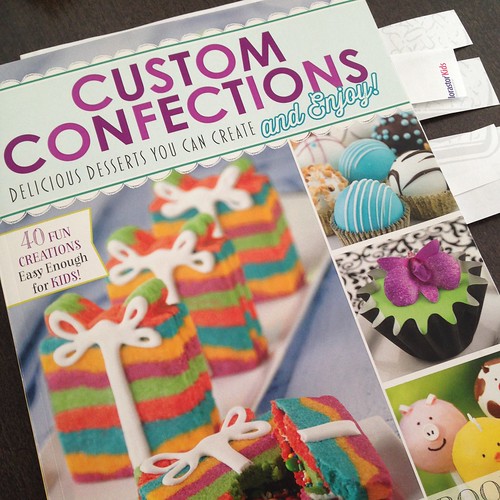
I was sent a copy of Jen Besel's book,
Custom Confections: Delicious Desserts You Can Create and Enjoy, to review and, as usual, I am thankful for any reason to bake. Part of what really had me excited about the book was that it claimed to have recipes that were easy enough for kids. Now that my girls are older, especially Cati at almost 4.5 years old, they are very interested in everything that I do in the kitchen and are constantly asking to help add and mix ingredients. As soon as Cati saw the book she grabbed it, sat down, and started leafing through the pages. Right off the bat, the book's cover is eye-catching and I can't blame Cati for being immediately drawn to it.
The meaning behind the name,
Custom Confections comes from Besel's view that
everyone can make custom desserts. With this view, Besel has developed recipes with easy-to-find ingredients, short prep time, and shortcuts to creating showstopping desserts. The book is divided into five sections and includes recipes for everything from cakes to cookies to bars to popsicles to frosting. Like a good cookbook (or at least my favorite ones), there s a conversion chart and a list of tools that not only are useful for a fully stocked kitchen, but also for making the recipes in
Custom Confections.
Aesthetically, the book is gorgeous to look at with pictures for every single recipe and fun colors and fonts. For the majority of the recipes you can lay the book flat on the counter and have the picture on one side and the recipe on the other. For someone who has baked as much as I have, it's always been a bit of a pet peeve when recipes are pages long and I have to flip back and forth to check the ingredient list and see where it matches up with the directions. Besel gives a one-sentence intro/commentary to every dessert, making you want to try every single dessert.
The only issue I had with the book was that the serving amount wasn't identified or clear. This is an issue for me because I usually cut recipes down so we don't have too many sweets in the house at a given time.
As part of my review I picked five recipes from the book. Recipes were chosen based on what I thought the family would like, tools I had, ease of making, and involvement of kids. The five recipes were Molten Caramel Cake, PB & J Cheesecake Brownies, Stained Glass Cookies, Stuffed Strawberries, and Ooey, Gooey Turtle Cake.
Molten Caramel Cake
Eight ingredients, 10 steps, and about 20-25 minutes from prep to table. Cati was able to help with unwrapping the caramel candies, adding them to the batter, and sprinkling with sea salt. This recipe was, by far, the favorite for everyone in the family. I baked for 12 minutes, but my cakes (4) could have used an extra minute or two in the oven. The leftover cake was put in the fridge and reheated the next day and tasted just as good as it did fresh out of the oven. This dessert is perfect for the chocolate lover and I loved that sea salt was added as caramel-sea salt is one of my favorite combinations. I've made molten cakes before and, while they are one of my favorite desserts, I rarely make them because the recipes I have tried before have been too involved. This recipe solves that problem for me and now molten cakes will be a dessert that I make more frequently.
PB & J Cheesecake Brownies
Nine ingredients, eight steps, and at least 40 minutes from prep to table. Instead of making an 8x8 pan of brownies, I made 12 brownie cups, quartered the cream cheese recipe, and added PB & J to half of the cups so that I could get a good taste of the finished cheesecake (plus, I'm not a fan of peanut butter in desserts). I also added a chocolate drizzle to the cups to make them look even prettier. The cups baked for 25 minutes and neither of the girls helped with the prep work for this dessert. The finished dessert was a hit and it was hard to get the girls to only have one for dessert. The brownie portion is made from a mix, but the cheesecake is made from scratch and, when baked, the cheesecake was smooth and didn't crack when cooled! The only thing I would change about this recipe is heating up the jam before putting it in the cheesecake mixture so that it mixes easier.
Stained Glass Cookies
Four ingredients, eight steps, and about 25 minutes from prep to table. This recipe was probably the funnest one for the girls as they got to unwrap the candies, help break them up into small pieces, place them in the hole of the cookie, and decorate their own cookies. They even sat in front of the oven, looking in to watch the candy melt. Once the cookies were out of the oven I was surprised by how hard the candies were! For some reason, I thought the candies would melt and become more pliable, but once cooled, the melted candy became hard again. My mistake with this recipe was thinking I had cookie cutters when I went to buy the ingredients and not actually checking to see if I did so my cookies did not end up with the wide opening I would have wanted.
Stuffed Strawberries
Five ingredients, eight steps, and about 20 minutes from prep to table. I made half the filling recipe and had enough filling to "stuff" a dozen small- and medium-sized strawberries. The girls helped with this recipe by eating the cut-off tips. The finished product was so beautiful that it was almost a shame to eat. But eat them we did, and I am so happy we did because the strawberries were delicious and I fell in love with the tart-tangy-sweet combination. We ate all the stuffed strawberries in one sitting so I would call this recipe a complete success.
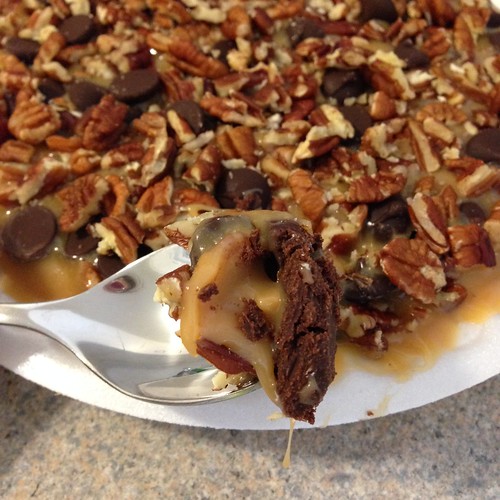
Ooey, Gooey Turtle Cake
Five ingredients, nine steps, 10 minutes prep, and a torturous four hours to table. I made half the recipe and refrigerated the cake to expedite the process. The girls helped with unwrapping the caramel candies and sprinkling the cake with the pecans. I will warn you now, this dessert is completely addictive and incredibly dangerous. This was the simplest of the recipes I tried and, along with the Stuffed Strawberries, one of the recipes that I think best exemplifies Besel's efforts at creating easy-to-make custom desserts.
Custom Confections: Delicious Desserts You Can Create and Enjoy by Jen Besel will be available for purchase September 1st, 2014 for
$12.95 USD ($14.95 CAD).
A copy of this book was provided to me by
IWPR and the publisher,
Capstone Young Readers, free of charge. The views and opinions in this review, however, are my own.
For more on my baking adventures
follow me on Facebook and Instagram @thecookierunner.