Showing posts with label cheese. Show all posts

Thursday, September 4, 2014

Vote for my post on Mom Blog Network

Chicago Eats: August Edition

When I first started this blog, I did so because I wanted to keep track of all the new places we ate at in Boston. Then, I started baking and stopped keeping track of where we ate. Then, I had kids and started running so the baking and eating out when down. Now that we are in Chicago and in full exploration mode, I'm going back to the roots of this blog: talking about the places I've eaten in the new city. Funny enough, my girls have gotten to the point that they know they have to wait to eat until I've taken a picture of their food. I am, however, not going to write full blown reviews of places. Instead, I'm just going to highlight the best things I've eaten in the month. With that said, here are my August favorites:

Cheesie's

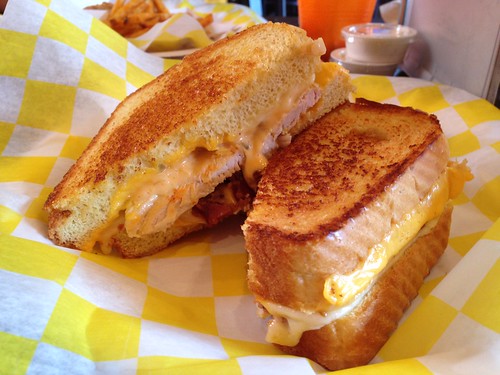
Lunchtime in Lincoln Park. Cranky, hungry kids. I walked into the first place I could find that had no wait and that place was Cheesie's. I knew it was going to be a winner because everyone in the family loves grilled cheese. What I didn't know was how cheesy the sandwiches were going to be. I ordered "The Melt," a grilled cheese sandwich with chicken, bacon, Thousand Island dressing, American cheese and Chihuaha cheese. All this on Texas toast. This was so good, but oh so bad. It was delicious, but it felt like the ultimate cheat meal for me. (Cheesie's is located at 958 West Belmont Ave.)
Hoosier Mama Pie Company

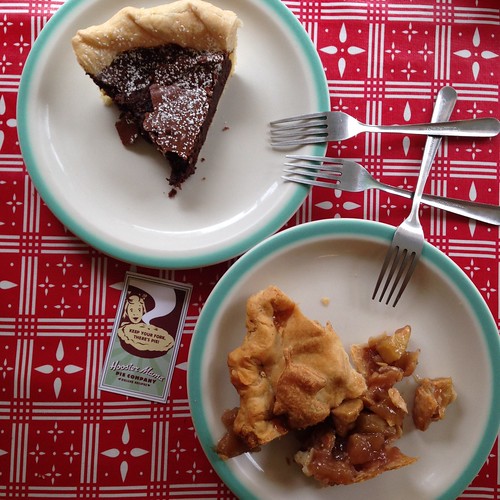
A friend recommend Hoosier Mama Pie Company and told me it was the best pie on the planet. Curious, I went on a trip with the girls and we ordered their apple pie and chocolate chess pie. The pies were delicious! I loved the apple pie and the girls tore up the chocolate pie. The apple pie had apple chunks in it and the crust was so buttery. The chocolate chess pie was creamy and had a cookie-like crust. After eating these two slices and leaving, I felt guilty for not grabbing a pie to go. I have been plotting a return trip ever since I swallowed the last bit of apple pie. (Hoosier Mama Pie Company is located at 1618 1/2 Chicago Avenue).
The Pub at Mayne Stage

The Pub at Mayne Stage is another place we just happened to dine at after an afternoon of walking around a local art show. They were still on the brunch menu and I indulged just a little and ordered their Steak and Eggs. This dish came with skirt steak, onion strings, black beans, potatoes, and two eggs. Everything about this dish was amazing. The beans surprised me a bit because I have never seen beans served with steak and eggs but I was pleasantly surprised. The steak was tender and almost made me wish I eat steak more often. I think, however, that my favorite part of this restaurant was the $2 mimosas. (The Pub at Mayne Stage is located at 1330 West Morse Ave).


Mekato's Colombian Bakery

Mekato's is a bakery that a colleague recommended to Alex. Being Colombian myself and having a deep love for Colombian food, I was anxious to get out to this bakery. We went on a Sunday (free parking) and basically ordered everything they sold. What you see in the picture below are traditional Colombian foods like empanadas (turnovers), arepa de choclo con queso (corn cake topped with cheese), papa rellena ("stuffed potatoe" or fried pastry filled with meat and potatoes), and bunuelos (fried cheese balls). I was basically in love after the first bite. We cleared the table! This is another place that I can't wait to go back to so I can pig out again. (Mekato's is located at 5423 N. Lincoln Avenue).


It's the beginning of the month and I'm already eager to get out and eat. I have a list of restaurants I want to try but I love the ability to go out with no plan and just stumble on something new. If you have any recommendations please let me know!


For more on my move to Chicago and my food-finding adventures, follow me on Facebook and Instagram @thecookierunner 
Stephanie

Thursday, March 6, 2014

Vote for my post on Mom Blog Network

Recipe Revisited: Beer Cheese Dip


I am in the middle of studying for my graduate school comprehensive exam. I started this journey of going back to school to become a marriage and family therapist back in 2010 and it's hard to believe that I am two months shy of graduation. The only thing standing in my way is taking and passing this exam. I'm working on cases, timing myself, and studying intensely with one of school friends (future colleague!). I am ready for this test to be done with so that I can give my brain a rest for a little bit. I am already thinking of going to Disney to celebrate passing this exam (I will pass it. I will pass it. I will pass it.).

Because it has been too quiet on here, I am sharing a recipe that also dates back to 2010. I remember when I first made this Beer Cheese Dip and how much I loved the recipe. This has become my go-to appetizer recipe and I make it whenever we have people over. I love the simplicity of ingredients and how quickly it comes together. The last time I made it, I made half of the recipe and that was enough for eight people to snack on before the real meal.

Beer Cheese Dip
Source: Jodi Zyvith on Allrecipes.com 

2 (8 ounce) packages cream cheese, softened
2 (8 ounce) packages shredded Cheddar cheese
1/2 teaspoon garlic powder
1/2 cup beer
1 (1 pound) loaf round bread

Place cream cheese, Cheddar cheese, garlic powder and beer in a large bowl. Using an electric mixer, blend until smooth.

Remove and reserve top of round bread. Hollow out the loaf, reserving removed bread pieces.

Spoon cream cheese mixture into the hollowed loaf. Replace bread top between servings. Use the reserved removed bread pieces for dipping.


Follow me on Facebook and Instagram @thecookierunner! Stephanie

Tuesday, June 12, 2012

Vote for my post on Mom Blog Network

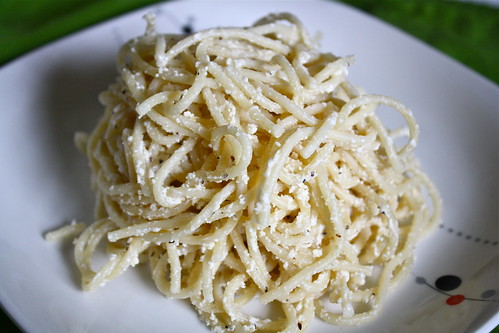
Meyer lemon spaghetti with goat cheese

Lemon Goat Cheese Pasta
I'm always on the hunt for quick and easy pasta dishes. I came across this recipe and was really excited about it because of the goat cheese. The pasta was delicious and, if you are a fan of goat cheese, you will love this pasta.

Lemon Spaghetti with Goat Cheese
Source: In Erika's Kitchen
Serves 2

1/2 lb spaghetti or angel hair pasta
1/4 cup lemon juice
1/2 cup grated Grana Padano or Parmigiano-Reggiano cheese
2 ounces fresh, soft goat cheese
1/4 cup olive oil
salt and pepper to taste

Bring a large pot of water to a boil. Salt the water, then add the pasta. Cook until the pasta is al dente, and not a moment longer.

While the pasta is cooking, grate the zest of the Meyer lemon into a large bowl. Juice the lemon into the same bowl, then add the cheeses, olive oil, a pinch of salt, and a healthy grind of black pepper. Ladle a bit of the hot pasta cooking water from the pot into the bowl. Whisk everything together until it's smooth.

When the pasta is cooked al dente, drain it and add it to the bowl with the lemon mixture. Toss, grind on a bit more pepper, and eat.
Stephanie

Friday, May 4, 2012

Vote for my post on Mom Blog Network

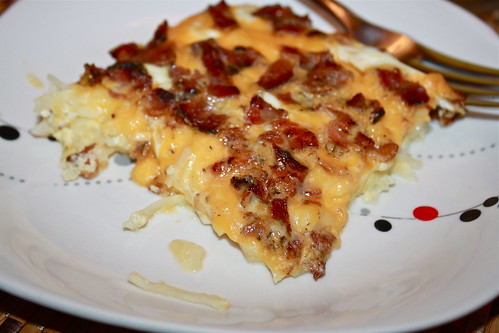
Easy Potato and Bacon Breakfast Casserole

Breakfast Casserole
I have one recommendation and that's to go and make this right now. Who cares if it's not time for breakfast; this dish is that good. The best part? It's incredibly easy to put together. So easy and beyond delicious. If you won't listen to me and make this now, then definitely make it tomorrow morning. This is the perfect way to start any day. 


Easy Potato and Bacon Breakfast Casserole
Source: Adapted from Our Best Bites
Serves: 2-3

2 cup shredded hash browns
7-8 slices of bacon
1 cup shredded cheddar cheese
3 eggs
1 cup milk
Salt
Freshly ground black pepper

Preheat the oven to 350 degrees F. Prepare an 8x8 pan by coating it with cooking spray.

Begin cooking bacon. If the potatoes are frozen place them in the pan and then place in the preheated oven while the bacon cooks. Once the bacon is done cooking, place them on a dish lined with a paper towel. Once cooled, crumble.

In a 2-cup measuring cup, mix together the milk, eggs, salt, and pepper.

Spread the cheese over the potatoes. Sprinkle crumbled bacon and then pour the egg mixture evenly.

Bake, uncovered, for 30-35 minutes until the cheese is slightly browned. Remove from oven and let sit 15 minutes before cutting.
 Stephanie

Monday, February 6, 2012

Vote for my post on Mom Blog Network

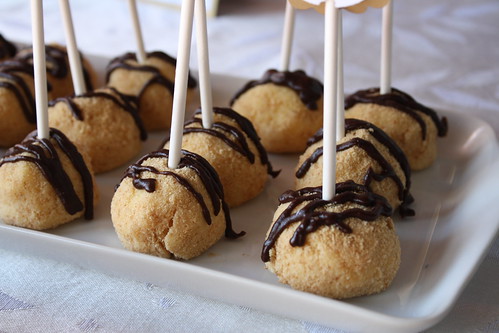
Cheesecake Bites

IMG_6183
Here's a dessert I have been dying to make again ever since I made them with the Daring Bakers back in April 2008. This time around, however, I wanted to take it easier on myself and instead of dipping them in chocolate I rolled them in graham cracker crumbs and drizzled them with chocolate sauce. The resulting dessert was literally a cheesecake on a stick. I don't remember much from the last time I made these, but this time I felt horrible ruining the cheesecake by scooping out balls because the cheesecake was, by far, the most beautiful cheesecake I have ever seen or made in my life. It was stunning. The best part about this dessert is that I stuck the bites in the freezer and they are a perfect snack for whenever the sweet tooth pops up. 

Cheesecake Pops
Source: Jill O'Connor's Sticky, Chewy, Messy, Gooey
Makes 20 – 25 Pops

2 8-oz. plus 4 oz packages cream cheese at room temperature
1 cups sugar
1⁄8 cup all-purpose flour
1⁄8 teaspoon salt
2.5 large eggs (I scrambled the third egg and just used half of it)
1 egg yolk
1/2 tsp pure vanilla extract
1⁄8 cup heavy cream
Boiling water as needed
Twenty to twenty-five 8-inch lollipop sticks
~1/2 cup graham cracker crumbs
1/4 chocolate sauce

Position oven rack in the middle of the oven and preheat to 325 degrees F. Set some water to boil.

In a large bowl, beat together the cream cheese, sugar, flour, and salt until smooth. If using a mixer, mix on low speed. Add the whole eggs and the egg yolks, one at a time, beating well (but still at low speed) after each addition. Beat in the vanilla and cream.

Grease a 9-inch cake pan (not a springform pan), and pour the batter into the cake pan. Place the pan in a larger roasting pan. Fill the roasting pan with the boiling water until it reaches halfway up the sides of the cake pan. Bake until the cheesecake is firm and slightly golden on top, 35 to 45 minutes.

Remove the cheesecake from the water bath and cool to room temperature. Cover the cheesecake with plastic wrap and refrigerate until very cold, at least 3 hours or up to overnight.

When the cheesecake is cold and very firm, scoop the cheesecake into 2-ounce balls and roll in graham cracker crumbs. When all balls are rolled, drizzle with chocolate sauce. Refrigerate for another hour or so and then serve and enjoy.
Stephanie

Wednesday, February 1, 2012

Vote for my post on Mom Blog Network

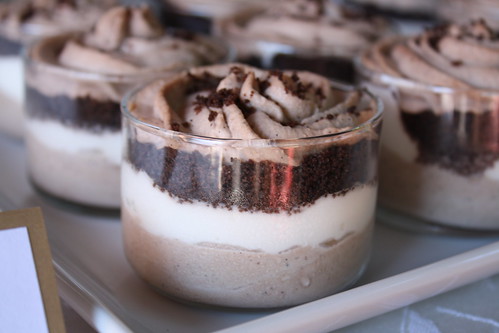
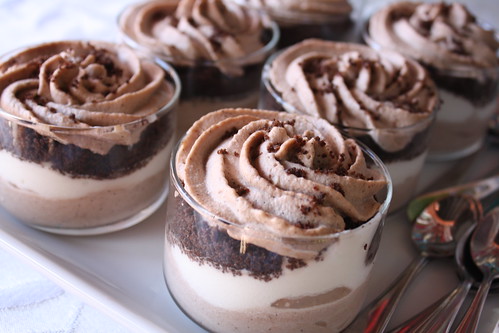
Tiramisu Trifles

IMG_6190
I have been dying to make a dessert-in-a-jar type dessert. They look so pretty and I love anything that's a miniaturized, single serving. I wanted whatever I made to be something different so I picked these Tiramisu Trifles. I actually put a lot more Kahlua than the recipe calls for, but that's the only major change I made. I also made my own chocolate cookies based on this Oreo Cookie recipe because if I was going to something as delicious and divine as tiramisu, I was going to go all out. And let me tell you, this dessert was spot on and tasted just like tiramisu.
IMG_6193

Tiramisu Trifles
Source: My Baking Addiction
Yields: 4 servings (Note: I doubled the recipe and had enough for about 5.3 oz 14 trifles)

For the base
1 cup heavy whipping cream
1/4 cup granulated sugar
1 cup ricotta cheese, any style
1 tablespoon unsweetened cocoa powder
1 tablespoon Kahlua (I added about 1/4-1/3 cup Kahlua to the doubled recipe)
1 teaspoon instant espresso granules

In a large bowl, Combine whipping cream and sugar beat until stiff, about four minutes. Transfer whipped cream to a medium bowl and set aside. (Do not clean bowl of food processor.)

Combine cheese, cocoa powder, Kahlua and instant espresso granules in bowl and beat until combined.

Add cheese mixture to bowl with whipped cream; fold in with rubber spatula until no white streaks remain.

For the layering
Whipped Cream: 1 cup heavy cream, whipped with 2 tablespoons granulated sugar until stiff
Chocolate Wafer Cookies: 1/2 cup chocolate cookie crumbs

Trifle Assembly
Spoon Tiramisu base and then layer with whipped cream and cookie crumbs. Top with leftover cookie crumbs or any other topping.
Stephanie

Tuesday, March 15, 2011

Vote for my post on Mom Blog Network

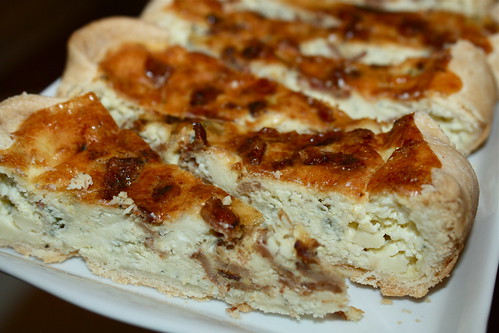
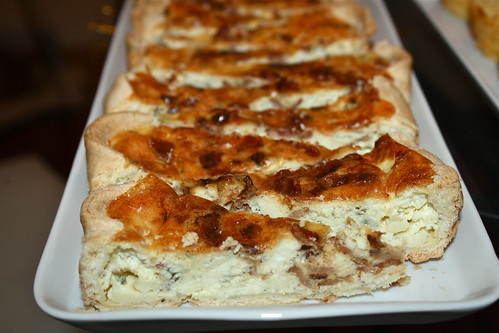
Gorgonzola Bacon Quiche

Gorgonzola Bacon Quiche
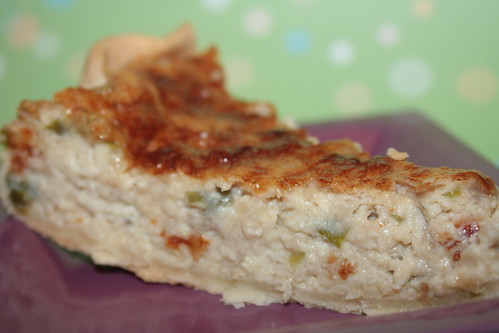
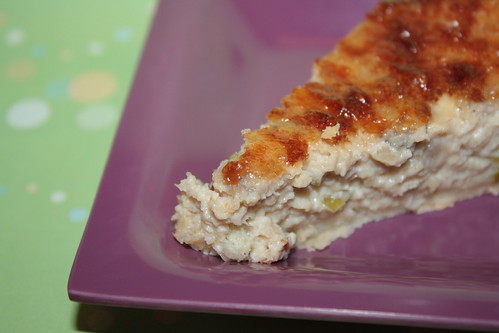
This quiche is easy to make and you will be so glad that you did. When I made it I got lots of compliments. I mean, you really can't go wrong with cheese and bacon, right? If you like pungent cheeses like gorgonzola and the flavor it creates when combined with bacon then you will definitely love this quiche.
Gorgonzola Bacon Quiche

Gorgonzola Bacon Quiche
Source: Adapted from Weber's Big Book of Grilling
Serves 6 to 8

1 uncooked pie crust (9 inches), store-bought
3 large eggs
3/4 cup heavy cream
~6 oz gorgonzola cheese crumbs
4 slices of thick-cut bacon (you can add more if you want), cooked and crumbled
1/4 tsp salt
1/4 tsp freshly ground black pepper

Preheat oven to 350 degrees F. Line a pie pan with the pie crust. Fill the pie with the cheese and bacon.

In a small bowl whisk the eggs and cream together. Pour into pie pan, making sure it gets into all the grooves.

Bake until crust and edges turn golden brown and a knife inserted in the middle comes out clean, about 30 minutes.

Remove from oven and allow to cool to room temperature. Slice, serve, and enjoy.
Stephanie

Thursday, December 30, 2010

Vote for my post on Mom Blog Network

Best Beer Cheese Dip

Beer Cheese Dip
I made this as an appetizer for our Christmas Day meal and it was a huge hit. I seasoned with salt and pepper but that's the only change I made to this recipe. Also, I used a stout because I wanted a stronger, full-bodied beer taste to my dip. It was beyond delicious and Abuela-approved.

Beer Cheese Dip
Source: Jodi Zyvith on Allrecipes.com

2 (8 ounce) packages cream cheese, softened
2 (8 ounce) packages shredded Cheddar cheese
1/2 teaspoon garlic powder
1/2 cup beer
1 (1 pound) loaf round bread

Place cream cheese, Cheddar cheese, garlic powder and beer in a large bowl. Using an electric mixer, blend until smooth.

Remove and reserve top of round bread. Hollow out the loaf, reserving removed bread pieces.

Spoon cream cheese mixture into the hollowed loaf. Replace bread top between servings. Use the reserved removed bread pieces for dipping.
Stephanie

Friday, October 15, 2010

Vote for my post on Mom Blog Network

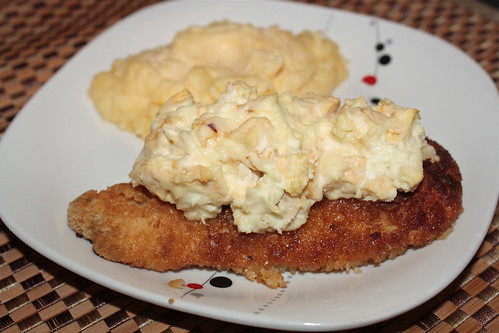
Goat Cheese & Apple Chicken

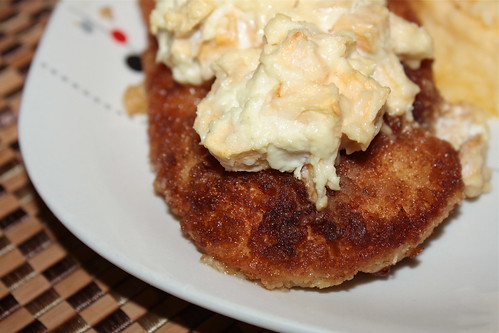
Chicken w/ Goat Cheese & Apple
As far as I can remember I've only had goat cheese 3 times in my life. I saw the goat cheese at the market and I had to buy it. My mouth watered at the thought of chicken topped with goat cheese, apple, and maple syrup. The dish did not disappoint. The goat cheese apple mixture provided a smooth and tart contrast to the crispy and savory chicken. Let's not forget about the maple syrup and how well its sweetness paired with the goat cheese. I licked my plate clean it was that good.

Goat Cheese & Apple Chicken
Serves 2

1 chicken breast, halved
3/4 cup Saltine cracker crumbs
1/2 tsp garlic salt
1 egg
2 Tbsp olive oil
3 oz goat cheese, at room temperature
1/2 an apple chopped
Salt
Pepper
Maple syrup

Preheat oven to 250 degrees F. Line a baking dish with aluminum foil and spray with cooking oil. 

Season chicken with salt and pepper. In a small bowl combine the cracker crumbs and garlic salt. In another small bowl whisk the egg with a fork. Dip the seasoned chicken into the egg and then the cracker mixture.

Over medium heat, add the oil and then cook the chicken until brown and crispy and cooked through. Place the chicken on the baking dish.

In another small bowl combine the goat cheese and the apples. Spread mixture evenly over the chicken breasts. Drizzle with maple syrup.

Bake for about 20 minutes or until cheese is warm and browned. Remove from oven.

Drizzle with more maple syrup. Serve and enjoy!
Chicken w/ Goat Cheese & Apple
Stephanie

Friday, October 8, 2010

Vote for my post on Mom Blog Network

Cheesy Onion Quiche

Gruyere & Onion Quiche
I love quiche. I love how you can pretty much eat it at any time of day and have it be a completely appropriate dish. Alex saw this dish and wanted me to make it. This is normally a recipe I would have stayed away from because of the amount of onions but because Alex wanted to try it I made it. I'm so glad I did because the quiche was incredible. We went with Gruyère cheese and the combination of that with the onion was a feast for the senses. The onions give this quiche a unique taste and the best part is that you can't even feel the onions in the quiche.
Gruyere & Onion Quiche

Cheesy Onion Quiche
Source: Adapted from Weber's Big Book of Grilling
Serves 6 to 8

1 uncooked pie crust (9 inches), store-bought
4 Tbsp unsalted butter
1 cup finely chopped red onions
3 large eggs
3/4 cup heavy cream
1 1/2 cups grated Jarlsberg, Swiss, or Gruyère cheese
3 Tbsp chopped scallions
1/4 tsp Tabasco sauce
1/4 tsp salt
1/4 tsp freshly ground black pepper

Preheat oven to 350 degrees F. Line a pie pan with the pie crust.

In a skillet over medium heat melt the better. Add the red onion and cook, stirring occasionally, until translucent, 3 to 5 minutes. Transfer to medium bowl and allow to cool for a few minutes. In a small bowl whisk the eggs and cream together and add to the onion butter mixture. Add the remaining filling ingredients and mix thoroughly.

Pour filling into pie pan. Bake until crust and edges turn golden brown and a knife inserted in the middle comes out clean, about 30 minutes.

Remove from oven and allow to cool to room temperature. Slice, serve, and enjoy.
Gruyere & Onion Quiche
Stephanie

Friday, September 17, 2010

Vote for my post on Mom Blog Network

Oh, Burger!

Blue Cheese Bacon Burger
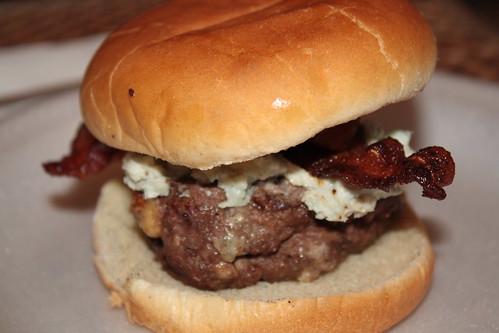
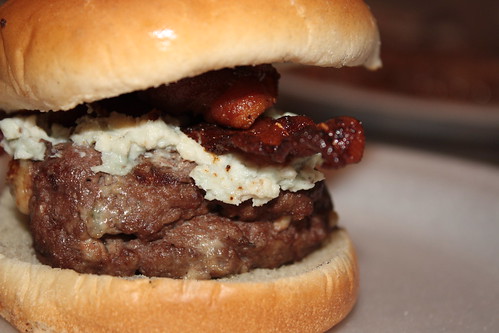
I love burgers. I'm perfectly happy with a plain cheeseburger but, if you really want to make me happy, give me a burger with cheddar cheese, bacon, and a fried egg. My arteries and cholesterol will be thanking me for that one in the future. Alex, on the other hand, likes to experiment with burgers. He made us blue cheese bacon burgers recently and the burger was beyond delicious. He mixed blue cheese into the ground beef so that was a pleasant surprise when eating the burger. I think the cheese mixed in actually helped the burger to taste extra juicy because it added a creamy texture to the hamburger meat. Alex topped the burgers with a mountain of blue cheese, which melted oh so deliciously on the burger, and topped that with bacon. It was pure burger heaven.

What's your favorite burger?

Blue Cheese Bacon Burger

Stephanie

Saturday, August 21, 2010

Vote for my post on Mom Blog Network

Cheddar-Beer Fondue

Beer Cheese Fondue
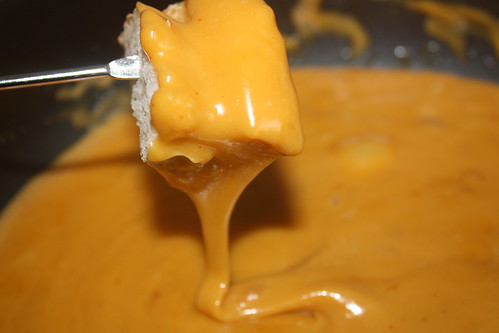
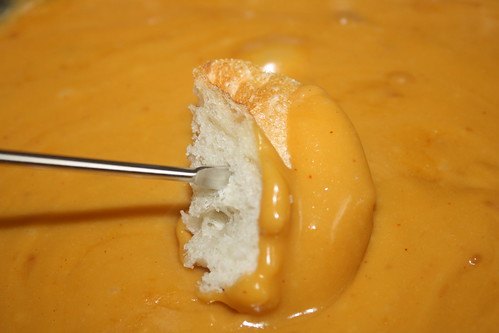
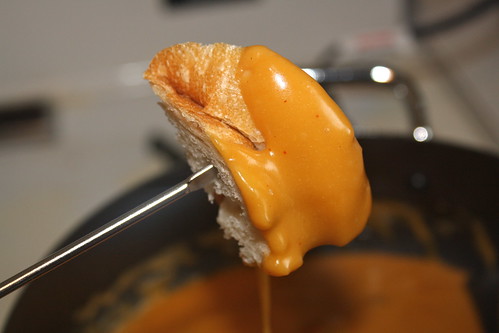
We got a fondue pot when we got married. I hadn't even opened the box until recently. Poor fondue pot was sitting around waiting to be used for the past 3 years. Can you believe that? I needed to make up for all this lost time so I made a Cheddar Beer  Fondue. Cheese and beer? Heaven. It's hard for me to describe how this tasted. All I can say is that the bitterness of the beer really brings out the sharpness of the cheese. Better than the one you get at Melting Pot if you ask me. The main thing I learned is that you have to eat the fondue immediately. I made it earlier in the day and it was beautiful and silky. When I reheated it, it became pasty. It still tasted good, it just didn't have the smooth fondue consistency.
 Beer Cheese Fondue
Cheddar Beer Fondue
Source: Southern Food (here)

1 lb. sharp cheddar cheese, shredded
1 tbsp. flour
1 1/2 tsp. dry mustard
Dash cayenne (or add a dash of hot sauce to the melted mixture)
3/4 c. beer (I used a dark lager)
2 tsp. Worcestershire sauce

In bowl, combine cheese, flour, mustard and ground cayenne; mix to blend well. In fondue pot, combine beer and Worcestershire sauce. Set temperature at 375° and heat until bubbling. Gradually add cheese mixture and stir constantly until cheese melts and mixture is smooth, about 5 minutes. Reduce temperature to 200° and serve with crusty bread.
 Beer Cheese Fondue
Stephanie

Saturday, September 5, 2009

Vote for my post on Mom Blog Network

Ham & Cheddar Puffs

Here's another quick and easy appetizer that's full of taste and big on presentation. The original recipe called for prosciutto and gruyere but I went the poor girl route and used ham and chedder cheese.
Ham & Cheese Pinwheels
Source: Joy the Baker (here)

1 package puff pastry
8 slices of ham
3 Tablespoons Dijon mustard
1 cup shredded cheddar cheese
flour for dusting
fresh ground black pepper

Preheat oven to 400 degrees F. Line a baking sheet with parchment paper and set aside.

Thaw puff pastry in the refrigerator for 2 to 3 hours. Once thawed, carefully unfold and lay on a floured work surface. If the pastry tears at the seam in the unfolding process. Dust flour on top of the pastry as well.

Puff pastry will already be very flat, but with a rolling pin, roll the dough out to about 11×9-inches. Layer the eight slices of hamon top of the puff pastry. Using a butter knife, layer the mustard on top of the ham slices. Top with cheese, and as much fresh ground black pepper as you like.

Begin to roll the right side of the pastry in towards the center. Next roll the left side of the pastry in towards the center. Press together. Dough will not stick together, but if you brush away some of the excess flour on the center dough pieces, they will stay together better during baking.

With a sharp knife, slice the dough into 1/2-inch thick slices. Place on a baking sheet lines with parchment paper. Bake at 400 degrees F for about 12-15 minutes, until a deep golden brown. Let cool on the pan for 5 minutes, then remove from baking sheet and serve warm or at room temperature.

Serve and enjoy!

Sunday, August 30, 2009

Vote for my post on Mom Blog Network

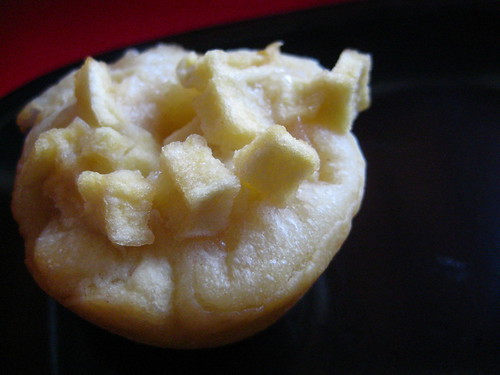
Apple and Brie Bites

I absolutely love finger foods and bite-size appetizers. We had Alex's co-interns over and I wanted to make a sweet appetizer for people to munch on. I found this recipe and switched out the fruit. The end result was a delicious little morsel and a definite crowd pleaser.

Apple and Brie Bites

Adventures in the Kitchen (
here)
1 can Pillsbury Crescent Recipe Creation
1 apple, peeled, finely chopped
1 tablespoon packed dark brown sugar
8 ounces Brie cheese, rind removed, cut into squares
Heat oven to 375F. Grease or spray 12 mini muffin cups. Unroll dough onto work surface. Using a small circle cutter, cut out 12 circles. Gently press circles into mini muffins.
In small bowl mix the apple and the brown sugar. Place 1 cheese chunk in each cup. Top with apple mixture.
Bake 10-15 minutes or until edges are deep golden brown. Cool 5 minutes and remove from muffin cups.

Serve and enjoy!