Wednesday, September 10, 2008

Vote for my post on Mom Blog Network

Of Poodles and Frogs


I've noticed that I have been in the kitchen more since starting school. With the amount of reading I do and the amount of time that takes up you would think that I wouldn't have much time leftover to get in the kitchen, but I do. Something about being in the kitchen baking relaxes me. Despite focusing on measurements and making sure everything is mixed together just right, my brain shuts down and does something amazing: it stops thinking logically and rationally. It's like my brain reverts back to the time when I had no responsibilities and no worries. It's so liberating!

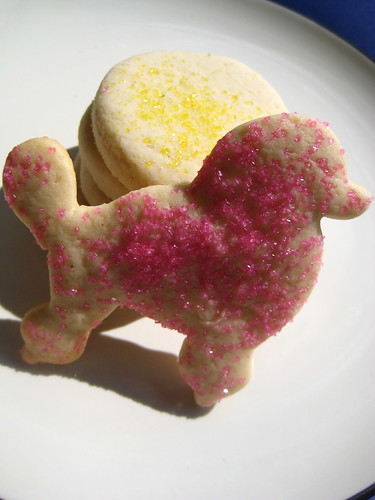
One of the things I baked was sugar cookies. I've had a recipe that I have been wanting to try from Sur La Table since last December. The dough was so easy to work with and I had so much fun using my poodle and frog cookie cutters. This may sound weird but the cookie tasted more like a sugar cookie the next day than the day it was made.

Our Favorite Sugar Cookies
Source: Sur La Table (here)
Makes 3 dozen cookies.

1 cup butter, softened
1 cup granulated sugar
2 eggs
1 1/2 tsp vanilla extract
3 3/4 cups all-purpose flour
2 tsp baking powder
1/4 cup heavy whipping cream
1/2 cup colored sugar, for decoration, optional

In a medium bowl, cream together the butter and sugar. Sift together the flour and baking powder; stir into mixture, alternating with the heavy cream. Cover dough and chill for 2 to 3 hours until firm.

Preheat the oven to 350 degrees. Prepare cookie sheets with parchment paper. On a lightly floured surface roll the dough out to 1/4-inch thickness and cut into desired shapes. Place cookies 1-inch apart of the cookie sheets and sprinkle with colored sugar.

Bake for 12 to 14 minutes until bottoms and edges of cookies are light brown. Remove from oven ans cool on wire racks. Store in airtight container.


Before baking.


Lovely poodle and frog.


All the cookies.


I thought the poodles were so cute.
Vote for my post on Mom Blog Network

Wordless Wednesday


Tuesday, September 9, 2008

Vote for my post on Mom Blog Network

FINALLY!


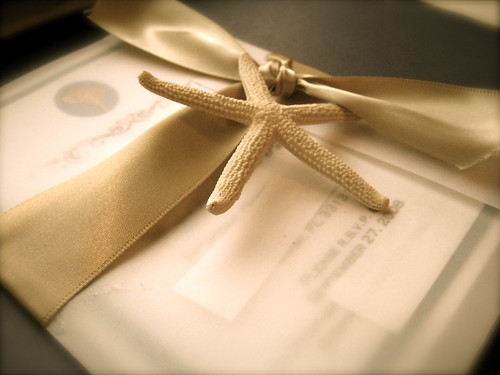
I have been wanting to share the invitations I made for Girl-Alex's shower. I finished them over two weeks ago and was waiting on the postal person to deliver her invite. Now that she has it and knows the theme of her shower (beaches), I can post pictures. And let me just warn you that I got very creative with some of the pictures (there's even posing with a starfish).

Enjoy!


Vote for my post on Mom Blog Network

TWD: Whopper Cookies


This week Rachel of Confessions of a Tangerine Tart made a great choice. I say it's great because I had always been curious about this recipe and have heard mixed reviews about it so I was happy to finally have a reason to try the recipe. I actually liked the cookie and I have to admit that I was a tad bit disappointed that it didn't have as much of a malt taste as I thought it would. The cookie was more like a chewy, chocolate cookie with a hint of something extra. You could just tell this wasn't your basic chocolate cookie. Alex liked the cookie A LOT. He would scarf down 3 cookies and then complain about how I was making him fat. But hey, I never told him he had to eat the cookies. I take no responsibility for how good the cookies taste; don't blame the baker!

Make sure to check out the other TWD blogs and Rachel's blog for the recipe.

The dough was fudge-y and delicious


Delicious!

Monday, September 8, 2008

Vote for my post on Mom Blog Network

Obsession of the Week

I love to scrapbook and for whatever reason I haven't scrapbooked as much as I would like. I have tons of pictures printed out, papers and stickers and even 3 albums that are waiting to be used, but I just haven't gotten around to it. I'm hoping that the 100 beautiful pages of scrapbook paper I bought this weekend (the store had a HUGE sale) will help kick in the urge into gear. If it doesn't, well at least I have pretty paper to look at and photograph.


Vote for my post on Mom Blog Network

It's 'Canes Time!


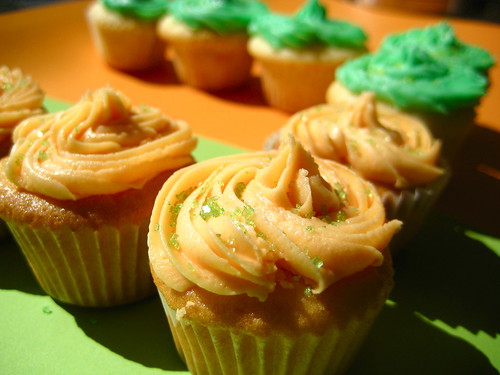
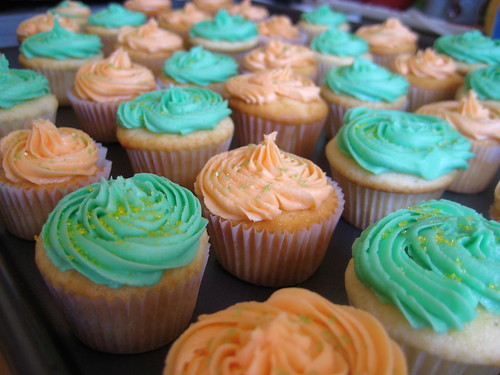
It's been a while since I've been a true Miami Hurricanes fan. While at UM for undergrad I had so much personal drama going on that the only thing I could think of was graduating. I don't feel like I got the full experience of going to a school that is known for sports greatness, but the school holds so many great memories for me because I met all of my closest friends there and I don't know who I'd be today without the presence of all these people in my life. The 'Canes spirit was rejuvinated this weekend after I read countless emails about the 'Canes v. Gators game. Some of my friends were saddened and angered by the loss and I figured that one thing that can cheer these girls up is a virtual cupcake. So while you guys can't taste these, you can enjoy the pictures :)

Cupcakes recipe here and frosting recipe here.

Yum!


Do you bleed green?


Or orange?


Or both?


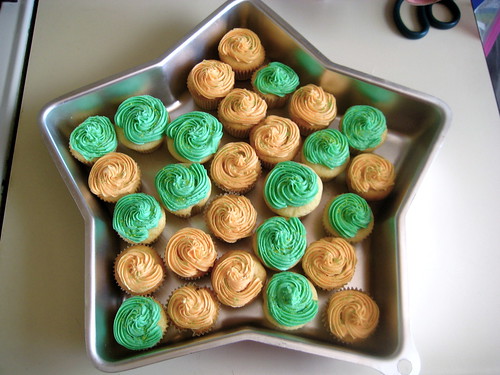
This picture says a lot about me...
I'm a 'Canes girl, I love stars, and I love to bake :)

Monday, September 1, 2008

Vote for my post on Mom Blog Network

Obsession of the Week

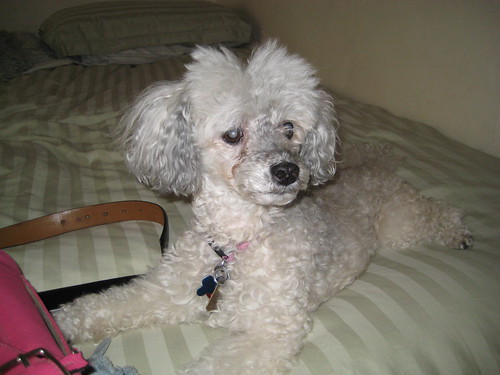
I cannot get over how cute my dog is. I swear that she gets cuter each day and that she is the most lovable dog on this planet. I've had her for more than half of my life and I love her to pieces. She's given me plenty of scares over the years from needing an emergency hysterectomy to having cancer, but she's also been the source of plenty of happy and fun times. She's only been in Alex's life for 5.5 years and he's hooked too. I love to see them play together and my ovaries literally start pounding inside my body when I see Alex tuck Perla in or when he carries her around like a baby. It's just incredible to see my 190 lb husband melt over my 9 lb poodle. I mean, how can you resist this little one?


Vote for my post on Mom Blog Network

TWD: PB, Oatmeal, & Chocolate Chipsters


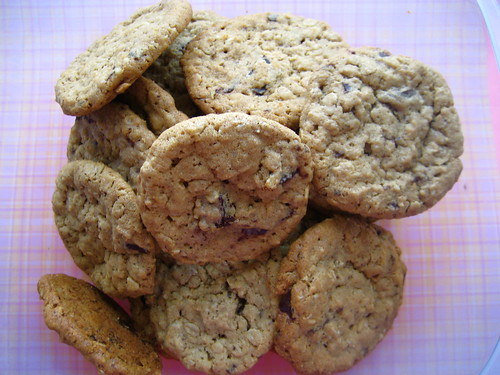
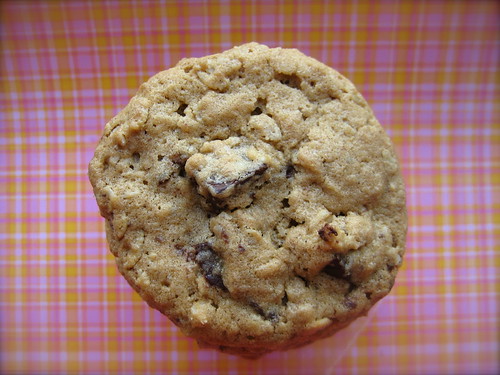
The name for this week's cookie is a mouth full: Chunky Peanut Butter and Oatmeal Chocolate Chipsters. There is no way you can be confused about what's in this cookie. It's all in the name! This was a good and simple cookie. And although I could taste a hint of peanut butter, Alex couldn't. He thought it was a regular oatmeal chocolate chip cookie, which translates to him liking the cookie but not loving it. Even though he didn't love the cookie, that didn't stop him from eating them all! The man cannot resist a pretty looking cookie.

Thanks to Stefany from Proceed with Caution for this week's selection. Make sure to check her blog for the recipe and to check TWD to see how the others made out with the cookie.

Cookie dough...yum!


All packed up.


One for you!

Sunday, August 31, 2008

Vote for my post on Mom Blog Network

Daring Bakers: Éclairs!


This month has been a perfect example of why I love being a part of the Daring Bakers. They have the tendency to pick recipes that sound and look fancy; recipes that look way too involved to even want to attempt to make them (just look at the Filbert Gateau and L'Opera cake). Then they also have a tendency to chose recipes that are so well known that you have never even considered trying to make at home because you can just as easily go to the store to pick some up (Danish Braid and this month's Éclairs). It's this switch up of the unknown and known that makes being a Daring Baker so much fun. You get the opportunity to make these incredibly beautiful desserts while at the same time you get to find out that they really aren't as hard as you thought they would be.

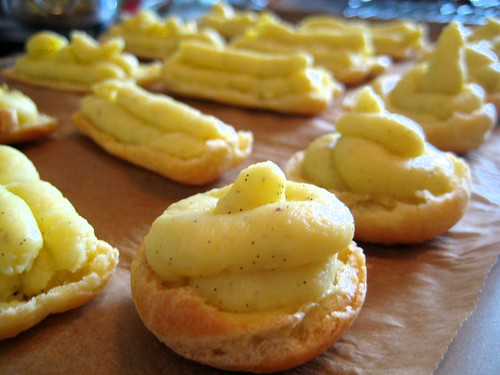
The Éclair is a dessert that I love to eat, but for all the times that I have eaten one I have never once asked myself how it was made. I think I was too caught up in the deliciousness of dough and cream and chocolate to ever wonder how and when these three elements came together to produce dessert greatness. But this month's challenge dared me to use something other than the-hand-to-mouth-rubbing-belly-saying-mmmm motion and required me to really break down the recipe and throw my senses into eclairs in a way I never had before. It was no easy task. I still managed to eat a little bit of everything as I was making it. It is amazing how much the dough, cream, and chocolate taste separately. I did diverge a little from the recipe selected by MeetaK and Tony Tahhan by using a vanilla bean pastry cream instead of a chocolate. I felt that a vanilla pastry cream would sit better with the main eater in my household and it did. Alex said he doesn't think he would have liked the eclairs as much as he did if they had a chocolate filling.

I definitely recommend this dessert to someone who has a few hours to spare and wants to make something that will really impress people. I don't think many people ever expect anyone to make Éclairs from scratch. Thank you Meeta and Tony for a great selection and don'f forget to the check the Kitchen and the BlogRoll for more Daring Bakers goodness.


And now the recipe selected by Tony and Meeta....

Pierre Hermé’s Chocolate Éclairs
Recipe from Chocolate Desserts by Pierre Hermé
(makes 20-24 Éclairs)

• Cream Puff Dough (see below for recipe), fresh and still warm

1) Preheat your oven to 375 degrees F (190 degrees C). Divide the oven into thirds by positioning the racks in the upper and lower half of the oven. Line two baking sheets with waxed or parchment paper.
2) Fill a large pastry bag fitted with a 2/3 (2cm) plain tip nozzle with the warm cream puff dough. Pipe the dough onto the baking sheets in long, 4 to 41/2 inches (about 11 cm) chubby fingers. Leave about 2 inches (5 cm) space in between each dough strip to allow them room to puff. The dough should give you enough to pipe 20-24 éclairs.


3) Slide both the baking sheets into the oven and bake for 7 minutes. After the 7 minutes, slip the handle of a wooden spoon into the door to keep in ajar. When the éclairs have been in the oven for a total of 12 minutes, rotate the sheets top to bottom and front to back. Continue baking for a further 8 minutes or until the éclairs are puffed, golden and firm. The total baking time should be approximately 20 minutes.

Notes:
1) The éclairs can be kept in a cool, dry place for several hours before filling.


Assembling the éclairs
:

• Chocolate glaze (see below for recipe)
• Chocolate pastry cream (see below for recipe)

1) Slice the éclairs horizontally, using a serrated knife and a gently sawing motion. Set aside the bottoms and place the tops on a rack over a piece of parchment paper.
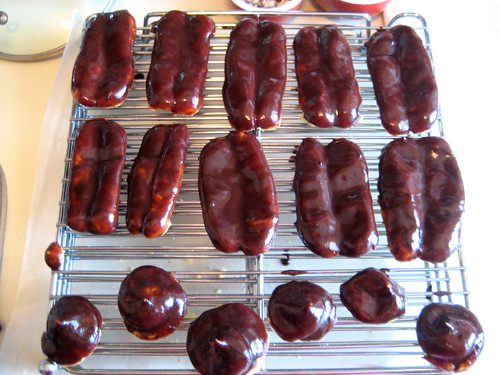
2) The glaze should be barely warm to the touch (between 95 – 104 degrees F or 35 – 40 degrees C, as measured on an instant read thermometer). Spread the glaze over the tops of the éclairs using a metal icing spatula.


Allow the tops to set and in the meantime fill the bottoms with the pastry cream.


3) Pipe or spoon the pastry cream into the bottoms of the éclairs. Make sure you fill the bottoms with enough cream to mound above the pastry. Place the glazed tops onto the pastry cream and wriggle gently to settle them.

Notes:
1) If you have chilled your chocolate glaze, reheat by placing it in a bowl over simmering water, stirring it gently with a wooden spoon. Do not stir too vigorously as you do not want to create bubbles.
2) The éclairs should be served as soon as they have been filled.

Pierre Hermé’s Cream Puff Dough

Recipe from Chocolate Desserts by Pierre Hermé
(makes 20-24 Éclairs)

• ½ cup (125g) whole milk
• ½ cup (125g) water
• 1 stick (4 ounces; 115g) unsalted butter, cut into 8 pieces
• ¼ teaspoon sugar
• ¼ teaspoon salt
• 1 cup (140g) all-purpose flour
• 5 large eggs, at room temperature

1) In a heavy bottomed medium saucepan, bring the milk, water, butter, sugar and salt to the boil.
2) Once the mixture is at a rolling boil, add all of the flour at once, reduce the heat to medium and start to stir the mixture vigorously with a wooden spoon. The dough comes together very quickly. Do not worry if a slight crust forms at the bottom of the pan, it’s supposed to. You need to carry on stirring for a further 2-3 minutes to dry the dough. After this time the dough will be very soft and smooth.
3) Transfer the dough into a bowl of a mixer fitted with the paddle attachment, or using your handmixer or if you still have the energy, continue by hand. Add the eggs one at a time, beating after each egg has been added to incorporate it into the dough. You will notice that after you have added the first egg, the dough will separate, once again do not worry. As you keep working the dough, it will come back all together again by the time you have added the third egg. In the end the dough should be thick and shiny and when lifted it should fall back into the bowl in a ribbon.
4) The dough should be still warm. It is now ready to be used for the éclairs as directed above.

Notes:
1) Once the dough is made you need to shape it immediately.
2) You can pipe the dough and the freeze it. Simply pipe the dough onto parchment-lined baking sheets and slide the sheets into the freezer. Once the dough is completely frozen, transfer the piped shapes into freezer bags. They can be kept in the freezer for up to a month.

Chocolate Pastry Cream
Recipe from Chocolate Desserts by PierreHermé

• 2 cups (500g) whole milk
• 4 large egg yolks
• 6 tbsp (75g) sugar
• 3 tablespoons cornstarch, sifted
• 7 oz (200g) bittersweet chocolate, preferably Velrhona Guanaja, melted
• 2½ tbsp (1¼ oz: 40g) unsalted butter, at room temperature

1) In a small saucepan, bring the milk to a boil. In the meantime, combine the yolks, sugar and cornstarch together and whisk in a heavy‐bottomed saucepan.
2) Once the milk has reached a boil, temper the yolks by whisking a couple spoonfuls of the hot milk into the yolk mixture.Continue whisking and slowly pour the rest of the milk into the tempered yolk mixture.
3) Strain the mixture back into the saucepan to remove any egg that may have scrambled. Place the pan over medium heat and whisk vigorously (without stop) until the mixture returns to a boil. Keep whisking vigorously for 1 to 2 more minutes (still over medium heat).Stir in the melted chocolate and then remove the pan from the heat.
4) Scrape the pastry cream into a small bowl and set it in an ice‐water bath to stop the cooking process. Make sure to continue stirring the mixture at this point so that it remains smooth.
5) Once the cream has reached a temperature of 140 F remove from the ice‐water bath and stir in the butter in three or four installments. Return the cream to the ice‐water bath to continue cooling, stirring occasionally, until it has completely cooled. The cream is now ready to use or store in the fridge.

Notes:
1) The pastry cream can be made 2‐3 days in advance and stored in the refrigerator.
2) In order to avoid a skin forming on the pastry cream, cover with plastic wrap pressed onto the cream.
3) Tempering the eggs raises the temperature of the eggs slowly so that they do not scramble.

Chocolate Glaze

Recipe from Chocolate Desserts by Pierre Hermé
(makes 1 cup or 300g)

• 1/3 cup (80g) heavy cream
• 3½ oz (100g) bittersweet chocolate, finely chopped
• 4 tsp (20 g) unsalted butter, cut into 4 pieces, at room temperature
• 7 tbsp (110 g) Chocolate Sauce (recipe below), warm or at room temperature

1)In a small saucepan, bring the heavy cream to a boil. Remove from the heat and slowly begin to add the chocolate, stirring with a wooden spoon or spatula.
2) Stirring gently, stir in the butter, piece by piece followed by the chocolate sauce.

Notes:
1) If the chocolate glaze is too cool (i.e. not liquid enough) you may heat it briefly in the microwave or over a double boiler. A double boiler is basically a bowl sitting over (not touching) simmering water.
2) It is best to glaze the eclairs after the glaze is made, but if you are pressed for time, you can make the glaze a couple days ahead of time, store it in the fridge and bring it up to the proper temperature (95 to 104 F) when ready to glaze.

Chocolate Sauce
Recipe from Chocolate Desserts by Pierre Hermé
(makes 1½ cups or 525 g)

• 4½ oz (130 g) bittersweet chocolate, finely chopped
• 1 cup (250 g) water
• ½ cup (125 g) crème fraîche, or heavy cream
• 1/3 cup (70 g) sugar

1) Place all the ingredients into a heavy‐bottomed saucepan and bring to a boil, making sure to stir constantly. Then reduce the heat to low and continue stirring with a wooden spoon until the sauce thickens.
2) It may take 10‐15 minutes for the sauce to thicken, but you will know when it is done when it coats the back of your spoon.
Notes:
1) You can make this sauce ahead of time and store it in the refrigerator for two weeks. Reheat the sauce in a microwave oven or a double boiler before using.
2) This sauce is also great for cakes, ice-cream and tarts.

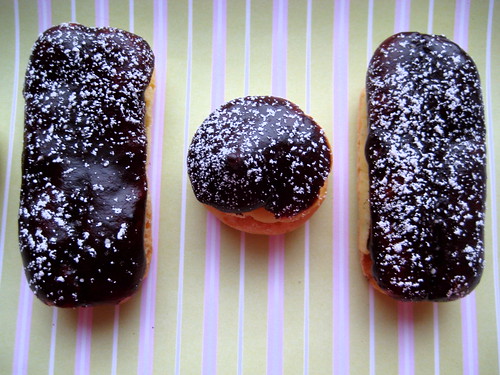
I made 3 sizes.


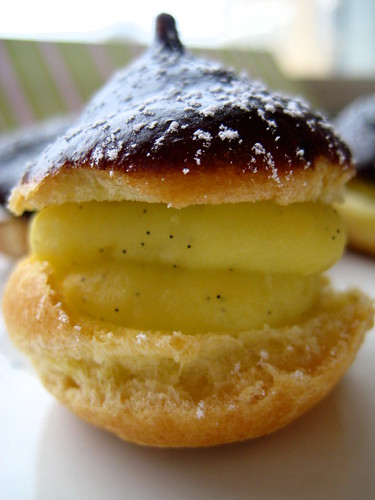
Close-up of goodness.