Wednesday, May 28, 2008

Vote for my post on Mom Blog Network

Daring Bakers: L'Opera


I must give credit to the following ladies: Lis, Fran, Shea, and Ivonne. These ladies picked out an amazingly intimidating recipe for this month's Daring Bakers challenge. When I first saw the recipe, I was happy it was a dessert but I also felt like running away from my computer. The recipe is scary looking because it is long and has like a million and five parts. I considered not even attempting the recipe because it seemed so far beyond my skill level. I was seriously intimidated. Then, I looked at the recipe a second time and smacked the cowardly-ness out of myself. If I am going to be a Daring Baker, I need to be daring. I need to not wimp out when something seems so intimidating. Did you catch that? Seems intimidating. Once I got over myself and lifted my baking self-esteem up, I realized that the recipe wasn't that bad. All you need to do is break the recipe up and tackle each part as you go along. The hard part with this recipe is twofold; it's hard when you have to combine all the elements and it's hard to resist eating it once it's all done.

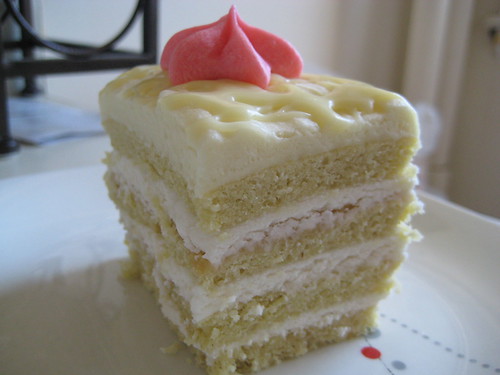
I halved this recipe, but what you see below is the recipe for the whole amount. Instead of the buttercream recipe given by the Daring Bakers I used this buttercream recipe. Also, once I realized how sweet this dessert was going to be, I drizzled the white chocolate over the top instead of smoothing it over. Here's my inspiration and looking guide to this dessert.

Just in case, here's a quick background of the dessert as given by the Daring Bakers:
So what exactly is an Opéra Cake? Well it's a cake that is made up (usually) of five components: a joconde (a cake layer), a syrup (to wet the joconde), a buttercream (to fill some of the layers), a ganache or mousse (to top the final cake layer) and a glaze (to cover the final layer of cake or of ganache/mousse).

And now, without further ado, prepare yourself for the symphony of sights and smells of L'Opera.

A Taste of Light: Opéra Cake
This recipe is based on Opéra Cake recipes in Dorie Greenspan’s Paris Sweets and Tish Boyle and Timothy Moriarty’s Chocolate Passion.

For the joconde
(Note: The joconde can be made up to 1 day in advance and kept wrapped at room temperate)

What you’ll need:
•2 12½ x 15½-inch (31 x 39-cm) jelly-roll pans (Note: If you do not have jelly-roll pans this size, do not fear! You can use different-sized jelly-roll pans like 10 x 15-inches.)
•a few tablespoons of melted butter (in addition to what’s called for in the ingredients’ list) and a brush (to grease the pans)
•parchment paper
•a whisk and a paddle attachment for a stand mixer or for a handheld mixer
•two mixing bowls (you can make do with one but it’s preferable to have two)

Ingredients:
6 large egg whites, at room temperature
2 tbsp. (30 grams) granulated sugar
2 cups (225 grams) ground blanched almonds (Note: If you do not want to use almond meal, you can use another nut meal like hazelnut. You can buy almond meal in bulk food stores or health food stores, or you can make it at home by grinding almonds in the food processor with a tablespoon or two of the flour that you would use in the cake. The reason you need the flour is to prevent the almonds from turning oily or pasty in the processor. You will need about 2 cups of blanched almonds to create enough almond meal for this cake.)
2 cups icing sugar, sifted
6 large eggs
½ cup (70 grams) all-purpose flour
3 tbsp. (1½ ounces; 45 grams) unsalted butter, melted and cooled

1.Divide the oven into thirds by positioning a rack in the upper third of the oven and the lower third of the oven.

2.Preheat the oven to 425◦F. (220◦C).

3.Line two 12½ x 15½- inch (31 x 39-cm) jelly-roll pans with parchment paper and brush with melted butter.

4.In the bowl of a stand mixer fitted with the whisk attachment (or using a handheld mixer), beat the egg whites until they form soft peaks. Add the granulated sugar and beat until the peaks are stiff and glossy. If you do not have another mixer bowl, gently scrape the meringue into another bowl and set aside.

5.If you only have one bowl, wash it after removing the egg whites or if you have a second bowl, use that one. Attach the paddle attachment to the stand mixer (or using a handheld mixer again) and beat the almonds, icing sugar and eggs on medium speed until light and voluminous, about 3 minutes.

6.Add the flour and beat on low speed until the flour is just combined (be very careful not to overmix here!!!).

7.Using a rubber spatula, gently fold the meringue into the almond mixture and then fold in the melted butter. Divide the batter between the pans and spread it evenly to cover the entire surface of each pan.

8.Bake the cake layers until they are lightly browned and just springy to the touch. This could take anywhere from 5 to 9 minutes depending on your oven. Place one jelly-roll pan in the middle of the oven and the second jelly-roll pan in the bottom third of the oven.

9.Put the pans on a heatproof counter and run a sharp knife along the edges of the cake to loosen it from the pan. Cover each with a sheet of parchment or wax paper, turn the pans over, and unmold.

10.Carefully peel away the parchment, then turn the parchment over and use it to cover the cakes. Let the cakes cool to room temperature.


For the syrup
(Note: The syrup can be made up to 1 week in advance and kept covered in the refrigerator.)

What you’ll need:
•a small saucepan

Ingredients:
½ cup (125 grams) water
⅓ cup (65 grams) granulated sugar
1 to 2 tbsp. of the flavouring of your choice (i.e., vanilla extract, almond extract, cognac, limoncello, coconut cream, honey etc.)

1.Stir all the syrup ingredients together in the saucepan and bring to a boil.

2.Remove from the heat and let cool to room temperature.

For the buttercream
(Note: The buttercream can be made up to 1 month in advance and packed in an airtight container. If made way in advance, you can freeze the buttercream. Alternatively you can refrigerate it for up to 4 days after making it. To use the buttercream simply bring it to room temperature and then beat it briefly to restore its consistency.)

What you’ll need:
•a small saucepan
•a candy or instant-read thermometer
•a stand mixer or handheld mixer
•a bowl and a whisk attachment
•rubber spatula

Ingredients:
1 cup (100 grams) granulated sugar
¼ cup (60 grams) water
seeds of one vanilla bean (split a vanilla bean down the middle and scrape out the seeds) or 1 tbsp. pure vanilla extract (Note: If you are flavouring your buttercream and do not want to use the vanilla, you do not have to. Vanilla will often enhance other flavours but if you want an intense, one-flavoured buttercream, then by all means leave it out!)
1 large egg
1 large egg yolk
1¾ sticks (7 ounces; 200 grams) unsalted butter, at room temperature
flavouring of your choice (a tablespoon of an extract, a few tablespoons of melted white chocolate, citrus zest, etc.)

1.Combine the sugar, water and vanilla bean seeds or extract in a small saucepan and warm over medium heat just until the sugar dissolves.

2.Continue to cook, without stirring, until the syrup reaches 225◦F (107◦C) [*Note: Original recipe indicates a temperature of 255◦F (124◦C), however, when testing the recipe I found that this was too high so we heated to 225◦F and it worked fine] on a candy or instant-read thermometer. Once it reaches that temperature, remove the syrup from the heat.

3.While the syrup is heating, begin whisking the egg and egg yolk at high speed in the bowl of your mixer using the whisk attachment. Whisk them until they are pale and foamy.

4.When the sugar syrup reaches the correct temperature and you remove it from the heat, reduce the mixer speed to low speed and begin slowly (very slowly) pouring the syrup down the side of the bowl being very careful not to splatter the syrup into the path of the whisk attachment. Some of the syrup will spin onto the sides of the bowl but don’t worry about this and don’t try to stir it into the mixture as it will harden!

5.Raise the speed to medium-high and continue beating until the eggs are thick and satiny and the mixture is cool to the touch (about 5 minutes or so).

6.While the egg mixture is beating, place the softened butter in a bowl and mash it with a spatula until you have a soft creamy mass.

7.With the mixer on medium speed, begin adding in two-tablespoon chunks. When all the butter has been incorporated, raise the mixer speed to high and beat until the buttercream is thick and shiny.

8.At this point add in your flavouring and beat for an additional minute or so.

9.Refrigerate the buttercream, stirring it often, until it’s set enough (firm enough) to spread when topped with a layer of cake (about 20 minutes).

For the white chocolate ganache/mousse (This is optional)
(Note: The mousse can be made ahead and refrigerated until you’re ready to use it.)

What you’ll need:
•a small saucepan
•a mixer or handheld mixer

Ingredients:
7 ounces white chocolate
1 cup plus 3 tbsp. heavy cream (35% cream)
1 tbsp. liquer of your choice (Bailey’s, Amaretto, etc.)

1.Melt the white chocolate and the 3 tbsp. of heavy cream in a small saucepan.
2.Stir to ensure that it’s smooth and that the chocolate is melted. Add the tablespoon of liqueur to the chocolate and stir. Set aside to cool completely.
3.In the bowl of a stand mixer, whip the remaining 1 cup of heavy cream until soft peaks form.
4.Gently fold the whipped cream into the cooled chocolate to form a mousse.
5.If it’s too thin, refrigerate it for a bit until it’s spreadable.
6.If you’re not going to use it right away, refrigerate until you’re ready to use.

For the glaze
(Note: It’s best to make the glaze right when you’re ready to finish the cake.)

What you’ll need:
•a small saucepan or double boiler

Ingredients:
14 ounces white chocolate, coarsely chopped
½ cup heavy cream (35% cream)

1.Melt the white chocolate with the heavy cream. Whisk the mixture gently until smooth.
2.Let cool for 10 minutes and then pour over the chilled cake. Using a long metal cake spatula, smooth out into an even layer.
3.Place the cake into the refrigerator for 30 minutes to set.

Assembling the Opéra Cake
(Note: The finished cake should be served slightly chilled. It can be kept in the refrigerator for up to 1 day).

Line a baking sheet with parchment or wax paper.

Working with one sheet of cake at a time, cut and trim each sheet so that you have two pieces (from each cake so you’ll have four pieces in total): one 10-inch (25-cm) square and one 10 x 5-inch (25 x 12½-cm) rectangle.

All the ingredients.


Step A (if using buttercream only and not making the ganache/mousse):

Place one square of cake on the baking sheet and moisten it gently with the flavoured syrup.

Spread about one-third of the buttercream over this layer.

Top with the two rectangular pieces of cake, placing them side by side to form a square. Moisten these pieces with the flavoured syrup.

Spread another third of the buttercream on the cake and then top with the third square of joconde. Use the remaining syrup to wet the joconde. Spread the remaining buttercream on top of the final layer of joconde and then refrigerate until very firm (at least half an hour).

Make the glaze and after it has cooled, pour/spread it over the top of the chilled cake. Refrigerate the cake again to set the glaze.

Serve the cake slightly chilled. This recipe will yield approximately 20 servings.

Step B (if making the ganache/mousse):

Place one square of cake on the baking sheet and moisten it gently with the flavoured syrup.

Spread about three-quarters of the buttercream over this layer.

Top with the two rectangular pieces of cake, placing them side by side to form a square. Moisten these pieces with the flavoured syrup.

Spread the remaining buttercream on the cake and then top with the third square of joconde. Use the remaining syrup to wet the joconde and then refrigerate until very firm (at least half an hour).

Prepare the ganache/mousse (if you haven’t already) and then spread it on the top of the last layer of the joconde. Refrigerate for at least two to three hours to give the ganache/mousse the opportunity to firm up.

Make the glaze and after it has cooled, pour/spread it over the top of the chilled cake. Refrigerate the cake again to set the glaze.

Almost done...


Serve the cake slightly chilled. This recipe will yield approximately 20 servings.

Done!


Remember, if you want to see more of this challenge from the other Daring Bakers check out the Blogroll. Also, check out The Daring Bakers Kitchen for more cool stuff.

Enjoy!


Tuesday, May 27, 2008

Vote for my post on Mom Blog Network

My Husband, My Handyman

I love my husband. I really do. I know that the man can do anything that he sets his mind to. I have full faith in his capabilities. Now, I don't like to bring my man down, but he just doesn't come across as being handy. I don't know what it is or how to describe it. If you have met Alex and have known him for some time, you would agree with me. You may have absolutely no trouble thinking about him using a scalpel or performing some kind of gory surgery, but you will have trouble thinking about him using a screwdriver and putting a nail in the wall.

This past Saturday we spent a good deal of the day cleaning up our apartment. The kitchen has always been a sore spot for me because it is way too small for me and I am constantly knocking things down and struggling to have just enough counter space to do what I have to do. After cleaning the kitchen I realized that some shelving on the wall would greatly reduce my kitchen stress. We went to just about every home store in the city and I was utterly amazed by how much shelving can cost. I wanted to get something cheap and something that would suit the purpose I wanted which was to hold my baking stuff. I didn't want to get something that was overly nice because it isn't worth putting something nice in an apartment that you are only renting. We made one last stop at Economy Hardware and, luckily enough, they had exactly what I was looking for. It looks a little industrial, but it is perfect for what I wanted and we get to add more shelves later if we want.

The best part? Alex put it up! Anchors, screws, and all. I was so proud of him and he totally made my day by helping me realize my vision. Every time I look at the shelf, I am reminded that although Alex doesn't seem handy around the house, he really can be when it means making his wife happy.

New and improved kitchen.


Close-up of the new shelf.

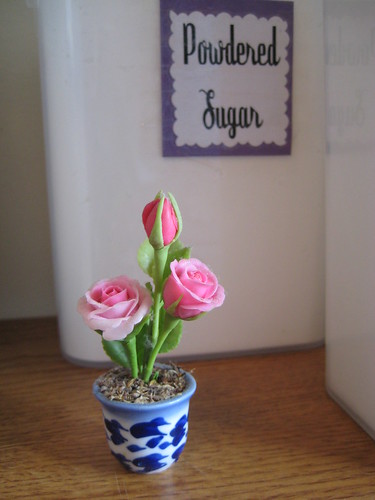
Just because...this little rose plant is made out of clay and I think it's the cutest thing ever.
Vote for my post on Mom Blog Network

Raspberry Butter Cookies


One of my blog obsessions is Joelen's Culinary Adventures. The woman does some incredible things with foods and hosts the most delicious food events. So when I saw her post about joining her "Culinary Adventures in Cyberspace" I jumped on it. While she has a few adventures posted that I want to participate in, this was the one I wanted to do first:

Little Chefs: Cookies ~ This event is dedicated to all the young aspiring chefs out there. In this culinary adventure, we're teaming up with the Ronald McDonald House each month to provide some kid-friendly events to their children & families… as well as a chance for your children to participate too! This month, we're making cookies from scratch with the kids. If you have any cookie recipes easy enough for kids to make, please share it during this culinary blogging adventure!

For this adventure, I thought it would be fun to do some easy cookies that had a red color to them in honor of Ronald McDonald's cool hair. I chose to make butter cookies with raspberries in them. The recipe is easy to follow and doesnt' have too many ingredients in them (you can even change the fruit to something else). The only part that isn't too kid friendly (depending on the age) is when you have to cut the roll into the slices, but you don't even have to do this part because of how well the dough holds together. After I baked the cookies, I thought about how great it would have been to create a flat sheet of dough, freeze that, and then use cookie cutters to make cool shapes out of the dough. Making the cookies this way would definitely be more kid friendly.

Raspberry Butter Cookies

Source: Carole Bloom's The Essential Baker


4 ounces (8 Tbsp/1 stick) unsalted butter, softened

1/3 cup firmly packed light brown sugar

1/8 tsp salt

1 cup all-purpose flour

1/2 cup sliced raspberries


Place the butter in a bowl and beat until fluffy, about 2 minutes.


Add the brown sugar and salt to the butter and cream together well. Stop occasionally and scrape down the sides and bottom of the bowl with a rubber spatula.


Add the flour in two stages to the butter mixture and blend thoroughly after each addition.


Add the raspberry to the dough mixture and stir in with the spatula.


Place a large sheet of wax paper on a flat surface and place the dough on the sheet. Use the wax paper to shape and roll the dough into a cylinder about 8 inches long and 2 inches wide. Cover the cylinder tightly with the waxed paper and then wrap in plastic wrap. Chill in the freezer for 45 minutes or in the fridge for at least 4 hours, until firm enough to slice.


Adjust the oven racks to the middle of the oven. Preheat the oven to 325 degrees F. Line a baking sheet with parchment paper or with a non-stick pan liner.


Place the cookie cylinders on a cutting board. Using a sharp knife, cut the cylinder into 1/2-inch-thick slices. Cut straight down and roll the cylinder a quarter after every 6 slices so it will keep its round shape. If the dough becomes soft while you are working with it, rewrap it, chill for another 10-15 minutes, then continue slicing.


Place the slices on the baking sheets, leaving at least 1 inch of space between them. Bake for 20-25 minutes, until set. Remove the baking sheets from the oven and leave the cookies on the sheets to cool on the racks.


Vote for my post on Mom Blog Network

Recipe Remix: PB&J French Toast


I came across this blog event on the What's Cooking? board of The Nest and thought it was such a fun thing to do. I was even more excited about the event because it was about breakfast foods and breakfast is my absolute favorite meal of the day. The whole premise of Recipe Remix is to take a recipe we all know and "remix" it in a fun, new, and different way.

After making myself a peanut butter and jelly sandwich yesterday for lunch I thought about how cool it would be to make this lunch staple a breakfast item. I went to bed dreaming about how a French Toast-pb&j sandwich combination would taste and I am happy to say that it tasted good! It tasted like your typical French Toast but with a gooey, yummy center. I dusted some powdered sugar on it and while it tasted good without syrup, I poured syrup on it just to see how well it would go with the pb&j filling. Remixing French Toast and combining it with all-time favorite sandwich (pb&j) was an awesome idea and I can't wait to make this again.

PB&J French Toast

Butter for skillet
1 egg
1/4 tsp vanilla extract

2 slices bread
Peanut Butter
Jelly (I used strawberry)


1. Over medium-low heat melt butter in a skillet.
2. Combine egg and vanilla extract and set aside.
3. Prepare pb&j sandwich as you normally would.
4. Dip the pb&j sandwich in the egg mixture and coat both sides.
5. Place on skillet and cook until golden; flip and repeat
6. Enjoy!


Thanks to Robin of Made With Love and Danielle of Make No Little Meals for hosting! If you want more details on Recipe Remix, click here.

Vote for my post on Mom Blog Network

Tuesdays With Dorie: Sticky Buns


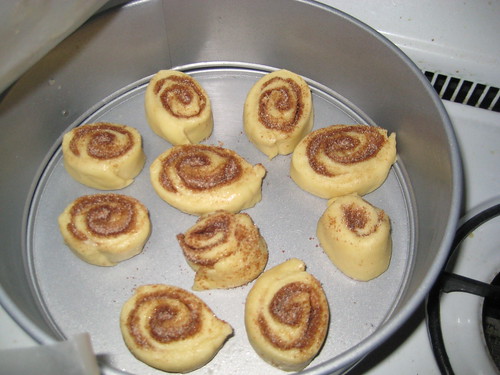
I have never had sticky buns before; heck, I only found out about them on our last trip to Miami when I caught an episode of Throwdown with Bobby Flay in which he challenged a Boston bakery that made sticky buns. After making the recipe for Dorie's sticky buns this week, I am a little upset with myself....how could I have possibly existed this long without them? They were sooo good. If it's any indication of how good I thought they were I ate 3 of them within an hour of them being taken out of the oven and they were all gone in less than 24 hours.

I halved the recipes for both the brioche and the sticky buns because I was afraid that it would have been too much for the two of us to eat. Although I think Alex and I could have tackled the entire recipe, I am happy I didn't make the whole amount because the buns have a short window of goodness (they were a little hard the next morning). I am already looking forward to making these delicious goodies again.

Thank you Madame Chow of
Madame Chow's Kitchen for introducing sticky buns to me; you have changed my life for the better with your selection. Don't forget to check out all the great blogs on the Tuesdays With Dorie website.


Pecan Honey Sticky Buns (whole recipe)
Source: Dorie Greenspan's Baking: From My Home to Yours
Makes 15 buns

For the Glaze
1 cup (packed) light brown sugar
1 stick (8 tablespoons) unsalted butter, cut into 4 pieces
1/4 cup honey
1-1/2 cups pecans (whole or pieces)

For the Filling
1/4 cup sugar
3 tablespoons (packed) light brown sugar
1 tablespoon ground cinnamon
3 tablespoons unsalted butter, at room temperature

For the Buns
1/2 recipe dough for Golden Brioche loaves (see below), chilled and ready to shape (make the full recipe and cut the dough in half after refrigerating it overnight)

Generously butter a 9-x-13-inch baking pan (a Pyrex pan is perfect for this).

To make the glaze: In a heavy-bottomed saucepan, bring the brown sugar, butter, and honey to a boil over medium-low heat, stirring frequently to dissolve the sugar. Pour the glaze into the buttered pan, evening it out as best you can by tilting the pan or spreading the glaze with a heatproof spatula. Sprinkle over the pecans.

To make the filling: Mix the sugars and cinnamon together in a bowl. If necessary, in another bowl, work the butter with a spatula until it is soft, smooth and spreadable.

To shape the buns: On a flour-dusted work surface, roll the chilled dough into a 16-inch square. Using your fingers or a pastry brush, spread the softened butter over the dough. Sprinkle the dough with the cinnamon sugar, leaving a 1-inch strip bare on the side farthest from you. Starting with the side nearest you, roll the dough into a cylinder, keeping the roll as tight as you can. (At this point, you can wrap the dough airtight and freeze it for up to 2 months . . . . Or, if you want to make just part of the recipe now, you can use as much of the dough as you'd like and freeze the remainder. Reduce the glaze recipe accordingly).

With a chef's knife, using a gentle sawing motion, trim just a tiny bit from the ends of the roll if they're very ragged or not well filled, then cut the log into 1-inch thick buns. (Because you trim the ragged ends of the dough, and you may have lost a little length in the rolling, you will get 15 buns, not 16.) Fit the buns into the pan cut side down, leaving some space between them.

Lightly cover the pan with a piece of wax paper and set the pan in a warm place until the buns have doubled in volume, about 1 hour and 45 minutes. The buns are properly risen when they are puffy, soft, doubled and, in all likelihood, touching one another.


Getting ready to bake: When the buns have almost fully risen, center a rack in the oven and preheat the oven to 375 degrees F.

Remove the sheet of wax paper and put the pan on a baking sheet lined with parchment or a silicone mat. Bake the sticky buns for about 30 minutes, or until they are puffed and gorgeously golden; the glaze will be bubbling away merrily. Pull the pan from the oven.

The sticky buns must be unmolded minutes after they come out of the oven. If you do not have a rimmed platter large enough to hold them, use a baking sheet lined with a silicone mate or buttered foil. Be careful - the glaze is super-hot and super-sticky.

Look at all that deliciousness.

What You'll Need for the Golden Brioche Dough (this recipe makes enough for two brioche loaves. If you divide the dough in half, you would use half for the sticky buns, and you can freeze the other half for a later date, or make a brioche loaf out of it!):

2 packets active dry yeast (each packet of yeast contains approx. 2 1/4 teaspoons)
1/3 cup just-warm-to-the-touch water
1/3 cup just-warm-to-the-touch whole milk
3 1/3 cups all-purpose flour
2 teaspoons salt
3 large eggs, at room temperature
1/4 cup sugar
3 sticks (12 ounces) unsalted butter, at room temperature but still slightly firm

What You'll Need for the Glaze (you would brush this on brioche loaves, but not on the sticky buns):
1 large egg
1 tablespoon water

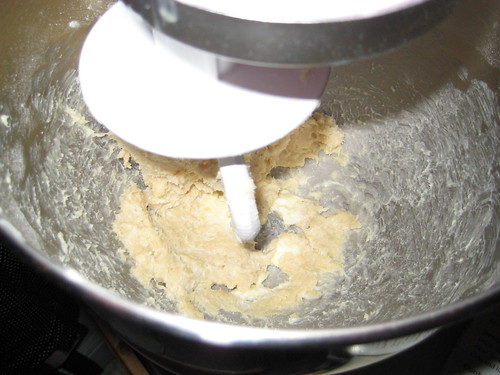
To Make The Brioche: Put the yeast, water and milk in the bowl of a stand mixer and, using a wooden spoon, stir until the yeast is dissolved. Add the flour and salt, and fit into the mixer with the dough hook, if you have one. Toss a kitchen towel over the mixer, covering the bowl as completely as you can-- this will help keep you, the counter and your kitchen floor from being showered in flour. Turn the mixer on and off a few short pulses, just to dampen the flour (yes, you can peek to see how you're doing), then remove the towel, increase the mixer speed to medium-low and mix for a minute or two, just until the flour is moistened. At this point, you'll have a fairly dry, shaggy mess.

Scrape the sides and bottom of the bowl with a rubber spatula, set the mixer to low and add the eggs, followed by the sugar. Increase the mixer speed to medium and beat for about 3 minutes, until the dough forms a ball. Reduce the speed to low and add the butter in 2-tablespoon-size chunks, beating until each piece is almost incorporated before adding the next. You'll have a dough that is very soft, almost like batter. Increase the speed to medium-high and continue to beat until the dough pulls away from the sides of the bowl, about 10 minutes.

Transfer the dough to a clean bowl (or wash out the mixer bowl and use it), cover with plastic wrap and leave at room temperature until nearly doubled in size, 40 to 60 minutes, depending upon the warmth of your room.

Deflate the dough by lifting it up around the edges and letting it fall with a slap to the bowl. Cover the bowl with the plastic wrap and put it in the refrigerator. Slap the dough down in the bowl every 30 minutes until it stops rising, about 2 hours, then leave the uncovered dough in the refrigerator to chill overnight. (After this, you can proceed with the recipe to make the brioche loaves, or make the sticky buns instead, or freeze all or part of the dough for later use.)

The next day, butter and flour two 8 1/2-x-4 1/2-inch pans.

Pull the dough from the fridge and divide it into 2 equal pieces. Cut each piece of the dough into 4 equal pieces and roll each piece into a log about 3 1/2 inches long. Arrange 4 logs crosswise in the bottom of each pan. Put the pans on a baking sheet lined with parchment or a silicone mat, cover the pans lightly with wax paper and leave the loaves at room temperature until the dough almost fills the pans, 1 to 2 hours. (Again, rising time with depend on how warm the room is.)

Getting Ready To Bake: Center a rack in the oven and preheat the oven to 400 degrees F.

To Make the Glaze: Beat the egg with the water. Using a pastry brush, gently brush the tops of the loaves with the glaze.

Bake the loaves until they are well risen and deeply golden, 30 to 35 minutes. Transfer the pans to racks to cool for 15 minutes, then run a knife around the sides of the pans and turn the loaves out onto the racks. Invert again and cool for at least 1 hour.

Same photo, different colors. Left: original photo; Right: enhanced colors.

Monday, May 26, 2008

Vote for my post on Mom Blog Network

Sometimes People Suck...

Blake from Blake Makes had a giveaway of Amano Artisan Chocolate not too long ago. I was one of the lucky ones that posted in time to get a free set of chocolates. Unfortunately, Amano sent the chocolate out by FedEx. I tried calling FedEx to set up some kind of pick up but their customer service sucks, especially when something is sent home delivery. On the third attempt the chocolate was supposedly left, but when I came home the chocolate was no where to be found. I'm assuming someone took the chocolate or maybe it just wasn't delivered...who knows. I was so disappointed and spent the night dreaming about the day that we don't have to live in an apartment building or under a management company that refuses to accept packages for their residents. I hope that whoever took the chocolate was at least able to enjoy it with a guilt-free conscious or that they were able to bake something incredible with it.

This is what the goods look like in case you see someone with them who looks suspicious ;-)

Tuesday, May 20, 2008

Vote for my post on Mom Blog Network

Tuesdays With Dorie: Madeleines


I am so happy that Tara of Smells Like Home chose a cookie for this week's recipe. I love baking cookies. No, no, I adore baking cookies. In my eyes they are the perfect dessert and snack food. It's not like a cake or brownie where you have to cut a piece off or a cupcake that requires special packaging if you want to take one to go. You see, cookies come in single size servings; no slicing, cutting, or silverware necessary. It's just you and that scrumptious cookie. You can have one after you meal or in between your meals. Cookies are perfect for just about every occasion and I don't think I have ever met a person who doesn't like cookies. Cookies are just perfection, plain and simple.

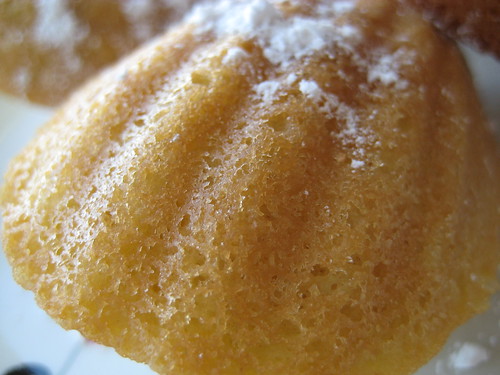
I was very excited when I saw that the recipe for this week was Madeleines. I have never had a madeleine and the closest I have ever come to one is at the counter as I pay for my Starbucks frapp. I had always assumed that this cookie was crunchier and denser than your regular cookie. I was wrong because this cookie was fluffy, light, and spongy. I made mine in a full size madeleine mold and I am not ashamed to say that I ate 8 of the 12 cookies. I was stunned that I ate so many of them, but I couldn't resist them. This is a cookie I definitely recommend everyone trying. And if I don't convince you, make sure to go to the Tuesdays With Dorie website and look through all of the incredible blogs, I'm sure one of those blogs will lure you.

Traditional Madeleines
Source: Dorie Greenspan's Baking: From My Home to Yours

2/3 cup all-purpose flour
3⁄4 teaspoon baking powder
Pinch of salt
1⁄2 cup sugar
Grated zest of 1 lemon
2 large eggs, at room temperature
2 teaspoons pure vanilla extract
3⁄4 stick (6 tablespoons) unsalted butter, melted and cooled
Confectioners' sugar, for dusting

Whisk together the flour, baking powder and salt.

Working in a mixer bowl, or in a large bowl, rub the sugar and lemon zest together with your fingertips until the sugar is moist and fragrant. Add the eggs to the bowl. Working with the whisk attachment, or with a hand mixer, beat the eggs and sugar together on medium-high speed until pale, thick and light, 2 to 3 minutes. Beat in the vanilla. With a rubber spatula, very gently fold in the dry ingredients, followed by the melted butter. Press a piece of plastic wrap against the surface of the batter and refrigerate it for at least 3 hours, or for up to 2 days. This long chill period will help the batter form the hump that is characteristic of madeleines. (For convenience, you can spoon the batter into the madeleine molds, cover and refrigerate, then bake the cookies directly from the fridge; see below for instructions on prepping the pans.)

Getting Ready to Bake: Center a rack in the oven and preheat the oven to 400 degrees F. Butter 12 full-size madeleine molds, or up to 36 mini madeleine molds, dust the insides with flour and tap out the excess. Or, if you have a nonstick pan (or pans), give it a light coating of vegetable cooking spray. If you have a silicone pan, no prep is needed. Place the pan(s) on a baking sheet.

Spoon the batter into the molds, filling each one almost to the top. Don't worry about spreading the batter evenly, the oven's heat will take care of that.

Bake large madeleines for 11 to 13 minutes, and minis for 8 to 10 minutes, or until they are golden and the tops spring back when touched. Remove the pan(s) from the oven and release the madeleines from the molds by rapping the edge of the pan against the counter. Gently pry any recalcitrant madeleines from the pan using your fingers or a butter knife. Transfer the cookies to a rack to cool to just warm or to room temperature.


If you are making minis and have more batter, bake the next batch(es), making certain that you cool, then properly prepare the pan(s) before baking.

Just before serving, dust the madeleines with confectioners' sugar.

Makes 12 large or 36 mini cookies

Serving: Serve the cookies when they are only slightly warm or when they reach room temperature, with tea or espresso.

Now you've been as close to one as I was before ;-)

Monday, May 19, 2008

Vote for my post on Mom Blog Network

When I Crave Tacos...

...I head to Cactus Club. They seriously have the best tacos I have ever had. I literally crave these tacos for weeks. I remember the first time I had them...it was like I was suddenly back in Miami at my favorite little tacos place. It was obsession, I mean, love at first bite. Cactus Club is also known for their margaritas, and let me just say that Cactus Club is worth going to just for the drinks. Their drinks are reasonably priced and they definitely don't skimp on the liquor. To give you an idea for how frequently we go, the bouncer man knows us and lets us right in (woo hoo for not needing to whip out the ID!!).

We went to Cactus Club on Friday so that the graduate could indulge in her insatiable desire for tacos. We, of course, ordered the Horni Margaritas (my favorite). This drink has the right blend of liquor and juices and it's perfect for the margarita lover (I knew a few, too).

In all my weirdness, I get really excited for the chips and salsa. I say weird because I don't like tomatoes but I like the juice in the salsa. The chips and salsa are good and a great prelude to the meal to come.

We ordered the pork taquitos, which were great. When they brought them out I was telling Alex how they reminded me of flautas. I honestly don't know how to describe what a flauta is; it's like char grilled meat wrapped in a crispy tortilla (I think the difference in name, is a regional thing?). As soon as I bit into this, I think my salivary glands went nuts. It was so good. The rest of the night Alex was patting himself on the back because he made a great selection for the appetizer.


Alex ordered the chimichanga. He loves eating a chimichanga because it's a full meal wrapped in a tortilla. It has meat, rice, beans, and sauce all stuffed into the tortilla. Alex's favorite sauce at Cactus Club is the chipotle adobo sauce.

And now...the moment you have all been waiting for...my tacos!! They are delicious and that's all there is to it!


In all the times that we have gone to Cactus Club we have never ordered dessert. We always end up eating and drinking too much that dessert is the last thing on our minds. My goal is to one day try one of their desserts, but for now I will keep dreaming about their tacos.
Vote for my post on Mom Blog Network

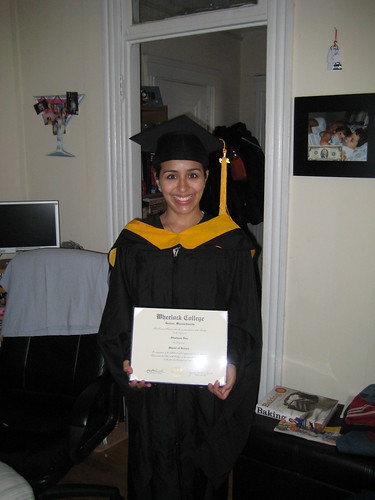
I GRADUATED!!

It feels great to have my MS degree! Now I get to take some time off before starting school again in the fall. The graduation ceremony was nice but too long (3 hours) and all the speeches given were incredible. I cannot believe I started this program 2 years ago and now it's over. My husband was there cheering me on as I walked across the stage to pick up my prize and the outpour of love from my families and friends was awesome. I just can't get over the fact that it's over...


PS please excuse the messy house

Sunday, May 18, 2008

Vote for my post on Mom Blog Network

Technical difficulties

The pictures are kind of screwy right now and I think it has to do with Shutterfly (the hosting site I use). Shutterfly is changing their format and making changes to how you share pictures online. I'm working on getting the pictures fixed and finding a new site to store my pictures at. Stay tuned...

Tuesday, May 13, 2008

Vote for my post on Mom Blog Network

Tuesdays with Dorie: Florida Pie


Being a Florida girl I had high hopes for this dessert. I've never had key lime pie (I've only eaten the crust) so I was hoping this would be a great introduction to a dessert that is so love and created near my hometown of Miami, FL. Making every bit of the dessert was fun and each of the parts tasted great. I just wasn't a fan of all the parts together. I felt like the coconut cream took away from the tartness of the lime filling. If I had reservations about the coconut cream, there was no doubt that Alex would too. I sat sat there nervously watching Alex as he took his first bite of the dessert and, as I expected, he didn't like it. The coconut cream part of the dessert just didn't do it for him. He liked every other part of the dessert but felt like the coconut cream really took away from the lime flavor. The next time I make this dessert will definitely be without the coconut cream. The good news is that I brought it into work and my manager loved it. What killed the dessert for me, made the dessert for him, so it's really all about preference.

I halved the dessert so make sure to go to Tuesdays with Dorie and check out all the blogs for the full recipe and thanks to Dianne of Dianne's Dishes for selecting this week's dessert.

Florida Pie
Source: Dorie Greenspan's Baking: From My Home to Yours

1 4.5-inch graham cracker crust (page 235), fully baked and cooled, or a store-bought crust
½ and 1/6 cups heavy cream

3/4 cups shredded sweetened coconut 2 large eggs, separated
½ of a 14-ounce can sweetened condensed milk 1/4 cup fresh Key (or regular) lime juice (from about 5 regular limes)
1/8 cup of sugar

Getting Ready: Center a rack in the oven and preheat the oven to 350 degrees F. Put the pie plate on a baking sheet lined with parchment of a silicone mat (I used a springform pan).

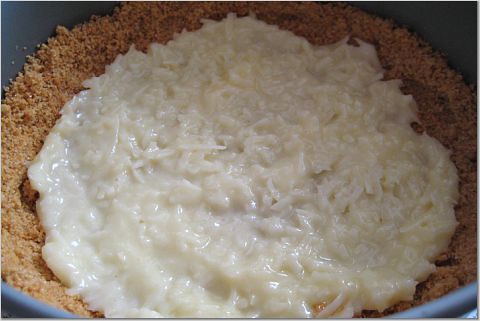
Put the cream and 1/2 cup of the coconut in a small saucepan and bring it to a boil over medium-low heat, stirring almost constantly. Continue to cook and stir until the cream is reduced by half and the mixture is slightly thickened. Scrape the coconut cream into a bowl and set it aside while you prepare the lime filling.

The players.


Working with a stand mixer, preferable fitted with a paddle attachment, or with a hand mixer in a large bowl beat the egg yolk at high speed until thick and pale. Reduce the mixer speed to low and beat in the condensed milk. Still on low, add half the lime juice. When it is incorporated, add the remaining juice, again mixing until it is blended. Spread the coconut cream in the bottom if the graham cracker crust, and pour over the lime filling.


Bake the pie for 12 minutes. Transfer the pie to a cooling rack and cool for 15 minutes, then freeze the pie for at least 1 hour.

To Finish the Pie with Meringue: Put the 2 egg whites and the sugar in a medium heavy-bottom saucepan and heat over medium-low heat whisking all the while until the whites are hot to the touch. Transfer the whites to a stand mixer, fitted with the whisk attachment, or use a hand mixer in a large bowl, and beat the whites at high speed until they reach room temperature and hold firm peaks. Using a rubber spatula, fold the remaining 1/4 cup coconut into the meringue (I omitted).

Spread the meringue over the top of the pie, and run the pie under the boiler until the top of the meringue is golden brown. (Of if you've got a blowtorch, you can use it to brown the meringue). Return the pie to the freezer for another 30 minutes or for us to 3 hours before serving.

I love the lighting in this picture.


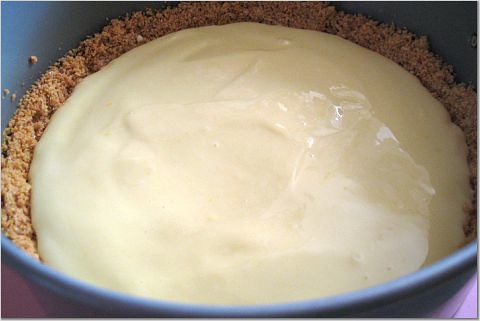
You can really see the layers in this picture.

Monday, May 12, 2008

Vote for my post on Mom Blog Network

A Look Back and Graduation Cupcakes


There's always a weird combination of mixed emotions when something comes to an end. It's usually happiness and sadness or excitement and anxiety or maybe even a combination. In my particular case I am feeling happy and sad. After what feels like an eternity, which has only really amounted to 2 years, I will be graduating from my masters program. I started this program knowing that it would end, but I didn't expect it to end so quickly. Where have the last 2 years gone? Did I really experience it all and sit through 36 credits worth of classes? Am I more qualified to do anything because of this degree? Who knows. Not like it matters anyway since I will be starting classes for my third degree this upcoming fall (yeah, I like school).

After this semester which not only kicked my butt, but also left me bruised and sucking on my thumb for comfort, I am happy to be done. I cannot wait to walk across that stage and get my degree. Not that I ever plan on doing it, but I like the option of putting "MS" at the end of my name (I personally don't like designations after a name). I am happy to put on that cap and gown and anticipate having that glowing feeling of accomplishment. Nothing feels better than doing something on your own and living your dreams. I am sad because this is the end. I will no longer walk into a class and discuss different issues in child development and bereavement. I am sad because I can no longer use the excuse of "I have a paper to write" to get out of things ("I have a paper to write" sounds so much better than "I am lazy and don't want to do it"). It's just sad to have this chapter of my life over with.

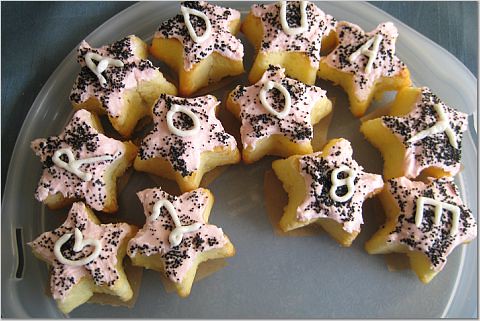
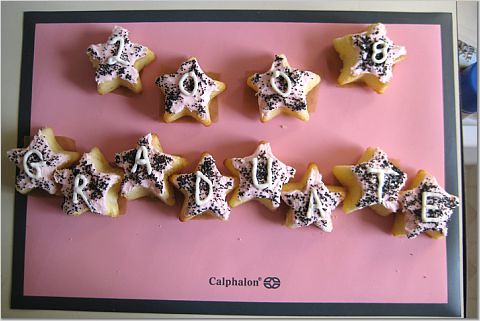
To combat these mixed feelings and the thoughts of how my life will be once August rolls around, I decide to bake some special cupcakes. I finally got to use the cupcake silicone baking mold Christina got me for my birthday. I couldn't think of a more perfect cupcake to make than the one's from Magnolia Bakery in New York (these cupcakes make me happy). I had fun decorating them and, of course, they are decorated in pink and black.

Magnolia's Vanilla Cupcakes

Source: Allysa Torey's
More from Magnolia: Recipes from the World-Famous Bakery and Allysa Toery's Home Kitchen (online here)

Cupcakes
3/4
cups self-rising flour
1/2 and 1/8 cups all-purpose flour

1/2 cup (1 stick) unsalted butter, softened

1 cups sugar

2 large eggs, at room temperature

1/2 cup milk

1/2 tsp vanilla extract

Icing
Vanilla Buttercream, recipe follows

Preheat oven to 350 degrees F.

Line 1 (1/2 cup-12 capacity) muffin tins with cupcake papers. (I used my silicone mold, this yielded 21 stars)

In a small bowl, combine the flours. Set aside.

In a large bowl, on the medium speed of an electric mixer, cream the butter until smooth. Add the sugar gradually and beat until fluffy, about 3 minutes. Add the eggs, 1 at a time, beating well after each addition. Add the dry ingredients in 3 parts, alternating with the milk and vanilla. With each addition, beat until the ingredients are incorporated but do not over beat. Using a rubber spatula, scrape down the batter in the bowl to make sure the ingredients are well blended.

Carefully spoon the batter into the cupcake liners, filling them about 3/4 full. Bake for 20 to 25 minutes, or until a cake tester inserted into the center of the cupcake comes out clean.

Cool the cupcakes in tins for 15 minutes. Remove from the tins and cool completely on a wire rack before icing.


Vanilla Buttercream
1/4 cup (1/2 stick) unsalted butter, softened

1 to 3 cups confectioners' sugar

1/8 cup milk

1/2 tsp vanilla extract

(I've made these cupcakes before and it was too much frosting for me, so I quartered the original recipe amount.)

Place the butter in a large mixing bowl. Add 1 cups of the sugar and then the milk and vanilla. On the medium speed of an electric mixer, beat until smooth and creamy, about 3 to 5 minutes. Gradually add the remaining sugar, 1/2 cup at a time, beating well after each addition (about 2 minutes), until the icing is thick enough to be of good spreading consistency. You may not need to add all of the sugar. If desired, add a few drops of food coloring and mix thoroughly. (Use and store the icing at room temperature because icing will set if chilled.) Icing can be stored in an airtight container for up to 3 days. .

The finished cupcakes.


Close-up of my letters


Vote for my post on Mom Blog Network

Pancakes!

Breakfast for dinner...does it get any better than that? I don't think so, unless you are about to eat a warm chocolate chip cookie. I had bought buttermilk earlier in the week for the White Chocolate Cupcakes and didn't want it to go to waste, so I decided to make pancakes. These pancakes came out good but they were a little too dense for my taste. I think with some tweaking, this recipe can be great.

Classic Buttermilk Pancakes
Source: Lou Siebert Pappas' Pancakes & Waffles
Makes about fourteen 4-inch pancakes

2 cups all-purpose flour
2 tsp sugar
1 tsp baking powder
1/4 tsp salt
2 large eggs, separated
2 cups plus 2 Tbsp buttermilk
2 Tbsp unsalted butter, melted
Cooking Oil

In a small bowl, combine the flour, sugar, baking powder, baking soda, and salt. In a small, deep bowl, beat the egg whites with an electric mixer until soft, glossy speaks form. In another bowl, beat or whisk together the egg yolks, buttermilk, and butter. Add the buttermilk mixture to the dry ingredients and mix just until combine. Fold in the egg whites.

Heat a griddle or large skillet over medium heat and grease lightly. For each pancake, spoon or pour about 1/4 cup batter onto the hot griddle. Cook until bubbles appear on the surface and the edges look dry, about 2 minutes. Turn over and cook until golden brown, about 1 minute more.

Serve immediately or transfer the pancakes to a baking sheet and keep warm in a 200 degrees oven. Bake the remaining batter as directed.

Top with butter and syrup and enjoy!

Vote for my post on Mom Blog Network

You Must Try This

I needed help figuring out what to do with the chicken thighs I had defrosting and asked for recommendations on the What's Cooking? board. Someone recommended this recipe and it was soo good. Although I only had half the amount of chicken, I used the original amount of spices and honey. The broiler function on my stove scares the crap out of me so it took a little bit longer to make than what the original recipe says. This dish is spicy, so have the water ready. At first you taste the sweetness of the honey and then the spiciness hits you. According to Alex, it's even better the next day.

Spicy Brushed Chicken Thighs
Source: Cooking Light (here)

2 tsp garlic powder
2 tsp chili powder
1 tsp salt
1 tsp ground cumin
1 tsp paprika
8 skinless, boneless chicken thighs (I used 4 bone-in chicken thighs)
Cooking spray
6 Tbsp honey
2 tsp cider vinegar

Preheat oven to 350 degrees. Lightly coat a baking pan with the cooking spray.

Combine first six ingredients in a large bowl. Add chicken to the bowl and toss to coat. Place the chicken in the baking pan and bake 15 minutes. After the 15 minutes, remove the chicken from the oven, turn the chicken over and bake for another 15 minutes.

Combine the honey and vinegar in a small bowl and stir well. Remove chicken from the oven and brush with half of the honey mixture. Bake for 5 minutes. Remove the chicken from the oven, turn over, and brush with the honey mixture. Bake for another 5 minutes. Remove from oven and let cool for a few minutes.

Serve and enjoy!