Sunday, June 29, 2008

Vote for my post on Mom Blog Network

Daring Bakers: Danish Bread


Kelly of Sass & Veracity and Ben of What's Cookin'? made a great selection this month as the Daring Bakers challenge. I was so excited to try my hand at making a pastry-like dessert with an apple filling. Danish bread is a little time consuming but the end result is so worth it. Trust me, it's worth it. I ended up eating 3/4 of it by myself. As it always happens with me and involved recipes, I forget to do certain parts. In this recipe I forgot to add the vanilla bean to the apple filling and forgot about the egg wash. I only remembered the egg wash toward the end of my baking. I also forgot to braid the bread. Ooops. Little instances of forgetfulness that I am thankful didn't end up making a huge impact on the taste and look of the dessert.

Enjoy!

DANISH DOUGH

Source: Sherry Yard's The Secrets of Baking
Makes 2-1/2 pounds dough

Ingredients
For the dough (Detrempe)
1 ounce fresh yeast or 1 tablespoon active dry yeast
1/2 cup whole milk
1/3 cup sugar
Zest of 1 orange, finely grated
3/4 teaspoon ground cardamom
1-1/2 teaspoons vanilla extract
1/2 vanilla bean, split and scraped
2 large eggs, chilled
1/4 cup fresh orange juice
3-1/4 cups all-purpose flour
1 teaspoon salt

For the butter block (Beurrage)
1/2 pound (2 sticks) cold unsalted butter
1/4 cup all-purpose flour

DOUGH
Combine yeast and milk in the bowl of a mixer fitted with the paddle attachment and mix on low speed. Slowly add sugar, orange zest, cardamom, vanilla extract, vanilla seeds, eggs, and orange juice. Mix well. Change to the dough hook and add the salt with the flour, 1 cup at a time, increasing speed to medium as the flour is incorporated. Knead the dough for about 5 minutes, or until smooth. You may need to add a little more flour if it is sticky. Transfer dough to a lightly floured baking sheet and cover with plastic wrap. Refrigerate for 30 minutes.

Without a standing mixer: Combine yeast and milk in a bowl with a hand mixer on low speed or a whisk. Add sugar, orange zest, cardamom, vanilla extract, vanilla seeds, eggs, and orange juice and mix well. Sift flour and salt on your working surface and make a fountain. Make sure that the “walls” of your fountain are thick and even. Pour the liquid in the middle of the fountain. With your fingertips, mix the liquid and the flour starting from the middle of the fountain, slowly working towards the edges. When the ingredients have been incorporated start kneading the dough with the heel of your hands until it becomes smooth and easy to work with, around 5 to 7 minutes. You might need to add more flour if the dough is sticky.

BUTTER BLOCK
1. Combine butter and flour in the bowl of a mixer fitted with a paddle attachment and beat on medium speed for 1 minute. Scrape down the sides of the bowl and the paddle and then beat for 1 minute more, or until smooth and lump free. Set aside at room temperature.
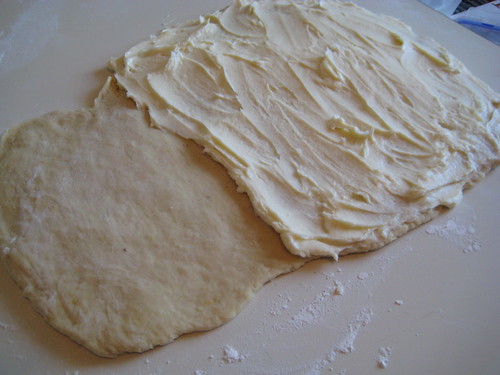
2. After the detrempe has chilled 30 minutes, turn it out onto a lightly floured surface. Roll the dough into a rectangle approximately 18 x 13 inches and 1⁄4 inch thick. The dough may be sticky, so keep dusting it lightly with flour. Spread the butter evenly over the center and right thirds of the dough. Fold the left edge of the detrempe to the right, covering half of the butter. Fold the right third of the rectangle over the center third. The first turn has now been completed. Mark the dough by poking it with your finger to keep track of your turns, or use a sticky and keep a tally. Place the dough on a baking sheet, wrap it in plastic wrap, and refrigerate for 30 minutes.
3. Place the dough lengthwise on a floured work surface. The open ends should be to your right and left. Roll the dough into another approximately 13 x 18 inch, 1⁄4-inch-thick rectangle. Again, fold the left third of the rectangle over the center third and the right third over the center third. No additional butter will be added as it is already in the dough. The second turn has now been completed. Refrigerate the dough for 30 minutes.
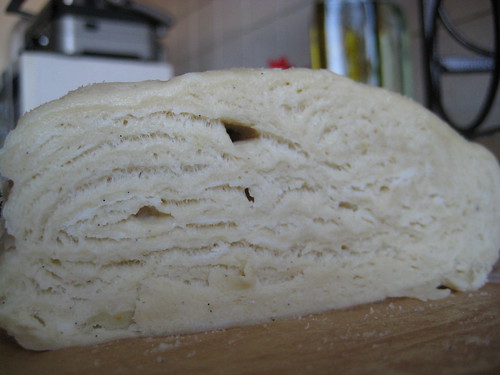
4. Roll out, turn, and refrigerate the dough two more times, for a total of four single turns. Make sure you are keeping track of your turns. Refrigerate the dough after the final turn for at least 5 hours or overnight. The Danish dough is now ready to be used. If you will not be using the dough within 24 hours, freeze it. To do this, roll the dough out to about 1 inch in thickness, wrap tightly in plastic wrap, and freeze. Defrost the dough slowly in the refrigerator for easiest handling. Danish dough will keep in the freezer for up to 1 month.


APPLE FILLING
Makes enough for two braids

Ingredients
4 Fuji or other apples, peeled, cored, and cut into 1⁄4-inch pieces
1/2 cup sugar
1 tsp. ground cinnamon
1/2 vanilla bean, split and scraped
1/4 cup fresh lemon juice
4 tablespoons unsalted butter

Toss all ingredients except butter in a large bowl. Melt the butter in a sauté pan over medium heat until slightly nutty in color, about 6 - 8 minutes. Then add the apple mixture and sauté until apples are softened and caramelized, 10 to 15 minutes. If you’ve chosen Fujis, the apples will be caramelized, but have still retained their shape. Pour the cooked apples onto a baking sheet to cool completely before forming the braid. (If making ahead, cool to room temperature, seal, and refrigerate.) They will cool faster when spread in a thin layer over the surface of the sheet. After they have cooled, the filling can be stored in the refrigerator for up to 3 days. Left over filling can be used as an ice cream topping, for muffins, cheesecake, or other pastries.


DANISH BRAID
Makes enough for 2 large braids

Ingredients
1 recipe Danish Dough (see above)
2 cups apple filling, jam, or preserves (see above)

For the egg wash: 1 large egg, plus 1 large egg yolk

1. Line a baking sheet with a silicone mat or parchment paper. On a lightly floured surface, roll the Danish Dough into a 15 x 20-inch rectangle, 1⁄4 inch thick. If the dough seems elastic and shrinks back when rolled, let it rest for a few minutes, then roll again. Place the dough on the baking sheet.
2. Along one long side of the pastry make parallel, 5-inch-long cuts with a knife or rolling pastry wheel, each about 1 inch apart. Repeat on the opposite side, making sure to line up the cuts with those you’ve already made.
3. Spoon the filling you’ve chosen to fill your braid down the center of the rectangle. Starting with the top and bottom “flaps”, fold the top flap down over the filling to cover. Next, fold the bottom “flap” up to cover filling. This helps keep the braid neat and helps to hold in the filling. Now begin folding the cut side strips of dough over the filling, alternating first left, then right, left, right, until finished. Trim any excess dough and tuck in the ends.


Egg Wash
Whisk together the whole egg and yolk in a bowl and with a pastry brush, lightly coat the braid.

Proofing and Baking
1. Spray cooking oil (Pam…) onto a piece of plastic wrap, and place over the braid. Proof at room temperature or, if possible, in a controlled 90 degree F environment for about 2 hours, or until doubled in volume and light to the touch.
2. Near the end of proofing, preheat oven to 400 degrees F. Position a rack in the center of the oven.
3. Bake for 10 minutes, then rotate the pan so that the side of the braid previously in the back of the oven is now in the front. Lower the oven temperature to 350 degrees F, and bake about 15-20 minutes more, or until golden brown. Cool and serve the braid either still warm from the oven or at room temperature. The cooled braid can be wrapped airtight and stored in the refrigerator for up to 2 days, or freeze for 1 month.

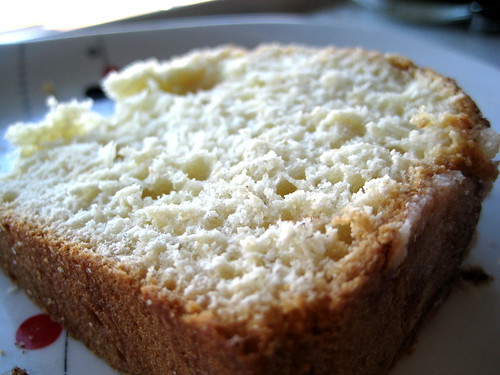
Finished bread without the braiding.


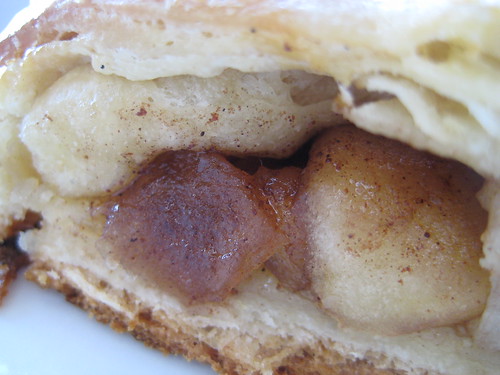
A fresh slice and close-up of apples.


Friday, June 27, 2008

Vote for my post on Mom Blog Network

To Eat and Eat Some More

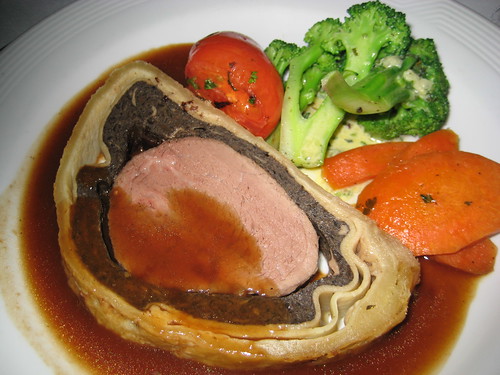
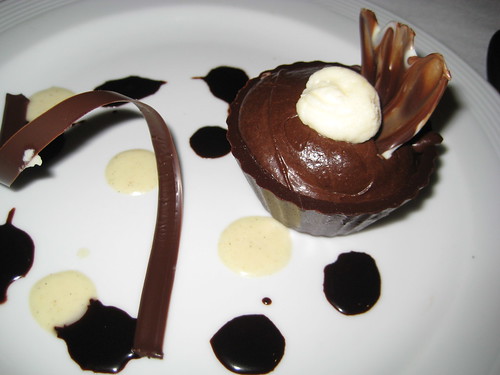
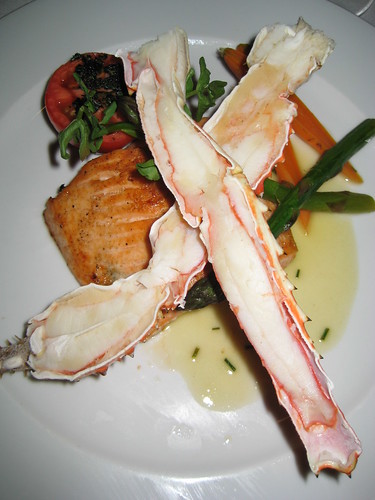
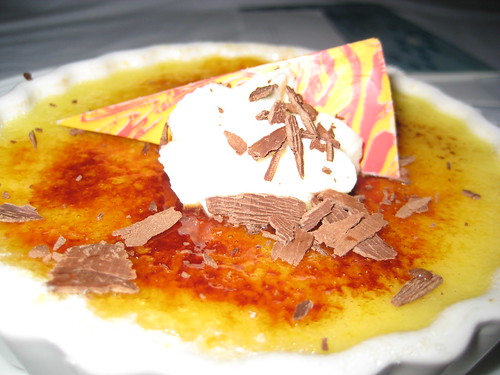
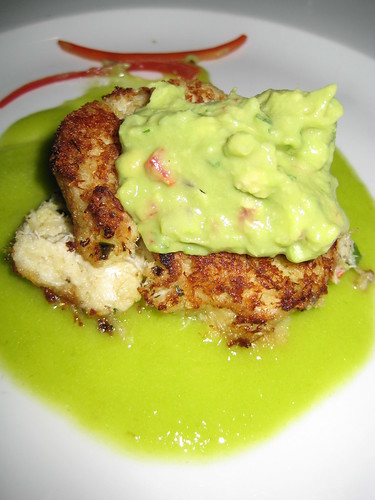
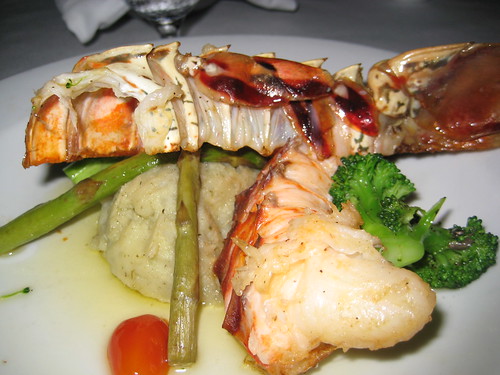
What is the best part of vacationing? Eating! And not just eating like you do on a regular basis, but eating like you will never see food again. I have a theory that a person's stomach expands when they are on vacation. How else can you explain the constant hunger and the multiple trips to the buffet? No where else is this more apparent than on a cruise. We recently got back from a family vacation that took place on a cruise and I was amazed the whole time because of how much everyone ate. It was like our stomachs were bottomless pits that were never fully satiated. The cruise had an incredible amount of food and the buffets had an assortment goods. But on this cruise, it was the restaurants that really had me impressed. The presentation of the food was great and I liked how they used Cooking Light recipes to create a menu that was not only delicious, but also healthy. Here's a snippet of some of the dishes we ate (and drank) aboard Norwegian Cruise Line's Spirit:


Apple Pie


Veal Wellington with Fresh Vegetables


Shrimp Risotto


Chocolate Mousse in a Chocolate Cup


Cosmopolitan Martini


Salmon and Crab Legs


Creme Brulee


Crab Cake with a Spicy Guacamole Sauce


Lobster and Mashed Potatoes


Tiramisu


Ricotta Cheesecake with a Strawberry Sauce


Veal Scallopini
Vote for my post on Mom Blog Network

And I Cry...

As I stuff my face with all the foods that I have been craving for the past 6 months.

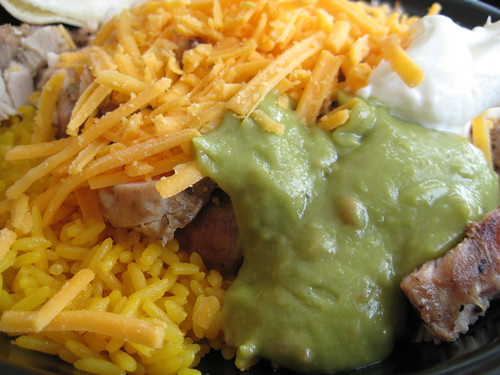
Living in Boston has made me learn to appreciate all the good food I took advantage of when I lived in Miami. Boston has a great dining scene and you can get a variety of foods from all different parts of the world, but there are still things in Miami that I just can't get in Boston. Not only did I experience culture shock when we first moved to Boston, but I also experienced food shock. I honestly thought I could get all the same things (or at least similar) I ate in Miami in Boston. I was so wrong. In Miami you have a huge Spanish, particularly Cuban, influence on food while Boston has a more international approach to food. One of the things that I find myself constantly craving is Natural Chicken Grill. This place is great for food on the go and, like any place with Spanish influences, the servings are huge. My favorite thing to order from here is their South of the Border Chop. This chop is full of diced up grilled chicken, yellow rice, guacamole, sour cream, and cheddar cheese. This is then topped with a yellow mustard curry sauce that is nothing like the curry sauce you get at Indian/Thai restaurants.

The next time you are in Miami I definitely recommend going here and trying one of their chops. You will not regret it. As for me? Let me wipe away my tears and keep on chewing...


Vote for my post on Mom Blog Network

A Miami Feast: Bonefish Grill

Alex and I had been wanting to go to Bonefish Grill for what seems like forever. We first heard about this restaurant when we were undergrads and our then-supervisor raved about their bang bang shrimp. We never went when we lived in Miami because we had assumed that they were a pricey restaurant. So as the search continued for a nice restaurant to eat at for our anniversary we thought Bonefish Grill would be a great place to go to and celebrate. Once we got there we were so impressed with the look of the restaurant. It had a simple decor but it was so pretty and the lighting really highlighted all the brown hues of the different decorations. We were even more impressed when we saw the prices; most of their entrees were in the teens and no drink was over $8. Our impression of the restaurant only grew as they brought out each part of our meal. The servings were huge! And for the price of the dishes, it was a great value.

We started the dinner with some drinks. I ordered a lemon drop martini that was delicious. It was the freshest martini I had ever had. The lemon juice in it tasted like it was fresh squeezed. Alex had a Patron margarita that was just as good.


Although my introduction to Bonefish Grill was hearing the recommendation of their bang bang shrimp I couldn't resist ordering their coconut shrimp. I love coconut shrimp and order it each time I get a chance. This coconut shrimp did not disappoint; it was soooo ridiculously good.


Alex ordered the only appetizer that was not seafood since he doesn't like seafood. He was so happy with his choice of egg rolls and thought the sweet and spicy sauces the rolls came with were a perfect compliment to the dish.


For the main dish I ordered the tilapia with a lemon butter and whipped garlic potatoes. When thinking about what I wanted to eat, I wanted something light and flavorful. Tilapia was the perfect thing for what I wanted. The fish was lightly seasoned, wood grilled, and soaked in the lemon butter. It was soft and mouth-watering. The potatoes were delicious; they were airy and had just the right amount of garlic.


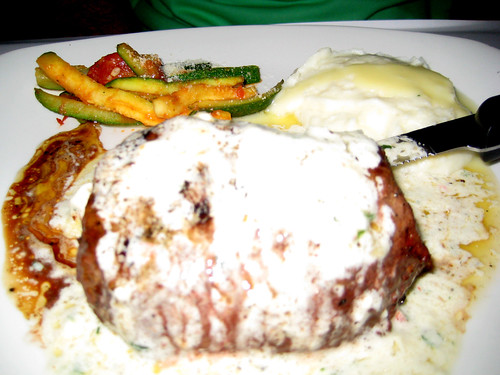
Being the steak man that he is, Alex ordered the sirloin steak topped with a gorgonzola-butter sauce and the garlic potatoes. The steak was cooked to perfection and was covered in sauce. Alex said this steak was just as good as the steaks he's had in the more expensive steakhouses. (Note: bad picture follows).


We didn't have dessert because we were so full from everything else we ate. The appetizers themselves are perfect for sharing but we each had one. We also caught a view of several of their desserts and they were so huge that we knew we wouldn't even be able to put in a dent in one of them if we ordered it. Instead we came home and had one of these suckers:


The service at Bonefish Grill was great and I really hope we are able to go back the next time we are in town.

Wednesday, June 25, 2008

Vote for my post on Mom Blog Network

The Versatile Baker

I only say versatile because I baked something in another person's kitchen and it came out good. If you have ever cooked or baked in someone else's kitchen, then you know how difficult it can be. You have no idea where anything is and you are afraid to touch things. I am lucky that the kitchen I used is gorgeous and about 10 times the size of my kitchen. However, this is Abuela's kitchen so I was afraid that I would make something that wasn't up to par with the great cooking of Abuela. But I received the greatest compliment ever from Abuela when she said that what I made was so good that I could sell them. Now I just hope that whatever dessert I make next is just as good as this one.

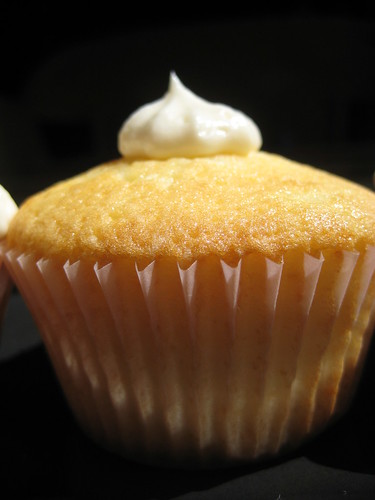
What did I bake, you ask? Cupcakes! This little dessert is so delightful and fun to make. Plus, I really wanted to frost something. I used a recipe that I found on Country Living but I changed the order of how they mixed the batter because I didn't like the way they had the batter coming together. The batter is so light that it looks like it should be a frosting more than a cake batter. Once baked the batter turns into a beautiful golden cake. I topped the cupcakes with a vanilla buttercream (here) and this was a perfect touch that maintained the lightness and fluffyness of the cake.

New and Old: Brand new stove and mixer from the 70s.


Vanilla Cupcakes
Source: Country Living (here)
Makes approximately 15 cupcakes

1 1/2 cups sifted cake flour
1 1/2 tsps baking powder
1/4 tsp salt
1/2 cup (1 stick) unsalted butter, softened
1 cup sugar
2 large eggs, at room temperature
1/2 tsp vanilla extract
1/2 cup whole milk

1. Preheat oven to 400 degrees. Line a muffin pan with cupcake liners.
2. Combine the cake flour, baking powder, and salt in a bowl and set aside.
3. Cut the butter up into tablespoon-sized pieces and place in a large bowl. Using a hand mixer, cream the butter until fluffy. Add the sugar until well blended and then add the eggs, one at a time, until blended.
4. Combine the vanilla extract and milk. Alternating with the dry ingredients, add the milk to butter mixture until blended.
5. Spoon the batter into the cupcake liners, filling until 3/4 full. Bake for 12-15 minutes. Let cool to room temperature before frosting.

Out of the oven and frosted.


Close up of frosting and cake.


More cupcakes.


And more cupcakes because they are so pretty.


Tuesday, June 24, 2008

Vote for my post on Mom Blog Network

My Apologies to Dorie

I won't be participating in TWD for the next few weeks because I am in Miami and didn't bring my Dorie book with me. Sorry!
Vote for my post on Mom Blog Network

Papers and Canvases

The gift for year one of marriage is supposed to be paper. I had an easy time coming up with a gift for Alex but he had a hard time. Took him a little bit to figure it out but he did and he did an amazing job with my gift. He wrote me a beautiful letter describing how he felt on our wedding day and told me that I could pick any cooking class I wanted as a gift. This is the best gift because I have a list at home with all the different classes I want to try.

I lucked out in that I can call Lauren of Spinach N Peace a close friend. Lauren is an artist among other great things and she was kind enough to say yes to me when I asked her if she could make a painting of us as a gift to Alex. When Alex saw the painting and recognized the lettering on it as the lyrics to our first dance he was smitten. He showed the painting to everyone in the house (we are in Miami now) and was so happy that we have an original and personal piece of artwork to hang up in our apartment.

Thank you Lauren for helping me impress Alex!


Vote for my post on Mom Blog Network

Where Does Time Ago?

It's hard to believe that year has gone by so quickly. For the past few days I have been thinking about the nature of time and how we are all governed by it. Sometimes the days are eternal and other days fly by so quickly that you barely have any recollection of what happened. Other days are a combination of the slow and fast tempo of time. These "other" days are what I look forward to and long for. A perfect example of one of these "other" days is our wedding day.

Our wedding day was exactly one year ago from today. The days leading up to the wedding were eternal. I wanted to be a Mrs already and the anticipation of the white gown and the walk down the aisle to Alex was killing me. The days after the wedding were a blur. I know we went to Jamaica and sat on the beach and drank and looked at our newly ringed fingers, but that's all I can remember. However, the day of the wedding was something in it of itself. The day felt long and quick at the same time. At the end of the night I asked myself where the time went but during all the wedding events I felt like time had stopped for us. It was like being in a weird time warp. I remember every second, every smile, every kiss, every laugh of that day like it was yesterday. And yet, here we are 12 months, 366 days (did you forget Feb 29?!) later. Again, I ask, where does time go? If it's that time flies when you are having fun then I must agree with that reasoning. This past year has been nothing but amazing. I had always heard that the first year of marriage is the hardest and was paranoid that we would fall prey to this generalization, but we didn't. The first year for us was so good that we can only hope that the rest of our years together are as good as this past one has been. Not that we haven't fought or had our disagreements, but our first year was not marked by anything negative. Well maybe, if you count an increase in sugar intake as a result of my constant baking. Our first year of marriage has been marked by our growth as a couple and as individuals and I can only hope that we continue to grow together. And if tough times do come up and year two isn't as easy as year one, I will make sure that we remind ourselves of the love we have for each other and the fun we have with one another.


Monday, June 23, 2008

Vote for my post on Mom Blog Network

It's an Obsession.

I am officially a crazy, obsessive baker. Today the words "I would rather have cookbooks than jewelry" slipped out of my mouth. I was dead serious. What kind of girl would actually turn down beautiful pieces of jewelry in exchange for cookbooks? Apparently, one named Stephanie who has had her brain rattled by endless months of winter that have forced her to really get into baking. In my defense, the cookbooks are REALLY, really, really awesome. The best part? My husband bought me two and my mother in-law bought me one. I cannot wait to start baking and making. Stay tuned....


Tuesday, June 17, 2008

Vote for my post on Mom Blog Network

TWD: Cream Puff Rings


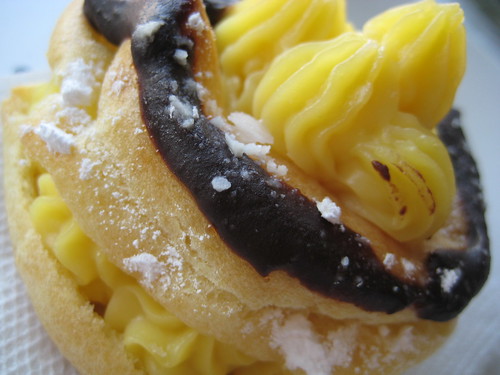
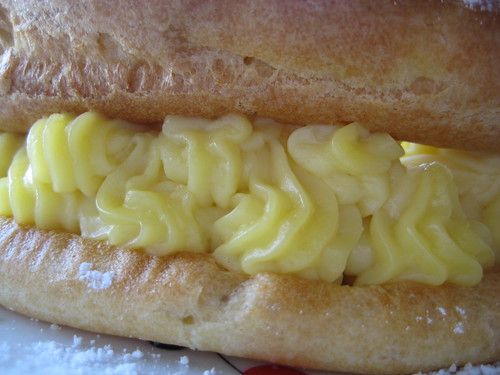
This week Caroline of A Consuming Passion chose Dorie's Peppermint Cream Puff Ring. I was excited to try my hand at this type of pastry and to make pastry cream. I ended up making a regular pastry cream versus the peppermint cream because (a) I didn't have mint leaves, and (b) we like peppermint, but only in small doses and I wasn't too sure how strong the peppermint taste would be. I was also afraid that if it tasted too much like peppermint we wouldn't eat the whole thing and it would go to waste. Well, it went to waste either way. Dorie is not lying when she says this dessert must be eaten within 8 hours of it being made. I even halved the recipe and it was still too much for us. While the dessert itself is good, I was bummed that it didn't last long (cream started getting hard). The cream was great and easy to pipe and the dough was amazing. Once the dough was baked it was so light and airy. Together (and topped with chocolate) it was delicious!

As always, make sure to check out the TWD website so you can see how everyone else interpreted this dessert.

Dough and sea-looking-creature cream


Finished cream ring


A mini-me cream ring :)

Wednesday, June 11, 2008

Vote for my post on Mom Blog Network

Something's A Kuchen


Last week I was doing what I do best and I was talking about food and baking. Because I am such a professional I was doing all this at work and in front of the big bosses (Hi Edgar! Hi Steve!). I had just received my box from Amano and was so excited that you would have thought I won the lotto or something. Somehow the topic of puff pastries came up and I was going on about how cool I thought puff pastry was (layers of dough and butter are cool in my book). Then Steve asked me if I had heard of kuchen and if I had done any ethnic desserts. I had never heard of kuchen and never made any ethnic desserts unless I made it through TWD or Daring Bakers. That night I set out to find a recipe for kuchen and I found a few but I wasn't satisfied because they didn't seem authentic. The benefit of my search is that I found out what kuchen was; "kuchen" itself is the German word for cake and can refer to sweets such as coffee cake pastries and pie-like pastries. I also found out that it's the state dessert for South Dakota. (Click here to read more on kuchen.)

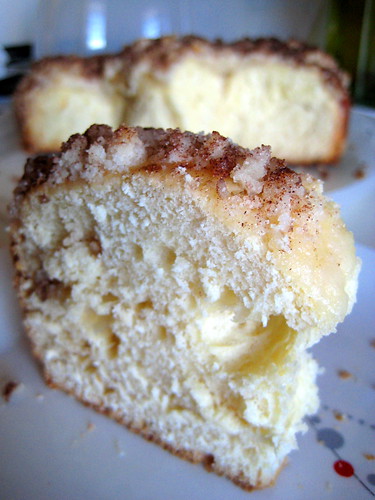
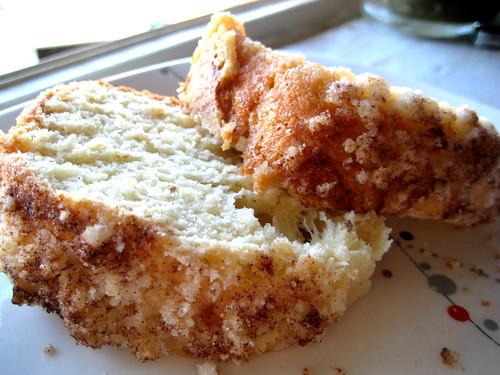
I emailed Steve the next day and he was kind enough to give me the recipe from a German Lutheran cookbook he had. When I saw the recipe I was impressed. The author of this recipe must have loved to make kuchen because the ingredients could have cleared out a supermarket. Just to give you an idea, the original recipe called for 14 cups of flour. I quartered the recipe and was still left with a huge amount of kuchen. Since I have never had kuchen before I have no idea if what I made is what a kuchen is supposed to taste like. Either way, it tasted good (especially with a glass of milk). This dessert is not for those counting carbs because it is loaded with flour. The dough in this recipe came out more like a bread than a cake, so once it was baked it was dense. The streussel topping was perfect because it highlighted the sweetness of the dough. As I sit here eating a slice I think a honey butter would go perfect as a spread.

Thanks Steve for the recipe!

Kuchen

Dough
3-4 cups all-purpose flour
1/4 tsp salt
1 cup milk
4 Tbsp butter
1/2 cup sugar
2 eggs
1 tsp, plus 1/8 tsp yeast
1 Tbsp warm water

Streussel

3/4 cup sugar
1/2 cup flour
4 Tbsp butter
1 tsp cinnamon
salt


1.
Combine the flour and the salt in a bowl and set aside.
1. Heat milk, butter, and sugar over low heat in a small saucepan. Once warmed, set aside and let cool
2. In the bowl of a stand mixer, beat the eggs with a fork.
3. In another another bowl combine the yeast and the warm water. Add this mixture to the eggs.
4. Slowly add 1/4 cup of the milk mixture to the eggs and combine (this will temper the eggs and prevent them from scrambling). Slowly add the rest of the milk mixture to the eggs.
5. Using the dough hook attachment, add the flour 1 cup at a time to the liquids. (Note: this dough is sticky!). Knead the dough for at least 10 minutes.
6. Transfer the dough to a lightly greased bowl, cover with plastic wrap, and let it sit in a warm place for at least an hour. Once it has risen, place the dough in a greased pan (I used a 9 inch springform pan) and let it sit for 30 more minutes. At this time, preheat the oven to 350 degrees.
7. Combine the ingredients for the streussel and sprinkle over the kuchen.
8. Bake for 45-60 minutes, or until a knife inserted comes out clean.
9. Remove from oven and cool.
10. Cut yourself a slice and enjoy! (Make sure to store the kuchen in an air-tight container.)

Fresh out of the oven


All sliced up.


Pretty dough.


Enjoy your slice :)